はじめに
この記事はZeals Advent Calendar 2019 の20日目の記事です。
はじめまして!普段はZealsのプロダクトの開発PMをしている阿久津です。
本日は先日参加したミニハッカソンPython mini Hack-a-thonで簡単なバッチを作成しましたので、紹介できたらと思います。
自社のプロダクトとは全く関係ないですw
モチベーション
エンジニアが必要な情報は書籍やネットから得る事がメインかと思いますが、現場のエンジニアの生の知見や声からの発見も多いと思います。私自身、勉強会やハッカソンに行って他のエンジニアと交流することでとても刺激をもらっています。
興味のある分野のイベントには積極的に参加したいな、とという気持ちはあるものの、
- 探すのが面倒くさい
- すでにスケジュールがあって参加できない
- 気がついたら行きたいイベントが終わっていた。。
ということで、参加できず残念な気持ちになっていました。
自分に興味のある分野のイベントをカレンダーに自動で登録してくれたら、幸せだなと思ったのですが、良いツールが無かったので作る事にしました。
必要要件
自分が欲しい必要な要件洗い出してみました。
- キーワード、場所を指定する事ができる
- 一日一回検索をかけてくれて自動でカレンダーに登録してくれる
- 無料だと嬉しい
使ったもの
- 利用したAPI
- Google Calendar API(普段からGmail利用しているので)
-
connpass API
- シンプルに作りたかったので、APIを公開して頂いていたconnpassさんのAPIを利用しました
- 言語、フレームワーク
- Python, Flask
- クラウドサービス:GCP
- [Cloud Scheduler] (https://cloud.google.com/scheduler/)
-
Cloud Run
- シンプルで使いやすい、そして安いという噂のCloud Run。使ってみたかったのでこの機会に
手順
作成手順を順を追って記載したいと思います。
- イベント情報の取得
- イベント情報のカレンダーへの登録
- Cloud Runの導入
- Cloud Schedulerの導入
作業ログとして残していた部分があるので、間違っているところはご指摘頂けると嬉しいです。
1. イベント情報の取得
まずは、ローカル環境でイベントを取得してくれる機能の作成です。
CONNPASS_API = 'https://connpass.com/api/v1/event/'

class ConnpassEvent:

    def __init__(self, started_month: int, keyword: list, count=15):
        self.started_month = started_month
        self.keyword = keyword
        self.count = count

    def get_connpass_events(self):
        payload = {
            'ym': self.started_month,
            'keyword': self.keyword,
            'count': self.count,
        }
        response_data = requests.get(CONNPASS_API, payload)
        if response_data.status_code == 200:
            return response_data.json()['events']
Connpass APIを参考に検索月、キーワード、取得件数を指定できるようにしました。
例外対応等はしていないです。。
2. イベント情報のカレンダーへの登録
続いて、取得したイベントの情報をカレンダーに登録します。
全体の流れとしては以下になります。
- Google Calendarにイベントを書き込めるように設定
- 対象のイベント情報を取得
- イベント情報を整形してカレンダーに登録
def insert_event_to_calendar(year_and_month=201912, input_search_word=['東京', 'エンジニア']):
    """Add the event to the calendar
    Args:
        year_and_month (int): year + month.
        input_search_word (list): list of words
    Returns:
        number of events registered
    """
    creds = check_google_token()
    service = build('calendar', 'v3', credentials=creds)

    target_events = ConnpassEvent(year_and_month, input_search_word)
    events = target_events.get_connpass_events()
    event_num = 0
    for event in events:
        if duplicate_event(event['event_id']):
            continue
        event_body = event_formatter(event)
        event = service.events().insert(calendarId='primary',
                                        body=event_body).execute()
        event_num += 1
    return event_num
2.1 Google Calendarにイベントを書き込めるように設定
まず、最初に自分のGoogle Calendarにイベントを書き込めるように設定を行います。
カレンダーの設定は↓が参考になりましたので、詳しい説明は割愛させていただきます。
【Python】Google Calendar APIを使ってGoogle Calendarの予定を取得・追加する
2.2 対象のイベント情報を取得
続いて、connpass_event.pyを利用してイベント情報の取得を行います。
2.3 イベント情報を整形してカレンダーに登録
最後に、イベントを整形してカレンダーに登録します。登録の方法は2.1のリンクでも記載していますのでこちらでは割愛します。
ここでは、自分が詰まった、戸惑った点を記載します。
2.3.1 イベント内容の整形
イベント内容をGmailのカレンダーに登録できる形に整形します。
かなり細かく指定でき、カレンダーの件名、イベントの場所、時間、参加者、リマインダーの有無を今回は設定しました。
def event_formatter(event):
    event_formatted = {
        'summary': event['title'],
        'location': event['address'],
        'description': format_html_to_text(event['description']),
        'start': {
            'dateTime': event['started_at'],
            'timeZone': 'Asia/Tokyo',
        },
        'end': {
            'dateTime': event['ended_at'],
            'timeZone': 'Asia/Tokyo',
        },
        'recurrence': [
            'RRULE:FREQ=DAILY;COUNT=1'
        ],
        'attendees': [
            {'email': 'test@gmail.com'},
        ],
        'reminders': {
            'useDefault': False,
            'overrides': [
                {'method': 'email', 'minutes': 24 * 60},
                {'method': 'popup', 'minutes': 10},
            ],
        },
    }
    return event_formatted
2.3.2 イベントの詳細の整形
ConnpassのAPIの仕様でイベントの詳細がhtml形式になっていたので、人でも読める形に整形しました。最初この作業を忘れ、カレンダーに登録された詳細が凄いことになっていましたw
def format_html_to_text(html):
    soup_html = BeautifulSoup(html)
    for script in soup_html(["script", "style"]):
        script.extract()
    text = soup_html.get_text()
    # break into lines and remove leading and trailing space on each
    lines = (line.strip() for line in text.splitlines())
    # break multi-headlines into a line each
    chunks = (phrase.strip() for line in lines for phrase in line.split("  "))
    # drop blank lines
    text = '\n'.join(chunk for chunk in chunks if chunk)
    return text
3. Cloud Runの導入
いよいよ触ってみたかったCloud Runです。サクッと触ってみたい方は、Cloud Runを試してみるが参考になりました。
3.1 docker化に向けての事前準備
dockerイメージを作成するにあたり、シンプルに日付とキーワードを受け取れる簡単なウェブアプリケーション化しました。
import os

from flask import Flask, request
import insert_event

app = Flask(__name__)

@app.route('/')
def listen_event():
    target_date = request.args.get('date')
    target_word = [request.args.get('keywords')]
    insert_event.insert_event_to_calendar(target_date, target_word)
    return 'ssuccess!'

if __name__ == "__main__":
    app.run(debug=False, host='0.0.0.0', port=int(os.environ.get('PORT', 8080)))
3.2 Cloud Runで利用できるようにdocker化
まずは設定から公式チュートリアルがわかりやすかったので、こちらで事前の環境構築周りは確認。
すぐに動くものを作りたかったので、チュートリアルにあるサンプルコードを参考にDockerfileを作成
# Use the official Python image.
# https://hub.docker.com/_/python
FROM python:3.7

# Copy local code to the container image.
ENV APP_HOME /connpass_calendar
WORKDIR $APP_HOME
COPY . .

# Install production dependencies.
RUN pip install --no-cache-dir -r requirements.txt
RUN pip install Flask gunicorn

# Run the web service on container startup. Here we use the gunicorn
# webserver, with one worker process and 8 threads.
# For environments with multiple CPU cores, increase the number of workers
# to be equal to the cores available.
CMD exec gunicorn --bind :$PORT --workers 1 --threads 8 main_server:app
dockerとは?という方は↓が参考になりました。
3.3 Cloud Run へのデプロイ
今回は事前にdocker化したイメージをCloud Run上にデプロイするため、クイックスタート: ビルドとデプロイを参考にデプロイを行います。
3.3.1 Cloud Build を使用してコンテナ イメージをビルド
DockerのイメージをContainer Registryに登録。PROJECT-IDはGCP プロジェクト IDになります。
gcloud builds submit --tag gcr.io/[PROJECT-ID]/batchschedulerv3
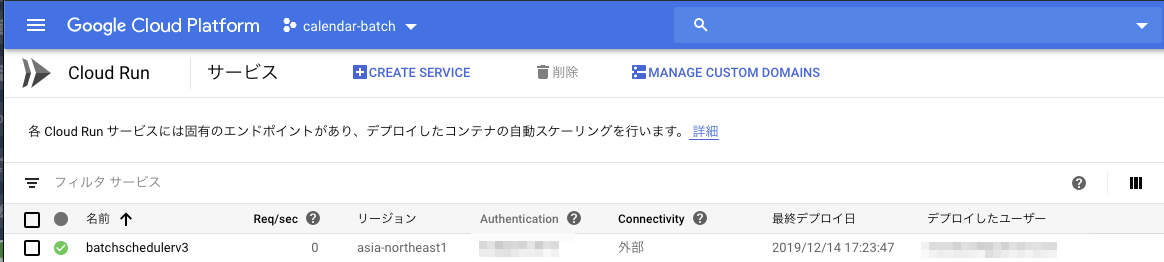
3.3.2 コンテナイメージのデプロイ
ビルドしたイメージをデプロイします。デプロイ自体は1,2分です。
gcloud beta run deploy --image gcr.io/[PROJECT-ID]/batchschedulerv3
噂通りイメージさえあればすぐにデプロイができてしまいました。
4. Cloud Schedulerの設定
Cloud Runで実行したエンドポイント向け週1回、毎朝9時の設定でイベント情報を取得してカレンダーに登録されるようにスケジューリングしました。
Running services on a schedule

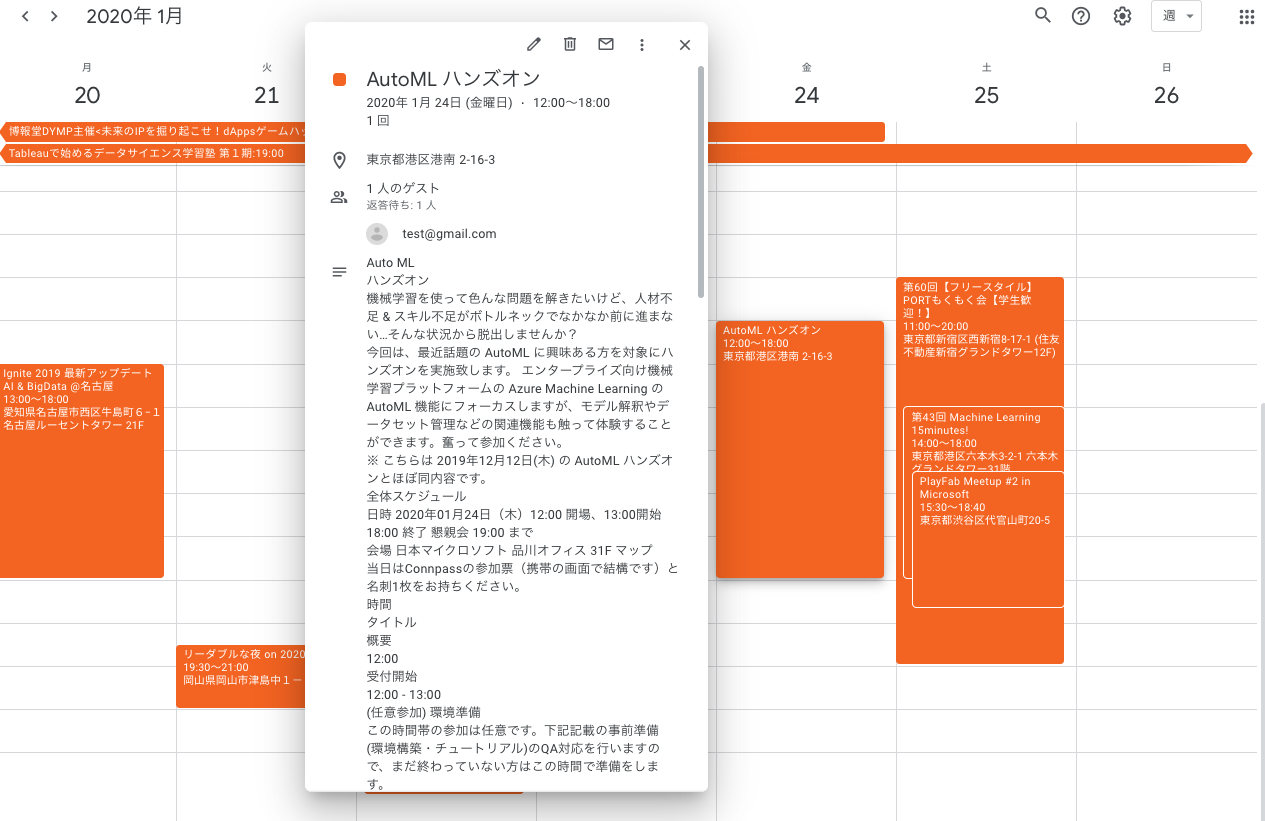
結果
こちらが、バッチの実行結果です。カレンダーに登録されました!!
場所やイベントの詳細もしっかり入っています!これでイベントを見過ごすことはなくなりそうです。
感想
- 必要要件はほぼ満たせました。今回のバッチは立ち上げ続けても10円/月もかから無さそうなので、無料では無いですが、コストは気にしなくて良いレベルです。
- Docker image さえ用意すればほとんど手間がかからずデプロイでき、すぐに動くものが作れるのでお手軽
- せっかくなので、社内で公開してみんなで使ってもらおうと思っています。
明日は頼れるSREエンジニアの@Ryuto_Fujiにバトンタッチです。ためになる記事を温めていると思うので楽しみにしていて下さい!!