背景
画像アップロードは、Webプロジェクトで最も一般的に使用される機能の1つです。 例えば、ネットショップの商品画像をアップロードすることです。それは簡単だと思います。 しかし、1つの商品に対して複数の画像ファイルをアップロードできるようにしたい場合は、少し複雑になります。Laravel5.5でどのように行われたかを見てみましょう。
1.データベースを準備する
シンプルな例を作りたいので、商品にはJANコードと商品目と複数枚の画像があるとしたら、以下のコマンドを実行します。
php artisan make:model Item -mc
php artisan make:model ItemPhoto -m
-mパラメータを使うと、マイグレーションを自動的に作成されます。
-cパラメータを使うと、コントローラーを自動的に作成されます。
便利でしょう.
Schema::create('items', function (Blueprint $table) {
    $table->increments('id');
    $table->string('jan')->uniqid();
    $table->string('name');
    $table->timestamps();
});
Schema::create('item_photos', function (Blueprint $table) {
    $table->increments('id');
    $table->integer('item_id')->unsigned();
    $table->foreign('item_id')->references('id')->on('items');
    $table->string('path');
    $table->timestamps();
});
一つの商品には複数枚の画像を持つため、1対多リレーションはEloquentモデルの関数として定義します。
class Item extends Model
{
    protected $fillable = ['jan', 'name'];

    public function photos()
    {
        return $this->hasMany('App\ItemPhoto');
    }
}
class ItemPhoto extends Model
{
    protected $fillable = ['item_id', 'path'];

    public function item()
    {
        return $this->belongsTo('App\Item');
    }
}
2.Route,Controller,Viewを作成する
商品登録フォームと結果ページを作成します。
Route::get('/items', 'ItemController@index');
Route::match(['GET', 'POST'], '/create', 'ItemController@create');
次、コントローラーを作成します。
class ItemController extends Controller
{

    public function index()
    {
        $items = Item::all();
        return view('item.index', compact('items'));
    }

    public function create(Request $request)
    {
        // POST
        if ($request->isMethod('POST')) {
            dd($request->all());
        }

        // GET
        return view('item.create');
    }

}
商品登録フォームを作成します。
<!-- メッセージ -->
@if (count($errors) > 0)
<ul>
    @foreach($errors->all() as $error)
    <li>{{ $error }}</li>
    @endforeach
</ul>
@endif
<!-- フォーム -->
<form action="{{ url('upload') }}" method="POST" enctype="multipart/form-data">
    <label for="jan">Janコード:</label>
    <input type="text" class="form-control" name="jan" value="">
    <br>
    <label for="name">商品名:</label>
    <input type="text" class="form-control" name="name" value="">
    <br>
    <label for="photo">画像ファイル(複数可):</label>
    <input type="file" class="form-control" name="files[][photo]" multiple>
    <br>
    <hr>
    {{ csrf_field() }}
    <button class="btn btn-success"> Upload </button>
</form>
3.バリデーションを作成する
フォームの入力値をチェックしたほうがいいでしょう。リクエストファイルを作成します。
php artisan make:request ItemRequest
class ItemRequest extends FormRequest
{
    public function authorize()
    {
        return true;
    }

    public function rules()
    {
        if ($this->isMethod('get')) return [];

        return [
            'jan' => 'required',
            'name' => 'required',
            'files.*.photo' => 'image|mimes:jpeg,bmp,png',
        ];
    }
}
*を使えば、配列の各要素をバリデーションすることもできます。詳しく
4.ファイルの保存場所を指定する
基本的には、すべてのファイルが/storage/appフォルダに保存されます。 しかし、/publicではないので、ブラウザURLから直接にアクセスすることはできませんので、変更します。
return [
    'default' => 'local',
    'disks' => [
        'local' => [
            'driver' => 'local',
            // 'root' => storage_path('app'), // 変更前
            'root' => public_path('item'),        // 変更後
        ],
    // ...
以上のように変更すれば、画像ファイルはすべて/public/item下にアップされます。
5.ItemControllerの全貌
ItemRequestクラスをControllerに use することを忘れないでください。
コントローラ全体のメソッドは次のようになります:
<?php

namespace App\Http\Controllers;

use App\Item;
use App\Http\Requests\ItemRequest;

class ItemController extends Controller
{

    public function index()
    {
        $items = Item::all();
        return view('item.index', compact('items'));
    }

    public function create(ItemRequest $request)
    {
        // POST
        if ($request->isMethod('POST')) {

            // 商品情報の保存
            $item = Item::create(['jan'=> $request->jan, 'name'=> $request->name]);

            // 商品画像の保存
            foreach ($request->file('files') as $index=> $e) {
                $ext = $e['photo']->guessExtension();
                $filename = "{$request->jan}_{$index}.{$ext}";
                $path = $e['photo']->storeAs('photos', $filename);
                // photosメソッドにより、商品に紐付けられた画像を保存する
                $item->photos()->create(['path'=> $path]);
            }

            return redirect('/items')->with(['success'=> '保存しました!']);
        }

        // GET
        return view('item.create');
    }
}
ご覧のように、ファイルをアップロードする方法は ->storeAs('photos', $filename) です。 第1引数はストレージに使用するサブフォルダの意味です。この場合は /public/item/photos になります。 第2引数は画像ファイルの名前です。
6.結果
Itemsテーブルのデータは

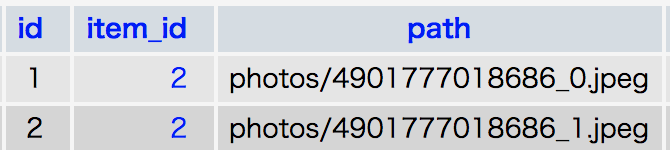
Item_Photosテーブルのデータは
最後
間違いなどがございましたら、ご指摘いただけると幸いです。