はじめに
2021/5/19に突如登場したAWSの新サービス。
これまで ECS Fargate や Lambda といった実行基盤と同じような感じで、高い抽象度で数クリックでお手軽に構築できることがウリだ。
しかも、なんとローンチのその日のうちに Terraform がキャッチアップしてるではないか!
これは、これまでそこそこ大変だったコンテナ環境の構築がどれくらいお手軽になったのか試さないワケにはいかないだろう!
コンテンツとコンテナの準備
今回は、自分で作った Nginx の Web サービスを公開するという前提にしてみよう。
なので、テキトーなコンテンツを作って Nginx のコンテナに詰め込むようにする。
<html>
  <head>
    <meta charset="utf-8">
    <title>はじめてのTerraform+AppRunner</title>
  </head>
  <body>
    <h1>Terraform+AppRunnerでNginx起動成功!</h1>
  </body>
</html>
FROM nginx:1.20-alpine

# copy static contents
COPY ./contents/ /usr/share/nginx/html/

# return
WORKDIR /

CMD ["/usr/sbin/nginx", "-g", "daemon off;"]
自前 Nginx コンテナを ECR に PUSH する
ということで、チュートリアルや例では ECR Public Gallery を使っているが、自分の ECR を使用する。
################################################################################
# ECR                                                                          #
################################################################################
resource "aws_ecr_repository" "nginx" {
  name = local.ecr_repository_name
}

data "aws_ecr_authorization_token" "token" {}

resource "null_resource" "image_push" {
  provisioner "local-exec" {
    command = <<-EOF
      docker build ../ -t ${aws_ecr_repository.nginx.repository_url}:latest; \
      docker login -u AWS -p ${data.aws_ecr_authorization_token.token.password} ${data.aws_ecr_authorization_token.token.proxy_endpoint}; \
      docker push ${aws_ecr_repository.nginx.repository_url}:latest
    EOF
  }
}
App Runner を構築する
そして、いよいよ App Runner の構築だ。
これが ECS なら、クラスタ作ってサービス作ってタスク定義して LB 作ってリスナー作ってターゲットグループ作ってと色々なサービスを作る必要があるが、App Runner だとこんな感じになる。
################################################################################
# App Runner                                                                   #
################################################################################
resource "aws_apprunner_service" "nginx" {
  depends_on = [null_resource.image_push]

  service_name = "nginx"

  source_configuration {
    image_repository {
      image_repository_type = "ECR"
      image_identifier      = "${aws_ecr_repository.nginx.repository_url}:latest"

      image_configuration {
        port = "80"
      }
    }

    authentication_configuration {
      access_role_arn = aws_iam_role.apprunner.arn
    }
  }
}
少ない!本当にこれだけで動いてしまうのか!?
と言いつつ、実は一つだけ足りていない。App Runner は ECR からコンテナイメージを Pull してくるので、ECR へのアクセス権限は最低限必要になる。
信頼されたエンティティに設定するプロバイダは build.apprunner.amazonaws.com である。
######################################################################
# IAM Role for App Runner                                            #
######################################################################
resource "aws_iam_role" "apprunner" {
  name               = local.iam_role_name
  assume_role_policy = data.aws_iam_policy_document.apprunner_assume.json
}

data "aws_iam_policy_document" "apprunner_assume" {
  statement {
    effect = "Allow"

    actions = [
      "sts:AssumeRole",
    ]

    principals {
      type = "Service"
      identifiers = [
        "build.apprunner.amazonaws.com",
      ]
    }
  }
}

resource "aws_iam_role_policy_attachment" "apprunner" {
  role       = aws_iam_role.apprunner.name
  policy_arn = aws_iam_policy.apprunner_custom.arn
}

resource "aws_iam_policy" "apprunner_custom" {
  name   = local.iam_policy_name
  policy = data.aws_iam_policy_document.apprunner_custom.json
}

data "aws_iam_policy_document" "apprunner_custom" {
  statement {
    effect = "Allow"

    actions = [
      "ecr:GetAuthorizationToken",
      "ecr:BatchCheckLayerAvailability",
      "ecr:GetDownloadUrlForLayer",
      "ecr:BatchGetImage",
      "ecr:DescribeImages",
    ]

    resources = [
      "*",
    ]
  }
}
ちょっと増えた。が、それにしても少ない。これで全部だ。
それでは terraform apply してみよう。
(前略)
aws_apprunner_service.nginx: Still creating... [4m40s elapsed]
aws_apprunner_service.nginx: Creation complete after 4m44s [id=arn:aws:apprunner:ap-northeast-1:xxxxxxxxxxxx:service/nginx/xxxxxxxxxxxxxxxxxxxxxxxxxxxxxxxx]

Apply complete! Resources: 6 added, 0 changed, 0 destroyed.
5分くらいで完成。早い!
マネージメントコンソールの画面は↓こんな感じだ。
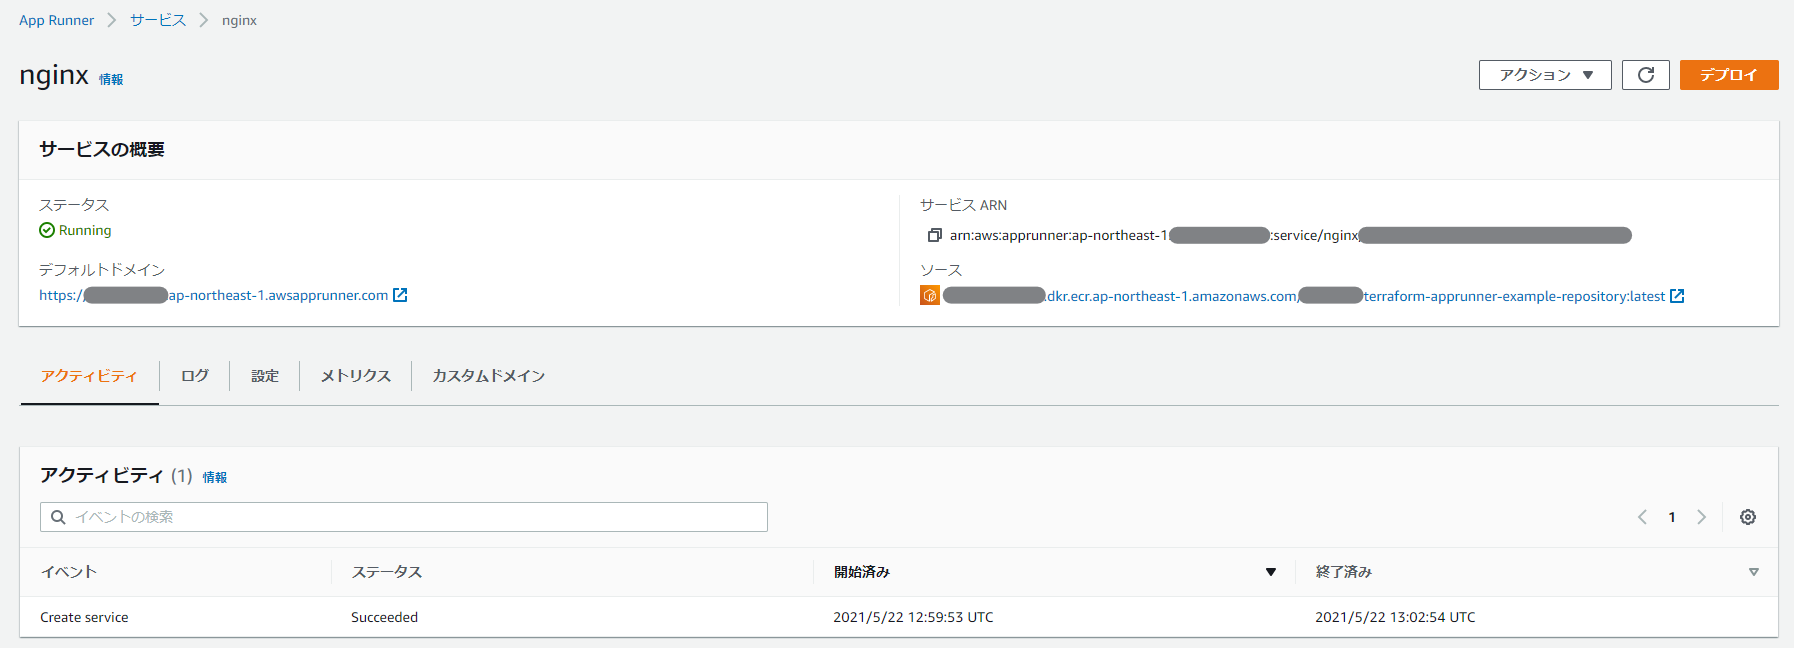
デフォルトのURLにアクセスしてみると……

無事、自分が作ったテキトーなコンテンツが表示された!
これはお手軽!
AWS App Runner は、お手軽ながらもオートスケーリングやカスタムドメインにも対応しているし、IAM による他のサービスのアクセス制御にも対応しているので、ガチガチではない標準的な要件の範囲であれば簡単に作れてしまうのは嬉しいところ。
どんどん活用していこう!
(追記)カスタムドメインを設定する
さて、せっかくだからカスタムドメインを設定して自由なドメイン名でサービスを提供してみよう。
当然ながら、事前にドメインの取得が必要になるので、過去の記事を参考にしながら、Route53 にホストゾーンの設定までは行っておく。
カスタムドメインの設定は、aws_apprunner_custom_domain_association のリソースを使う。
data "aws_route53_zone" "my_domain" {
  name = local.domain_name
}

resource "aws_apprunner_custom_domain_association" "my_domain" {
  service_arn          = aws_apprunner_service.nginx.arn
  domain_name          = "www.${data.aws_route53_zone.my_domain.name}"
  enable_www_subdomain = false
}
これを terraform apply すると、マネージメントコンソールのカスタムドメインのタブが、以下のように「証明書DNS検証の保留中」のステータスになる。

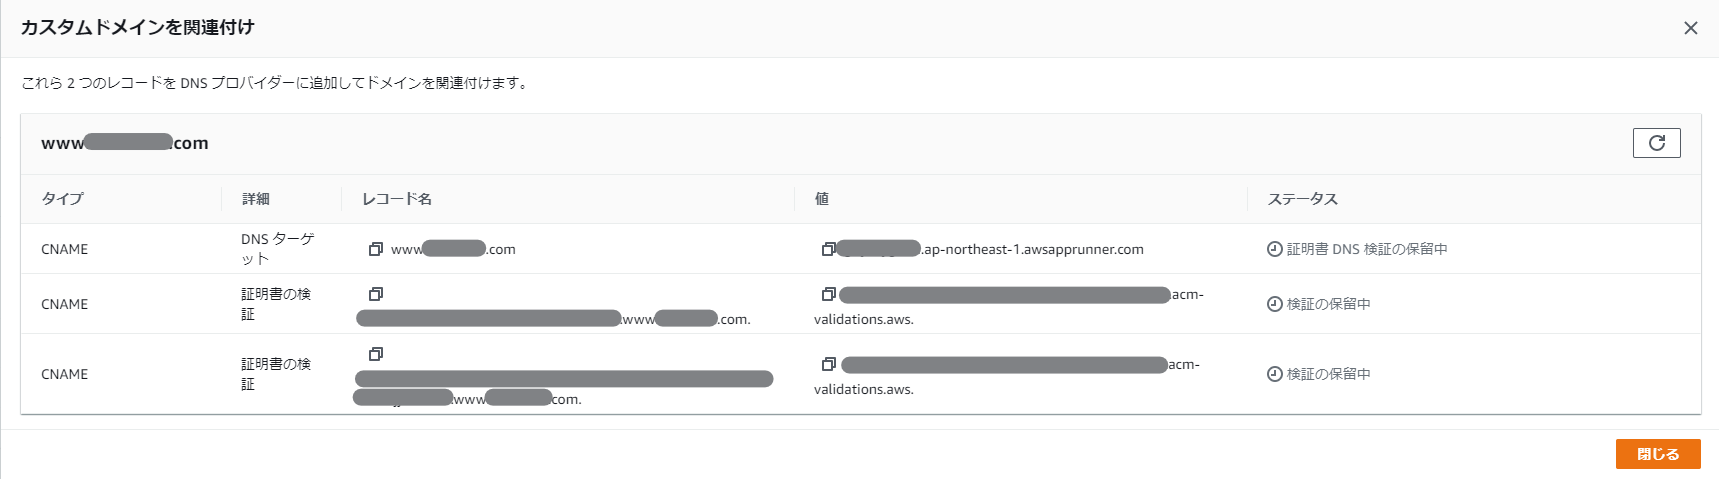
ここで、以下のようにしてあげることで、DNS検証を行える。
実際は、Terraform は一息で apply して問題ない。
resource "aws_route53_record" "www" {
  zone_id = data.aws_route53_zone.my_domain.zone_id
  name    = aws_apprunner_custom_domain_association.my_domain.domain_name
  type    = "CNAME"
  ttl     = "300"
  records = [aws_apprunner_custom_domain_association.my_domain.dns_target]
}

resource "aws_route53_record" "certificate_validation" {
  for_each = {
    for record in aws_apprunner_custom_domain_association.my_domain.certificate_validation_records : record.name => {
      name   = record.name
      record = record.value
    }
  }

  zone_id = data.aws_route53_zone.my_domain.zone_id
  name    = each.value.name
  type    = "CNAME"
  ttl     = "300"
  records = [each.value.record]
}
DNS検証を行ってしばらく待つと、ステータスが以下のように変わる。
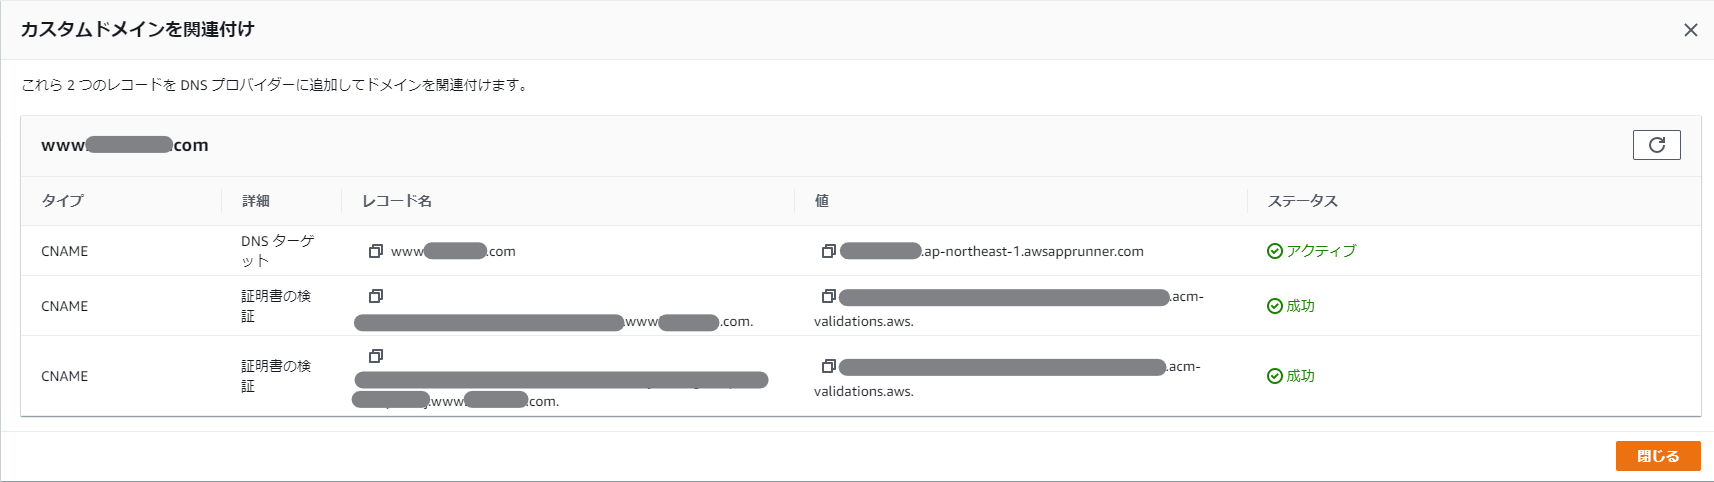
これで、設定したドメインで、App Runner でのサービスにアクセスすることが可能になる。
やり方さえ覚えてしまえば、少ない IaC で設定が可能になる。素晴らしい!