前提条件
システム開発をしていると、「バックエンドサービスが故障してエラーを返し始めたとしてもなんか良い感じに動作してシステム全体が不安定にならないようにしてね」とか無茶振りされること、あるよね?
そんな時に自前で動作を考えるのが面倒なので、Spring Bootの機能を使い倒してサーキットブレーカーにできるのではないかと実験してみた。
最終的に、AWS上で良い感じに動くようにしてみたいが、前半は実装方法まで。
Spring Bootの準備
とりあえず、Webアプリとして最小限で動いてくれてば良いので、テンプレートから空っぽのスタータープロジェクトを作成する。
pom.xmlには、デフォルト以外に以下の依存関係を設定しておこう。
    <dependencies>
        ……
        <dependency>
            <groupId>org.springframework.boot</groupId>
            <artifactId>spring-boot-starter-web</artifactId>
        </dependency>

        <dependency>
            <groupId>org.springframework.boot</groupId>
            <artifactId>spring-boot-starter-actuator</artifactId>
        </dependency>
        ……
    </dependencies>
RestControllerについては、今回の本題の部分ではないのでテキトー。最小構成で以下のような感じで。
package com.example;

import org.springframework.web.bind.annotation.RequestMapping;
import org.springframework.web.bind.annotation.RestController;

@RestController
public class WebController {

  @RequestMapping("/hello")
  public String hello() {
    return "hello()";
  }

}
バックエンドサービスへのヘルスチェックの追加定義
ここからは、Spring Bootのドキュメントを読みつつ。
バックエンドサービスへのヘルスチェックをカスタムヘルスチェックとして登録する。
今回は、制御が楽なようにバックエンドサービスをLambda関数にして実験しているので、ヘルスチェックの名前にLambdaが入っているが、適宜好きな名前に変更してもらえれば。
HealthIndicatorインタフェースを以下のような感じで実装する。
こうすると、起動時に自動的にBeanに登録されてくれるようだ。詳しいメカニズムは理解できていない。ちゃんと勉強せねば。
package com.example;

import org.springframework.boot.actuate.health.HealthIndicator;
import org.springframework.boot.actuate.health.Health;
import org.springframework.stereotype.Component;
import java.net.HttpURLConnection;
import java.net.URL;
import java.io.IOException;

@Component
public class LambdaHealthIndicator implements HealthIndicator {

  @Override
  public Health health() {
    int statusCode = check();
    if (statusCode != HttpURLConnection.HTTP_OK) {
      return Health.down().withDetail("HTTP Request Error", statusCode).build();
    } else {
      return Health.up().withDetail("HTTP Request Success", statusCode).build();
    }
  }

  private int check(){
    String strUrl = "Lambda関数のぶら下がったALB/NLB/API GatewayのURL";
    URL url = null;
    HttpURLConnection  urlConn = null;
    int statusCode = 200;

    try {
      url = new URL(strUrl);
      urlConn = (HttpURLConnection) url.openConnection();
      urlConn.setRequestMethod("GET");
      urlConn.connect();
      statusCode = urlConn.getResponseCode();
    } catch (IOException e) {
      e.printStackTrace();
      statusCode = 503;
    } finally {
      if (urlConn != null) {
        urlConn.disconnect();
      }
    }
    return statusCode;
  }
}
さて、これだけだとAcutuatorのデフォルト表示では、/actuator/health にアクセスしても
{"status":"UP"}
としか返してくれない。以下のような感じでアプリケーションプロパティを編集しておく必要がある。
management.endpoint.health.show-details=always
management.health.defaults.enabled=false
management.health.lambda.enabled=true
1行目は、ヘルスチェックの内容を詳細表示するためのオプション。
2行目は、trueになっていると、diskspaceとかも表示されてしまって見づらいので、この記事中では無効にする。
3行目は、追加したLambdaHealthIndicatorを有効化している。ドキュメントにも書かれているが、HealthIndicatorの接頭句が設定値として扱われるようだ。
実験してみる
上記のアプリを起動して、http://localhost:8080/actuator/healthにアクセスすると、
{"status":"UP","components":{"lambda":{"status":"UP","details":{"HTTP Request Success":200}}}}
と表示される。
ここで、バックエンドのLambda関数の設定からスロットリング(=同時実行の予約:0にする)をして、ALBから502応答が返ってくる状態にすると、
{"status":"DOWN","components":{"lambda":{"status":"DOWN","details":{"HTTP Request Error":502}}}}
となり、ちゃんとエラーを検知している。
Chromeのデベロッパーツールでヘッダを確認してみると、
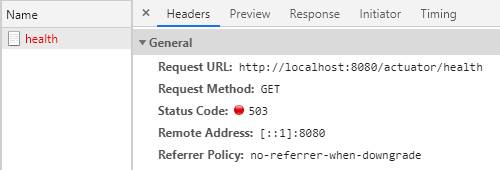
レスポンスコードも503になっているので、ヘルスチェックをここに向けることでサーキットブレーカーとして扱えるのではないだろうか!