概要
今回はRaspberry PIでPython Webを作成のため、環境構築及びサンプルコードを確認します。
事前作業
次のコマンドで環境を構築します。
# パッケージインデックスファイルのダウンロード
sudo apt-get update
# インストール済みのパッケージ更新をおこない
sudo apt-get upgrade

# Python環境構築インストール
sudo apt-get install python-dev python3-dev python-pip python3-pip

# Python 2.X Flaskインストール
pip install flask

# Python 3.X Flaskインストール
pip3 install flask
サンプルソース作成及び起動
①以下のサンプルソースを作成します。
※debug、Host、portを指定すると他のPCでアクセスが可能です。
指定すると同じネットワーク環境内にアクセスができます。
指定しない場合は、実行しているローカル環境のみアクセスが可能となります。
# run.py
from flask import Flask
app = Flask(__name__)

@app.route('/')
def hello_world():
    return '<html><body><h1>sample</h1></body></html>'

if __name__ == '__main__':
    # app.run()
    app.run(debug=False, host='192.168.1.25', port=5000)
②次のコマンドでサンプルソースを起動します。
pi@raspberrypi:~ $ python run.py
 * Serving Flask app "run" (lazy loading)
 * Environment: production
   WARNING: Do not use the development server in a production environment.
   Use a production WSGI server instead.
 * Debug mode: off
 # host, portの指定がある場合は、下記のように実行されます。
 * Running on http://192.168.1.25:5000/ (Press CTRL+C to quit)
 # host, portの指定がない場合は、下記のように実行されます。
 * Running on http://127.0.0.1:5000/ (Press CTRL+C to quit)
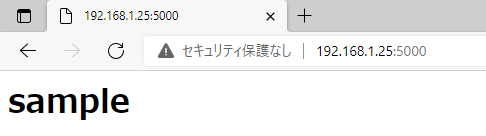
他のPCからアクセス
次のURLにRaspberryPIのIPアドレスを入れてブラウザで実行します。
http://xxx.xxx.xxx.xxx:5000
終わりに
環境構築は意外と簡単ですね。
次はHTMLテンプレートに値を渡す方法について説明致します。