概要
今日はVSCODEのSSHからサーバのソースを直接修正することについてメモしたいと思います。
開発環境
SSHで接続が可能なLinuxサーバであればOKです。
今回の説明で使うものはRaspberry piを利用します。
SSH接続の事前確認
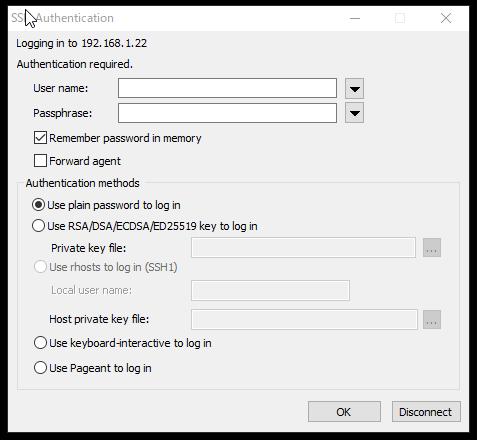
Raspberry PIへSSH接続を確認します。
②ログイン情報を入力すると次のようなコンソールプロンプトが表示されます。
※Raspberry PIへ問題なく接続ができることを確認しました。
Linux raspberrypi 4.14.34-v7+ #1110 SMP Mon Apr 16 15:18:51 BST 2018 armv7l

The programs included with the Debian GNU/Linux system are free software;
the exact distribution terms for each program are described in the
individual files in /usr/share/doc/*/copyright.

Debian GNU/Linux comes with ABSOLUTELY NO WARRANTY, to the extent
permitted by applicable law.
You have new mail.
Last login: Tue Sep 27 21:38:07 2022

pi@raspberrypi:~ $
Visual Studio Codeからパッケージをインストール
■インストール手順については次のサイトをご覧ください。
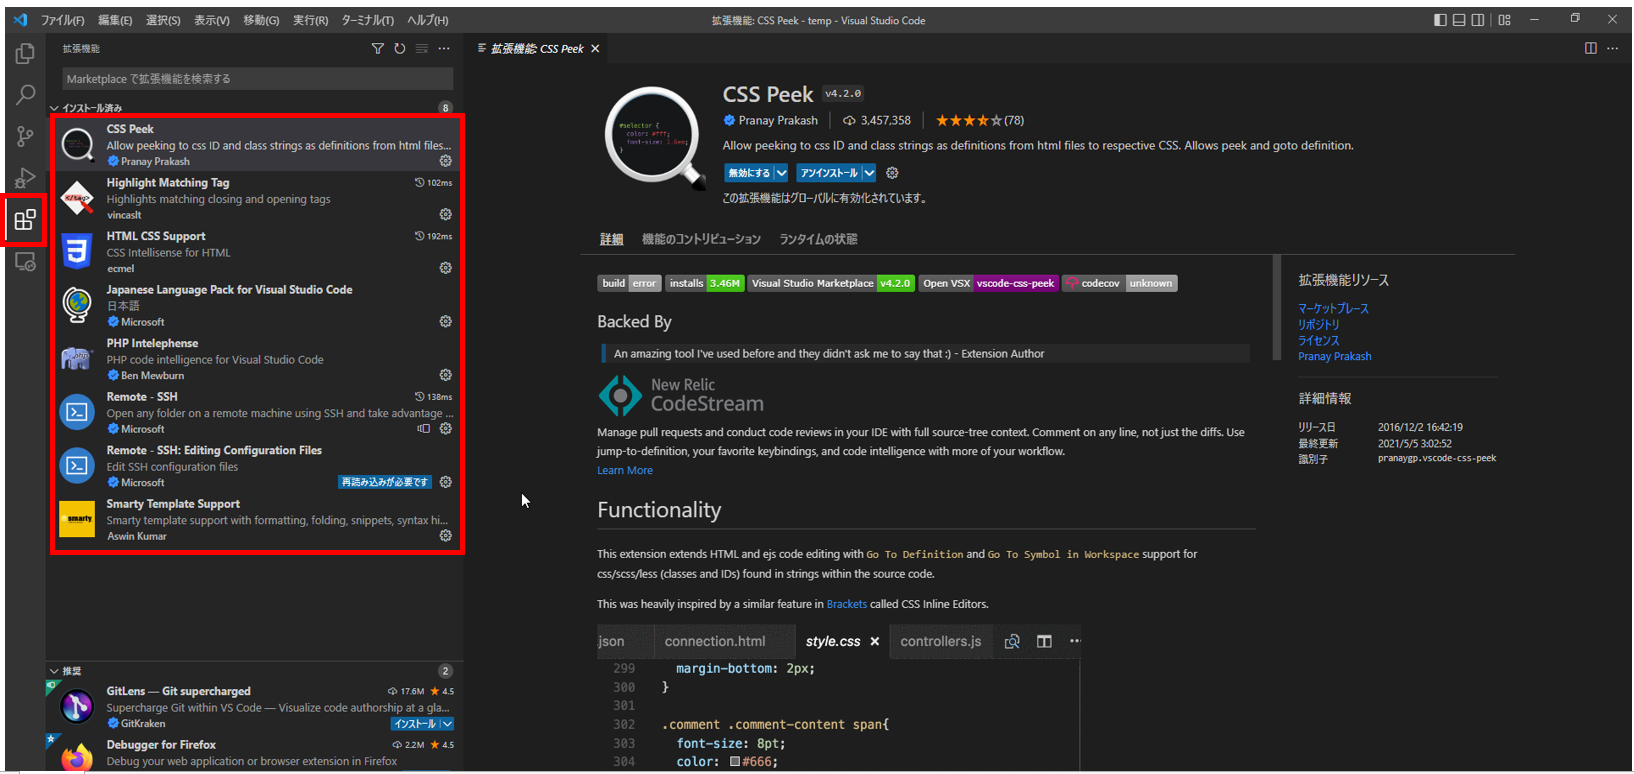
■各インストールするパッケージ一覧
以下のパッケージをインストールします。パッケージの内容は各サイトから参照してください。
①CSS Peek
②HighLight Matching Tag
③HTML CSS Support
④Japanese Language Pack for Visual studio code
⑤PHP Intelephense
⑥Remote SSH
⑦Remote SSH:Editing Configuration Files
⑧Smary Template Support
Visual Studio CodeでSSHを利用してRaspberry PIへ接続
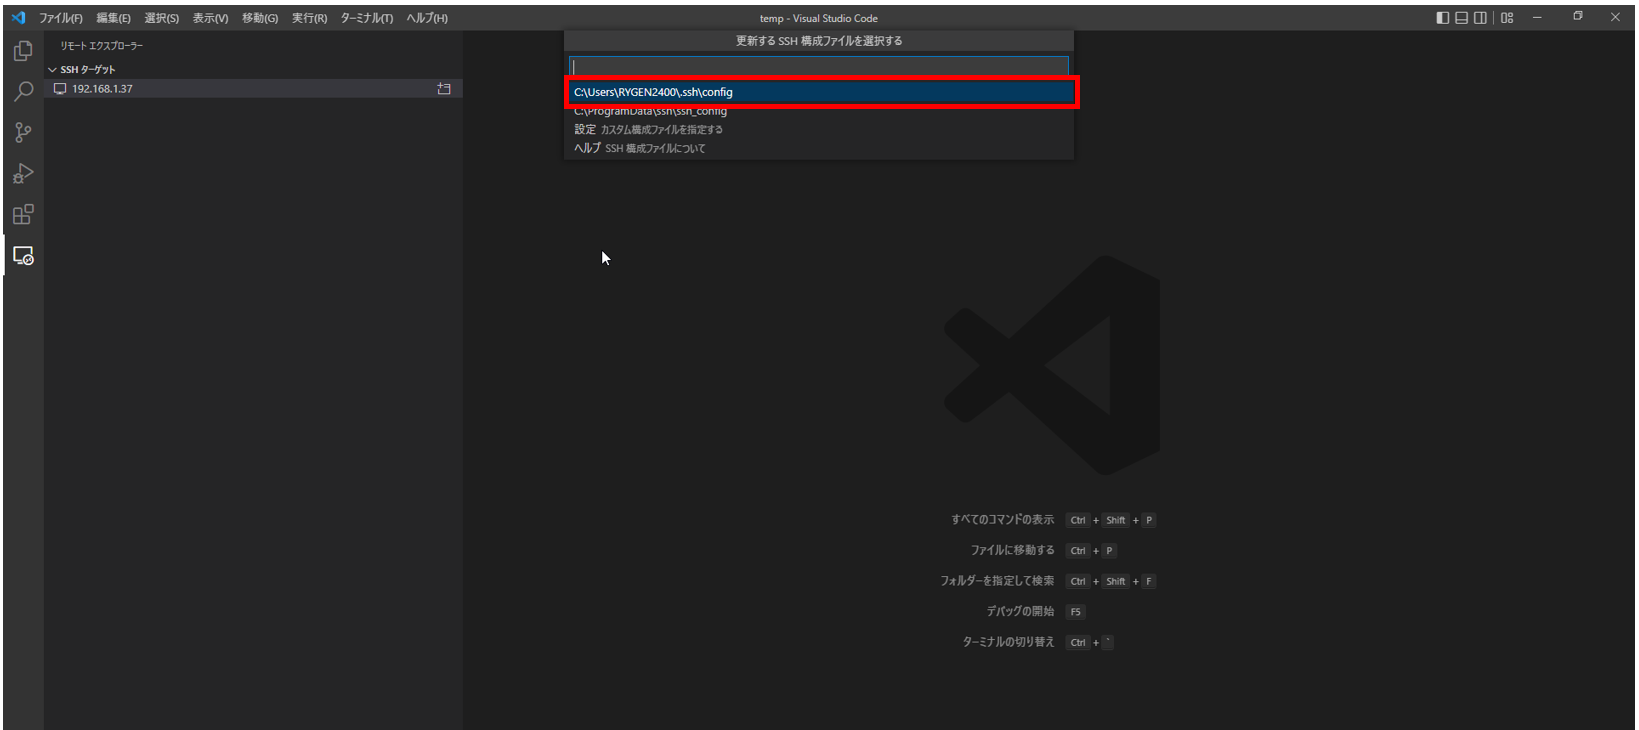
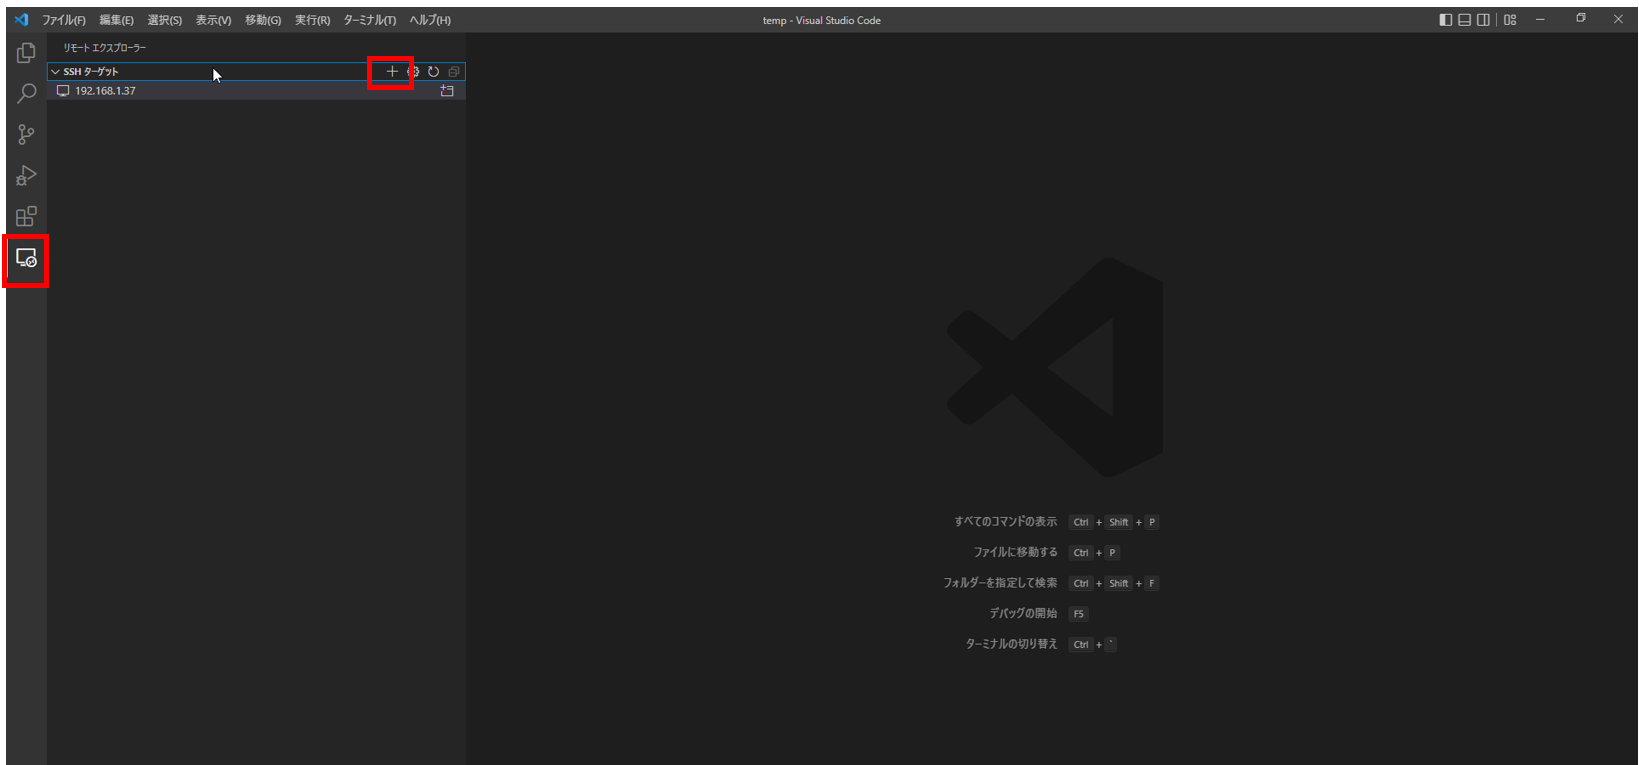
①次の画面で左のメニューをクリックしますと右側に表示されるSSHターゲットの「+」ボタンをクリックします。
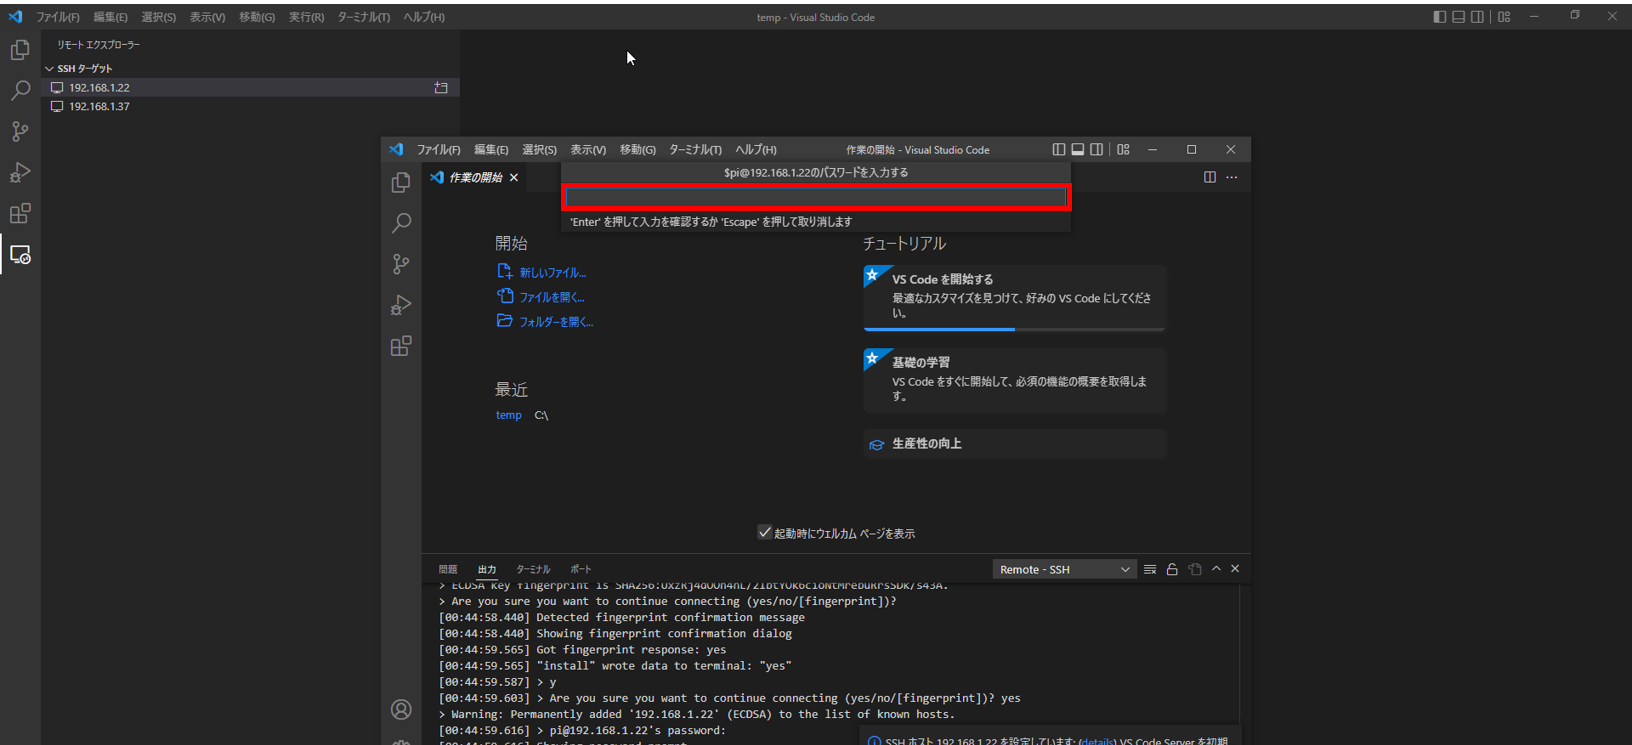
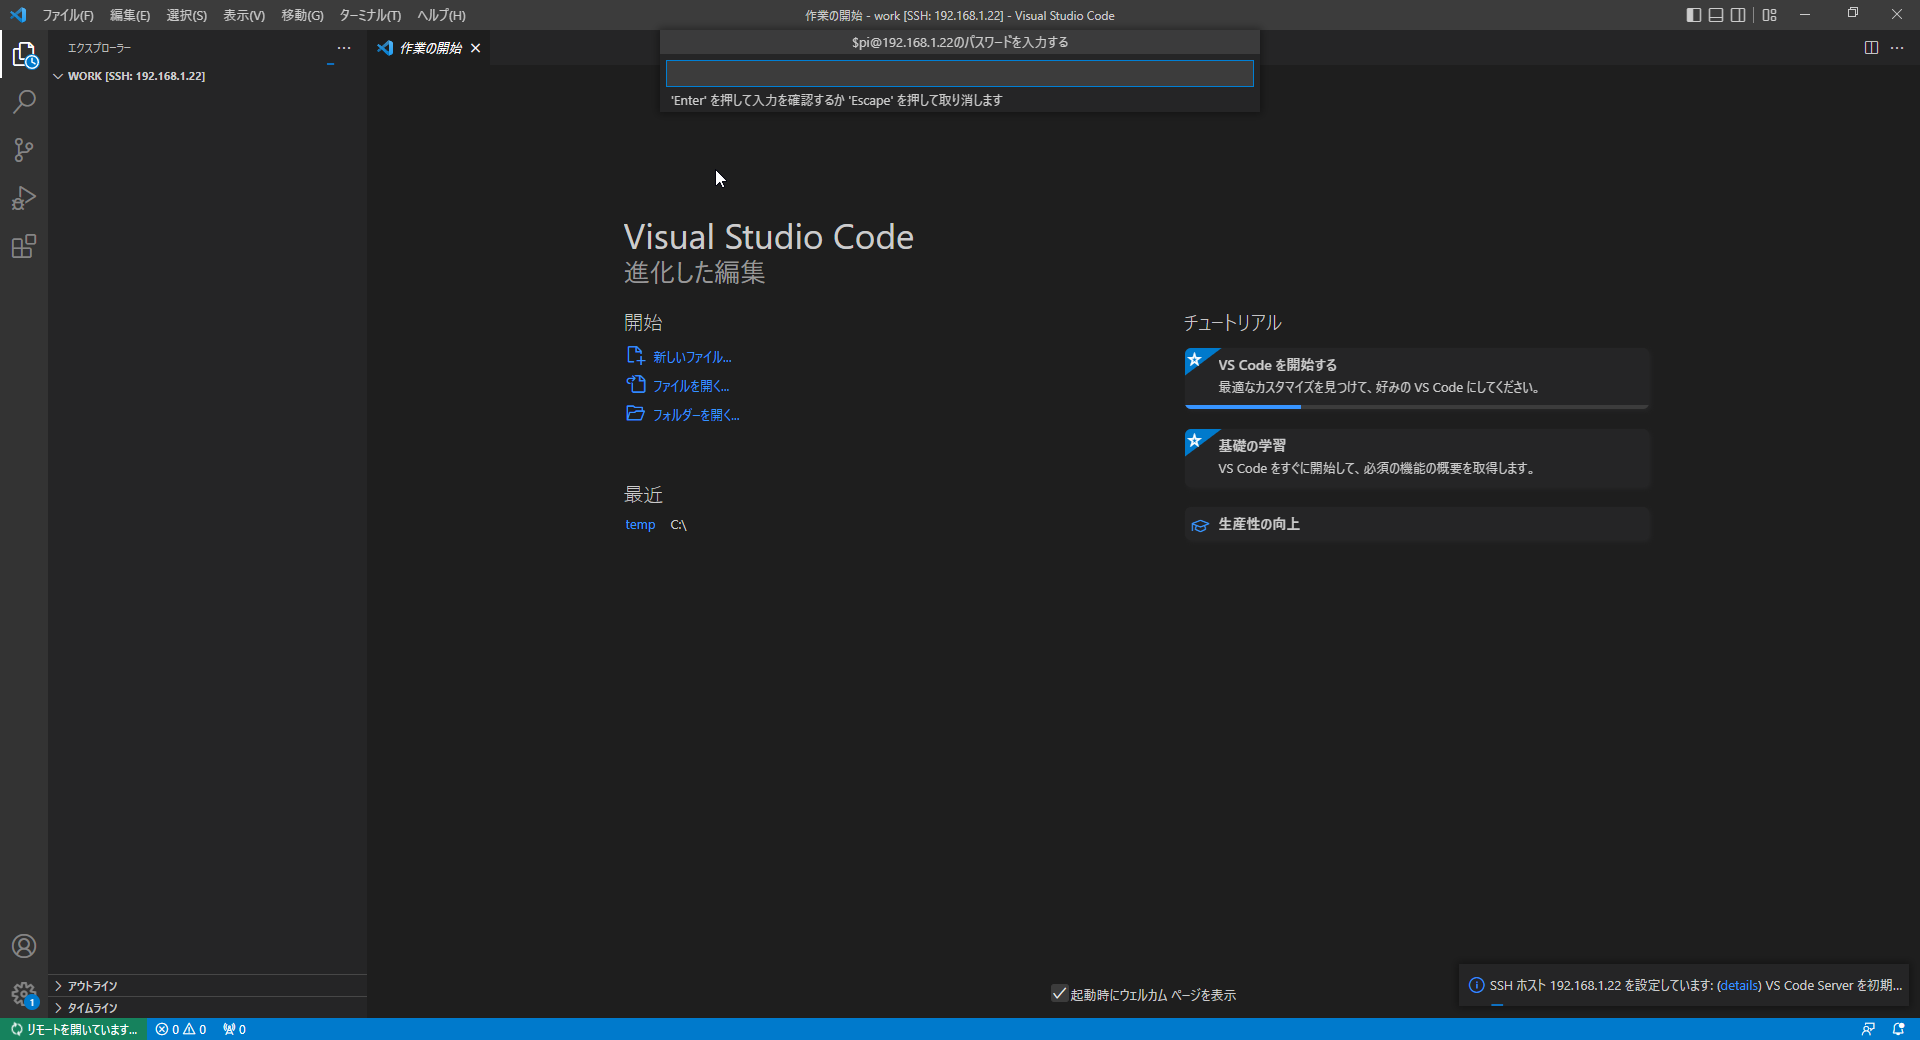
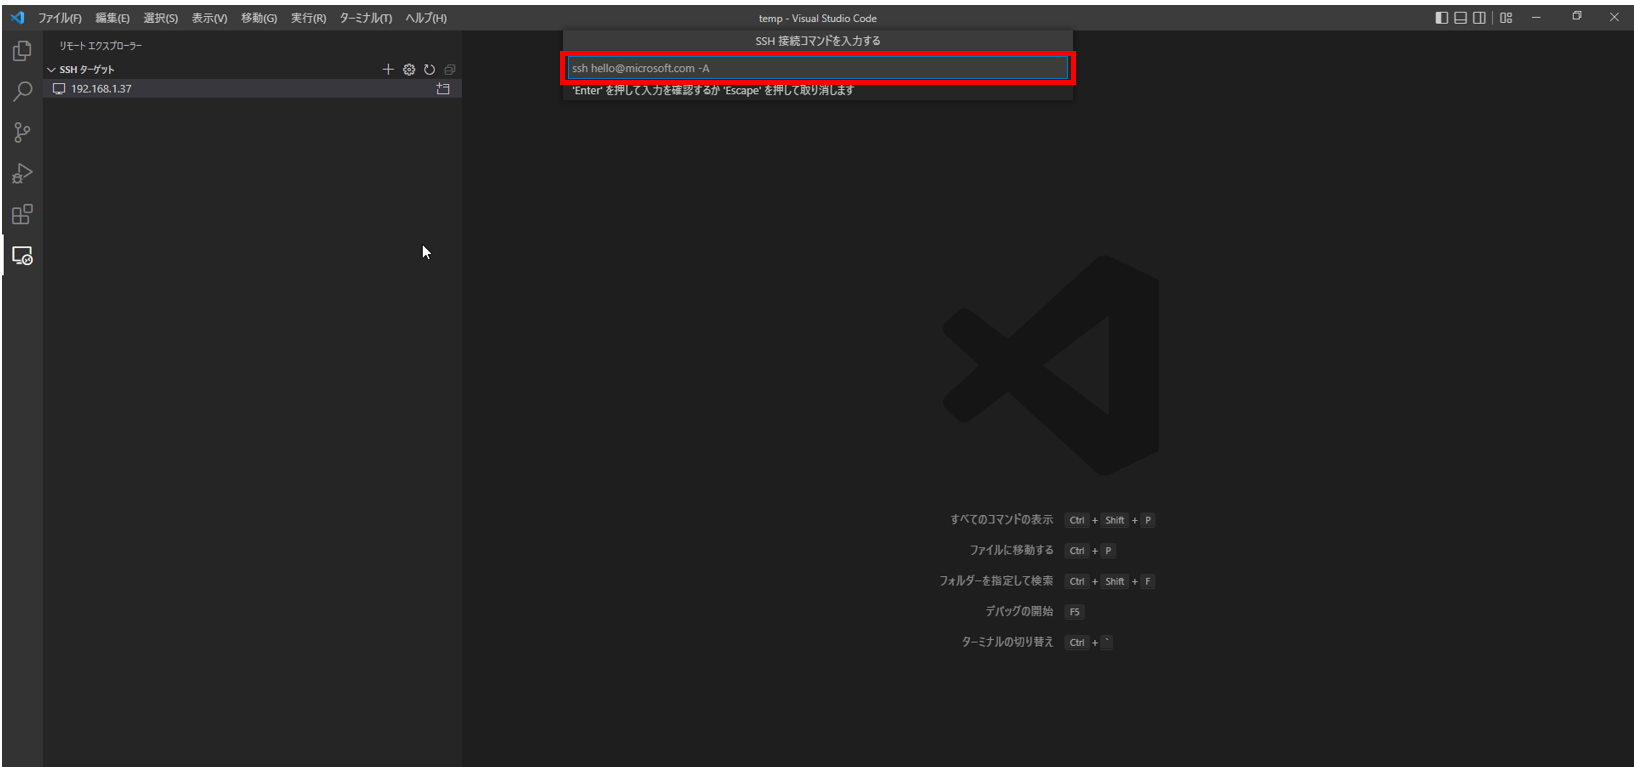
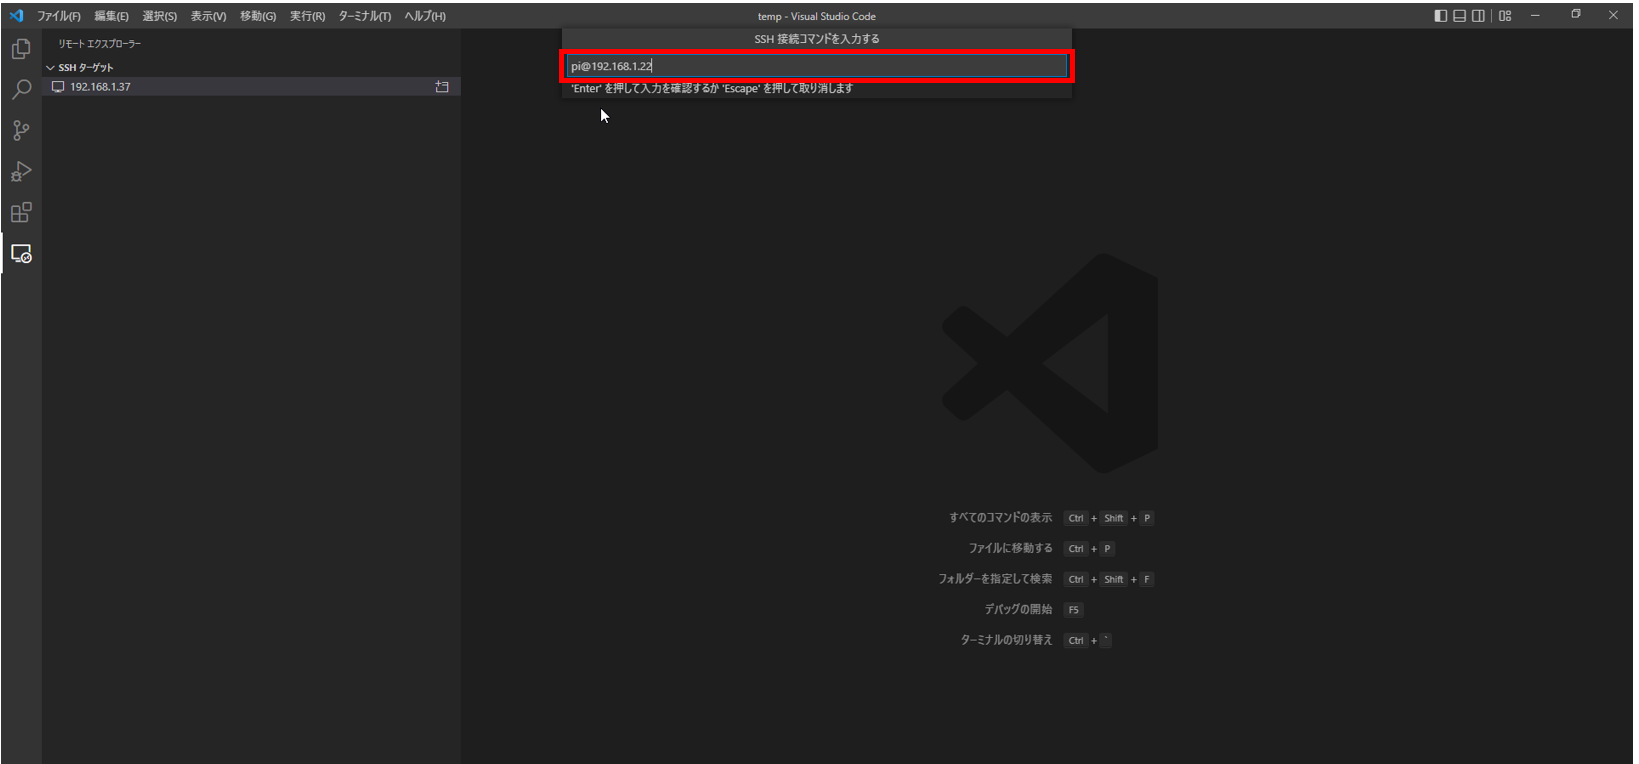
②Raspberry PIへ接続するアカウント@サーバアドレスを入力します。
例)pi@192.168.1.22
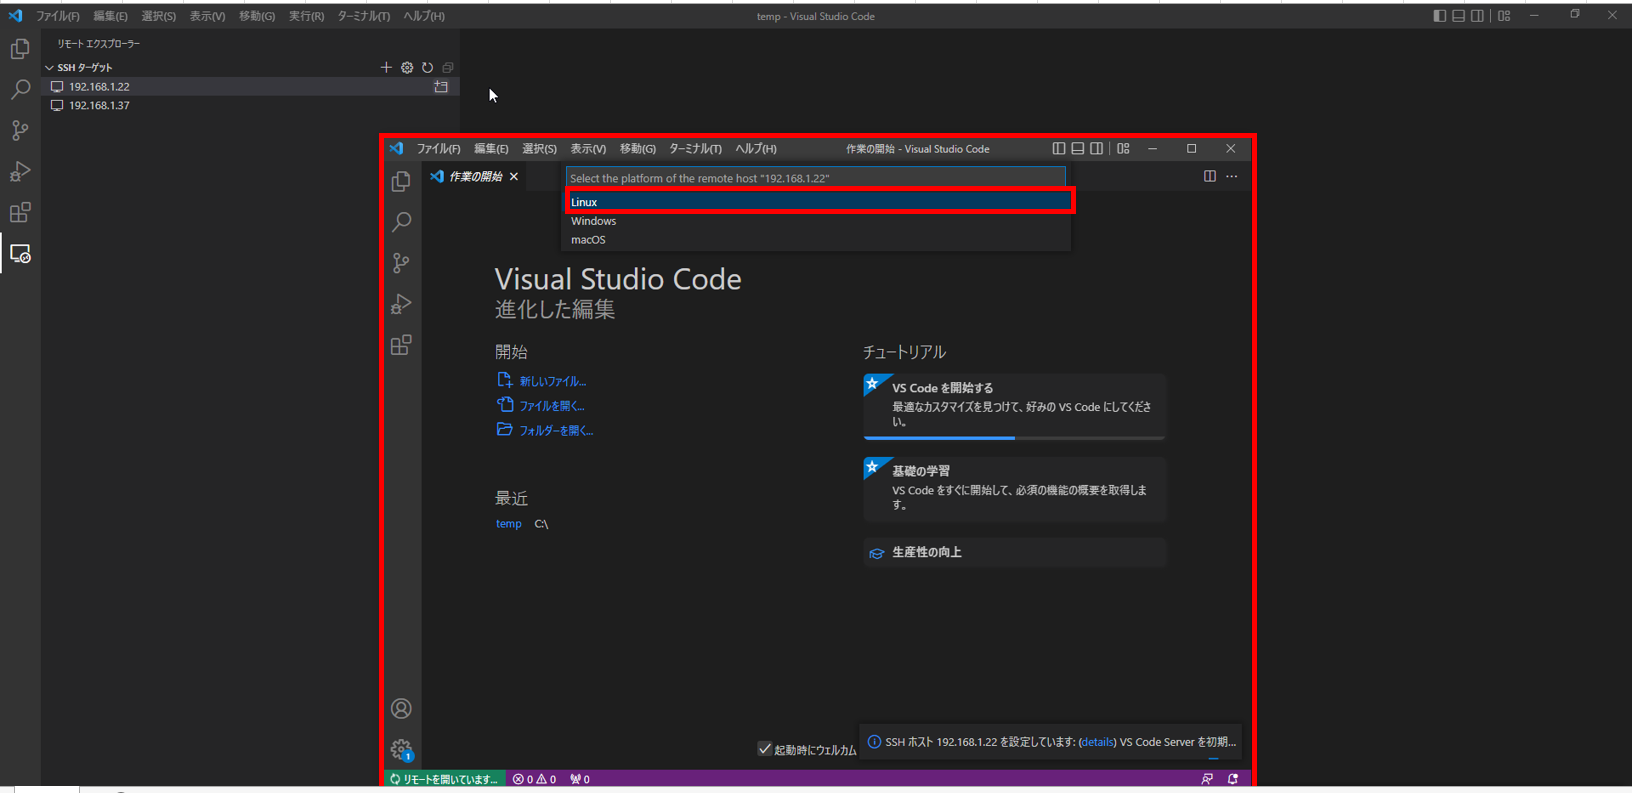
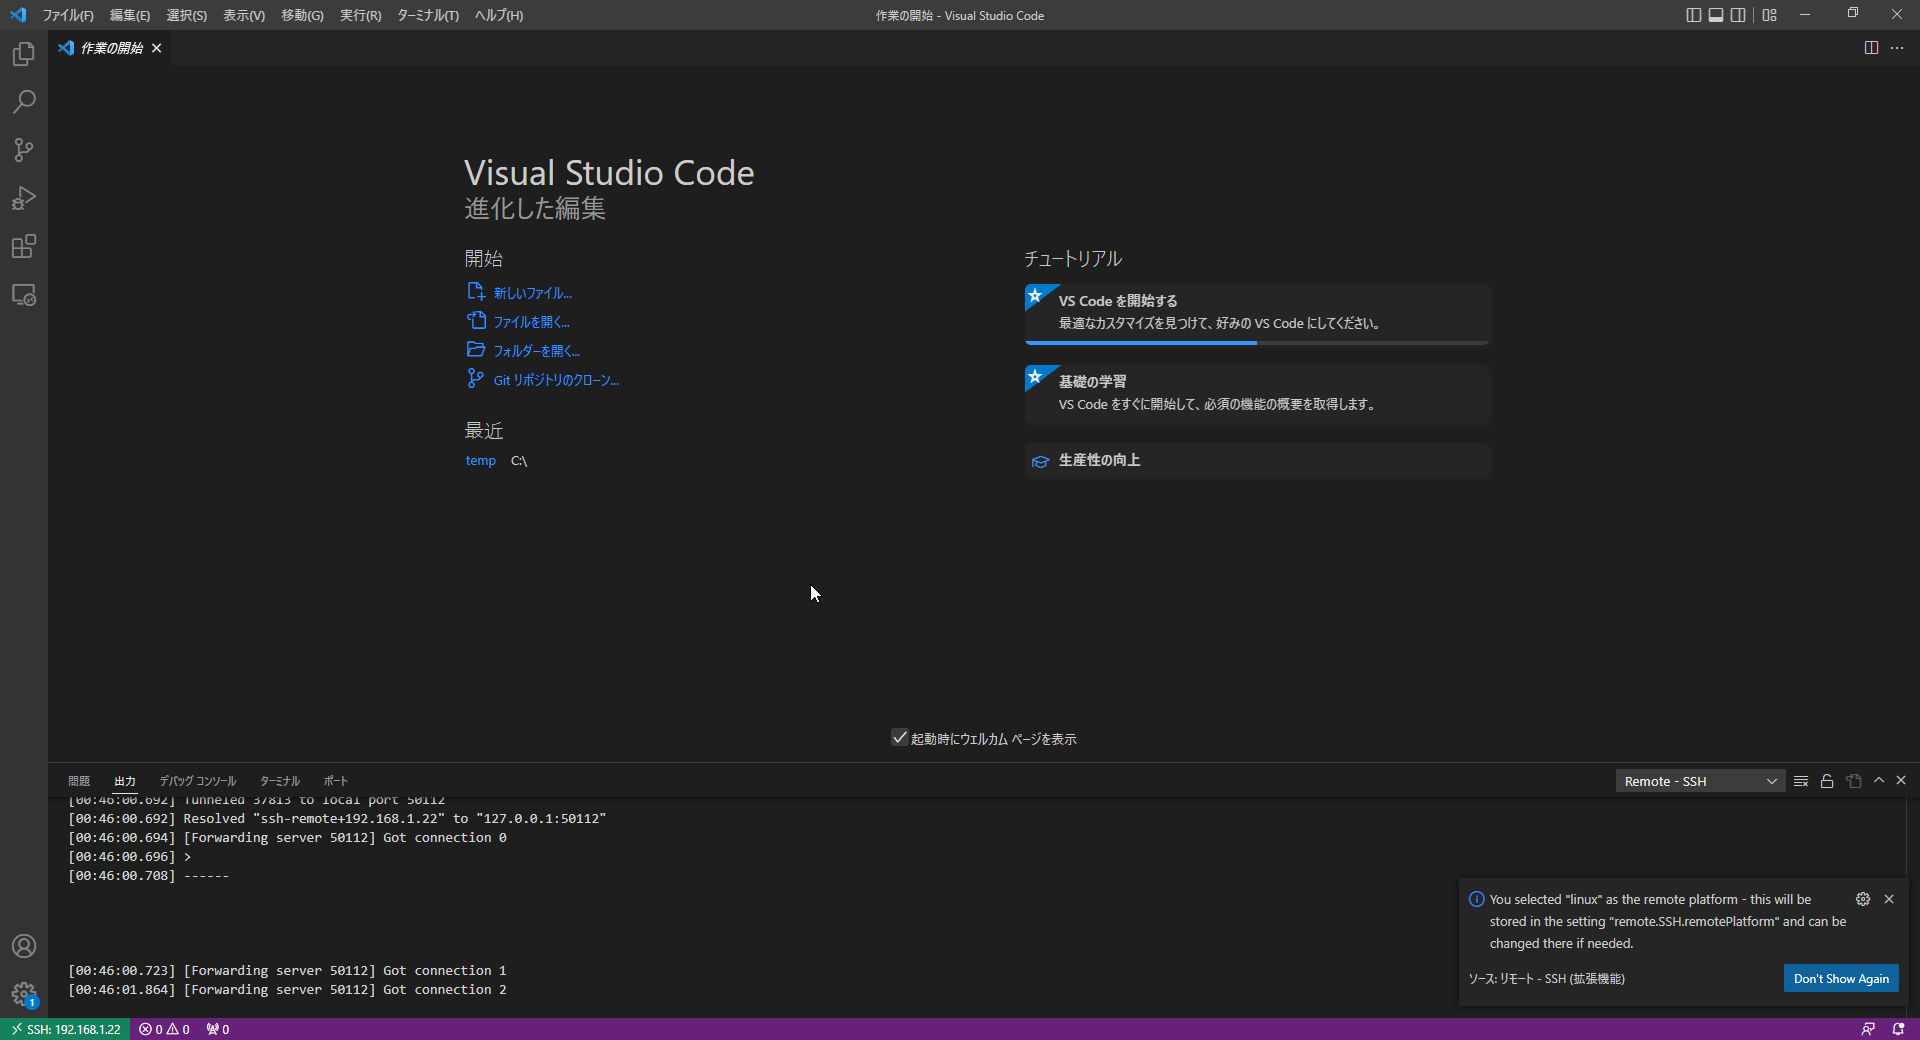
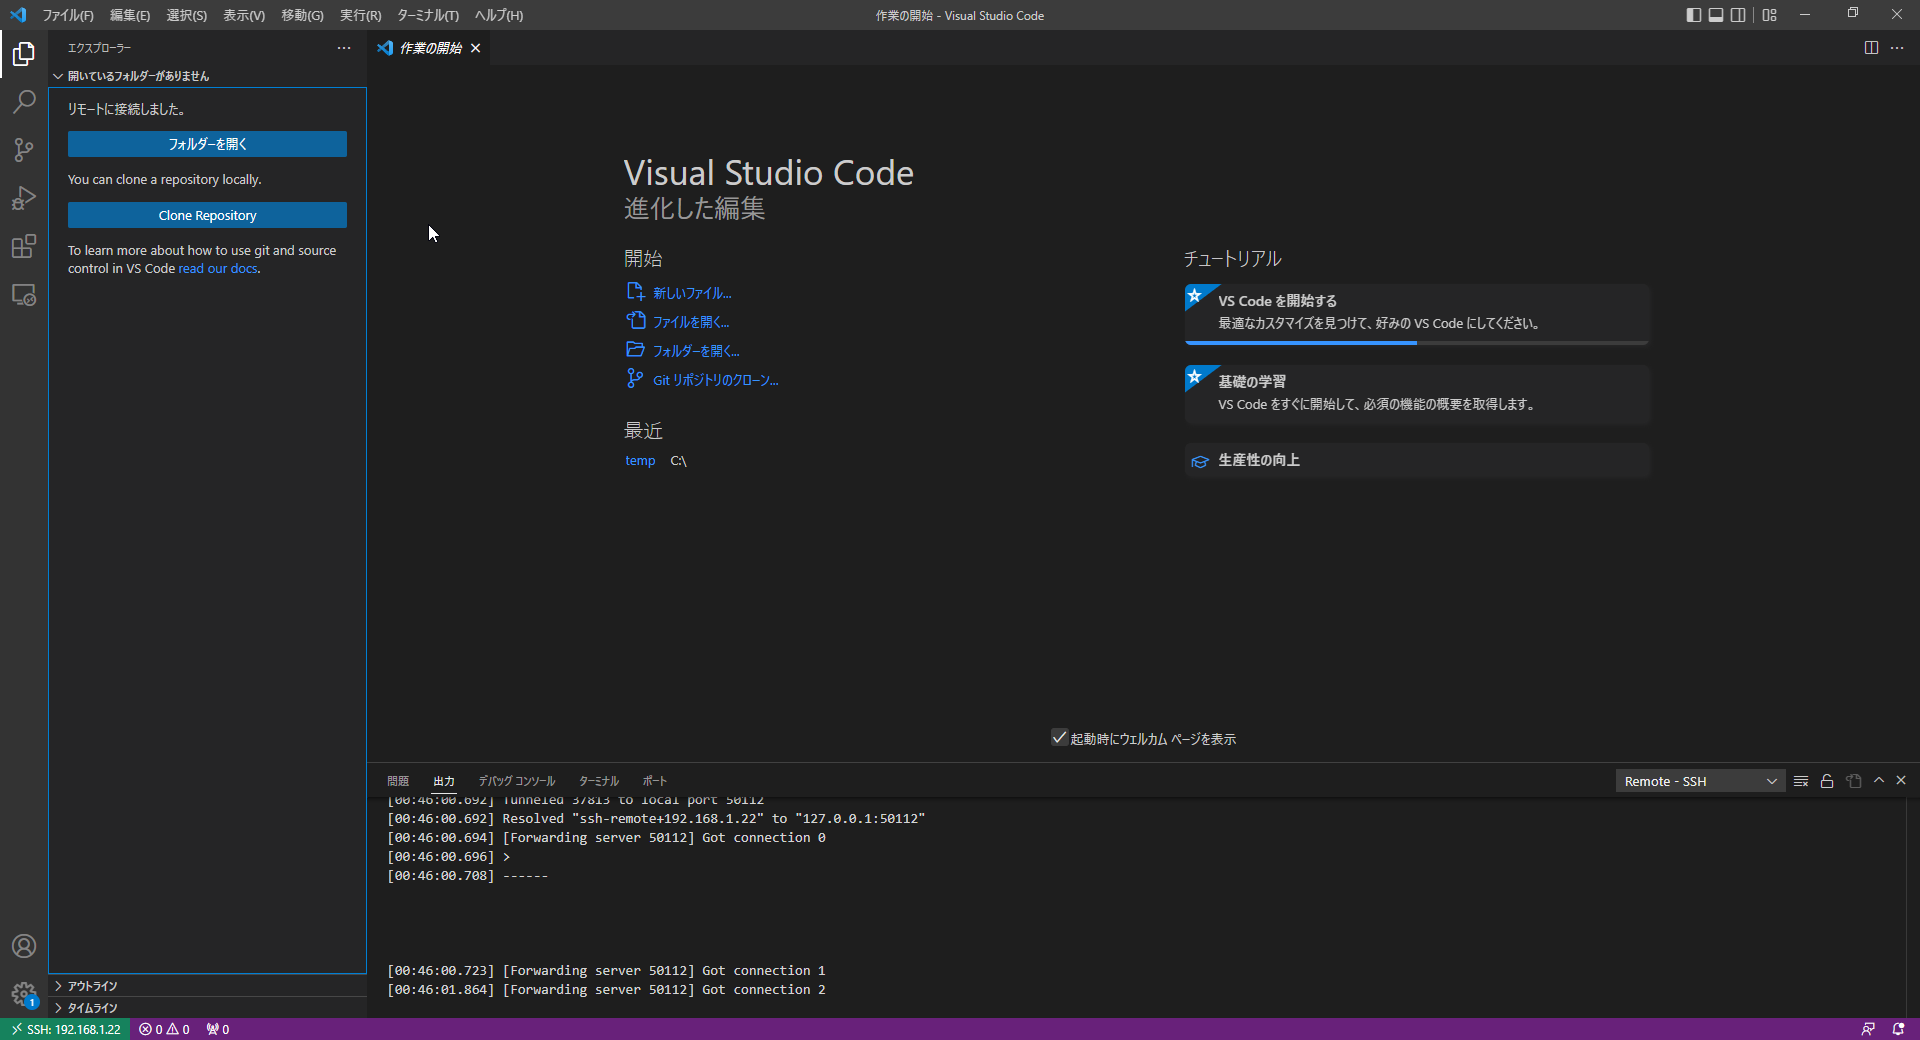
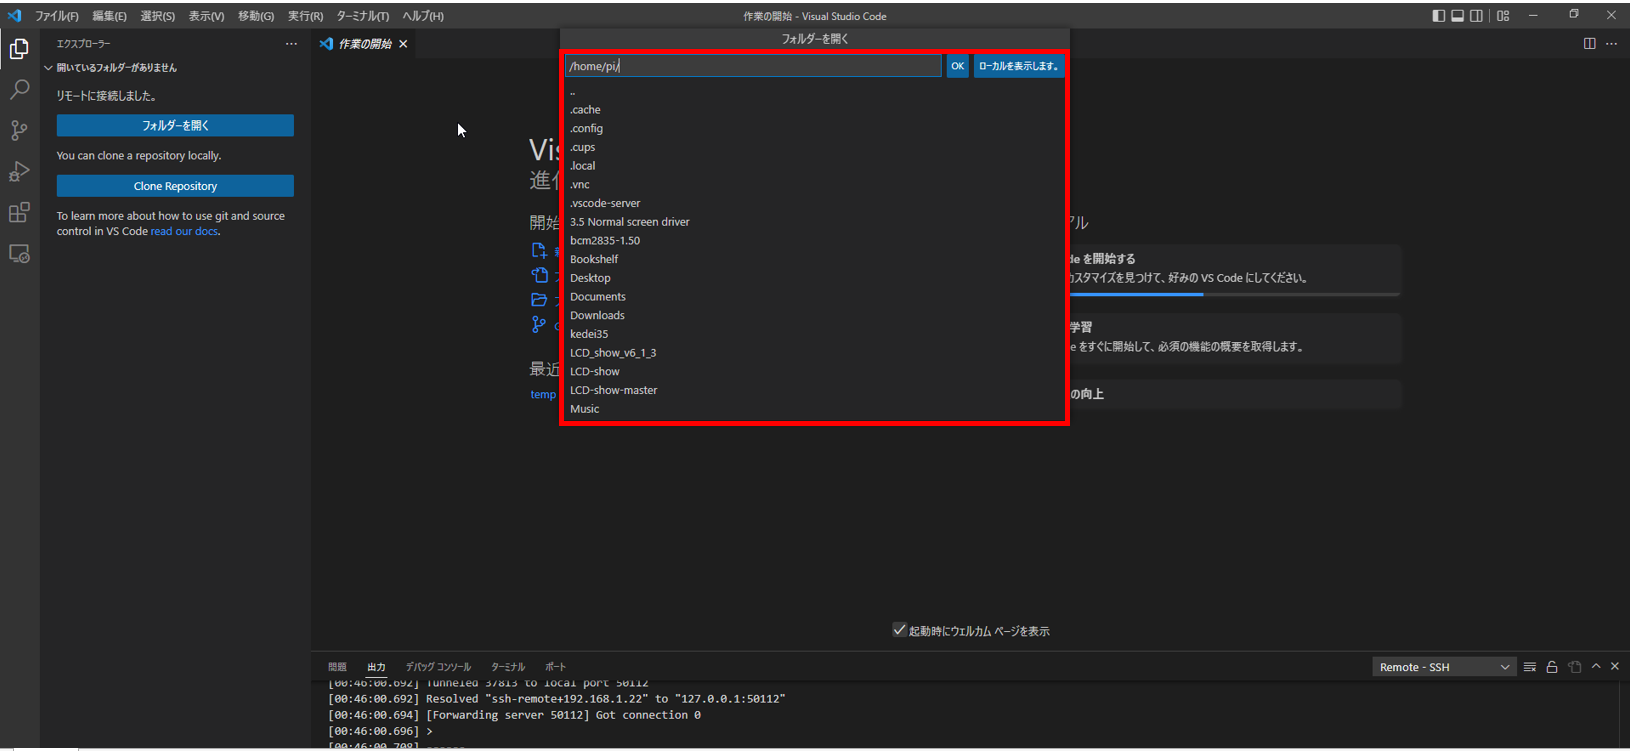
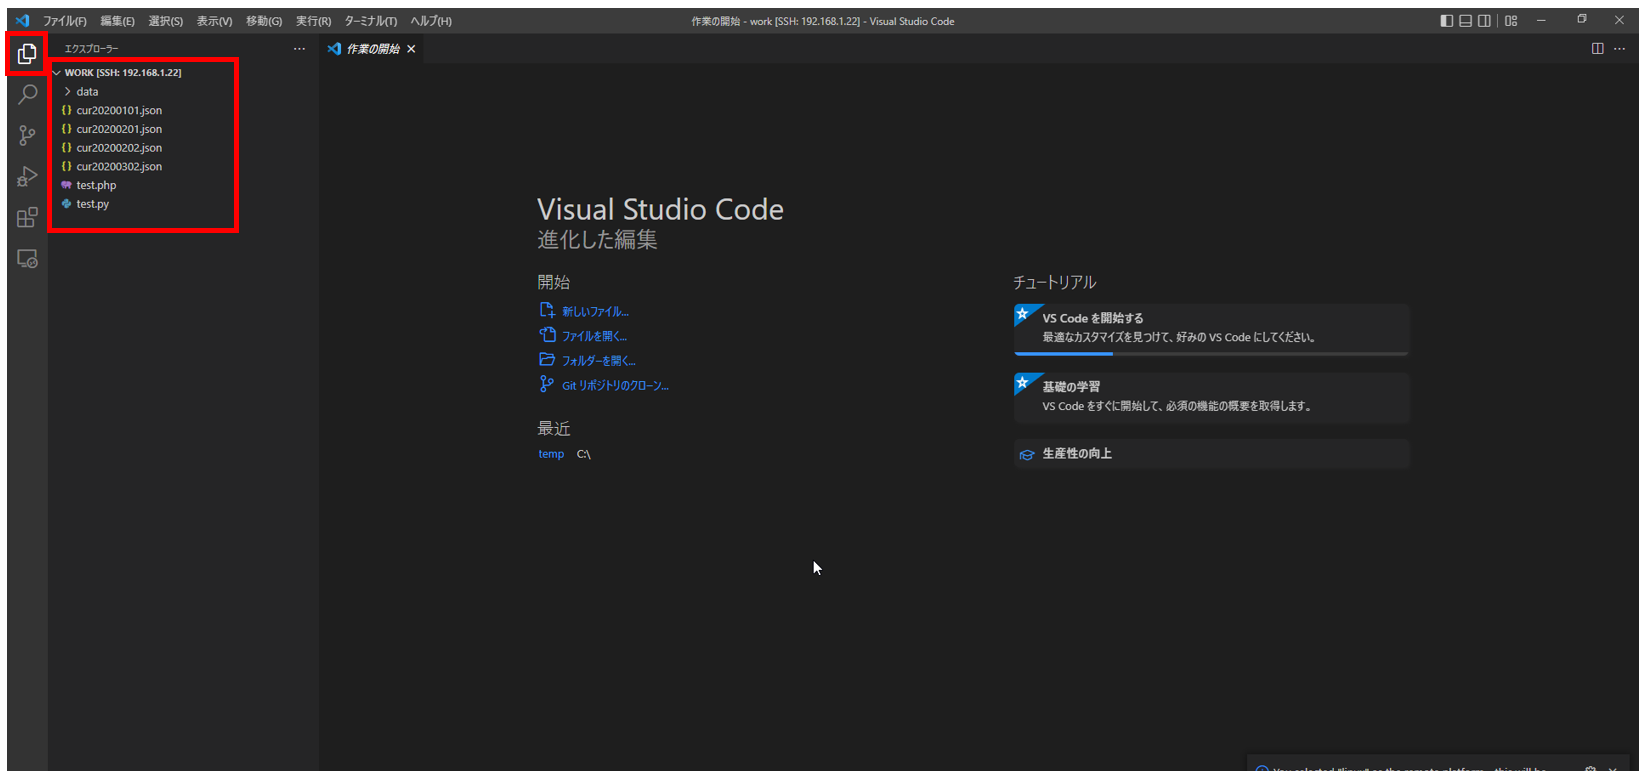
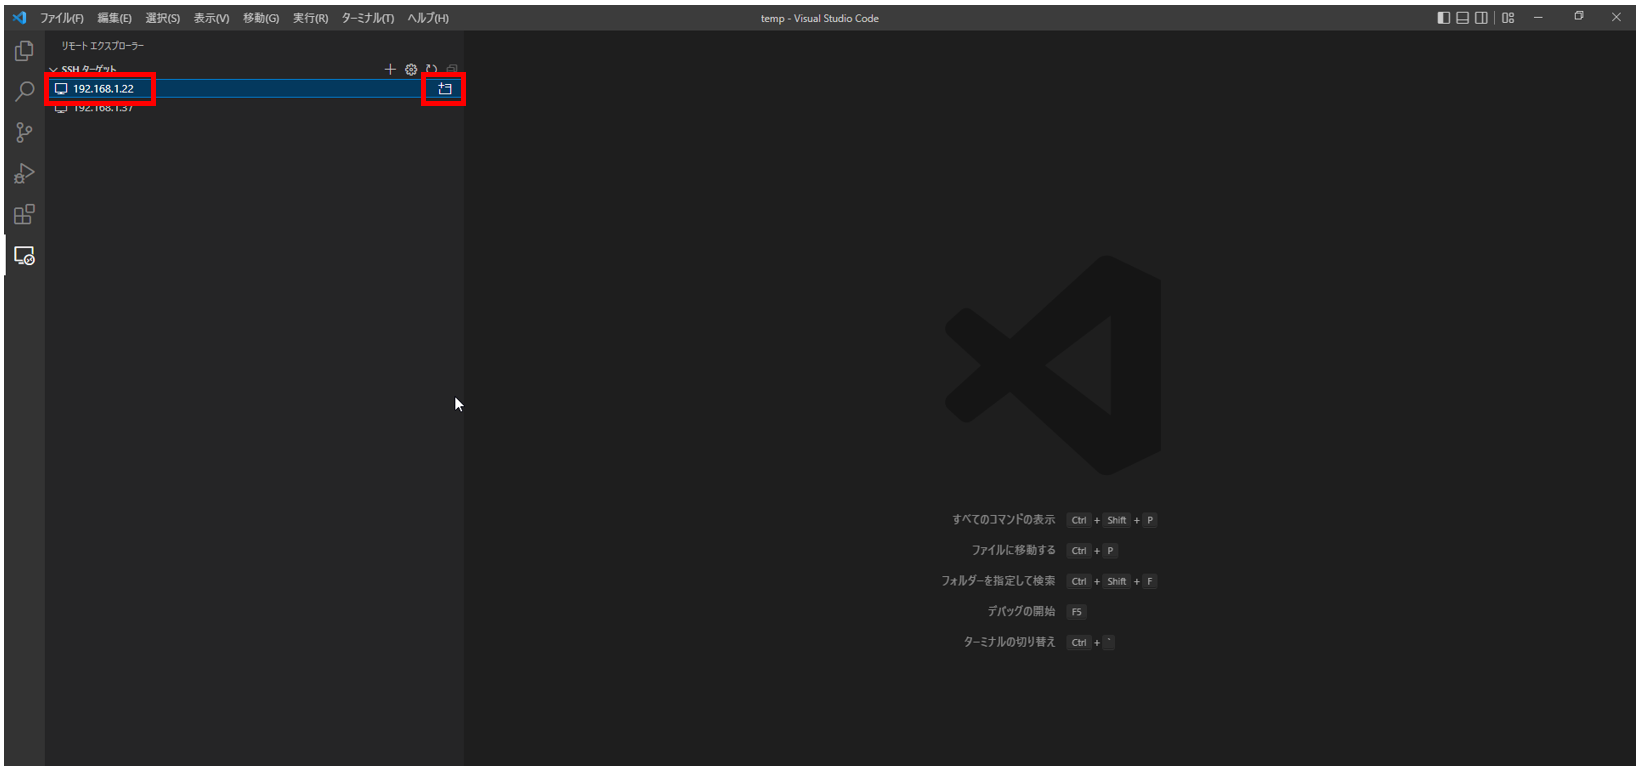
④新しくサーバアドレスが追加され、そこをクリックすると右側のボタンが表示されます。これをクリックします。
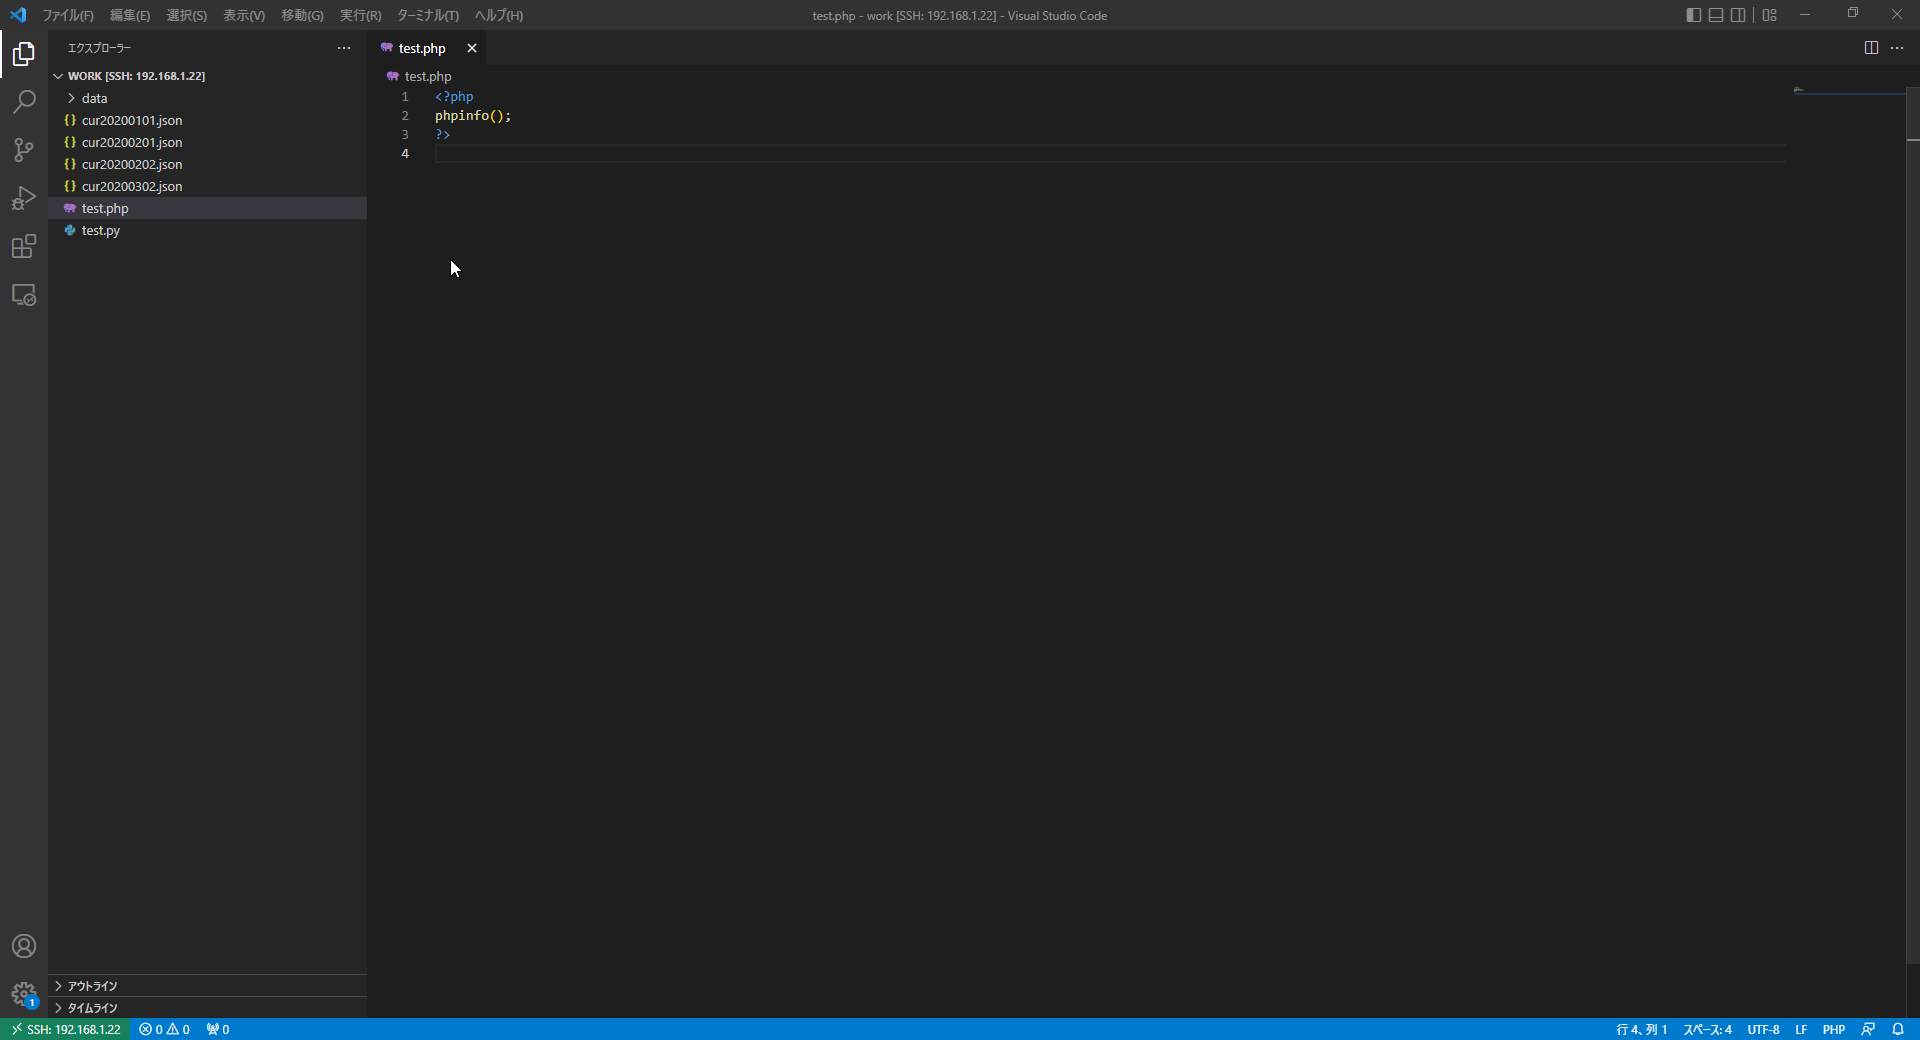
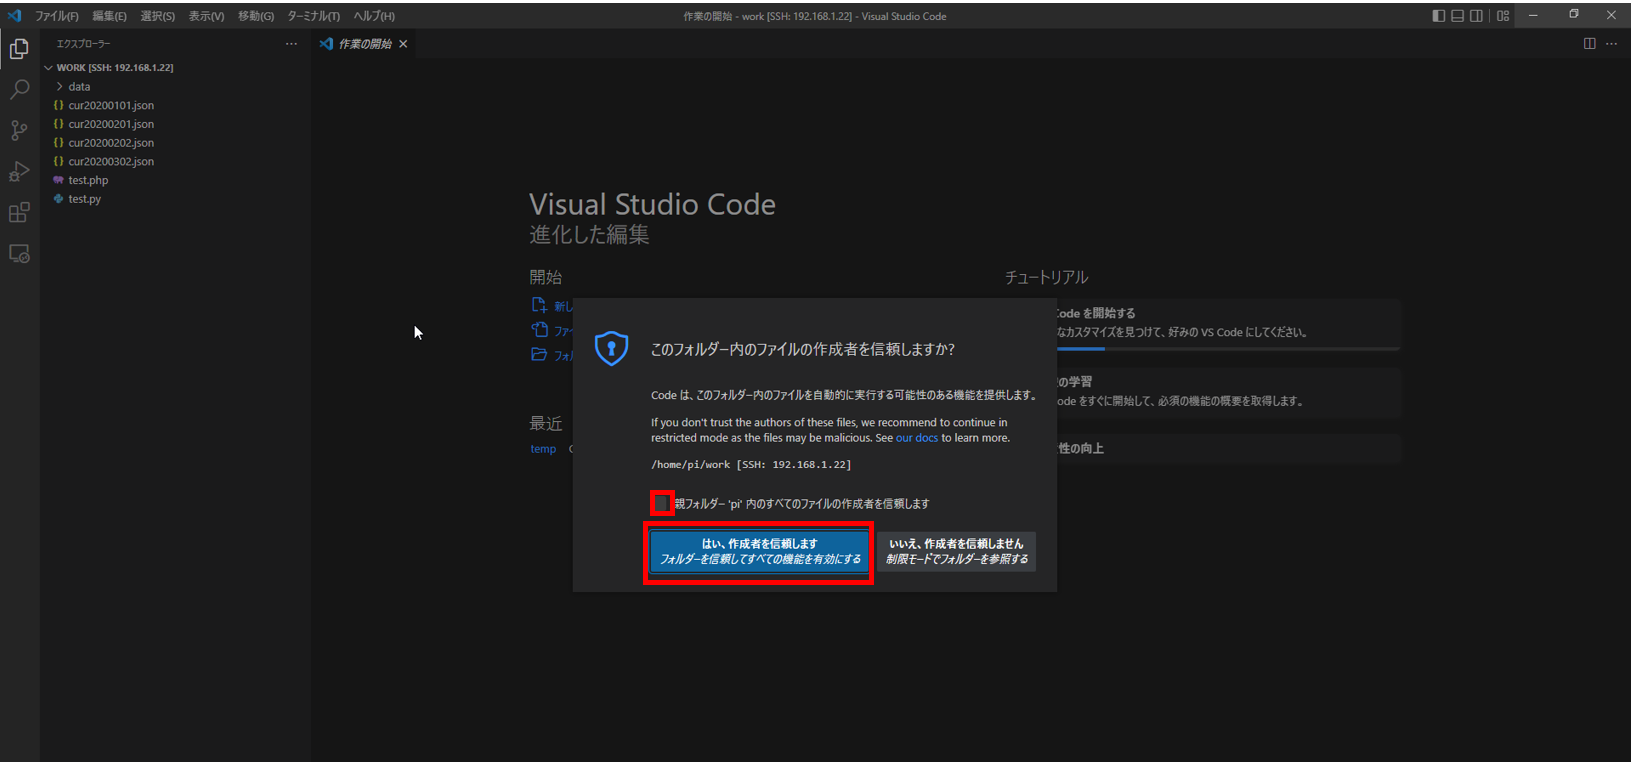
⑫次の画面で「はい。作成者を信頼します。」ボタンをクリックします。
★その他★
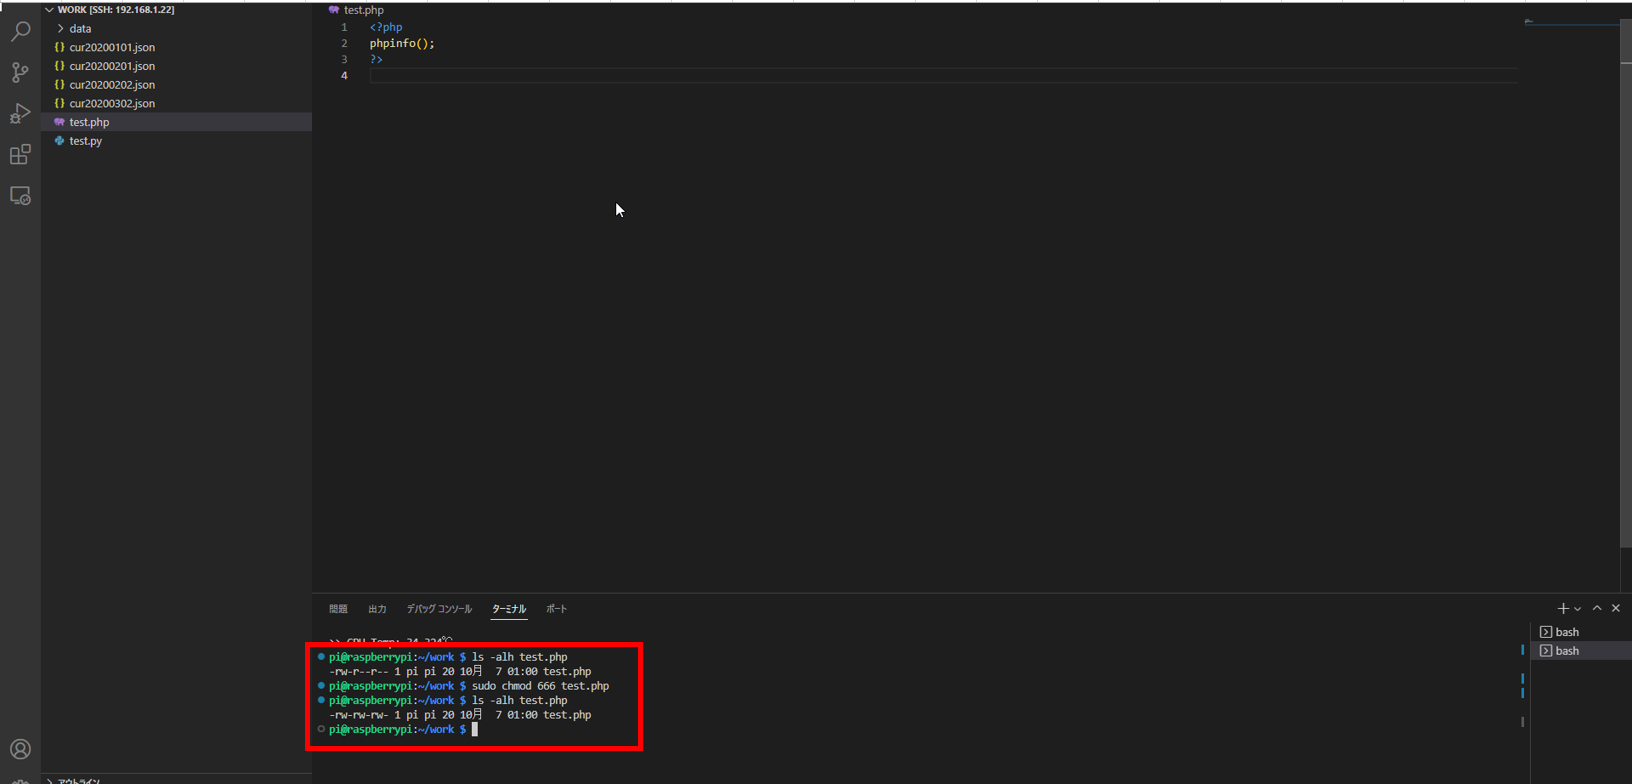
SSHでログインしているユーザとサーバの所有者が異なる場合は、次の手順でファイルの書き込み権限を付与します。
①次のメニューをクリックするとSSHでログインしたユーザのコンソールプロンプトが表示されます。
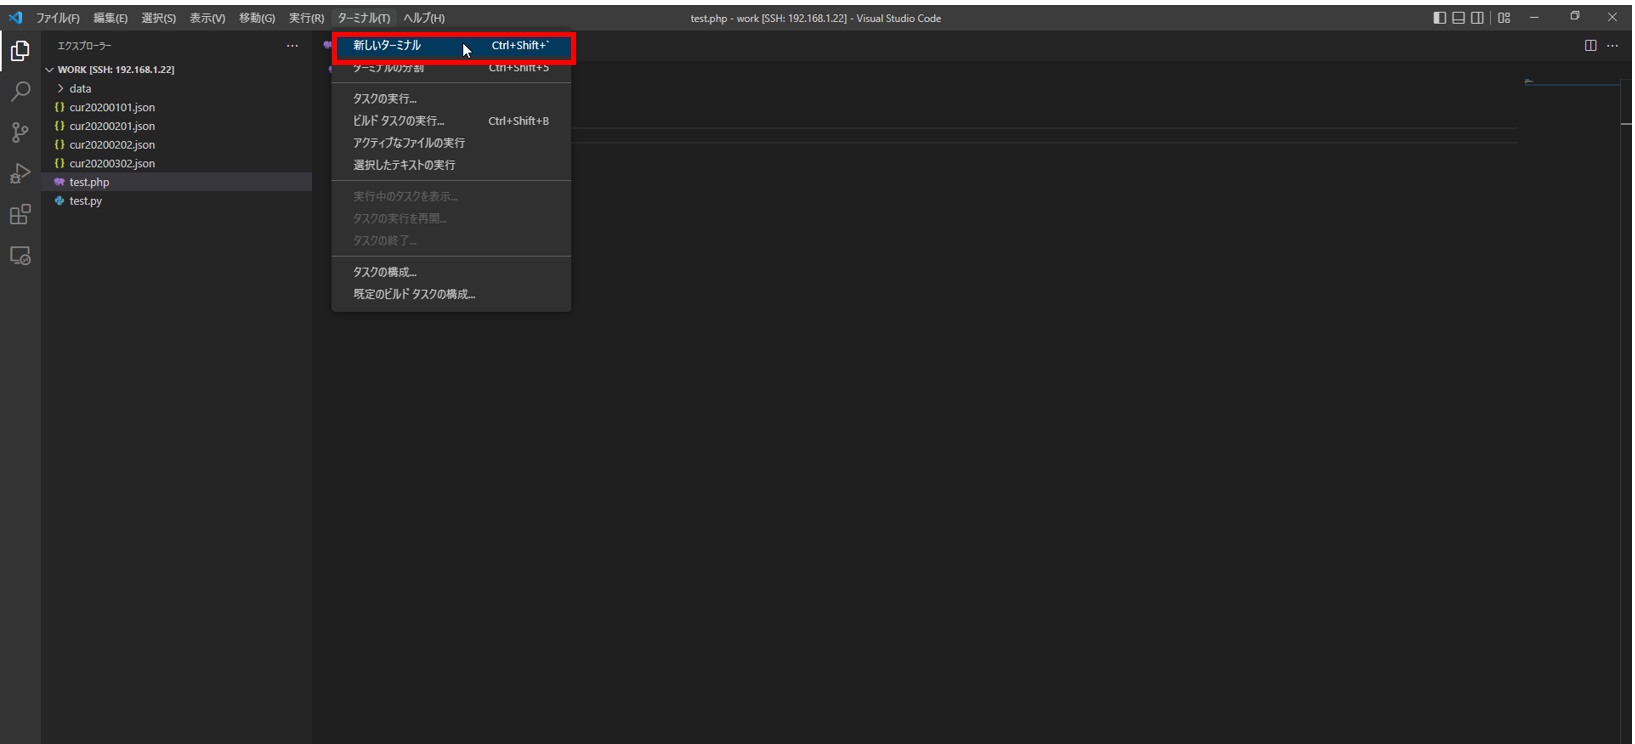
②次のコマンドをコンソールプロンプトで入力します。
ファイルの権限を他のユーザも書き込みができるように666に権限を変更します。
pi@raspberrypi:~/work $ ls -alh test.php
-rw-r--r-- 1 pi pi 20 10月  7 01:00 test.php
pi@raspberrypi:~/work $ sudo chmod 666 test.php
pi@raspberrypi:~/work $ ls -alh test.php
-rw-rw-rw- 1 pi pi 20 10月  7 01:00 test.php
pi@raspberrypi:~/work $
終わりに
これでVisual Studio Codeから直接サーバのソース修正をSSHから可能になります。
サーバだとVIエディタまたはVisual Studio Codeと似たようなもので修正が可能だと思いますが、
今回は一般的によく使われているVisual Studio Codeを基にメモをしました。
画面キャプチャが雑かもしれないですが、いかがでしょうか。
これでローカルにソースをダウンロードして修正後、サーバに再度アップロードする手間が減ります。
次はRedhat8.5でApache+PHP+Sybaseの環境設定のメモを作成します。
