VueとGridsomeを用いたJAMstaticなブログを作成します。以下の記事を簡単に意訳していますが、ほとんどGoogle先生頼りです![]()
※コードは一部変更しています。
参考サイト
Building a Blog with Vue and Markdown Using Gridsome
Introducing Gridsome
GridsomeはVue.jsを利用した静的サイトジェネレーターです。開発者は高速で安全な最新のJAMstack Webサイトを簡単に構築してデプロイできます。
Gridsomeには魅力的な機能が用意されているので、最も人気のある静的サイトジェネレーターの1つとなっています。機能の一部は次のとおりです。
- ホットリロードによるローカル開発-開発中にリアルタイムで変更を確認できます
- Vue.jsコードの記述-軽量で親しみやすいフロントエンドフレームワーク
- GraphQLデータレイヤー-すべてのデータの一元管理
- 自動ページルーティング-ファイルを含むページをすばやく作成して管理します
- プログレッシブ画像のサポート-画像の自動サイズ変更、最適化、遅延読み込み
- 自動ページプリフェッチ-高速ブラウジングのために、ページがバックグラウンドでロードされます
- 自動最適化コード-すぐに使用できるコード分割とアセット最適化を取得します
- 高速静的ページ生成-静的Webホストに安全かつ高速にデプロイします
- データソースプラグイン-一般的なヘッドレスCMS、API、Markdownファイルからデータを追加します
Prerequisites
このチュートリアルを完了するには、次の基本的な知識が必要です。
- HTMLとCSS
- Vue.jsとターミナルの使用方法
- GraphQLの仕組みに関する知識があれば尚可ですが、必須ではありません。
- Node.js(v8.3以降)とYarn
Setting Up a Gridsome Project
次のコマンドを実行して、新しいGridsomeプロジェクトを作成します。
最初にnpmまたはyarnを使用してGridsome CLIをインストールします。
$ npm install --global @gridsome/cli or
$ yarn global add @gridsome/cli
次にgridsome-blogという新しいプロジェクトを作成して実行します。
// create a new gridsome project
$ gridsome create gridsome-blog
$ cd gridsome-blog
$ gridsome develop
これらのコマンドを実行すると、ローカル開発サーバーがhttp://localhost:8080 で実行され、以下のようなサンプルページが表示されます。
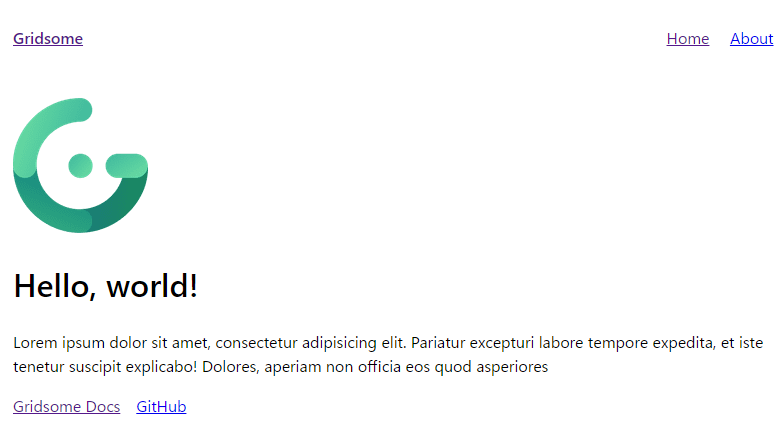
Gridsomeのホットリロード機能があるので、ソースファイルを変更すると、画面上にあるものが自動的に変更されるようになっています。
Building Out a Blog with Gridsome
ブログの構成要素を説明します。投稿のリストを含む単一のページがあり、各投稿にMarkdownのコンテンツがあります。これを実現するには、gridsome / source-filesystemと呼ばれるGridsomeプラグインを次のコマンドを使用してインストールします。
yarn add @gridsome/source-filesystem or
npm install @gridsome/source-filesystem
gridsome.config.jsに構成を追記します。
module.exports = {
  siteName: 'Gridsome Blog',
  siteDescription: 'A simple blog designed with Gridsome',
  plugins: [
    {
      use: '@gridsome/source-filesystem',
      options: {
        path: 'content/posts/**/*.md',
        typeName: 'Post',
      }
    }
  ]
}
上記の設定は、source-filesystemプラグインを設定するために必要なものです。設定するオプションは以下のとおりです。
- Path:投稿で使用するマークダウンコンテンツの場所。
- typeName:GraphQLタイプとテンプレート名。 src / templates内の.vueファイルは、テンプレートを持つためにtypeNameと一致する必要があります。
route:localhost:8080/blog/new-post のような投稿のルートです。
※公式ドキュメントに記載がないので、routeのオプションは廃止になったようです。
Gridsomeは、LayoutsをページとテンプレートのWrapperとして使用します。レイアウトには、ヘッダー、フッター、サイドバーなどのコンポーネントと、ページやテンプレートからのコンテンツが挿入されるスロットコンポーネントが含まれます。
<template>
  <main class="layout" role="main">
    <slot/>
    <div class="footer">
      <p>
        Built with
        <a class="link" href="//gridsome.org">Gridsome</a>
        & Made with ❤️ by
        <a class="link" href="//twitter.com/lauragift_">Gift Egwuenu</a>
      </p>
    </div>
  </main>
</template>

<style>
body {
  font-family: -apple-system, system-ui, BlinkMacSystemFont, "Segoe UI", Roboto,
    "Helvetica Neue", Arial, sans-serif;
  margin: 0;
  padding: 0;
  line-height: 1.5;
  border: 15px solid #fecd43;
  min-height: 100vh;
}
.layout {
  max-width: 760px;
  margin: 0 auto;
  padding-left: 20px;
  padding-right: 20px;
}
.footer {
  padding-top: calc(30em / 4);
  text-align: center;
  font-size: 1em;
}
.link {
  border: 2px dashed #fecd43;
  padding: 7px;
  color: #333;
  text-decoration: none;
}
</style>
上記のコードブロックは、Default.vueコンポーネントです。GitHubリポジトリで使用されているスタイルを確認してみましょう。
Creating the Page Layout
ページレイアウトは、ブログ投稿リストの表示とホームページとしても機能します。 GridsomeではPagesは通常のページと、GraphQLコレクションのリストおよびページ付けに使用されます。ブログ投稿はコレクションです。
ページのURLは、ファイルの場所と名前に基づいて生成されます。例えば、pagesフォルダ内にIndex.vueファイルを作成すると、index.htmlとなります。About.vue作成した場合も同様にabout.htmlとなり、/aboutとしてリンクが作成されます。これがPagesでのルーティングの仕組みです。
今回はすべての投稿を単一のページに表示したいだけなので、ない場合はIndex.vueファイルを作成します。
Index.vueを下記のように変更します。
<template>
  <Layout>
    <header class="header">
      <h1>Gridsome Blog</h1>
      <p>A simple blog designed with Gridsome</p>
    </header>
  </Layout>
</template>


<script>
export default {
  metaInfo: {
    title: 'Hello, world!'
  }
}
</script>

<style>
.header {
  font-family: "Stylish";
  font-size: 35px;
  text-align: center;
  line-height: 20px;
  padding: 0.7em;
}
.header h2 {
  font-weight: 200;
  font-size: 35px;
}
</style>
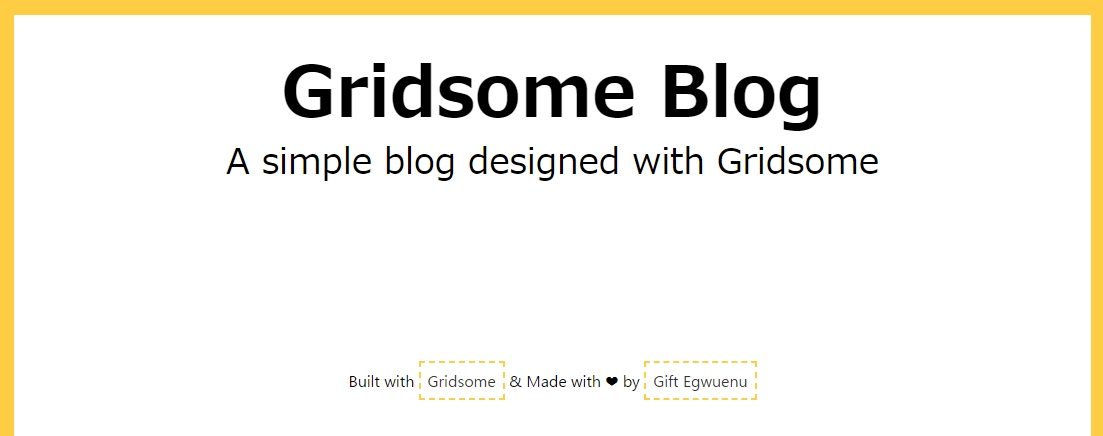
ホームページは以下のように表示されます。
これでホームページができたので、ブログ投稿のリストを作成してページに表示します。componentsフォルダ内にPostList.vueファイルを作成し、ブログの投稿のリストを表示するためのレイアウトを記述します。
<template>
<div class="post-list">
<hr class="line">
<p class="date" v-html="post.date"/>
<h3 class="title" v-html="post.title"/>
<p class="description" v-html="post.description"/>
<b>{{post.timeToRead}} min read</b>
<g-link :to="post.path" class="read">Read More <span class="visuallyhidden">about {{post.title}}</span></g-link>
</div>
</template>
<script>
export default {
props: ["post"]
};
</script>
<style>
.line {
border: 0.5px solid #cdc8c5;
margin: 30px 0;
}
.date {
font-weight: 300;
}
.read {
padding: 7px;
color: #333;
text-decoration: none;
border: 2px dashed #fecd43;
}
.visuallyhidden {
position: absolute !important;
width: 1px;
height: 1px;
padding: 0;
overflow: hidden;
clip: rect(0, 0, 0, 0);
white-space: nowrap;
clip-path: inset(50%);
border: 0;
}
.visuallyhidden:focus {
display: inline-block;
padding: 15px 23px 14px;
width: auto;
height: auto;
clip: auto;
color: #000000;
background-color: #ffffff;
clip-path: unset;
}
</style>
このファイル内に、投稿のリストを表示するためのコンテンツがあり、親コンポーネントから子コンポーネントのPostListにデータを渡すことを可能にするprops: ["post"]も追加しています。
Pagesフォルダ内のIndex.vueに戻ります。Gridsomeはすべてのデータ(この場合はGraphQL)のデータを集中管理しているので、とを使用して、ページ、テンプレート、コンポーネントにデータをフェッチします。
ここでは、Markdownで作成されたコンテンツディレクトリにあるすべての投稿をプルし、Vueコンポーネント内に表示できるように以下のような変更を加えます。
<template>
<Layout>
<header class="header">
<h1 v-html="$page.metadata.siteName" />
<h2 v-html="$page.metadata.siteDescription" />
</header>
<section class="posts">
<PostList v-for="edge in $page.allPost.edges" :key="edge.node.id" :post="edge.node" />
</section>
</Layout>
</template>
<script>
import PostList from "@/components/PostList";
export default {
components: {
PostList
},
metaInfo: {
title: "A simple blog"
}
};
</script>
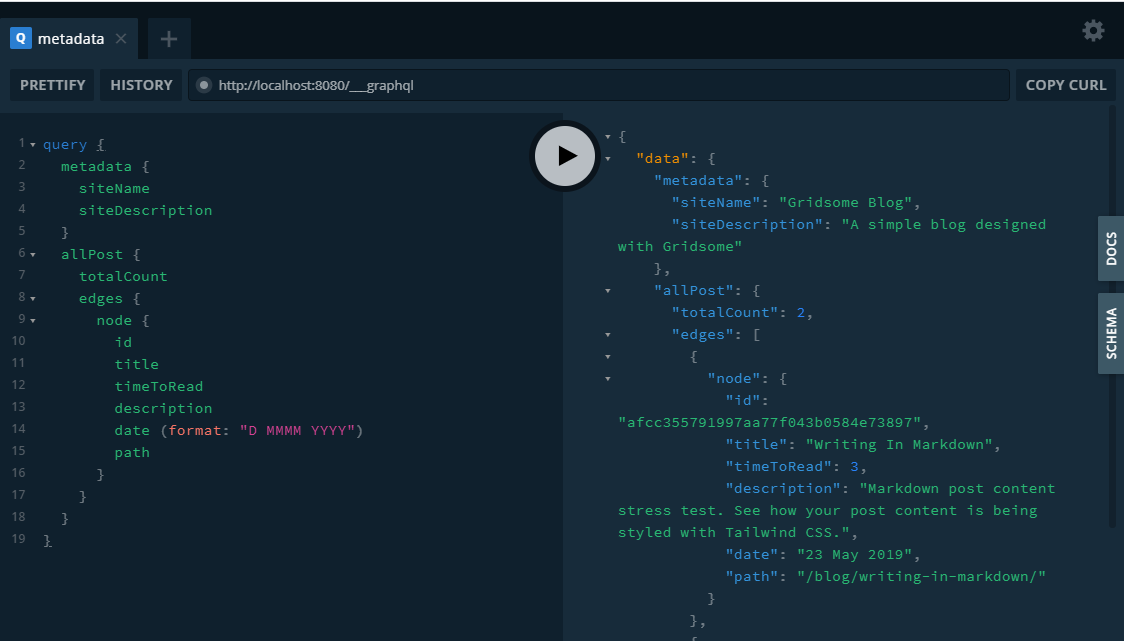
<page-query>
query {
metadata {
siteName
siteDescription
}
allPost {
totalCount
edges {
node {
id
title
timeToRead
description
date (format: "D MMMM YYYY")
path
}
}
}
}
</page-query>
・・・
Displaying the Post Layout
ここまででコンテンツフォルダからブログ投稿のリストが一覧表示することができました。
次はこれらの投稿の1つがクリックされたときに、投稿を詳細ページを表示するためのにテンプレートを作成します。
Gridsomeでは、テンプレートはGraphQLコレクションへの単一の投稿ビューを表示するために使用されます。次の内容のPost.vueファイルをtemplatesフォルダ内に追加します。
<template>
<Layout>
<br>
<g-link to="/" class="link"> ← Go Back</g-link>
<div class="post-title">
<h1>{{$page.post.title}}</h1>
<p class="post-date"> {{ $page.post.date}} | {{$page.post.timeToRead}} min read</p>
</div>
<div class="post-content">
<p v-html="$page.post.content" />
</div>
</Layout>
</template>
<page-query>
query Post ($path: String!) {
post: post (path: $path) {
id
title
content
date (format: "D MMMM YYYY")
timeToRead
}
}
</page-query>
<style>
.post-title {
text-align: center;
font-size: 30px;
line-height: 10px;
padding: 2em 0;
font-family: 'Stylish';
}
.post-date {
font-size: 16px;
font-weight: 400;
}
.post-content {
font-size: 20px;
}
</style>
これで、ホームページの[read more]をクリックすると、gridsome.config.jsで構成したように、投稿のタイトルを使用してスラッグで表示された単一の投稿のコンテンツが表示されます。
サンプル記事を投稿する
ここまでは参考サイト通りに実行しましたが、サンプル記事の投稿方法が書かれていなかったので補足します。
プラグインのインストールと設定
GitHubのソースコードのgridsome.config.jsは下記の通りになっています。
module.exports = {
  siteName: 'Gridsome Blog',
  siteDescription: 'A simple blog designed with Gridsome',
  templates: {
    Post: '/blog/:title',
  },
  plugins: [
    {
      use: '@gridsome/source-filesystem',
      options: {
        path: 'content/posts/**/*.md',
        typeName: 'Post',
      }
    }
  ],
  transformers: {
    //Add markdown support to all file-system sources
    remark: {
      externalLinksTarget: '_blank',
      externalLinksRel: ['nofollow', 'noopener', 'noreferrer'],
      plugins: [
        '@gridsome/remark-prismjs'
      ]
    }
  },
}
公式ドキュメントのtransformer-remarkとremark-prismjsを確認し、下記のコマンドでプラグインを追加し、上記のようにgridsome.config.jsを変更します。
$ npm install @gridsome/transformer-remark
$ npm install @gridsome/remark-prismjs
次にmain.jsに下記のようにを変更します。
import DefaultLayout from '~/layouts/Default.vue'
import 'prismjs/themes/prism.css'


export default function (Vue, { router, head, isClient }) {
  head.link.push({
    rel: 'stylesheet',
    href: 'https://fonts.googleapis.com/css?family=Stylish&display=swap'
  }),
  // Set default layout as a global component
  Vue.component('Layout', DefaultLayout)
}
サンプル記事を用意
content/postsフォルダを作成し、以下のようにファイルを作成します。
---
title: "Writing In Markdown"
description: "Markdown post content stress test. See how your post content is being styled with Tailwind CSS."
date: 2019-05-23
---

Today, A lot of developers are conversant with the `alt` attribute on images. I can say most of us know that it is one way of making webpages accessible but do we really understand the scope of the alternative text, when to make use of it, how to use it. I agree it is one step to being an accessibility advocate so that is why in this article, I'll be explaining in detail the alt attribute and how practicing it can improve web accessibility in a long run.
---
title: "Markdown styling"
description: "Markdown post content stress test. See how your post content is being styled with Tailwind CSS."
date: 2019-05-21
---

Today, A lot of developers are conversant with the `alt` attribute on images. I can say most of us know that it is one way of making webpages accessible but do we really understand the scope of the alternative text, when to make use of it, how to use it. I agree it is one step to being an accessibility advocate so that is why in this article, I'll be explaining in detail the alt attribute and how practicing it can improve web accessibility in a long run.
※サンプルの一部のみを抜粋しています。全文はGitHubにて確認してください。
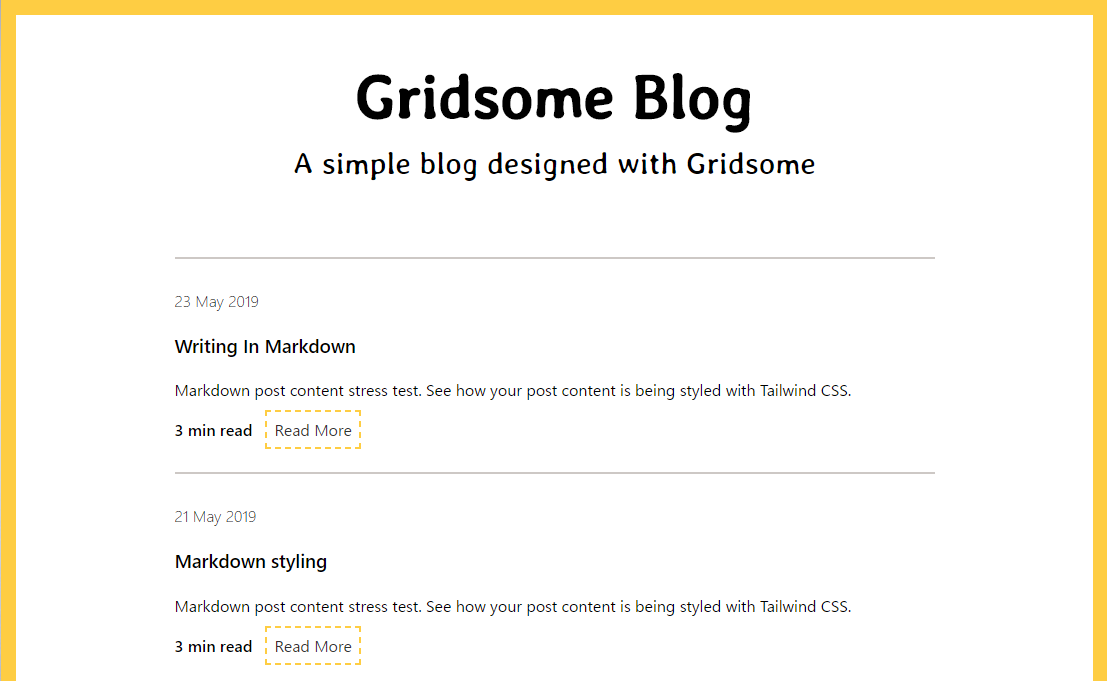
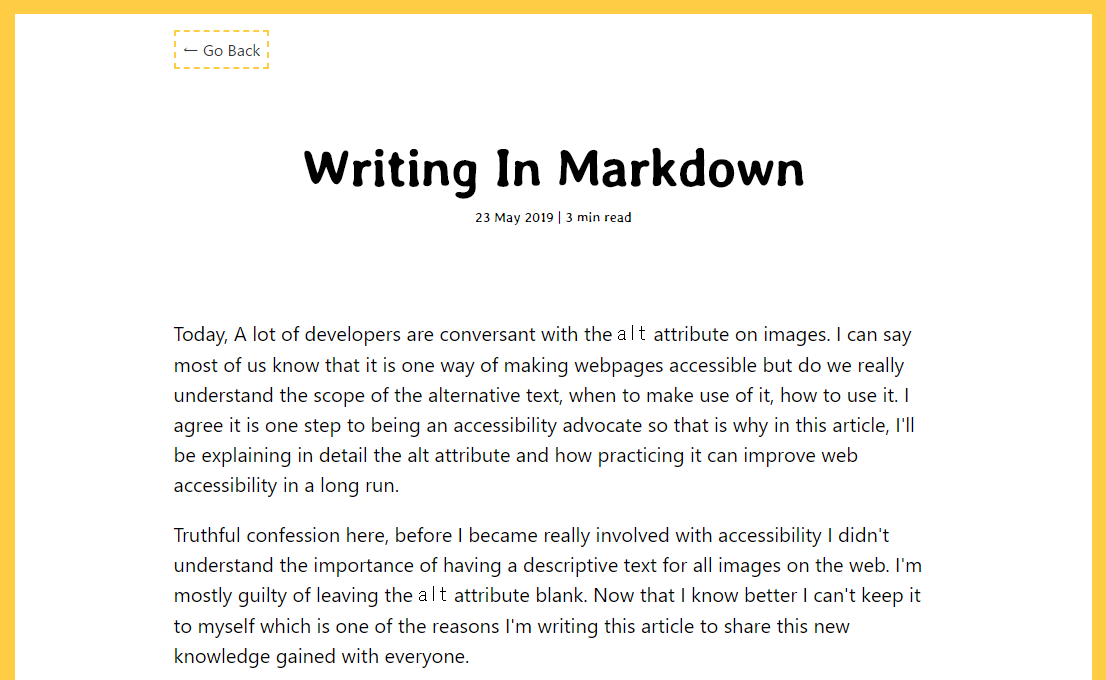
ここまでできると、以下のように投稿の一覧ページと投稿の詳細ページが表示されます。
投稿の一覧ページ
投稿の詳細ページ
おまけ
クエリを確認する変更する
http://localhost:8080/___explore を開くとクエリを試せるので、Gridosomeの公式ドキュメントやGraphQLの公式ドキュメントを参照して試してみてください。
VScodeの設定
設定は個人の自由ですが、下記の記事を参考にVScodeにプラグインを入れると、作業しやくすくなると思います。
https://qiita.com/kyohei_ai/items/aeddc6a179ea3a464ed5
今回のファイルはGitHubに公開していますので、参考にしてみてください。
https://github.com/neneta0921/gridsome-blog