The Complete Guide to Build a Full Blown Multilanguage Website with Nuxt.js
上記のチュートリアルに従って、Nuxt.jsでブログを作成する過程を紹介します。自分用のメモなので英訳もしませんし、解説も少なめです。
作業環境
- OS:Windows 10 HOME Edition(ver.2004)
- Node:v12.18.2
- NPM:v6.14.5
- NPX:v6.14.5
Environment setup
Requirements
- Basic understanding of Nuxt.js
- VueJs & their CLI
- NodeJS
- NPM
- NPX
- The CLI of now.sh for hosting
- An account on Storyblok.com to manage content
任意のフォルダにcdしてから、以下のコマンドを実行します。
$ npx create-nuxt-app mywebsite // yarn create nuxt-app mywebsite
$ cd mywebsite
$ npm run dev // yarn dev
npx create-nuxt-appを実行するといくつか質問があります。私は質問には以下のように答えました。
- Project name: mywebsite
- Programming language: JavaScript
- Package manager: Npm #package manager of your choice
- UI framework: None #no UI Framework
- Nuxt.js modules: #no modules needed
- Linting tools: ESLint
-
- Rendering mode: Universal (SSR / SSG) //choose Universal rendering mode (SSR)
- Deployment target: Static (Static/JAMStack hosting)
- Development tools: jsconfig.json (Recommended for VS Code)
ブラウザでhttp://localhost:3000 を開き、下記の画面が表示されればOKです。
sass-loaderをインストールします。また、Gitで管理をします。
$ npm install --save-dev sass-loader node-sass css-loader // yarn add -D sass-loader node-sass css-loader

// Initialize git
$ git init && git add . && git commit -m 'init'
Build a skeleton
Global SCSS in Nuxt.js
以下のようなフォルダ構成にします。
assets/
--| scss/
-----| elements/
--------| body.scss
--------| ...
-----| components/
--------| util.scss
--------| ...
-----| styles.scss
assets/scss/styles.scssファイルを作り、以下の内容を追加します。
$brand-color: #357F8A;
$breakpoint-small: 480px;
$breakpoint-medium: 768px;
$breakpoint-large: 960px;
$breakpoint-xlarge: 1220px;
$breakpoint-mini-max: ($breakpoint-small - 1);
$breakpoint-small-max: ($breakpoint-medium - 1);
$breakpoint-medium-max: ($breakpoint-large - 1);
$breakpoint-large-max: ($breakpoint-xlarge - 1);

@import 'elements/body.scss';
@import 'components/util.scss';
assets/scss/elements/body.scssファイルを作り、基本のフォントを定義します。
body {
  font-family: 'Zilla Slab', Helvetica, sans-serif;
  line-height: 1;
  font-size: 18px;
  color: #000;
  margin: 0;
  padding: 0;
}
assets/scss/components/util.scssファイルを作り、global utilityクラスを定義します。
.util__flex {
  display: flex;
}

.util__flex-col {
  flex: 0 0 auto;
}

.util__flex-eq {
  flex: 1;
}

.util__container {
  max-width: 75rem;
  margin-left: auto;
  margin-right: auto;
  padding-left: 20px;
  padding-right: 20px;
  box-sizing: border-box;
}
Add a google font to Nuxt.js
'body.scss'でZilla Slabフォントを定義しましたが、有効化するためにnuxt.config.jsを開き、以下の内容を追記します。
head: {
    ...
    link: [
      ...
      {
        rel: 'stylesheet',
        href: 'https://fonts.googleapis.com/css?family=Zilla+Slab:400,700'
      }
    ]
},
...
Define the default layout
layouts/default.vueファイルを下記の内容に変更します。
<template>
  <div>
    <top-header/>
    <main id="main" role="main">
      <nuxt/>
    </main>
    <bottom-footer/>
  </div>
</template>

<script>
import TopHeader from '~/components/TopHeader.vue'
import BottomFooter from '~/components/BottomFooter.vue'

export default {
  components: {
    TopHeader,
    BottomFooter
  }
}
</script>

<style lang="scss">
@import '../assets/scss/styles.scss';
</style>
ここでヘッダーとフッターがないためエラーが起こるので、次の項目で作成していきます。
Create the header component
./components/TopHeader.vueファイルを下記の内容で作成します。
<template>
  <header class="top-header util__flex util__container">
    <nav class="top-header__col">
      <ul class="nav">
        <li>
          <nuxt-link class="nav__item" to="/">Home</nuxt-link>
        </li>
        <li>
          <nuxt-link class="nav__item" to="/en/blog">Blog</nuxt-link>
        </li>
      </ul>
    </nav>
    <a href="/" class="top-header__col top-header__logo">
      <img src="http://a.storyblok.com/f/42016/1096x313/0353bf6654/logo2.png">
    </a>
    <nav class="top-header__col top-header__second-navi">
      <ul class="nav">
        <li>
          <nuxt-link class="nav__item" to="/en/blog">English</nuxt-link>
        </li>
        <li>
          <nuxt-link class="nav__item" to="/de/blog">German</nuxt-link>
        </li>
      </ul>
    </nav>
  </header>
</template>

<style lang="scss">
  .top-header {
    justify-content: space-between;
    padding-top: 30px;
    padding-bottom: 30px;
  }

  .top-header__logo {
    text-align: center;
    position: absolute;
    left: 50%;

    img {
      position: relative;
      max-height: 60px;
      left: -50%;
      top: -15px;
    }
  }

  .top-header__second-navi {
    text-align: right;
  }
</style>
Create the footer component
./components/BottomFooter.vueファイルを下記の内容で作成します。
<template>
  <footer class="bottom-footer">
    <div class="util__container">
      <nuxt-link class="bottom-footer__link" to="/en/sitemap">Sitemap</nuxt-link>
    </div>
  </footer>
</template>

<style lang="scss">
.bottom-footer {
  background: #e3f2ed;
  padding: 40px 0 120px 0;
  text-align: center;
}

.bottom-footer__link {
  color: #8ba19a;
  text-decoration: none;
}
</style>
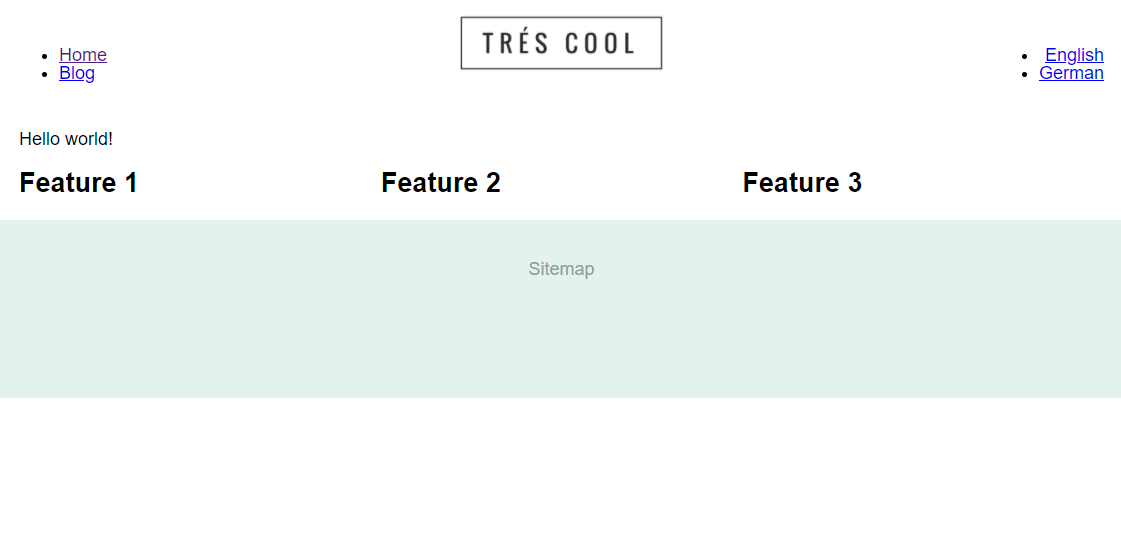
これでエラーが解消されて、以下のように表示されます。

ここまでの内容をコミットします。
$ git add . && git commit -m 'creates the skeleton'
Build a homepage
Install the Storyblok Nuxt.js module
Storyblok moduleをインストールします。
$ npm install storyblok-nuxt --save // yarn add -D storyblok-nuxt
インストールが終わったら、https://app.storyblok.com/ に登録orログインして、新しいスペースを作成します。
初回登録したら「Create your first space」というボタンが表示されたので押します。

適当に「Nuxt Blog」という名前をつけて作りました。

よく分からないのでスキップします。

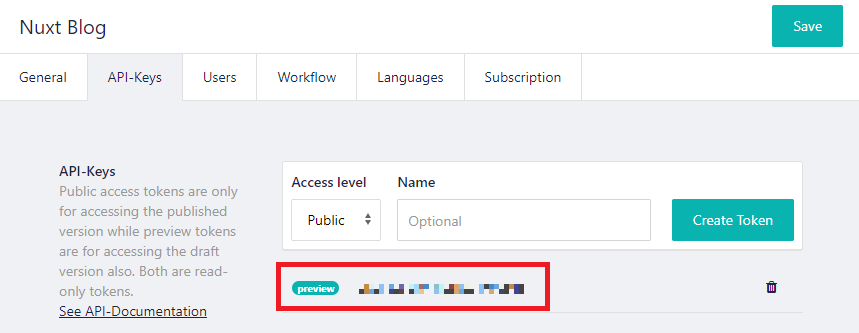
左側の「Settings」を選び、「API-Keys」のタブを押すと、PREVIEW_TOKENがあるのでコピーします。
PREVIEW_TOKENをnuxt.config.jsファイルに追加します。
module.exports = {
  modules: [
    [
      'storyblok-nuxt',
      {
        accessToken: 'YOUR_PREVIEW_TOKEN',
        cacheProvider: 'memory'
      }
    ]
  ],
  ...
}
Update the homepage component
pages/index.vueファイルを下記の内容に変更します。
<template>
  <section class="util__container">
    <component v-if="story.content.component" :key="story.content._uid" :blok="story.content" :is="story.content.component"></component>
  </section>
</template>

<script>

export default {
  data () {
    return {
      story: { content: {} }
    }
  },
  mounted () {
    // use the bridge to listen to events
    this.$storybridge.on(['input', 'published', 'change'], (event) => {
      if (event.action == 'input') {
        if (event.story.id === this.story.id) {
          this.story.content = event.story.content
        }
      } else {
        // window.location.reload()
        this.$nuxt.$router.go({
          path: this.$nuxt.$router.currentRoute,
          force: true,
        })
      }
    })
  },
  asyncData (context) {
    // Load the JSON from the API
    return context.app.$storyapi.get('cdn/stories/home', {
      version: 'draft'
    }).then((res) => {
      return res.data
    }).catch((res) => {
      if (!res.response) {
        console.error(res)
        context.error({ statusCode: 404, message: 'Failed to receive content form api' })
      } else {
        console.error(res.response.data)
        context.error({ statusCode: res.response.status, message: res.response.data })
      }
    })
  }
}
</script>
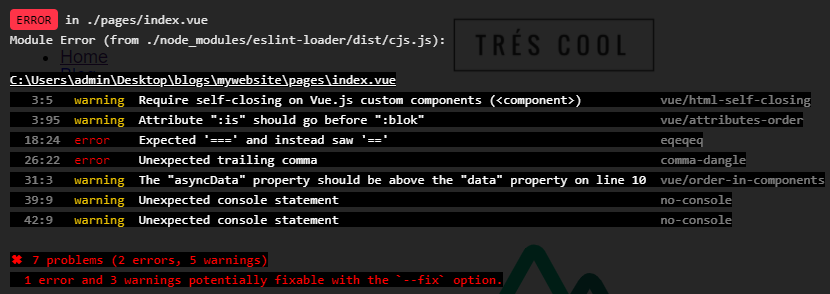
   3:5   warning  Require self-closing on Vue.js custom components (<component>)           vue/html-self-closing
   3:95  warning  Attribute ":is" should go before ":blok"                                 vue/attributes-order
  18:24  error    Expected '===' and instead saw '=='                                      eqeqeq
  26:22  error    Unexpected trailing comma                                                comma-dangle
  31:3   warning  The "asyncData" property should be above the "data" property on line 10  vue/order-in-components
  39:9   warning  Unexpected console statement                                             no-console
  42:9   warning  Unexpected console statement                                             no-console

✖ 7 problems (2 errors, 5 warnings)
  1 error and 3 warnings potentially fixable with the `--fix` option.
下記のようにエラーを修正しました。
<template>
  <section class="util__container">
    <component v-if="story.content.component" :key="story.content._uid" :blok="story.content" :is="story.content.component"></component>
  </section>
</template>

<script>

export default {
  data () {
    return {
      story: { content: {} }
    }
  },
  mounted () {
    // use the bridge to listen to events
    this.$storybridge.on(['input', 'published', 'change'], (event) => {
      if (event.action === 'input') {
        if (event.story.id === this.story.id) {
          this.story.content = event.story.content
        }
      } else {
        // window.location.reload()
        this.$nuxt.$router.go({
          path: this.$nuxt.$router.currentRoute,
          force: true
        })
      }
    })
  },
  asyncData (context) {
    // Load the JSON from the API
    return context.app.$storyapi.get('cdn/stories/home', {
      version: 'draft'
    }).then((res) => {
      return res.data
    }).catch((res) => {
      if (!res.response) {
        console.error(res)
        context.error({ statusCode: 404, message: 'Failed to receive content form api' })
      } else {
        console.error(res.response.data)
        context.error({ statusCode: res.response.status, message: res.response.data })
      }
    })
  }
}
</script>
Creating the homepage components
pluginsフォルダにcomponents.jsを追加します。
import Vue from 'vue'
import Page from '~/components/Page.vue'
import Teaser from '~/components/Teaser.vue'
import Grid from '~/components/Grid.vue'
import Feature from '~/components/Feature.vue'

Vue.component('page', Page)
Vue.component('teaser', Teaser)
Vue.component('grid', Grid)
Vue.component('feature', Feature)
自動的にはcomponents.jsを読み込まないので、nuxt.config.jsに以下のように追記します。
module.exports = {
  plugins: [
    '~/plugins/components'
  ],
  ...
Page.vue
<template>
  <div v-editable="blok" class="page">
    <component :key="blok._uid" v-for="blok in blok.body" :blok="blok" :is="blok.component"></component>
  </div>
</template>

<script>
export default {
  props: ['blok']
}
</script>
Teaser.vue
<template>
  <div v-editable="blok">
    {{ blok.headline }}
  </div>
</template>

<script>
export default {
  props: ['blok']
}
</script>
Grid.vue
<template>
  <div v-editable="blok" class="util__flex">
    <component :key="blok._uid" v-for="blok in blok.columns" :blok="blok" :is="blok.component"></component>
  </div>
</template>

<script>
export default {
  props: ['blok']
}
</script>
Feature.vue
<template>
  <div v-editable="blok" class="util__flex-eq">
    <h1>{{ blok.name }}</h1>
  </div>
</template>

<script>
export default {
  props: ['blok']
}
</script>
これで以下のように表示されます。
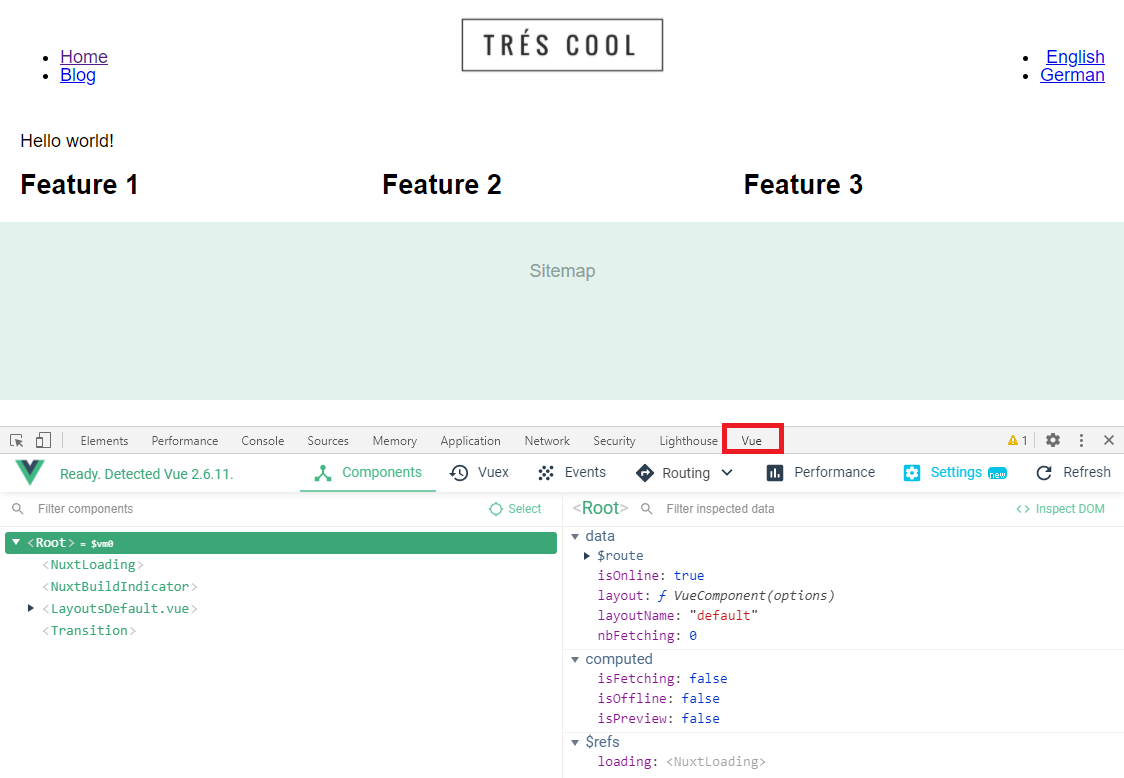
Vue.js devtoolsを使用して、ソースコードで作成されたコンポーネントを確認できます。Google Choromeで拡張機能のVue.js devtools をインストールした後、右クリックをして「拡張機能を管理」を開きます。
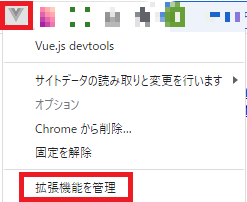
「ファイルの URL へのアクセスを許可する」をOnにします。

http://localhost:3000/をリロードしてからデベロッパーツールを起動するとVueのタブが追加されています。
Create your first block in Storyblok
Setup of the Nuxt.js environment preview
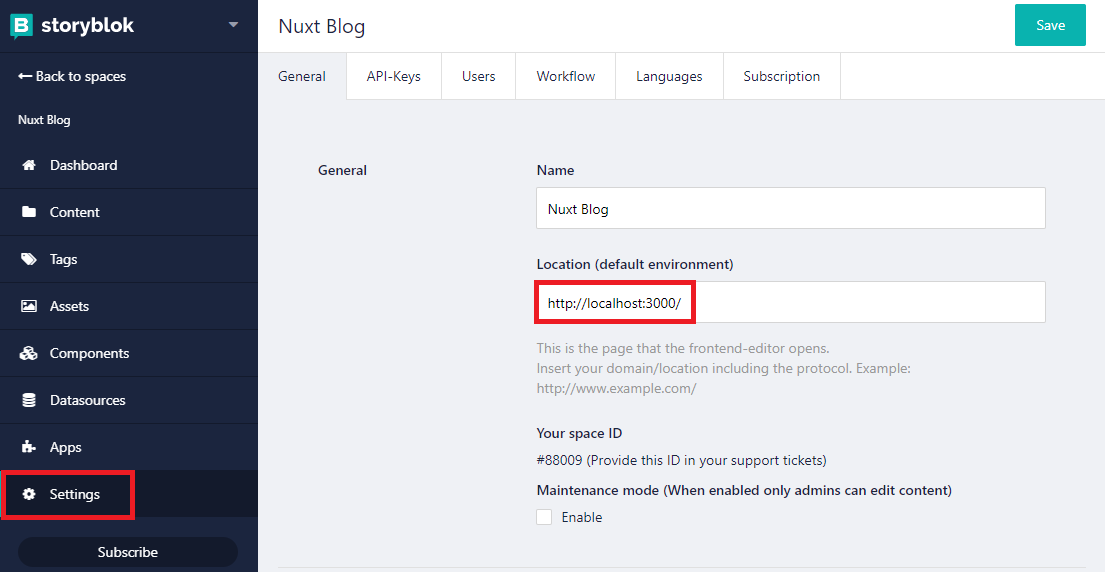
https://app.storyblok.com/ にログインして、Settingsを押して、'Location (default environment)'に「http://localhost:3000/ 」を入力してSaveボタンを押します。
ダッシュボードに戻り、Recent content changesの下に出てきている項目を選びます。

以下のような画面になるので、configタブを選び、Real Pathに/を入力して上のSaveを押します。
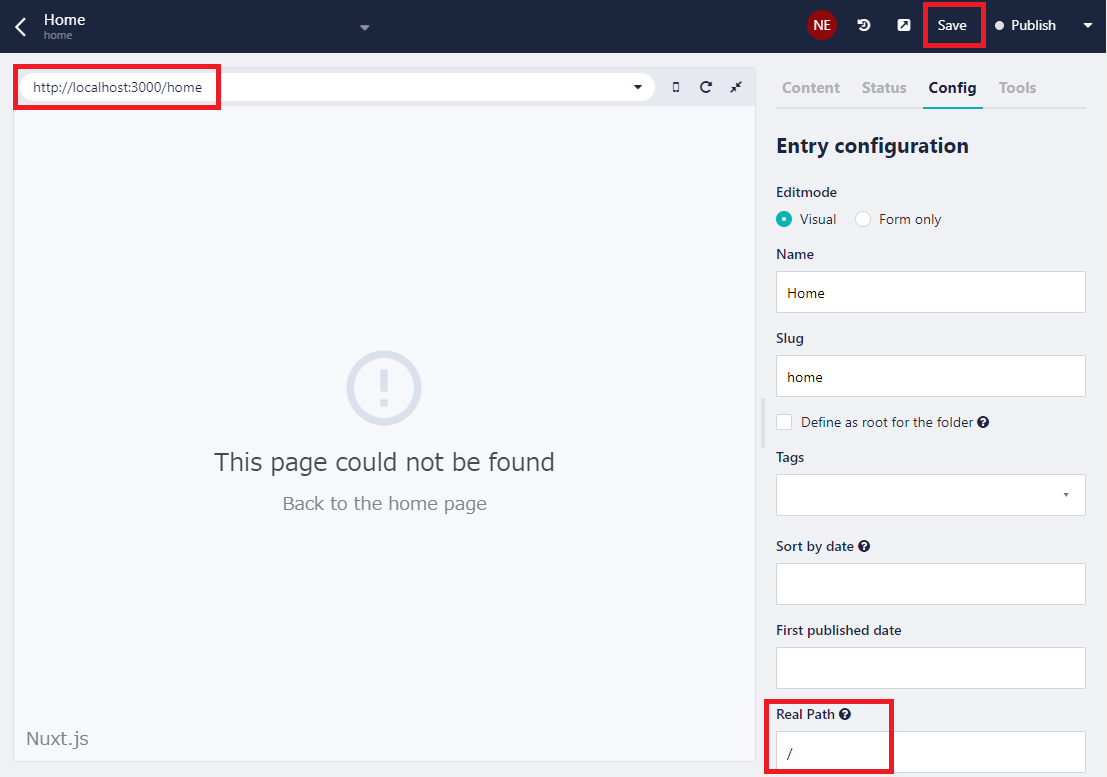
すると下記のような画面に更新されます。

Let's define the schema of a new slide block/component
下記の動画で新しいblockの作り方を学習します。
https://www.youtube.com/watch?v=NMM1qbGx9eo
画像やアイコンなどは以下のデモページよりダウンロードできます。
https://nuxtblok.now.sh/
以下の内容でcomponents/Slide.vueを作成します。
<template>
  <div class="slide" v-editable="blok">
    <img :src="blok.image">
  </div>
</template>

<script>
export default {
  props: ['blok']
}
</script>

<style lang="scss">
.slide img {
  width: 100%;
}
</style>
component.jsに以下を追記します。
import Vue from 'vue'
...
import Slide from '~/components/Slide.vue'

...
Vue.component('slide', Slide)
Teaser.vueを下記の内容に変更します。
<template>
  <div v-editable="blok" class="teaser">
    <component v-if="slide" :blok="slide" :is="slide.component"></component>
    <div class="teaser__pag">
      <button @click="handleDotClick(index)"
              :key="index"
              v-for="(blok, index) in blok.body"
              :class="{'teaser__pag-dot--current': index == currentSlide}"
              class="teaser__pag-dot">Next</button>
    </div>
  </div>
</template>

<script>
export default {
  props: ['blok'],

  data () {
    return {
      currentSlide: 0
    }
  },

  computed: {
    slide () {
      let slides = this.blok.body.filter((slide, index) => {
        return this.currentSlide === index
      })
      if (slides.length) {
        return slides[0]
      }
      return null
    }
  },

  methods: {
    handleDotClick (index) {
      this.currentSlide = index
    }
  }
}
</script>

<style lang="scss">
.teaser__pag {
  width: 100%;
  text-align: center;
  margin: 30px 0;
}

.teaser__pag-dot {
  text-indent: -9999px;
  border: 0;
  border-radius: 50%;
  width: 17px;
  height: 17px;
  padding: 0;
  margin: 5px 6px;
  background-color: #ccc;
  -webkit-appearance: none;
  cursor: pointer;

  &--current {
    background-color: #000;
  }
}
</style>
  4:5   warning  Require self-closing on Vue.js custom components (<component>)                    vue/html-self-closing
   4:43  warning  Attribute ":is" should go before ":blok"                                          vue/attributes-order
   6:15  error    '@click' should be on a new line                                                  vue/max-attributes-per-line
   7:15  warning  Attribute ":key" should go before "@click"                                        vue/attributes-order
   8:15  warning  Attribute "v-for" should go before "@click"                                       vue/attributes-order
   8:23  warning  Variable 'blok' is already declared in the upper scope                            vue/no-template-shadow
   9:15  warning  Attribute ":class" should go before "@click"                                      vue/attributes-order
  10:15  warning  Attribute "class" should go before "@click"                                       vue/attributes-order
  10:38  warning  Expected 1 line break before closing bracket, but no line breaks found            vue/html-closing-bracket-newline
  10:39  warning  Expected 1 line break after opening tag (`<button>`), but no line breaks found    vue/multiline-html-element-content-newline
  10:43  warning  Expected 1 line break before closing tag (`</button>`), but no line breaks found  vue/multiline-html-element-content-newline
  17:11  warning  Prop "blok" should define at least its type                                       vue/require-prop-types
  27:11  error    'slides' is never reassigned. Use 'const' instead                                 prefer-const

✖ 13 problems (2 errors, 11 warnings)
  2 errors and 9 warnings potentially fixable with the `--fix` option.
改行して@clickを新しい行に移行して、letをconstに変更しました。
components/Teaser.vue
<template>
  <div v-editable="blok" class="teaser">
    <component v-if="slide" :blok="slide" :is="slide.component"></component>
    <div class="teaser__pag">
      <button
        @click="handleDotClick(index)"
        :key="index"
        v-for="(blok, index) in blok.body"
        :class="{'teaser__pag-dot--current': index == currentSlide}"
        class="teaser__pag-dot">Next</button>
    </div>
  </div>
</template>

<script>
export default {
  props: ['blok'],

  data () {
    return {
      currentSlide: 0
    }
  },

  computed: {
    slide () {
      const slides = this.blok.body.filter((slide, index) => {
        return this.currentSlide === index
      })
      if (slides.length) {
        return slides[0]
      }
      return null
    }
  },

  methods: {
    handleDotClick (index) {
      this.currentSlide = index
    }
  }
}
</script>

<style lang="scss">
.teaser__pag {
  width: 100%;
  text-align: center;
  margin: 30px 0;
}

.teaser__pag-dot {
  text-indent: -9999px;
  border: 0;
  border-radius: 50%;
  width: 17px;
  height: 17px;
  padding: 0;
  margin: 5px 6px;
  background-color: #ccc;
  -webkit-appearance: none;
  cursor: pointer;

  &--current {
    background-color: #000;
  }
}
</style>
Extending the feature component
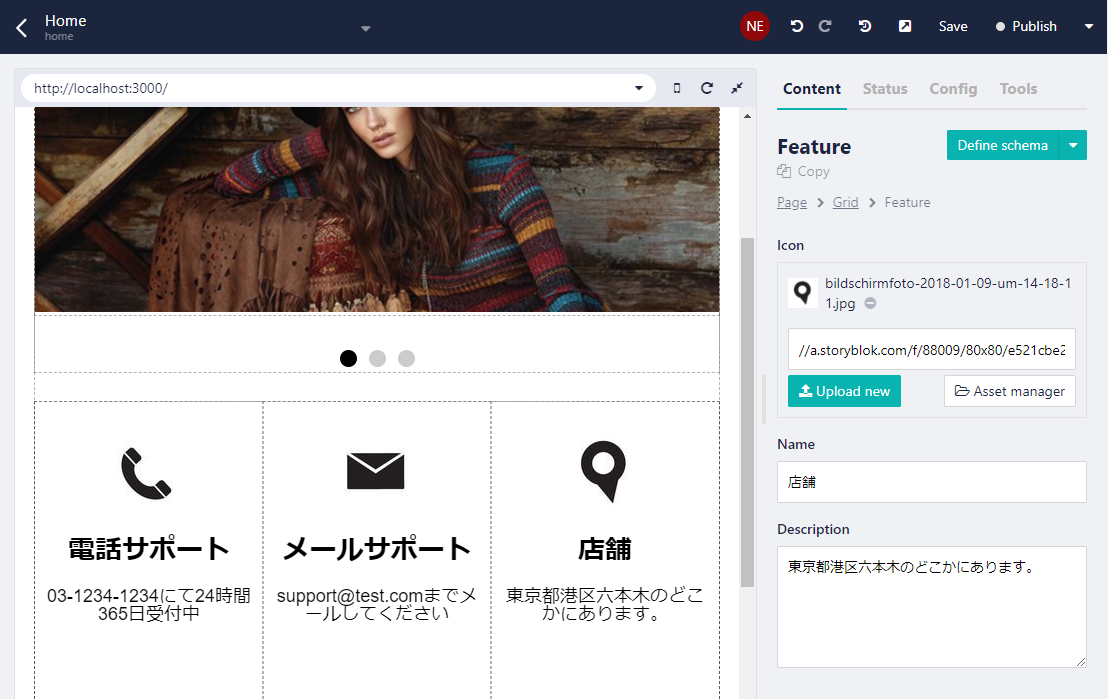
ブラウザからFeatureコンポーネントにdescriptionをtextareaとして、iconをimageとして追加します。

Feature.vueを編集します。
<template>
  <div v-editable="blok" class="feature util__flex-eq">
    <img :src="resizedIcon" class="feature__icon">
    <h1>{{ blok.name }}</h1>
    <div class="feature__description">
      {{ blok.description }}
    </div>
  </div>
</template>

<script>
export default {
  computed: {
    resizedIcon () {
      if (typeof this.blok.icon !== 'undefined') {
        return '//img2.storyblok.com/80x80' + this.blok.icon.replace('//a.storyblok.com', '')
      }
      return null
    }
  },
  props: ['blok']
}
</script>

<style lang="scss">
.feature {
  text-align: center;
  padding: 30px 10px 100px;
}

.feature__icon {
  max-width: 80px;
}
</style>
ブラウザからアイコンとテキストを追加して保存すると、以下のようになります。

Build a navigation menu
ダッシュボードに戻りContetを開き+Folderボタンを押すとポップアップが出るので、enと入力してSaveを押します。
Create global settings
作成したenフォルダを選ぶと画面が変わり、+Entryボタンを押すとポップアップが出るので、下記のようにsettingsと入力してSaveを押します。

画面が自動的に切り替わるのでconfigタブのReal Pathに/と入力してSaveを押します。
main_naviという名前でblockを追加します。
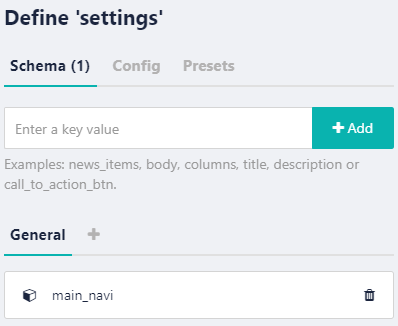
main_naviのなかにNav Itemを作成し、nameをtextとして、linkをlinkとして追加し、下記のようにコピペして2個にしてSaveを押します。

Getting global settings with the Vuex store
store/index.jsを作成し、以下の内容をコピペします。
※スペースがないとエラーが出たので修正しています。
export const state = () => ({
  cacheVersion: '',
  language: 'en',
  settings: {
    main_navi: []
  }
})

export const mutations = {
  setSettings (state, settings) {
    state.settings = settings
  },
  setLanguage (state, language) {
    state.language = language
  },
  setCacheVersion (state, version) {
    state.cacheVersion = version
  }
}

export const actions = {
  loadSettings ({ commit }, context) {
    return this.$storyapi.get(`cdn/stories/${context.language}/settings`, {
      version: context.version
    }).then((res) => {
      commit('setSettings', res.data.story.content)
    })
  }
}
Add a middleware
middleware/languageDetection.jsファイルを以下の内容で作成します。
※エラーが出たので修正しています。
export default function ({ app, isServer, route, store, isDev }) {
  const version = route.query._storyblok || isDev ? 'draft' : 'published'
  const language = route.params.language || 'en'

  if (isServer) {
    store.commit('setCacheVersion', app.$storyapi.cacheVersion)
  }

  if (!store.state.settings._uid || language !== store.state.language) {
    store.commit('setLanguage', language)

    return store.dispatch('loadSettings', { version, language })
  }
}
nuxt.config.jsに設定を追記します。
module.exports = {
  ...
  router: {
    middleware: 'languageDetection'
  },
Access the data in the TopHeader component
TopHeader.vueのtemplate部分を下記の内容に置き換えます。
<template>
  <header class="top-header util__flex util__container">
    <nav class="top-header__col">
      <ul class="top-header__nav">
        <li :key="index" v-for="(navitem, index) in $store.state.settings.main_navi">
          <nuxt-link class="top-header__link" :to="navitem.link.cached_url">
            {{ navitem.name }}
          </nuxt-link>
        </li>
      </ul>
    </nav>
    <a href="/" class="top-header__col top-header__logo">
      <img src="http://a.storyblok.com/f/42016/1096x313/0353bf6654/logo2.png">
    </a>
    <nav class="top-header__col top-header__second-navi">
      <ul class="top-header__nav top-header__nav--right">
        <li>
          <nuxt-link class="top-header__link" to="/en/blog">English</nuxt-link>
        </li>
        <li>
          <nuxt-link class="top-header__link" to="/de/blog">German</nuxt-link>
        </li>
      </ul>
    </nav>
  </header>
</template>

...
Build a blog section
以下のようなフォルダ構成にします。
pages/
--| _language/
-----| blog/
--------| _slug.vue
--------| index.vue
--| index.vue
Add a blog detail page
markdown parserをインストールします。
$ npm install marked --save // yarn add -D marked
pages/_language/blog/_slug.vueを作成します。
※エラーが出たので修正しています。
<template>
  <section class="util__container">
    <div v-editable="story.content" class="blog">
      <h1>{{ story.content.name }}</h1>
      <p><strong>{{ story.content.intro }}</strong></p>
      <div class="blog__body" v-html="body">
      </div>
    </div>
  </section>
</template>

<script>
import marked from 'marked'

export default {
  data () {
    return {
      story: { content: { body: '' } }
    }
  },
  computed: {
    body () {
      return marked(this.story.content.body)
    }
  },
  mounted () {
    // use the bridge to listen to events
    this.$storybridge.on(['input', 'published', 'change'], (event) => {
      if (event.action === 'input') {
        if (event.story.id === this.story.id) {
          this.story.content = event.story.content
        }
      } else {
        // window.location.reload()
        this.$nuxt.$router.go({
          path: this.$nuxt.$router.currentRoute,
          force: true
        })
      }
    })
  },
  asyncData (context) {
    // Load the JSON from the API
    const version = context.query._storyblok || context.isDev ? 'draft' : 'published'

    return context.app.$storyapi.get(`cdn/stories/${context.params.language}/blog/${context.params.slug}`, {
      version,
      cv: context.store.state.cacheVersion
    }).then((res) => {
      return res.data
    }).catch((res) => {
      context.error({ statusCode: res.response.status, message: res.response.data })
    })
  }
}
</script>

<style lang="scss">
.blog {
  padding: 0 20px;
  max-width: 600px;
  margin: 40px auto 100px;

  img {
    width: 100%;
    height: auto;
  }
}

.blog__body {
  line-height: 1.6;
}
</style>
Create the overview page
pages/_language/blog/index.vueを作成します。
※エラーが出たので修正しています。
<template>
  <section class="util__container">
    <div :key="blogPost.content._uid" v-for="blogPost in data.stories" class="blog__overview">
      <h2>
        <nuxt-link class="blog__detail-link" :to="'/' + blogPost.full_slug">
          {{ blogPost.content.name }}
        </nuxt-link>
      </h2>
      <small>
        {{ blogPost.published_at }}
      </small>
      <p>
        {{ blogPost.content.intro }}
      </p>
    </div>
  </section>
</template>

<script>
export default {
  data () {
    return { total: 0, data: { stories: [] } }
  },
  asyncData (context) {
    const version = context.query._storyblok || context.isDev ? 'draft' : 'published'

    return context.app.$storyapi.get('cdn/stories', {
      version,
      starts_with: `${context.store.state.language}/blog`,
      cv: context.store.state.cacheVersion
    }).then((res) => {
      return res
    }).catch((res) => {
      context.error({ statusCode: res.response.status, message: res.response.data })
    })
  }
}
</script>

<style lang="scss">
.blog__overview {
  padding: 0 20px;
  max-width: 600px;
  margin: 40px auto 60px;

  p {
    line-height: 1.6;
  }
}

.blog__detail-link {
  color: #000;
}
</style>
Create the blog content in Storyblok
ブラウザからen/blogフォルダを作成します。
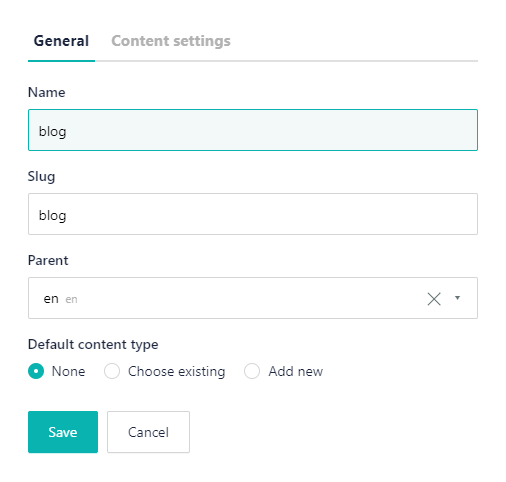
一つ記事を作った後にblogフォルダをデフォルトに設定します。

Create the blog article
ブラウザから記事を投稿します。+Entryを押し、以下のように入力します。
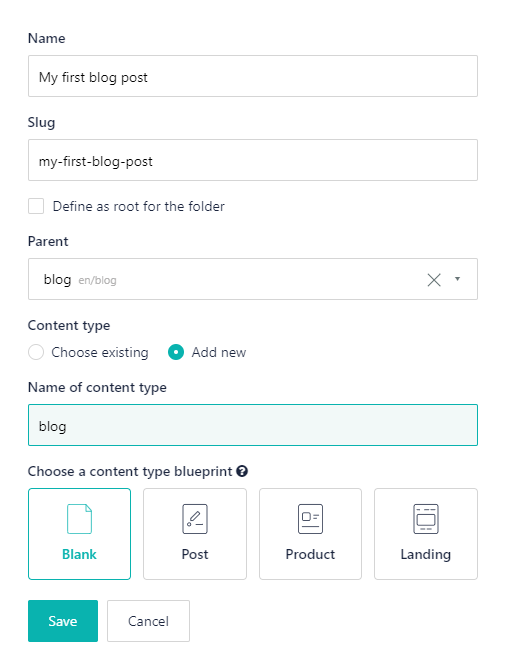
ブラウザから記事を作成します。

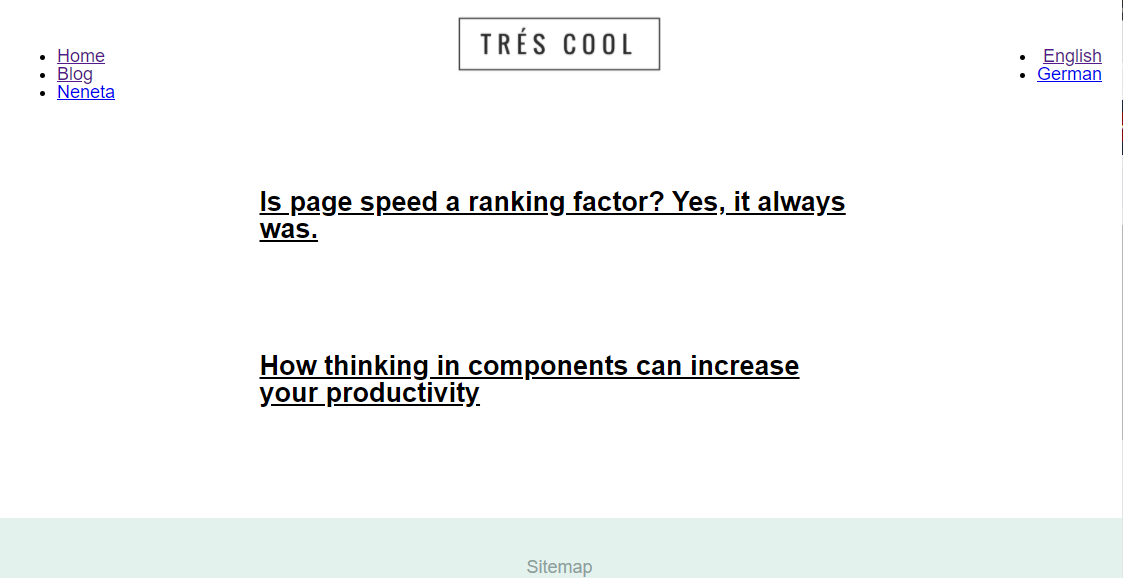
http://localhost:3000/en/blog にアクセスすると、下記のように表示されます。
Build a sitemap
pages/_language/sitemap.vueを作成します。
※エラーが出たので修正しています。
<template>
  <section class="util__container">
    <div class="sitemap">
      <h1>Sitemap</h1>

      <div v-for="language in tree" :key="language.id">
        <ul>
          <sitemap-item
            v-show="item.item.name !== 'Settings'"
            :model="item"
            v-for="item in language.children"
            :key="item.id">
          </sitemap-item>
        </ul>
      </div>
    </div>
  </section>
</template>

<script>
export default {
  data () {
    return {
      links: {}
    }
  },
  computed: {
    tree () {
      const parentChilds = this.parentChildMap(this.links)

      return this.generateTree(0, parentChilds)
    }
  },
  asyncData (context) {
    const version = context.query._storyblok || context.isDev ? 'draft' : 'published'

    return context.app.$storyapi.get('cdn/links', {
      version,
      starts_with: context.store.state.language,
      cv: context.store.state.cacheVersion
    }).then((res) => {
      return res.data
    }).catch((res) => {
      context.error(res)
    })
  },
  methods: {
    parentChildMap (links) {
      const tree = {}
      const linksArray = Object.keys(links).map(e => links[e])

      linksArray.forEach((link) => {
        if (!tree[link.parent_id]) {
          tree[link.parent_id] = []
        }

        tree[link.parent_id].push(link)
      })

      return tree
    },
    generateTree (parent, items) {
      const tree = {}

      if (items[parent]) {
        const result = items[parent]

        result.forEach((cat) => {
          if (!tree[cat.id]) {
            tree[cat.id] = { item: {}, children: [] }
          }
          tree[cat.id].item = cat
          tree[cat.id].children = this.generateTree(cat.id, items)
        })
      }

      return Object.keys(tree).map(e => tree[e])
    }
  }
}
</script>

<style lang="scss">
.sitemap {
  max-width: 600px;
  margin: 20px auto 60px;
}
</style>
components/SitemapItem.vueを作成します。
<template>
  <li class="sitemap-item">
    <nuxt-link :to="'/' + model.item.slug">
      {{model.item.name}}
    </nuxt-link>
    <ul v-if="model.children.length > 0">
      <sitemap-item
        :key="item.item.id"
        :model="item"
        v-for="item in model.children">
      </sitemap-item>
    </ul>
  </li>
</template>

<script>
export default {
  props: ['model']
}
</script>

<style lang="scss">
.sitemap-item {
  padding: 5px 0;

  a {
    color: #8ba19a;
  }

  ul {
    margin-top: 10px;
    margin-bottom: 10px;
  }
}
</style>
plugins/components.jsに追記します。
...
import SitemapItem from '~/components/SitemapItem.vue'

...
Vue.component('sitemap-item', SitemapItem)
http://localhost:3000/en/sitemap にアクセスすると、下記のように表示されます。

今回はここまでです。以下は省略します。
