概要
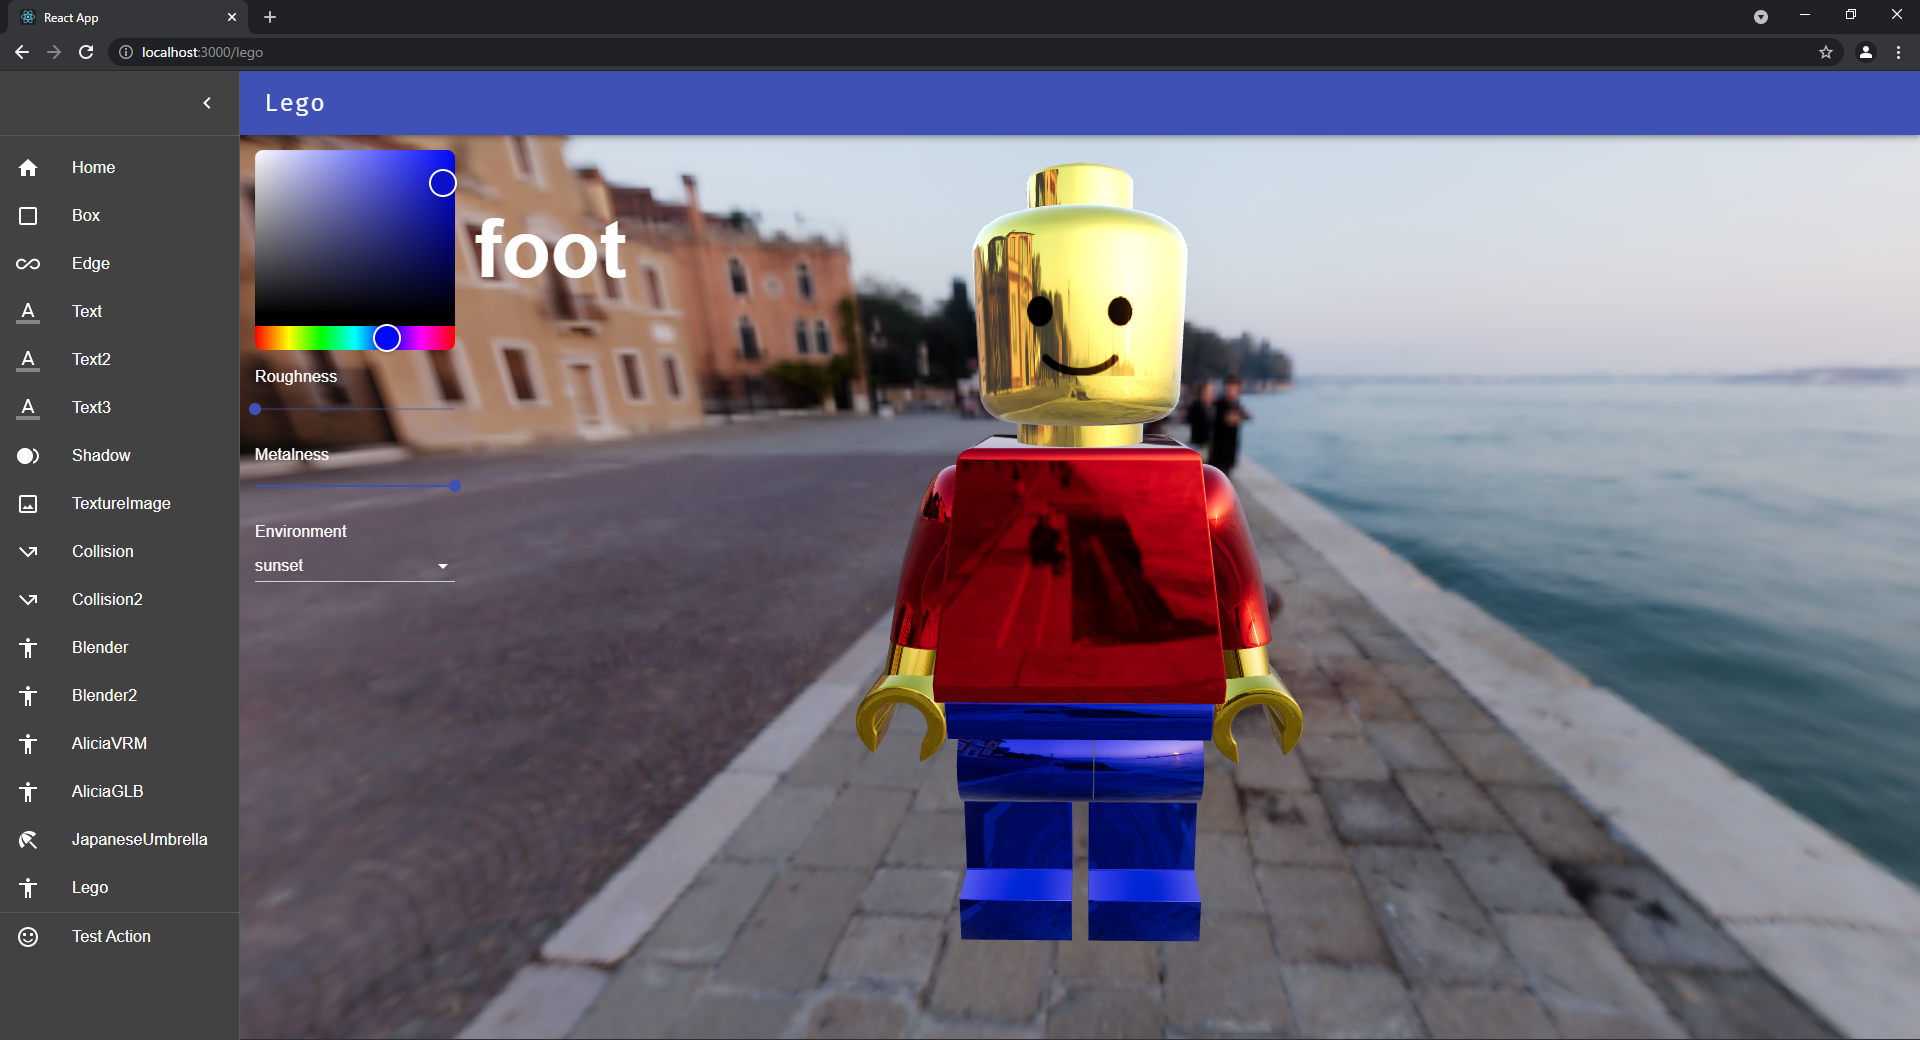
Blenderでモデリングしたmodelを、react-three-fiber(Three.jsのReact用ラッパーパッケージ)を使用してReactプロジェクトに読み込みます。
この記事では要点の説明をしますが、step by step の解説はしていないです。
前提
react-three-fiber(r3f) を使用して、Introduction を完了している方
環境
- Windows10
- VSCode
- React (17.0.2)
- typescript (4.0.3)
- three (0.129.0)
- @react-three/fiber (6.2.2)
- blender (2.93)
セットアップ
create-react-app を使用してプロジェクトを作成します。
作成方法は、以下を参照してください。
Three 関連のパッケージをインストールします。
npm i three @types/three @react-three/fiber @react-three/drei
モデリング
保存とエクスポートの確認は、こまめにしましょう!(自戒を込めて)
Lego人形
blender を使用してモデリングをします。
今回作成した Lego人形 は、以下を参考にさせて頂きました。
エクスポート
Three.js で扱うためには、.gltf か .glb ファイルとしてエクスポートします。
エクスポートの設定は、以下のようにします。
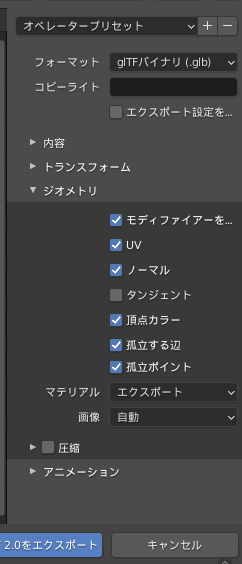
モデリングの何某かが原因で、エクスポート中にエラーになることがあるので、こまめにエクスポートできるか確認するといいと思います。
テクスチャー
Lego人形 の顔部分は、テクスチャーを使用します。リソース画像は、React側で再度読み込む必要がありますが、貼り付けに関する情報はエクスポートされます。
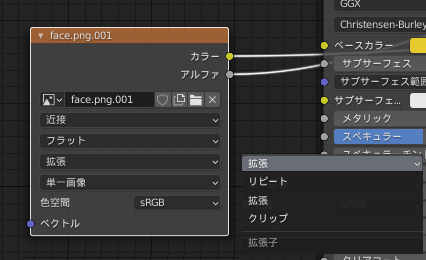
注意点として、Three.js ではテクスチャーの貼り付けオプションが以下の3つしかありません。
- THREE.RepeatWrapping :テクスチャーをリピートする
- THREE.ClampToEdgeWrapping :テクスチャーを拡張する
- THREE.MirroredRepeatWrapping :テクスチャーをミラーリピートする
blender でクリップ(繰り返しなし)を設定しても、Three.js側では対応していないので、拡張 を選択します。
拡張に設定すると、テクスチャー画像(青枠)の端(縦横の辺)が、貼り付け範囲(赤枠)まで引き延ばされます。
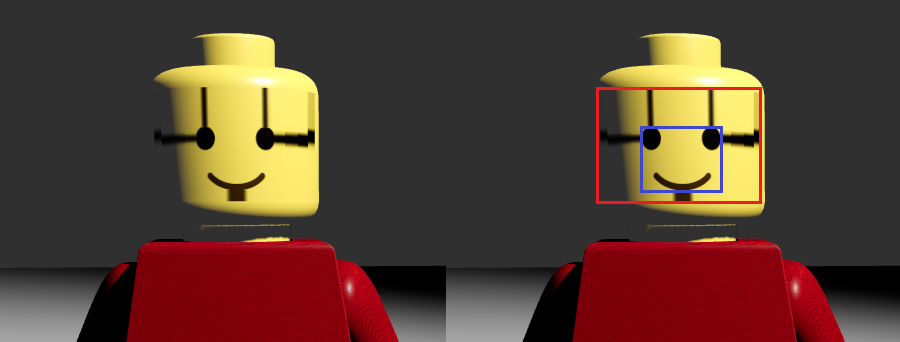
これを回避するためには、テクスチャーを張り付ける範囲に面(青枠)を作成して、それ以外の部分を縦横の辺の延長(赤線)から追い出します。
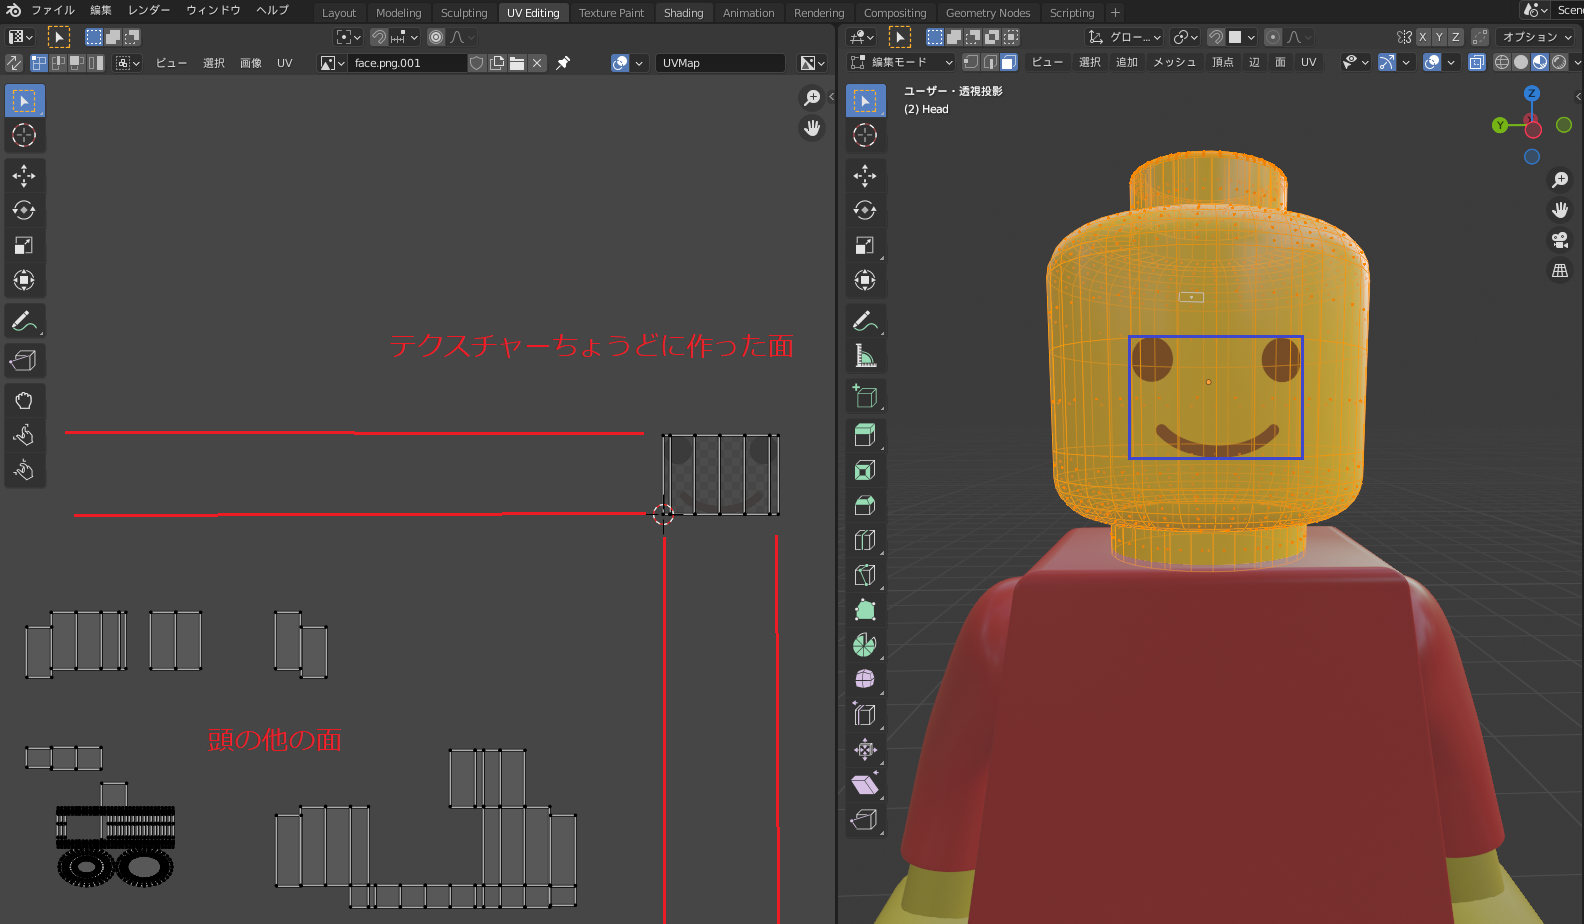
インポート
インポートファイルの作成
React でエクスポートしたモデルをインポートします。
そのために、以下のツールを使ってインポートファイルの雛形を作成します。
npx gltfjsx model.glb -t -s
-t :TypeScript 対応
-s :読み込んだ model に影の設定を割り当てる
成功すると、上記のファイル名の場合、Model.ts が作成されます。
リソース
リソースファイル(.glb ファイル、テクスチャー画像)は、React プロジェクトの public フォルダに置きます。
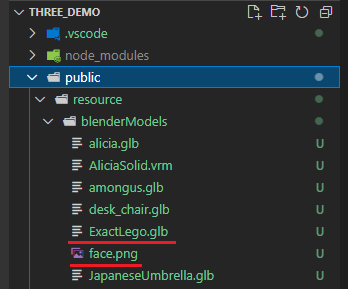
インポートファイルの読み込み
.gltf .glb ファイルをロードする場合、componet は Suspense で囲う必要があります。
export const TLego: React.FC = () => {
	return (
		<>
			{/* カメラ */}
			<OrbitControls enablePan={false} />

			{/* オブジェクト */}
			<Suspense fallback={null}>
				<Lego />
				<Environment preset='sunset' background={true} />
			</Suspense>
		</>
	);
};
gltfjsx で作成したファイル
const modelFolderPath = './resource/blenderModels/';
const modelPath = modelFolderPath + 'ExactLego.glb';
useGLTF.preload(modelPath);

export const Lego: React.FC = (props: JSX.IntrinsicElements['group']) => {
	const group = useRef<THREE.Group>();

	// model load
	const { nodes, materials } = useGLTF(modelPath) as GLTFResult;
	const [texture] = useTexture([modelFolderPath + 'face.png']);
	texture.flipY = false;
	materials.head.map = texture;
煮るなり焼くなり
これで、モデルはインポートできると思います。あとは、煮るなり焼くなりしていきます。
参考にしたコード
カラーセレクター
状態管理
Canvas と dom 間で状態をやり取りするときに、Recoil を使用するとひと工夫必要になります。
valtio を使うと、シンプルな状態管理を行うことができます。
UI
