クラウドのNetwork securityのingress ruleは、使っているうちにだんだん量が増えてくる事もあり、コンソールのGUIでは俯瞰的な管理は徐々にしにくくなります。
その場合、Excelなりに状態を出力して管理したいというニーズも出てくると思います。
そこで、ここではその Network securityの ingress rule を OCI CLI のコマンドラインでjson形式で取り出し、そのjsonをjqで整形して CSV形式にして、Excelで管理できるようにする手順を解説します。
前提条件
oci cli がインストールされた環境があること
oci cliのインストールは、以下のリンクなどを参考にしてください。
https://community.oracle.com/docs/DOC-1019624
jqがLinux terminalにインストールされていること
たとえば LinuxがUbuntuであれば、sudo apt-get install jq でインストールします。
jq は ver1.5 と ver1.6 で挙動が若干異なりますが、ここでは Ubuntuにapt-getで標準でinstallできるver1.5 で作業します。
Windows版のjqもありますが、挙動がLinuxと異なるため、ここではLinux版を使用します。
現状のsecurity list の取り出し方
security list CLI API 参考リンクに従って作業します
https://docs.cloud.oracle.com/en-us/iaas/tools/oci-cli/2.12.8/oci_cli_docs/cmdref/network/security-list.html
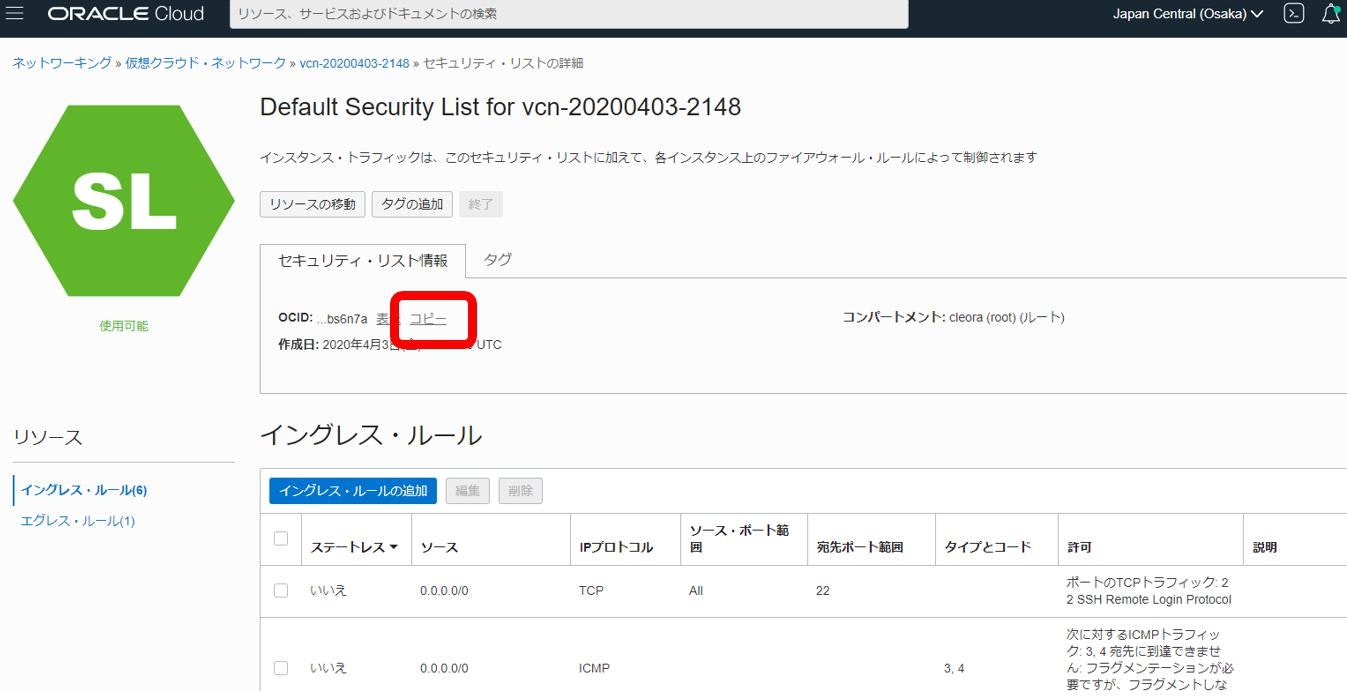
コンソールからsecurity list の OCID を取得して、保存します。

以下の2行のコマンドで現状のsecurity list を取り出します(コマンド例)
先ほどの security list のOCIDを式に代入します。
# ! /bin/bash
securitylistid="ocid1.securitylist.oc1.ap-osaka-1.aaaaaaaahd2ed2fzomojzwq2dfletyleakofzziz4eldw3uqr4tp3gbs6xxx"
oci network security-list get --security-list-id $securitylistid
このコマンドで、例えば以下のようなsecurity listが取り出せます
{
  "data": {
    "compartment-id": "ocid1.tenancy.oc1..aaaaaaaadwprdqa4weedbsy6e3f2ikin3cfqdvqwtk3dl73y5v2g7c2jgxxx",
    "defined-tags": {
      "Oracle-Tags": {
        "CreatedBy": "oracleidentitycloudservice/cleoramaster@gmail.com",
        "CreatedOn": "2020-04-03T12:49:40.741Z"
      }
    },
    "display-name": "Default Security List for vcn-20200403-2148",
    "egress-security-rules": [
      {
        "description": null,
        "destination": "0.0.0.0/0",
        "destination-type": "CIDR_BLOCK",
        "icmp-options": null,
        "is-stateless": false,
        "protocol": "all",
        "tcp-options": null,
        "udp-options": null
      }
    ],
    "freeform-tags": {},
    "id": "ocid1.securitylist.oc1.ap-osaka-1.aaaaaaaahd2ed2fzomojzwq2dfletyleakofzziz4eldw3uqr4tp3gbsxxxx",
    "ingress-security-rules": [
      {
        "description": null,
        "icmp-options": null,
        "is-stateless": false,
        "protocol": "6",
        "source": "0.0.0.0/0",
        "source-type": "CIDR_BLOCK",
        "tcp-options": {
          "destination-port-range": {
            "max": 22,
            "min": 22
          },
          "source-port-range": null
        },
        "udp-options": null
      },
      {
        "description": null,
        "icmp-options": {
          "code": 4,
          "type": 3
        },
        "is-stateless": false,
        "protocol": "1",
        "source": "0.0.0.0/0",
        "source-type": "CIDR_BLOCK",
        "tcp-options": null,
        "udp-options": null
      },
      {
        "description": null,
        "icmp-options": {
          "code": null,
          "type": 3
        },
        "is-stateless": false,
        "protocol": "1",
        "source": "10.0.0.0/16",
        "source-type": "CIDR_BLOCK",
        "tcp-options": null,
        "udp-options": null
      },
      {
        "description": null,
        "icmp-options": null,
        "is-stateless": false,
        "protocol": "6",
        "source": "0.0.0.0/0",
        "source-type": "CIDR_BLOCK",
        "tcp-options": {
          "destination-port-range": {
            "max": 3389,
            "min": 3389
          },
          "source-port-range": null
        },
        "udp-options": null
      },
      {
        "description": null,
        "icmp-options": null,
        "is-stateless": false,
        "protocol": "6",
        "source": "0.0.0.0/0",
        "source-type": "CIDR_BLOCK",
        "tcp-options": {
          "destination-port-range": {
            "max": 22,
            "min": 22
          },
          "source-port-range": null
        },
        "udp-options": null
      },
      {
        "description": null,
        "icmp-options": null,
        "is-stateless": false,
        "protocol": "6",
        "source": "0.0.0.0/0",
        "source-type": "CIDR_BLOCK",
        "tcp-options": {
          "destination-port-range": {
            "max": 443,
            "min": 443
          },
          "source-port-range": {
            "max": 443,
            "min": 443
          }
        },
        "udp-options": null
      }
    ],
    "lifecycle-state": "AVAILABLE",
    "time-created": "2020-04-03T12:49:40.744000+00:00",
    "vcn-id": "ocid1.vcn.oc1.ap-osaka-1.amaaaaaasqs3wliag6sv52neuechply6ijplojupqqwyai5kdhrd2vwzxxxx"
  },
  "etag": "695bexxx"
}
上記のようなSecurity listがjsonで取り出せました。
この作業工程はWindowsでも可能ですが、後続のjqの操作がLinuxなのでLinuxで抽出したほうが楽です。
もしもWindowsで作成したファイルを使いたい場合は、そのままですと jqにファイルを渡したときに
```というエラーが出ますので、その場合は
dos2unix というツールをLinux環境に `sudo apt-get install dos2unix` と追加installし、
`dos2unix SecurityList.json` と打って、改行をLinux形式に変換します

## CSVへの変換
先ほどのjson形式の`SecurityList.json`ファイルに対して、そのIngress-ruleの全てをjsonから取り出すshellを以下のように書きます、入力ファイル名は、ここではSecurityList.jsonに固定しています。

```shell
# ! /bin/bash
echo "description, icmp-options.code, icmp-options.type, is-stateless, destination, destination-type, protocol, source, source-type, tcp-options, destination-port-range.max, destination-port-range.min, source-port-range, udp-options" > SecuriyList.csv
cat SecurityList.json | jq -c -r '.data."ingress-security-rules"[] | [.description, ."icmp-options".code, ."icmp-options".type, ."is-stateless", .destnaion, ."destination-type", .protocol, .source, ."source-type", ."tcp-options"."destination-port-range".max, ."tcp-options"."destination-port-range".min, ."source-port-range", ."udp-options" ]' >> SecuriyList.csv
というコマンドを流すとjsonからSecurityList.csvが作られます
完成形
description, icmp-options.code, icmp-options.type, is-stateless, destination, destination-type, protocol, source, source-type, tcp-options, destination-port-range.max, destination-port-range.min, source-port-range, udp-options
[null,null,null,false,null,null,"6","0.0.0.0/0","CIDR_BLOCK",22,22,null,null]
[null,4,3,false,null,null,"1","0.0.0.0/0","CIDR_BLOCK",null,null,null,null]
[null,null,3,false,null,null,"1","10.0.0.0/16","CIDR_BLOCK",null,null,null,null]
[null,null,null,false,null,null,"6","0.0.0.0/0","CIDR_BLOCK",3389,3389,null,null]
[null,null,null,false,null,null,"6","0.0.0.0/0","CIDR_BLOCK",22,22,null,null]
[null,null,null,false,null,null,"6","0.0.0.0/0","CIDR_BLOCK",443,443,null,null]
これが、Ingress-Ruleを抽出したCSVです。
両端に[] が残っていますが、利用上問題はないので、これで完成とします。
これにより、ingress ruleが csvで管理できて、視認性もよくなったのではないかと思います。
Excelで開くとこんな感じに見えます、これならたくさんIngress-Ruleがあっても管理しやすそうですね。

Tips
-
jqで処理する要素名にとって、 - (マイナス記号)は、特殊記号です、従って 例えば sourceという要素は .source で処理できますが
source-type という要素名は ."source-type" と記述しないと、正しくparseできません。 -
jq のオプション -c は、 compactの意味で、改行を可能な限り少なく出力します。
-
セキュリティリストのひな型を入手するには、以下のコマンドで全パラメータを出力するjsonテンプレートが作れます。```
oci network security-list create --generate-full-command-json-input
しかし、今回は、全てではなく、 "ingressSecurityRules" の、自分が使用している部分を抜粋してcsv化するものを作るので参照しませんでした。