はじめに
ARkit触ってみました。
折角なので投稿してみます。
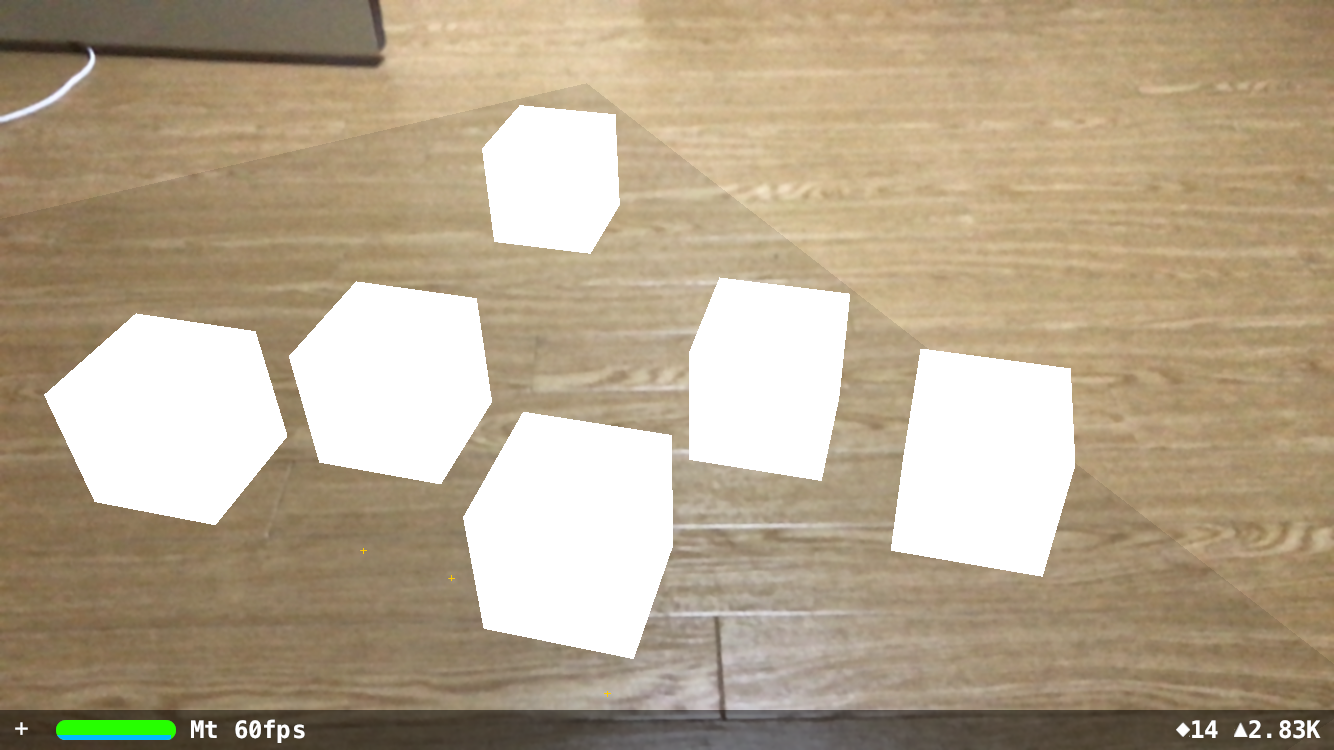
今回は平面に豆腐置きまくるところまでやってみました。
ほとんどこのブログを参考に作っています。
プロジェクト作成
Xcode9betaにて、「AugmentedReality App」を選択。
今回はSceneKitで作るので、そのままぽちぽちと進む。
そうすると、ARSCNView(sceneView)なるものがくっついたViewControllerが作成されます。
この状態でアプリを起動すると、空中に飛行機が浮かんでいると思います。
ARSCNViewの設定
ARSCNViewの設定をしていきます。
ViewController.swift
    override func viewDidLoad() {
        super.viewDidLoad()

        // Set the view's delegate
        sceneView.delegate = self

        // Show statistics such as fps and timing information
        sceneView.showsStatistics = true

        // デバッグ時用オプション
        // ARKitが感知しているところに「+」がいっぱい出てくるようになる
        sceneView.debugOptions = ARSCNDebugOptions.showFeaturePoints

        // もう飛行機はいらないのでコメントアウト
        // Create a new scene
//        let scene = SCNScene(named: "art.scnassets/ship.scn")!

        // 飛行機sceneはいなくなったので、新たに初期化
        sceneView.scene = SCNScene()
    }

    override func viewWillAppear(_ animated: Bool) {
        super.viewWillAppear(animated)

        // Create a session configuration
        let configuration = ARWorldTrackingSessionConfiguration()
        // ARKit用。平面を検知するように指定
        configuration.planeDetection = .horizontal
        // 現実の環境光に合わせてレンダリングしてくれるらしい
        configuration.isLightEstimationEnabled = true

        // Run the view's session
        sceneView.session.run(configuration)
    }
ここまでするだけで、平面を検知する度にARSCNViewDelegateのfunc renderer(_ renderer: SCNSceneRenderer, didAdd node: SCNNode, for anchor: ARAnchor)が呼ばれるようになります。
平面ノードの作成
次は、豆腐達を置くための平面そのものを作っていきます。
まずは、平面クラスを作成します。
Plane.swift
import UIKit
import SceneKit
import ARKit

class Plane: SCNNode {

    var anchor: ARPlaneAnchor!

    private var planeGeometry: SCNBox!

    init(anchor initAnchor: ARPlaneAnchor) {
        super.init()

        // この平面のAnchorを保持
        anchor = initAnchor

        // Anchorを元にノードを生成
        planeGeometry = SCNBox(width: CGFloat(initAnchor.extent.x),
                               height: 0.01,
                               length: CGFloat(initAnchor.extent.z),
                               chamferRadius: 0)
        let planeNode = SCNNode(geometry: planeGeometry)

        // 平面の位置を指定
        planeNode.position = SCNVector3Make(initAnchor.center.x, 0, initAnchor.center.z)
        // 平面の判定を追加
        planeNode.physicsBody = SCNPhysicsBody(type: .kinematic,
                                               shape: SCNPhysicsShape(geometry: planeGeometry,
                                                                      options: nil))

        // 写した時に位置がわかるようにうっすら黒い色を指定
        let material = SCNMaterial()
        material.diffuse.contents = UIColor(colorLiteralRed: 0.0, green: 0.0, blue: 0.0, alpha: 0.2)
        planeNode.geometry?.firstMaterial = material

        addChildNode(planeNode)
    }

    required init?(coder aDecoder: NSCoder) {
        fatalError("init(coder:) has not been implemented")
    }

    // 平面情報がアップデートされた時に呼ぶ
    func update(anchor: ARPlaneAnchor) {
        // 改めて諸々設定

        planeGeometry.width = CGFloat(anchor.extent.x)
        planeGeometry.length = CGFloat(anchor.extent.z)
        position = SCNVector3Make(anchor.center.x, 0, anchor.center.z)

        if let node = childNodes.first {
            node.physicsBody = SCNPhysicsBody(type: .kinematic,
                                              shape: SCNPhysicsShape(geometry: planeGeometry,
                                                                     options: nil))
        }
    }

}
あとは、ViewController側の平面検知デリゲートメソッドでこれを生成してあげます。
ViewController.swift
    func renderer(_ renderer: SCNSceneRenderer, didAdd node: SCNNode, for anchor: ARAnchor) {
        guard let planeAnchor = anchor as? ARPlaneAnchor else { return }

        // 平面を生成
        let plane = Plane(anchor: planeAnchor)

        // ノードを追加
        node.addChildNode(plane)

        // 管理用配列に追加
        planes.append(plane)
    }

    func renderer(_ renderer: SCNSceneRenderer, didUpdate node: SCNNode, for anchor: ARAnchor) {
        // updateされた平面ノードと同じidのものの情報をアップデート
        for plane in planes {
            if plane.anchor.identifier == anchor.identifier,
                let planeAnchor = anchor as? ARPlaneAnchor {
                plane.update(anchor: planeAnchor)
            }
        }
    }

    func renderer(_ renderer: SCNSceneRenderer, didRemove node: SCNNode, for anchor: ARAnchor) {
        // updateされた平面ノードと同じidのものの情報を削除
        for (index, plane) in planes.enumerated().reversed() {
            if plane.anchor.identifier == anchor.identifier {
                planes.remove(at: index)
            }
        }
    }
これで、平面を検知した箇所にうっすらと黒い床が置かれるようになりました。
豆腐作り
タップされた箇所に豆腐を作っていきます。
storyboardでARSCNViewの上にUITapGestureRecognizerを追加します。
ViewController.swift
    @IBAction func sceneViewTapped(_ recognizer: UITapGestureRecognizer) {

        // sceneView上のタップ箇所を取得
        let tapPoint = recognizer.location(in: sceneView)

        // scneView上の位置を取得
        let results = sceneView.hitTest(tapPoint, types: .existingPlaneUsingExtent)

        guard let hitResult = results.first else { return }

        // 箱を生成
        let cube = SCNBox(width: 0.1, height: 0.1, length: 0.1, chamferRadius: 0)
        let cubeNode = SCNNode(geometry: cube)

        // 箱の判定を追加
        let cubeShape = SCNPhysicsShape(geometry: cube, options: nil)
        cubeNode.physicsBody = SCNPhysicsBody(type: .dynamic, shape: cubeShape)

        // sceneView上のタップ座標のどこに箱を出現させるかを指定
        cubeNode.position = SCNVector3Make(hitResult.worldTransform.columns.3.x,
                                           hitResult.worldTransform.columns.3.y + 0.1,
                                           hitResult.worldTransform.columns.3.z)

        // ノードを追加
        sceneView.scene.rootNode.addChildNode(cubeNode)
    }
完成