ユカイ工学さんのkonashiをゲットしたので、とりあえずLチカしてみました。
Getting Startedが上手く動かず、いろいろ試行錯誤してみました。
準備するもの
ここはGetting Started+CocoaPodsです。
Xcodeで新規プロジェクトを作る
SDKはCocoaPodsで導入するので、取得するステップは飛ばします。
Xcodeで新規プロジェクトを作成します。
テンプレートはiOS Application の Single View Application を選びます。
CocoaPodsでSDKを導入する
前ステップで作成したプロジェクトが開いていると思いますが、邪魔なのでXcodeごとそっと閉じてください。[プロジェクト名].xcodeprojがある場所に移動して、
$ pod init
を実行しPodfileを作成します。
作成されたPodfileのtarget '[プロジェクト名]' doからendまでの間に以下のようにSDKの情報を記述します。
source "https://github.com/CocoaPods/Specs.git"
platform :ios, "7.1"
pod "konashi-ios-sdk", "~> 3.0"
その後、同じディレクトリで
$ pod install
として、SDKをインストールします。
完了したら、[プロジェクト名].xcworkspaceをXcodeで開いてください。
(間違えて[プロジェクト名].xcodeprojを開かないようにご注意を…)
CoreBluetoothFrameworkの追加
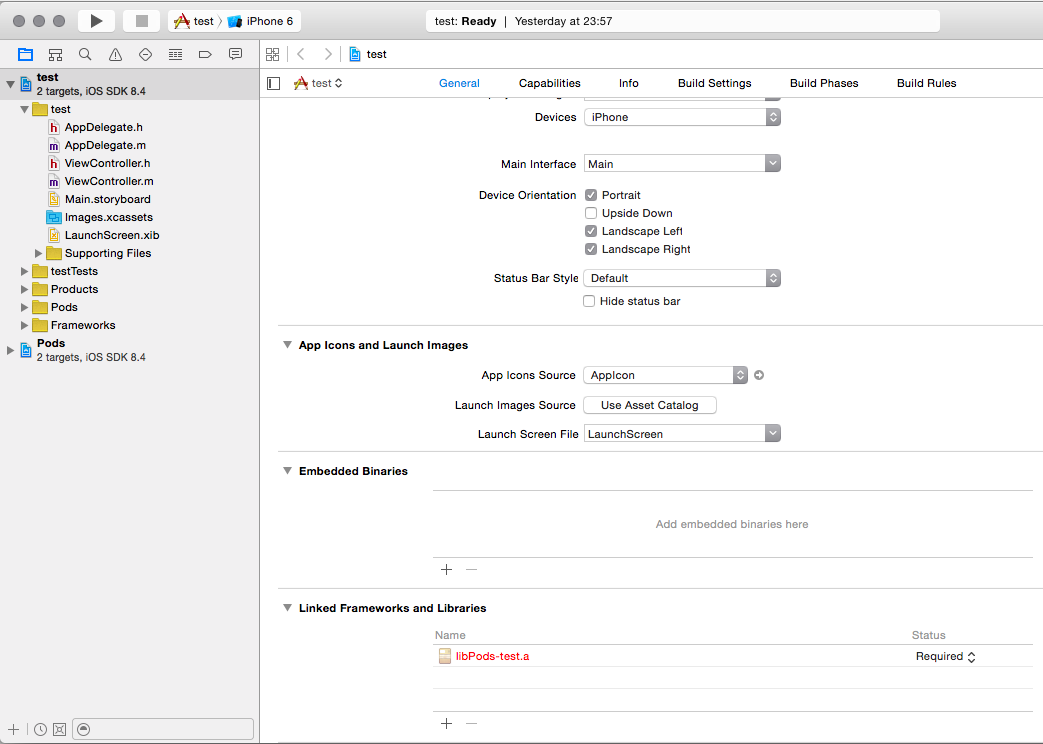
Xcodeの画面上で最初に作ったプロジェクト名の方のプロジェクトを選択し、TargetsのGeneralの一番下にあるLinked Frameworks and LibrariesのAdd Items(+)をクリックします。
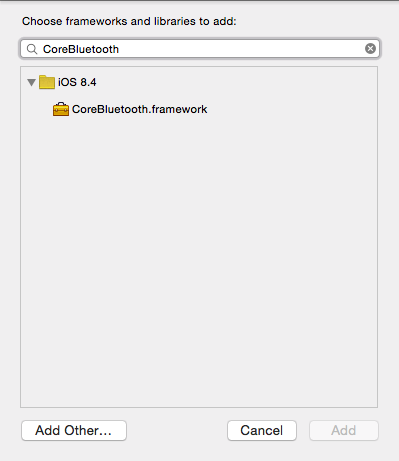
追加する項目を選択できますので、CoreBluetooth.frameworkを追加してください。
konashiと接続するためのボタンを追加
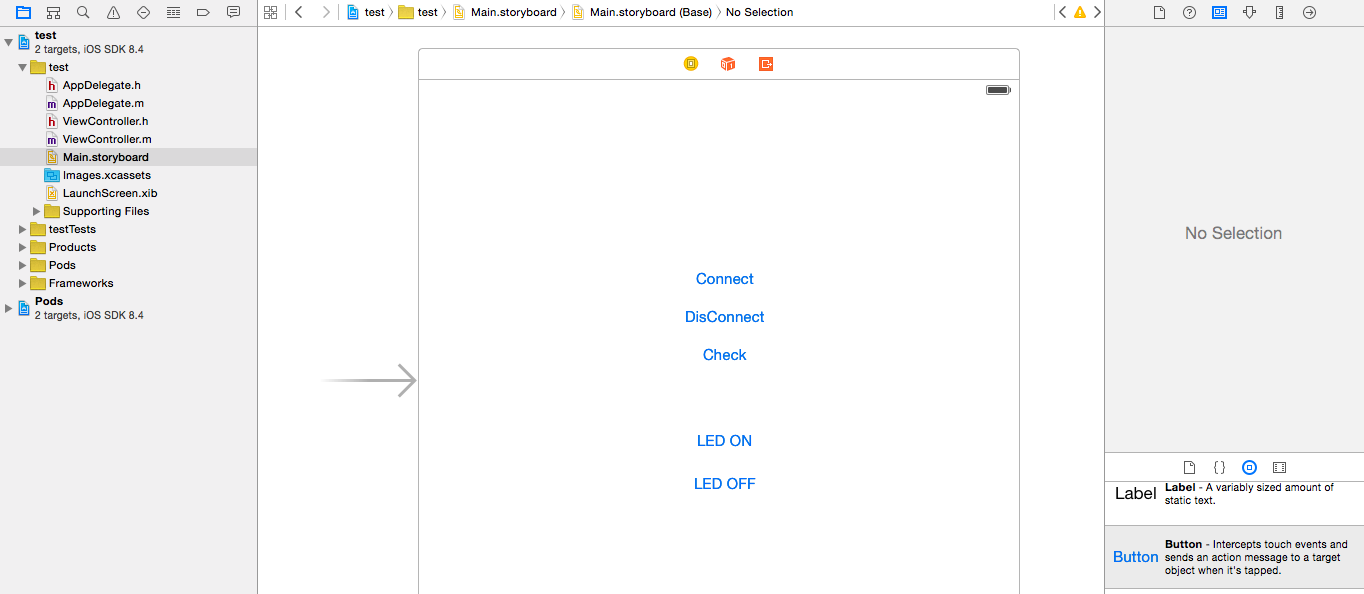
Main.storyboardを開いてボタンを5つ追加します。それぞれ、「Connect(接続)」「DisConnect(切断)」「Check(確認)」「LED ON」「LED OFF」としました。
ボタンタップ時の動作を追加するため、画面右上にある↓の3連ボタンの真ん中をクリックします。
すると、ViewController.mが勝手に開くと思いますのでViewController.hに切り替えます。
以下のように記述します。
# import <UIKit/UIKit.h>

@interface ViewController : UIViewController

- (IBAction)find:(id)sender;
- (IBAction)disconnect:(id)sender;
- (IBAction)check:(id)sender;

- (IBAction)ledOn:(id)sender;
- (IBAction)ledOff:(id)sender;

@end
書いたら、先ほど追加したボタンをcontrolボタンを押しながら選択し、そのまま今記述した各メソッドにドラッグ&ドロップして関連付けます。それぞれ対応は以下のとおりです。
- Connectボタン→ - find:
- DisConnectボタン→ - disconnect:
- Checkボタン→ - check:
- LED ONボタン→ - ledOn:
- LED OFFボタン→ - ledOff:
これで、ボタンをタップすると対応したメソッドが呼び出されるようになります。
ViewController.mに処理実体を追加
ViewController.mを以下のように記述してください。
# import "ViewController.h"
# import "Konashi.h"

@interface ViewController ()

@end

@implementation ViewController

- (void)viewDidLoad {
    [super viewDidLoad];
    // Do any additional setup after loading the view, typically from a nib.

    [Konashi initialize];
}

- (void)didReceiveMemoryWarning {
    [super didReceiveMemoryWarning];
    // Dispose of any resources that can be recreated.
}

- (IBAction)find:(id)sender {
    [Konashi find];
}

- (IBAction)disconnect:(id)sender {
    [Konashi disconnect];
}

- (IBAction)check:(id)sender {
    NSLog(@"konashi connected = %d", [Konashi isConnected]);
    NSLog(@"konashi ready = %d", [Konashi isReady]);
    NSLog(@"connected module = %@", [Konashi peripheralName]);
}

- (IBAction)ledOn:(id)sender {
    KonashiResult setPinResult = [Konashi pinMode:KonashiLED2 mode:KonashiPinModeOutput];
    KonashiResult writePinResult = [Konashi digitalWrite:KonashiLED2 value:KonashiLevelHigh];

    NSLog(@"setPinMode = %@", setPinResult == KonashiResultSuccess ? @"Success": @"Failure");
    NSLog(@"write = %@", writePinResult == KonashiResultSuccess ? @"Success" : @"Failure");
}

- (IBAction)ledOff:(id)sender {
    KonashiResult setPinResult = [Konashi pinMode:KonashiLED2 mode:KonashiPinModeOutput];
    KonashiResult writePinResult = [Konashi digitalWrite:KonashiLED2 value:KonashiLevelLow];

    NSLog(@"setPinMode = %@", setPinResult == KonashiResultSuccess ? @"Success": @"Failure");
    NSLog(@"write = %@", writePinResult == KonashiResultSuccess ? @"Success" : @"Failure");
}

@end
動作確認
実機でアプリを動作させます。端末のBluetoothをONにしておくことをお忘れなく。
Connectボタンをタップすると接続先のKonashiのリストが表示されますので接続先を選びます。
しばらくすると接続が完了します。本来ならば準備完了のイベントKonashiEventReadyToUseNotificationが発火して次の処理へ繋げられるようなのですが自分の端末では接続先を選んだらすぐに発火してしまい準備完了していないという謎の挙動を示していましたので、準備完了を確認するためにCheckボタンを用意しました。CheckボタンをタップするとNSLogで接続状況や接続先Konashiのモジュール名などが確認できます。
準備完了が確認できましたらLED ONボタンをタップすると、Konashi上のLED2が点灯します。LED OFFボタンをタップすると、点灯中のLED2を消灯できます。


