はじめに
本記事はNihon University Advent Calendar 2023の10日目の記事になります。
先日、業務でリッチエディタを実装することになり、技術調査から始めLexicalでWYSIWYGエディタを作成しました(WYSIWYGとは、「What You See Is What You Get」の頭文字を取ったものであり、仕上がりを確認しながら編集が出来るという意味です)。会社で初めて採用するライブラリだったかつ、公式ドキュメントもそこまで整備されていなく内部実装を見に行く機会が多かったので、ちょっとだけ中身の動作原理を理解しました。
本記事では、最低限のリッチエディタを作成できる簡単なアプリケーションを作成しそれがどのように動いているのかを簡単に説明しようと思います。内容が多いので二本立てにしており、一本目はLexicalの基本的な説明、二本目で実装を見ていく記事になっています。Lexicalの基本的な事をご存じな方は二本目から見ていただければと思います。
Lexicalについて
Lexicalとは、Meta社が開発したWYSIWYGなテキストエディタを作るためのJavaScirptで作られたフレームワークです。
太字や斜体、順序付きリストや見出しといった文字を装飾するための機能が付いたエディタが作成でき、それ以外の拡張も容易です。このような機能をフルスクラッチで作成しようとするとDOMのことを考えざるを得ないですが、Lexicalではその辺もうまく隠蔽されておりDOMを意識せずリッチエディタが作成できます。
より詳細なLexicalについての説明は素晴らしい記事があるのでそちらを参照していただければと思います。
基本的な概念
今回紹介する内部実装を理解できるだけの最低限のLexicalの基本的な概念を説明していきます。
詳細はこちらをご覧ください。
EditorState
With Lexical, the source of truth is not the DOM, but rather an underlying state model that Lexical maintains and associates with an editor instance.
とあり、Lexicalの核の部分となります。このEditorStateは主に後述するNodeとSelectionと呼ばれる二つの状態を持ちます。
ユーザの編集状態を保存する場合には、このEditorState単位で保存します。
// editorStateのロード
const editorStateJSONString = getEditorStateDummy();
const editorState = editor.parseEditorState(editorStateJSONString);

// editorStateの保存
saveContentDummy(JSON.stringify(editor.getEditorState()));
Node
Nodes are a core concept in Lexical. Not only do they form the visual editor view, as part of the EditorState, but they also represent the underlying data model for what is stored in the editor at any given time. Lexical has a single core based node, called LexicalNode that is extended internally to create Lexical's five base nodes:
とあります。
特に、
the underlying data model
であり、ユーザの入力情報は主にNodeに変換され、Lexical(EditorState)の内部で保存されます。
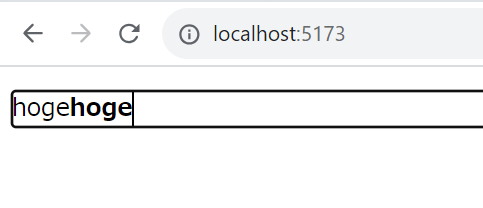
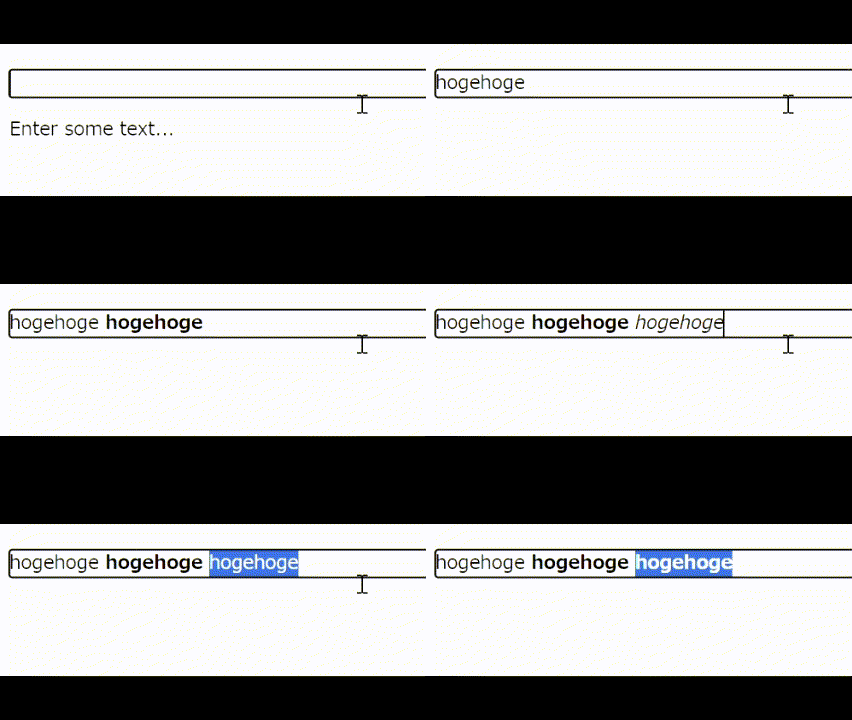
文字を入力すると、この部分のHTMLはこのようにレンダリングされます。
<div contenteditable="true" role="textbox" spellcheck="true" data-lexical-editor="true" style="user-select: text; white-space: pre-wrap; word-break: break-word;">
  <p class="editor-paragraph ltr" dir="ltr">
    <span data-lexical-text="true">hoge</span>
    <strong class="editor-textBold" data-lexical-text="true">hoge</strong>
  </p>
</div>
そして、EditorStateには次のようにNodeが格納されています。
new Map([
    [
        "root",
        {
            "__type": "root",
            "__parent": null,
            "__prev": null,
            "__next": null,
            "__key": "root",
            "__first": "2",
            "__last": "2",
            "__size": 1,
            "__format": 0,
            "__indent": 0,
            "__dir": "ltr",
            "__cachedText": "hogehoge"
        }
    ],
    [
        "2",
        {
            "__type": "paragraph",
            "__parent": "root",
            "__prev": null,
            "__next": null,
            "__key": "2",
            "__first": "3",
            "__last": "4",
            "__size": 2,
            "__format": 0,
            "__indent": 0,
            "__dir": "ltr"
        }
    ],
    [
        "3",
        {
            "__type": "text",
            "__parent": "2",
            "__prev": null,
            "__next": "4",
            "__key": "3",
            "__text": "hoge",
            "__format": 0,
            "__style": "",
            "__mode": 0,
            "__detail": 0
        }
    ],
    [
        "4",
        {
            "__type": "text",
            "__parent": "2",
            "__prev": "3",
            "__next": null,
            "__key": "4",
            "__text": "hoge",
            "__format": 1,
            "__style": "",
            "__mode": 0,
            "__detail": 0
        }
    ]
])
それぞれのノードは、parentやkey、next等を持ってます。
はい、細目で睨むと木構造が見えてきますね。このノードからDOMが構築できる理由もよく分かると思います。
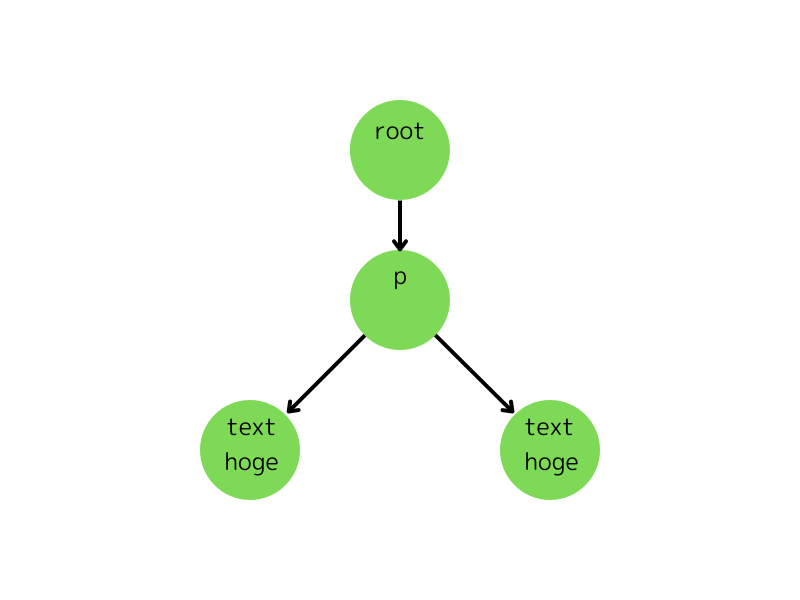
またformatという値も持っています。この値については次の記事で詳しくせつめいしますが、文字の装飾を決めるための値です。
Selection
https://lexical.dev/docs/concepts/selection
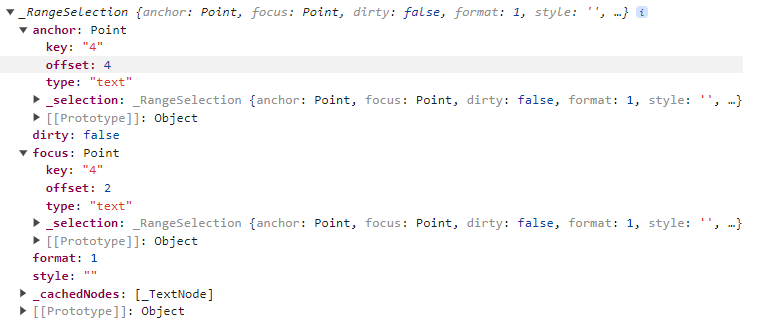
ユーザの選択範囲を管理する概念になります。キャレットもこれの一部に当たります。(object copyが出来なかったのでスクショですいません)
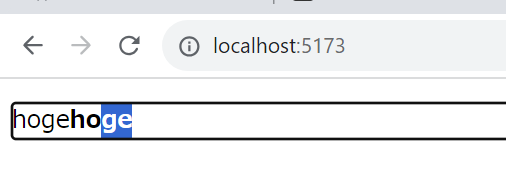
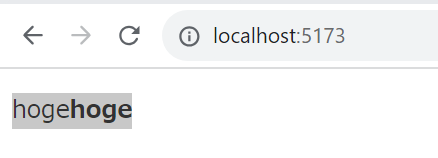
試しに先ほどのサンプル同様、選択してみましょう。
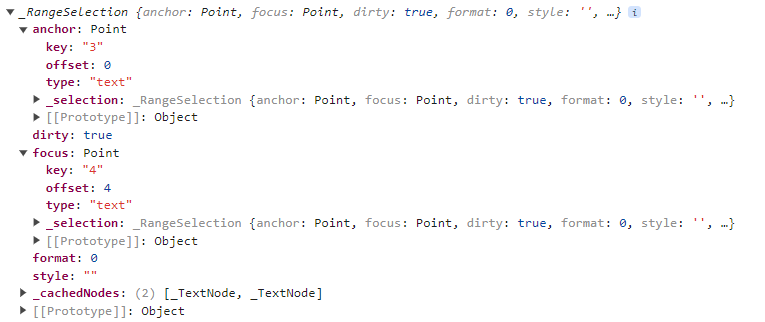
この場合、EditorStateは内部でこのようなSelectionを保持します。
このように、Selection(今回はRangeSelection)はanchor(選択範囲の始まり) -> focus(選択範囲の終わり)の位置をそれぞれ保持しています。そして、それらは「どのノード」の「offset」はいくつか?で保持しています。
Commands
Commands are a very powerful feature of Lexical that lets you register listeners for events like KEY_ENTER_COMMAND or KEY_TAB_COMMAND and contextually react to them wherever & however you'd like.
とあり、事前にコマンドを登録しておき(registerCommand)そのコマンドを実行指示(dispatchCommand)すると、事前に登録された関数が走るという流れになります。
公式の実装を貼っておきます。
const HELLO_WORLD_COMMAND: LexicalCommand<string> = createCommand();

editor.dispatchCommand(HELLO_WORLD_COMMAND, 'Hello World!');

editor.registerCommand(
  HELLO_WORLD_COMMAND,
  (payload: string) => {
    console.log(payload); // Hello World!
    return false;
  },
  LowPriority,
);
簡単に使ってみる
今回は、RichTextPluginを使って簡易的なエディタを作ってみたいと思います。
RichTextPluginに元から入っているコマンドしか使えないですが、ctrl+bで太字、ctrl+iで斜体等の装飾は動作します。
import { LexicalComposer } from "@lexical/react/LexicalComposer";
import { RichTextPlugin } from "@lexical/react/LexicalRichTextPlugin";
import { ContentEditable } from "@lexical/react/LexicalContentEditable";
import { HistoryPlugin } from "@lexical/react/LexicalHistoryPlugin";
import LexicalErrorBoundary from "@lexical/react/LexicalErrorBoundary";
import { theme } from "./theme";
function onError(error: Error) {
  console.error(error);
}
type InitialConfig = Parameters<typeof LexicalComposer>[0]["initialConfig"];

function App() {
  const initialConfig: InitialConfig = {
    namespace: "MyEditor",
    theme,
    onError,
  };

  return (
    <LexicalComposer initialConfig={initialConfig}>
      <RichEditor />
    </LexicalComposer>
  );
}

const RichEditor = () => {
  return (
    <RichTextPlugin
      contentEditable={<ContentEditable />}
      placeholder={<div>Enter some text...</div>}
      ErrorBoundary={LexicalErrorBoundary}
    />
  );
};

export default App;
凄いシンプルな記述ですね!
今は太字と斜体等が装飾可能ですが、コマンドやNodeを拡張することで自分の好きなように装飾が出来たりします。公式のPlayGroundでは、
- Heading
- Bullet List
- Order List
- Quote
- Font Size
- Color
- Background Color
等の装飾が可能になっています!
まとめ
Lexicalというライブラリを紹介し、簡単なRichEditorを使ってみました。本記事は簡単な紹介でしたが、次の記事ではどのように今回作成したエディタが動いているのかを
- Commandの登録・作成・発火
- Node→HTMLのレンダリングのされ方
- 太字や斜体等のフォーマットの仕方
の観点から紹介していきます。
