パワポより簡単にスライドを作りたくて…
開発ハンズオンセミナーをやっているます。セミナー資料はいつもパワポを使用して作成していました。でも、パワポだと次のような不便な点がありました。
- 資料をpdf化してSlideShareで公開していたたのですが、ハンズオン中に使用するコードのコピペができず、別途コピペ用のページをGitHubに用意していた…
- SlideShareでは画像が割れてしまうため、ローカル環境にDLしなければならない
- わかりやすくしようとして懲りすぎてしまうと、ごちゃごちゃして逆にわかりづらくなってしまう
などなど…
セミナーで使用するサンプルプロジェクトのコードはGitHubに置いていて、資料をREADME.mdにも書いています。マークダウンは上記のようなパワポの不便さを払拭する使いやすさがあります。
でもその一方で、全体を読み進めるにはスクロールしなければならないので、そのままではセミナーには使いにくいという欠点がありました。
__マークダウンをスライドにできたら便利だな~__と思って調べてみたところ、
Remarkに出会いました!
GitHub × Remark × Markdown = スライド完成!
使ったことない方向けに、簡単にそれぞれのサービスを紹介しておきます
| GitHub | ソフトウェア開発プロジェクトのためのソースコード管理サービス。 |
| Remark | GitHubを使用してマークダウンでスライドを作成するためのツール。 |
| Markdown | 文書を記述するための言語(軽量マークアップ言語)のひとつ。Qiitaもマークダウンですね! |
Remarkを使用してマークダウンで作成したスライドを、GitHubにcommitし、スライドとして公開することが可能です!
スライド作成方法を次に書いていますが、
- GitHubを既に使用している前提
- マークダウンの書き方を知っている前提
の前提のもと書いていますので、上記を良く知らないかたは少し調べてから呼んでみてください◎
スライド作成方法
1. 「index.html」と「sample.md」ファイルを作成する
コード解説は後で行いますので、下記の内容で作成してください
- 「index.html」は下記をコピーして作成したください
- 注意:ファイル名は必ずindex.htmlとしてください
<DOCTYPE html>
<html>
<head>
  <title>タイトル</title>
  <meta http-equiv="Content-Type" content="text/html; charset=UTF-8"/>
    <style type="text/css">
      @import url(https://fonts.googleapis.com/css?family=Ubuntu+Mono:400,700,400italic);
      /* Chromeでスライドを印刷するための設定 */
      @page {
          size: 1210px 681px;
          margin: 0;
      }
      @media print {
          .remark-slide-scaler {
              width: 100% !important;
              height: 100% !important;
              transform: scale(1) !important;
              top: 0 !important;
              left: 0 !important;
          }
      }
      /* 全体のスタイル */
      body { font-family: 'arial', sans-serif; }
      h1, h2, h3 {
        color: #006cb4;
        font-weight: 700;
      }
      .remark-slide-content h1 { font-size: 3em; }
      .remark-slide-content h2 { font-size: 2em; }
      .remark-slide-content h3 { font-size: 1.4em; }
      .footnote {
        position: absolute;
        bottom: 1em;
      }
      /* リンク */
      a, a > code {
        color: #ff1a75;
        text-decoration: none;
      }
      /* コード */
      code {
        font-family: 'Ubuntu Mono';
        border-radius: 5px;
        -web-border-radius: 5px;
      }
      .remark-code { background: #e7e8e2; font-size: 0.8em; border: 1px solid #555; display: block; }
      .remark-inline-code { background: #e7e8e2; }
      .remark-code-line-highlighted { background-color: #f5ff49; }
      .pull-left {
        float: left;
        width: 47%;
      }
      .pull-right {
        float: right;
        width: 47%;
      }
      .pull-right ~ p {
        clear: both;
      }
      /* タイトルページ */
      .inverse {
        background: #006cb4;
        color: #CCC;
      }
      .inverse h1, .inverse h2 {
        color: #f3f3f3;
        line-height: 1em;
      }
      /* 左右二段表示 */
      .left-column {
        width: 48%;
        float: left;
      }
      .right-column {
        width: 48%;
        float: right;
      }
    </style>
</head>
<body>
  <!-- Remarkjs -->
  <script src="https://remarkjs.com/downloads/remark-latest.min.js" type="text/javascript"></script>
  <script type="text/javascript">
    // sample.md
    var slideshow = remark.create({sourceUrl: "sample.md"});
  </script>
</body>
</html>
- 「sample.md」は下記リンク先をコピーして作成してください
https://raw.githubusercontent.com/natsumo/SampleSlide/master/sample.md

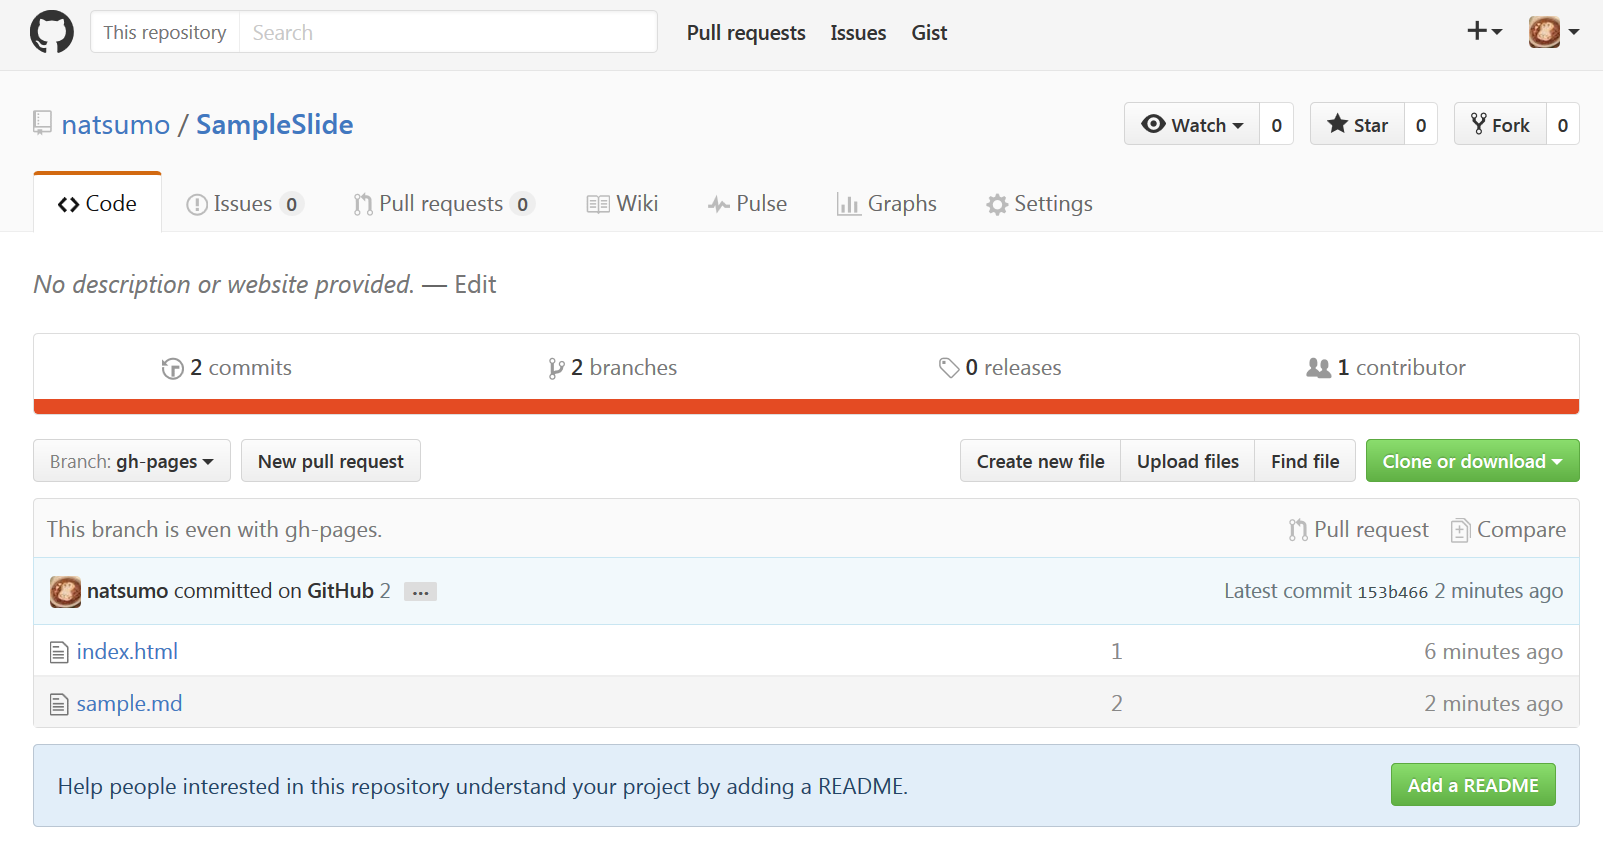
2. GitHubにプロジェクトを作成し、「index.html」と「sample.md」をcommitする
- 任意のプロジェクト名でGitHubにプロジェクトを作成し、先ほど作成した2つのファイルをcommitします
3. masterブランチから「gh-pages」ブランチを作成する
- 作成したgh-pagesブランチにあるマークダウンファイルが公開されます
- 作業はこれだけ!!簡単!
4. 完成!
- 「
https://ユーザー名.github.io/リポジトリ名」にアクセスしてみましょう! - 注意:ブラウザにブロックされる可能性があります
- 完成版サンプルを作成しましたので、活用してください
- 例)https://natsumo.github.io/SampleSlide/
コード解説
このサンプルでは、開発ハンズオンセミナーの資料を作成する上で、最低限必要な内容をまとめています
index.html
- CSSを書いてスライドのスタイルを決めています ※後ほど説明します
<meta http-equiv="Content-Type" content="text/html; charset=UTF-8"/>
  <style type="text/css">
  /* ここに書いています */

  </style>
- Remarkを使用できるようにします
<!-- Remarkjs -->
<script src="https://remarkjs.com/downloads/remark-latest.min.js" type="text/javascript"></script>
- マークダウンを読み込みます
<script type="text/javascript">
  // sample.md
  var slideshow = remark.create({sourceUrl: "sample.md"});
</script>
sample.md
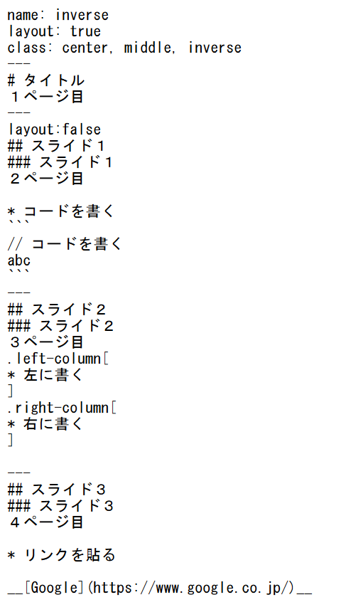
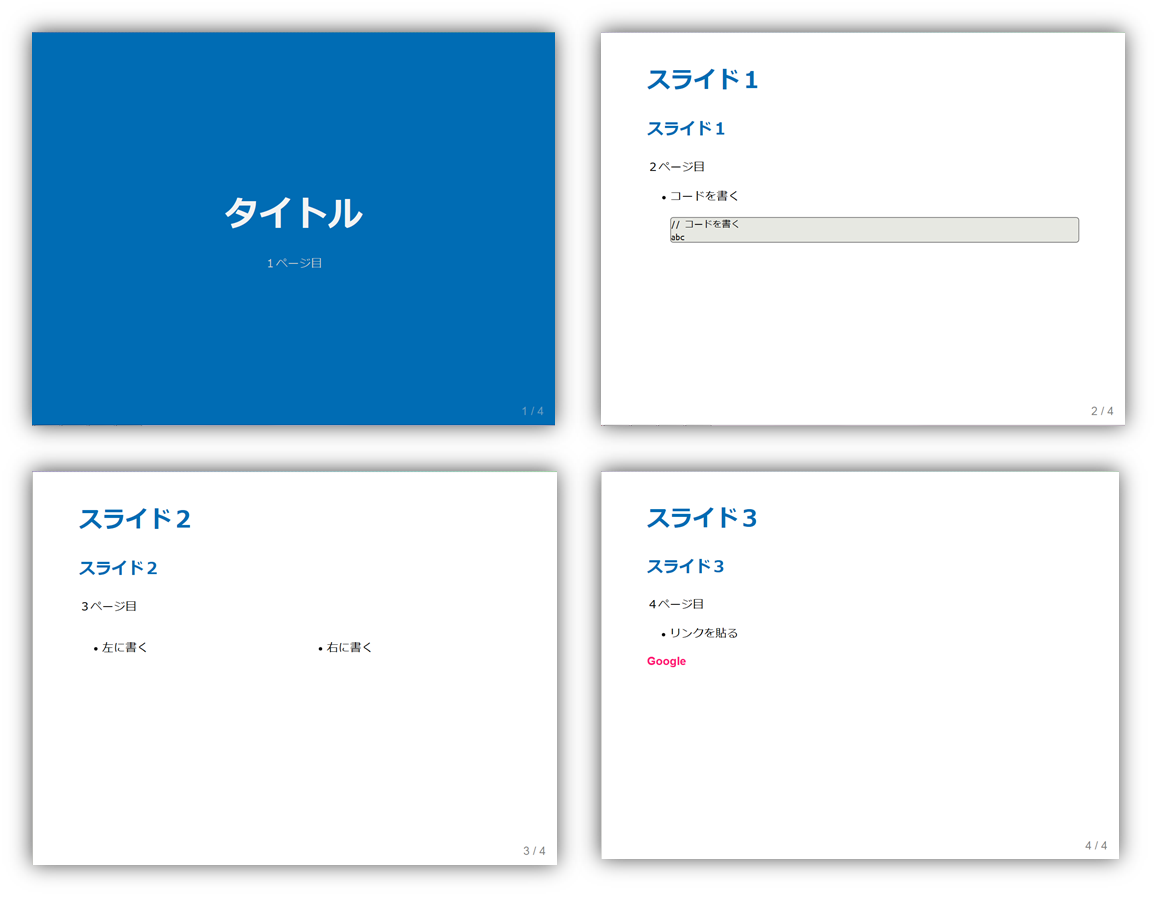
4枚サンプルスライドを用意しました
- タイトル
- スライド1:コード
- スライド2:左右二段表示
- スライド3:リンク
タイトル
name: inverse
layout: true
class: center, middle, inverse
---
# タイトル
1ページ目
上記のように書くとindex.htmlのCSSに書いた、下記の内容が反映されます
/* タイトルページ */
.inverse {
  background: #006cb4;
  color: #CCC;
}
.inverse h1, .inverse h2 {
  color: #f3f3f3;
  line-height: 1em;
}
スライド1:コード
タイトル画面の次の画面には
layout:falseを書く必要があります
---
layout:false
## スライド1
### スライド1
2ページ目

* コードを書く
```text
// コードを書く
abc
```
上記のように書くとindex.htmlのCSSに書いた、下記の内容が反映されます
/* コード */
code {
  font-family: 'Ubuntu Mono';
  border-radius: 5px;
  -web-border-radius: 5px;
}
.remark-code { background: #e7e8e2; font-size: 0.8em; border: 1px solid #555; display: block; }
.remark-inline-code { background: #e7e8e2; }
.remark-code-line-highlighted { background-color: #f5ff49; }
.pull-left {
  float: left;
  width: 47%;
}
.pull-right {
  float: right;
  width: 47%;
}
.pull-right ~ p {
  clear: both;
}
スライド2:左右二段表示
---
## スライド2
### スライド2
3ページ目
.left-column[
* 左に書く
]
.right-column[
* 右に書く
]
上記のように書くとindex.htmlのCSSに書いた、下記の内容が反映されます
/* 左右二段表示 */
.left-column {
  width: 48%;
  float: left;
}
.right-column {
  width: 48%;
  float: right;
}
スライド3:リンク
---
## スライド3
### スライド3
4ページ目

* リンクを貼る

__[Google](https://www.google.co.jp/)__
上記のように書くとindex.htmlのCSSに書いた、下記の内容が反映されます
/* リンク */
a, a > code {
  color: #ff1a75;
  text-decoration: none;
}
最後に
何で今まで使わなかったんだろう…と思うぐらい簡単だし、見やすい!!
これからはこれで資料作成頑張ります!!
スライドをChromeで印刷できるようになりました!(20170728追記)
index.htmlに以下のコードを記述することでChromeでスライドの印刷が可能になりました◎お試しください!
@page {
  size: 1210px 681px;
  margin: 0;
}
@media print {
  .remark-slide-scaler {
    width: 100% !important;
    height: 100% !important;
    transform: scale(1) !important;
    top: 0 !important;
    left: 0 !important;
  }
}
参考
実際にRemarkで作ってみたセミナー資料
- 【Swift編】クーポン配信アプリを作ろう!


