1.herokuからGoogleDriveを操作する
現在herokuで運用中のTwitter botがあります。
ツイートに使用する画像やCSVファイルのデータは、元々herokuにデプロイしてfsモジュールで読み込んでいましたが、下記の理由からそれらのデータをGoogleDriveから取得するように変更しました。
・画像・CSVファイルを編集する度にデプロイする必要がある
・HerokuのSlug Size(Slugは実行モジュール的な何か)が増大する
(1)botで行っているGoogleドライブの操作
以下の処理を行っています。
①ファイルIDの取得
②画像データの取得
③SpreadSheetデータの取得
④SpreadSheetデータの更新
⑤Documentデータの取得
⑥Documentデータの削除
⑦Documentデータの更新
(2)bot本体の仕様
以前作成した下記の星座占いbotの仕様を改善する形で実装しています。
[参考]【Node.js+heroku】Twitter星座占いbot作成
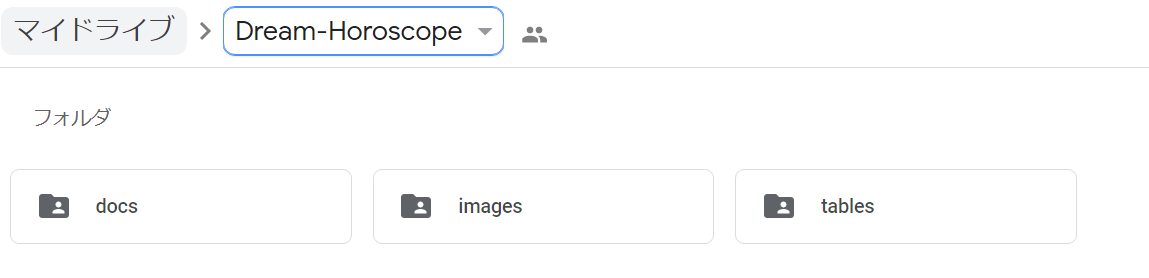
(3)設計書・プログラム
最新の設計書・プログラム等は下記のGoogleDriveに格納しています。
(過去の画像データ等が残ってしまっているため、GitHubは非公開設定です)
2.設計
詳しくは設計書参照なのですが、簡単に説明します。
基本的にファイルIDを取得してからなんやかんやします。
(1)画像データを利用する場合
①画像データのファイルIDの取得
②ファイルから画像データを取得
③画像データをツイートに貼付してツイート送信
(2)SpreadSheetデータを利用する場合
①SpreadSheetデータのファイルIDの取得
②ファイルから文字データを取得
③文字データよりツイート内容を編集してツイート送信
(3)SpreadSheetデータを更新する場合
①SpreadSheetデータのファイルIDの取得
②更新データの編集
③SpreadSheetデータの更新
(4)Documentデータを更新する場合(削除→更新)
①DocumentデータのファイルIDの取得
②Documentデータの最終文字位置を取得
③Documentデータの削除(1桁目~②で取得した最終文字位置まで)
④更新データの編集
⑤Documentデータの更新
3.実装
(1)GoogleCloudPlatformのAPI呼出し
詳しくはプログラム参照なのですが、APIを呼び出す関数は本体から以下のソースに切り出しています。
画像データはダウンロードするのではなく、バイナリデータを取得(responseTypeにarraybufferを指定)して(場合によっては編集を加えて)ツイートに使用しています。
"use strict";
//----------external function declaration----------
const async = require('async');
const {google} = require('googleapis');
const subs = require('./subFunc');

//----------instance declaration----------
const google_auth = new google.auth.GoogleAuth({
    scopes: ['https://www.googleapis.com/auth/drive', 'https://www.googleapis.com/auth/documents'],
});
const docs   = new google.docs({version: 'v1'});
const drive  = new google.drive({version: 'v3'});
const sheets = new google.sheets({version: 'v4'});

//----------GoogleCloudPlatform functions----------
//①ファイルIDの取得
function getFileID(folder_id, search_file_name) {
    return new Promise(async function(resolve, reject) {
        const params = {q: `'${folder_id}' in parents and trashed = false`, auth : google_auth};
        try {
            const res = await drive.files.list(params);
            const files = res.data.files;
            if (files.length) {
                files.map((file, index) => {
                    if (file.name == search_file_name) {
                        resolve(file.id);
                    } else if (files.length == (index + 1)){
                        reject("File not found:" + folder_id + "/" + search_file_name);
                    }
                });
            } else {
                reject("No files found:" + folder_id);
            }
        } catch (error) {
            reject("File ID get error." + subs.editErrMsg(error));
        }
    });
}

//②画像データの取得
function getImageData(file_id) {
    return new Promise(async function(resolve, reject) {
        try {
            const res = await drive.files.get({fileId: file_id, alt: 'media', auth: google_auth}, {responseType: 'arraybuffer'});
            resolve(Buffer.from(res.data));
        } catch (error) {
            reject("Image get error." + subs.editErrMsg(error));
        }
    });
}

//③SpreadSheetデータの取得
function getSheetData(file_id, arg_range, dimension) {
    return new Promise(async function(resolve, reject) {
        try {
            const params = {spreadsheetId: file_id, range: arg_range, majorDimension: dimension, auth: google_auth};
            const res = await sheets.spreadsheets.values.get(params);
            const get_data = res.data.values;
            if (get_data.length) {
                resolve(get_data);
            } else {
                reject("No files found:" + file_id);
            }
        } catch (error) {
            reject("Sheet get error." + subs.editErrMsg(error));
        }
    });
}

//④SpreadSheetデータの更新
function updateSheetData(file_id, arg_range, arg_value) {
    return new Promise(async function(resolve, reject) {
        try {
            const params = {spreadsheetId: file_id, range: arg_range, valueInputOption: "USER_ENTERED", auth: google_auth,
                            resource: {values: arg_value} };
            await sheets.spreadsheets.values.update(params);
            resolve("Succeeded");
        } catch (error) {
            reject("Sheet update error." + subs.editErrMsg(error));
        }
    });
}

//⑤Documentデータの取得(最終文字位置を取得)
function getDocLastIndex(file_id) {
    return new Promise(async function(resolve, reject) {
        let res_length = '';
        try {
            const res = await docs.documents.get({documentId: file_id, auth: google_auth});
            res_length = res.data.body.content.length;
            resolve(res.data.body.content[res_length - 1].endIndex -1);
        } catch (error) {
            reject("Doc last index get error." + subs.editErrMsg(error));
        }
    });
}

//⑥Documentデータの削除
function deleteDoc(file_id, end_index) {
    return new Promise(async function(resolve, reject) {
        try {
            await docs.documents.batchUpdate({
                documentId: file_id,
                requestBody: {
                    requests: [{deleteContentRange: {'range': {startIndex: 1,endIndex: end_index,}}}]
                },
                auth: google_auth
            });
            resolve("Succeeded");
        } catch (error) {
            reject("Doc delete error." + subs.editErrMsg(error));
        }
    });
}

//⑦Documentデータの更新
function updateDoc(file_id, write_text) {
    return new Promise(async function(resolve, reject) {
        try {
            await docs.documents.batchUpdate({
                documentId: file_id,
                requestBody: {
                    requests: [{insertText: {location: {index: 1}, text: write_text}}]
                },
                auth: google_auth
            });
            resolve("Succeeded");
        } catch (error) {
            reject("Doc update error." + subs.editErrMsg(error));
        }
    });
}
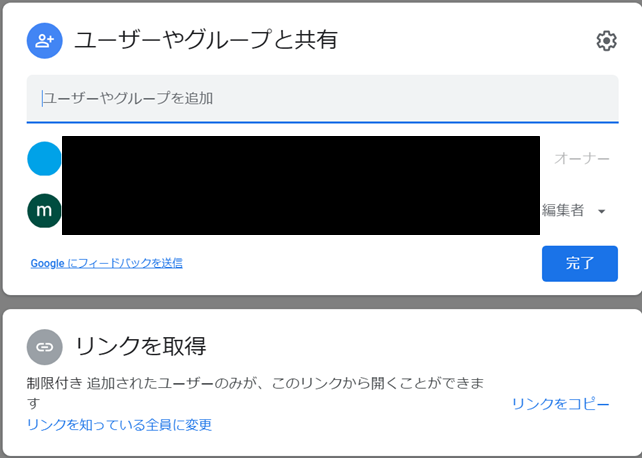
(2)使用するフォルダの共有設定
データ格納先のフォルダは、GCPサービスアカウントからアクセスできるように、GCPサービスアカウントを共有ユーザーに追加しておく必要があります。
①フォルダを選択
②「共有」を選択
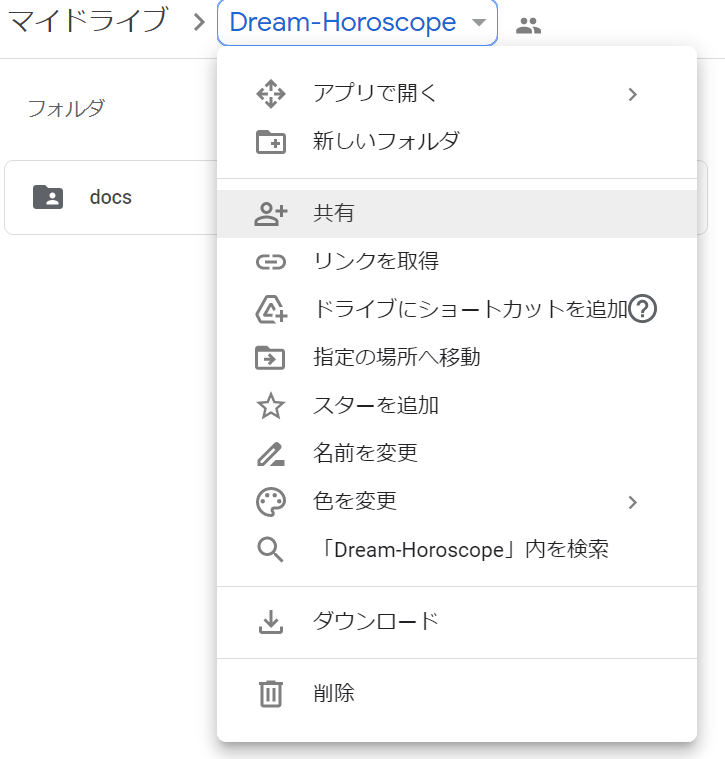
③GCPサービスアカウントを追加する
(3)herokuへのAPIキー設定
GCPサービスアカウントキーはJSON形式になっているので、管理画面からそのままベタ貼りだと認証できません。
一工夫が必要です。
若干違う手順で設定しましたが、ほぼ下記のサイトを参考に設定しました。
[参考]Heroku で Google Cloud API の認証を通す方法
①APIキー設定
APIキーはherokuのコンフィグ管理画面から追加しています。
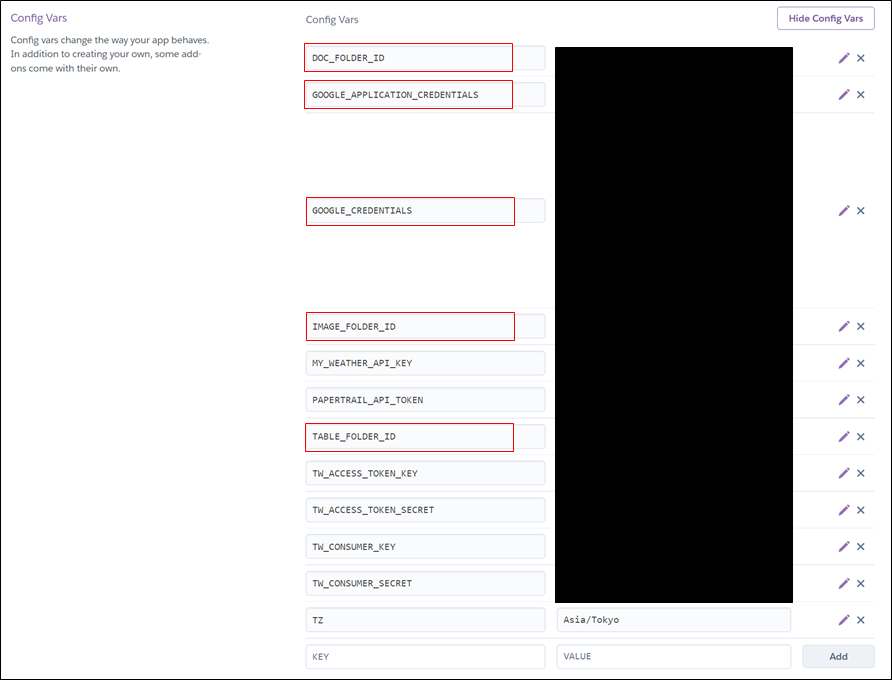
・GOOGLE_APPLICATION_CREDENTIALS:/app/google-credentials.json
・GOOGLE_CREDENTIALS:GCPサービスアカウントキー(ベタ貼り)
・DOC_FOLDER_ID:GoogleDriveのドキュメントフォルダのフォルダID
・TABLE_FOLDER_ID:GoogleDriveのテーブルフォルダのフォルダID
・IMAGE_FOLDER_ID:GoogleDriveの画像フォルダのフォルダID
②.profileファイルの作成
下記の内容で作成してデプロイします。
echo ${GOOGLE_CREDENTIALS} > /app/google-credentials.json
③即時反映したい場合
.profileファイルが実行されるのは次回のdyno再起動時なので、即時反映したい場合は下記の手順が必要。
heroku run bash
echo ${GOOGLE_CREDENTIALS} > /app/google-credentials.json
4.参考サイト
(1)GoogleCloudPlatform API設定関連
[参考]Google APIを利用するためのサービスアカウントの設定(認証)
[参考]APIキー、OAuthクライアントID、サービスアカウントキーの違い:Google APIs
[参考(再掲)]Heroku で Google Cloud API の認証を通す方法
(1)GoogleCloudPlatform APIの利用
①画像データの取得
[参考]Node.jsでGoogle Drive上のファイルをダウンロードする (Google Drive API v3)
[参考]Downloading an image from Drive API v3 continuously gives corrupt images. How should I decode the response from the promise?
[参考]バイナリデータの送信と受信 - Web API - MDN
②SpreadSheetの操作
[参考]【Node.js + Sheets API v4】Googleスプレッドシートを読み書きする
[参考]Google Sheets APIでセルの値を読み込む方法
③Documentの操作
[参考]Insert, delete, and move text | Google Docs API | Google Developers
[参考]Creating a node script that can write to google docs