前回の記事はこちら
今回は、ロビー画面などを作っていきます。
記事を続けて読んでいない人でも大丈夫です。
Lobbyを作る
UIのセット
これは好きにUIの場所などは変えてもらって構いません。
まず、LobbySceneという名前で新しいシーンを作ってください。
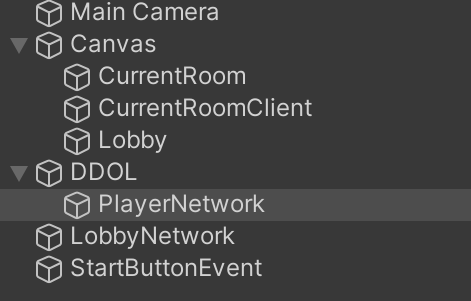
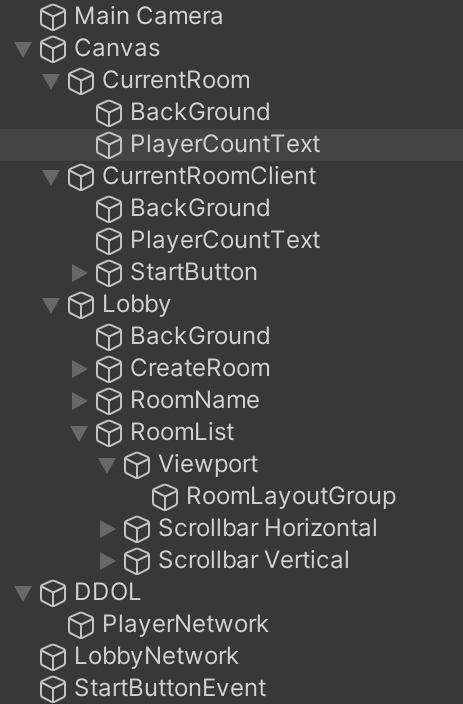
次に、LobbySceneにCanvasを配置し、CanvasにLobby,CurrentRoom,CurrentRoomClientという名前のEmptyオブジェクト(?)をそれぞれつっこみます。ただし、Lobbyを一番下に持ってきてください。
Lobby
DDOL,LobbyNetwork,StarButtonEventという名前でEmptyオブジェクトを作ってください(Canvasの外に)。DDOLの中にPlayerNetworkという名前でEmptyオブジェクトを作ります。
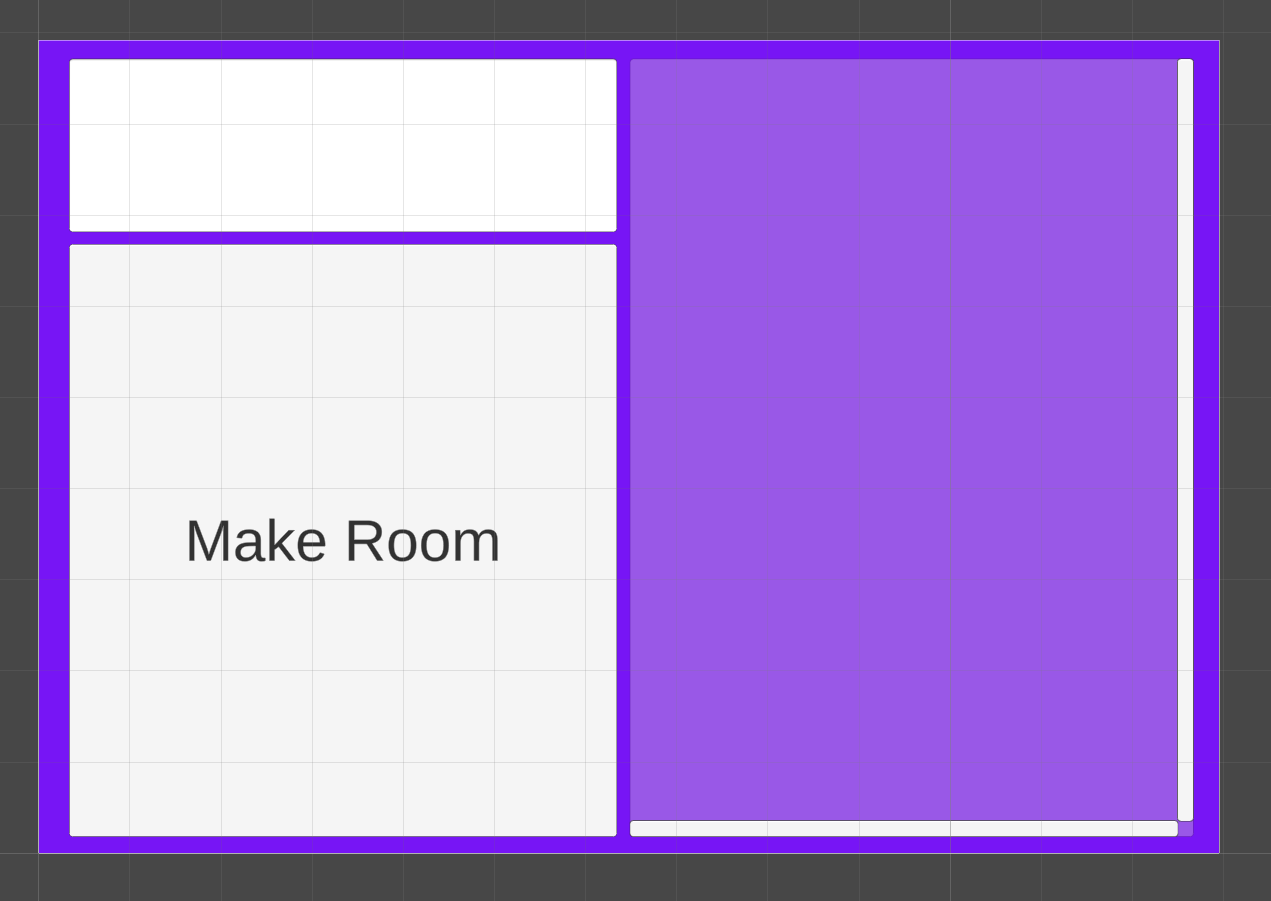
LobbyにBackGroundという名前でUIのImageオブジェクトを追加し、背景っぽくなるように全体に広げてください。色は自由に決めてください。
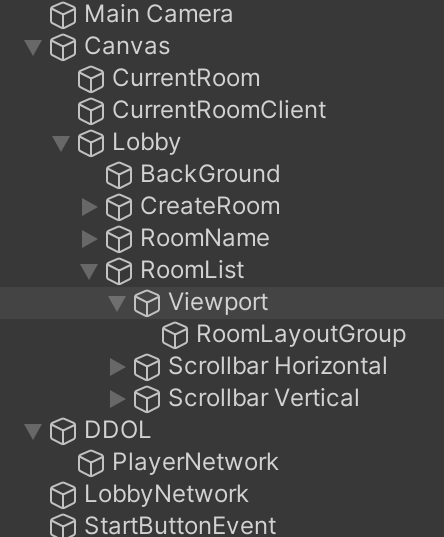
次に、UIのScrollViewオブジェクト、Buttonオブジェクト、InputFieldオブジェクトをそれぞれRoomList、CreateRoom、RoomNameという名前で作ってください。ただし、RoomListにくっついているViewPortにくっついているContentというオブジェクトは名前をRoomLayoutGroupに変えてください。下のようになっていればOKです。
RoomNameのプレースフォルダは削除して、ボタンのテキストはMake Roomにしてみました。
最後に、ProjectのAssetsにプレファブとして、ButtonオブジェクトをRoomListingという名前で作成してください。
CurrentRoom
Lobbyの時と同じように、BackGroundを作ってください。
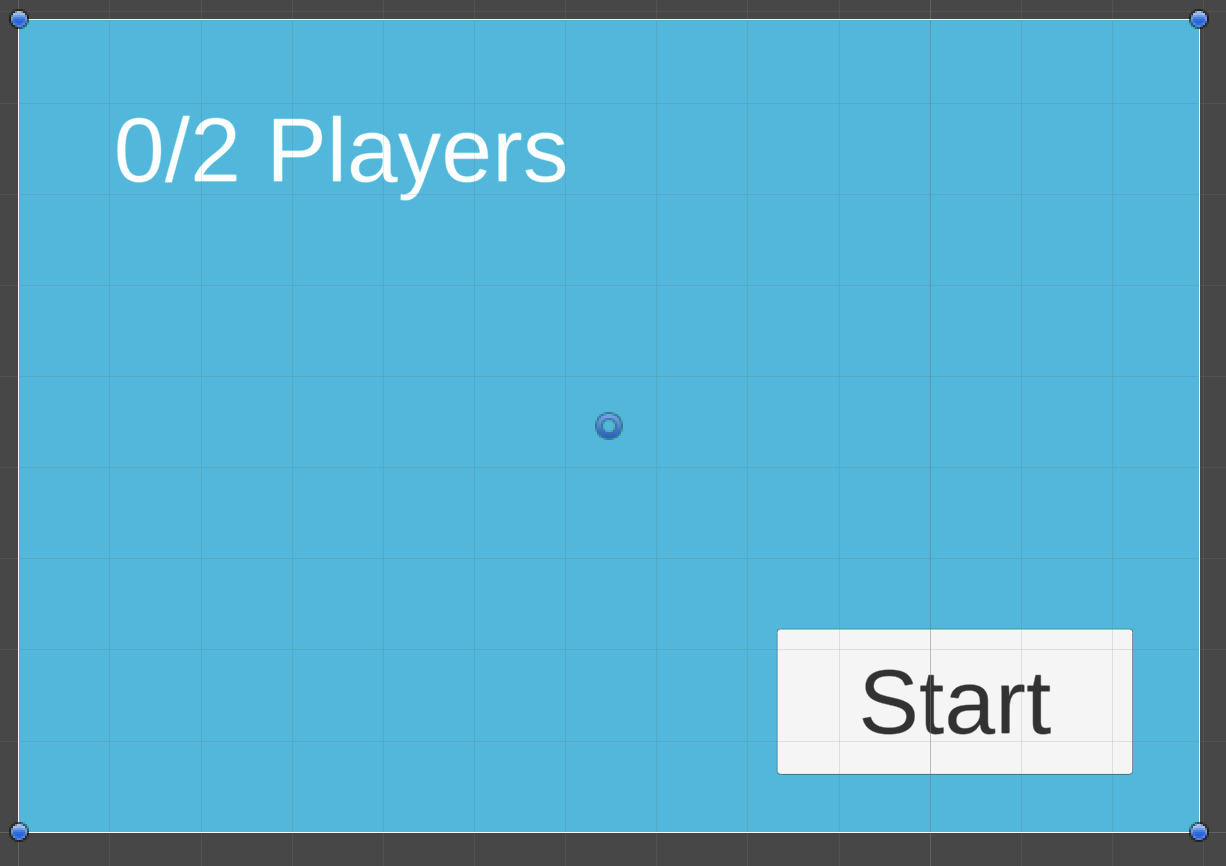
そうしたら、PlayerCountTextという名前でTextオブジェクト、StarButtonという名前でButtonオブジェクトを作ってください。
StartButtonのテキストはStartにして、PlayerCountTextのテキストは"0/2 Players"にしました。Lobbyオブジェクトを非アクティブにすると下のようになります。
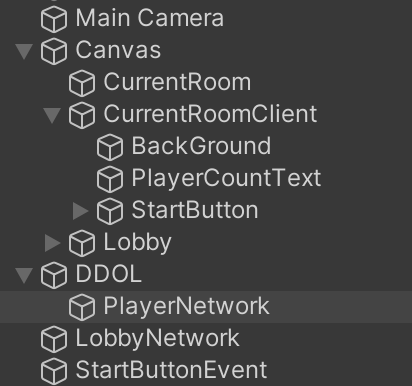
CurrentRoomClient
CurrentRoomの子オブジェクトを丸々コピーしてください。その後、StartButtonだけ削除してください。
最終的にはこのようになると思います。
こちらのYoutubeを参考にさせていただきました。
スクリプト
StartButtonは非アクティブにしてください。
次のようにスクリプトを作ってください。
なお、時々出てくるTMP_Textという型はTextMeshProを使っていない人はTextに変えてください。
using UnityEngine;

public class DDOL : MonoBehaviour
{
    // Start is called before the first frame update
    private void Awake()
    {
        DontDestroyOnLoad(this);
    }
}
using UnityEngine;

public class PlayerNetwork : MonoBehaviour
{
    public static PlayerNetwork Instance;
    public string PlayerName { get; private set; }

    // Start is called before the first frame update
    private void Awake()
    {
        Instance = this;

        PlayerName = "Distul#" + Random.Range(1000, 9999);
    }
}
using System.Collections;
using System.Collections.Generic;
using UnityEngine;
using Photon.Pun;
using Photon.Realtime;

public class LobbyNetwork : MonoBehaviourPunCallbacks
{
    // Start is called before the first frame update
    private void Start()
    {
        print("Connecting to server...");
        PhotonNetwork.ConnectUsingSettings();
    }

    public override void OnConnectedToMaster()
    {
        print("Connected to master.");
        PhotonNetwork.NickName = PlayerNetwork.Instance.PlayerName;

        PhotonNetwork.JoinLobby(TypedLobby.Default);
    }

    public override void OnJoinedLobby()
    {
        print("Joined lobby.");
    }
}
using System.Collections;
using System.Collections.Generic;
using Photon.Pun;
using Photon.Realtime;
using UnityEngine;
using UnityEngine.UI;
using TMPro;

public class CreateRoom : MonoBehaviourPunCallbacks
{
    [SerializeField]
    private TMP_Text _roomName;
    public TMP_Text RoomName
    {
        get { return _roomName; }
    }

    [SerializeField]
    private GameObject _lobby;
    public GameObject Lobby
    {
        get { return _lobby; }
    }

    [SerializeField]
    private GameObject _currentRoom;
    public GameObject CurrentRoom
    {
        get { return _currentRoom; }
    }

    [SerializeField]
    private GameObject _currentRoomClient;
    public GameObject CurrentRoomClient
    {
        get { return _currentRoomClient; }
    }

    public void OnClick_CreateRoom()
    {
        if (PhotonNetwork.CreateRoom(RoomName.text, new RoomOptions() { MaxPlayers = 2}))
        {
            print($"create room({RoomName.text}) successfully sent.");

            Lobby.SetActive(false);
            CurrentRoomClient.SetActive(false);
            CurrentRoom.SetActive(true);
        }
        else
        {
            Debug.LogError("create room failed to send.");
        }
    }

    public override void OnCreateRoomFailed(short returnCode, string message)
    {
        Debug.LogError("create room failed: " + message);
    }

    public override void OnCreatedRoom()
    {
        print("Room created successfully.");
    }
}
using System.Collections;
using System.Collections.Generic;
using UnityEngine;
using UnityEngine.UI;
using Photon.Pun;
using Photon.Realtime;
using TMPro;

public class RoomLayoutGroup : MonoBehaviourPunCallbacks
{
    public GameObject RoomListingPrefab;

    public override void OnRoomListUpdate(List<RoomInfo> roomList)
    {
        foreach(Transform child in this.transform)
        {
            Destroy(child.gameObject);
        }

        foreach(RoomInfo room in roomList)
        {
            if (room.PlayerCount >= 2)
                continue;

            GameObject roomListing = Instantiate(RoomListingPrefab, new Vector3(5f, 0f, 0f), Quaternion.identity, this.transform);
            roomListing.transform.Find("Text (TMP)").gameObject.GetComponent<TMP_Text>().text = room.Name;
        }
    }
}
using System.Collections;
using System.Collections.Generic;
using UnityEngine;
using Photon.Pun;
using TMPro;

public class RoomListing : MonoBehaviour
{
    public GameObject Lobby;
    public GameObject CurrentRoom;
    public GameObject CurrentRoomClient;

    private void Start()
    {
        Lobby = GameObject.Find("Lobby");
        CurrentRoom = GameObject.Find("CurrentRoom");
        CurrentRoomClient = GameObject.Find("CurrentRoomClient");
    }

    public void OnClick_JoinRoom()
    {
        string roomName = this.transform.Find("Text (TMP)").gameObject.GetComponent<TMP_Text>().text;
        PhotonNetwork.JoinRoom(roomName);

        Lobby.SetActive(false);
        CurrentRoom.SetActive(false);
        CurrentRoomClient.SetActive(true);
    }
}
using System.Collections;
using System.Collections.Generic;
using UnityEngine;
using UnityEngine.UI;
using Photon.Pun;
using TMPro;

public class CurrentRoom : MonoBehaviour
{
    [SerializeField]
    private TMP_Text _playerCountText;
    public TMP_Text PlayerCountText
    {
        get { return _playerCountText; }
    }

    public GameObject StartButtonObj;

    private void Update()
    {
        if (PhotonNetwork.CurrentRoom == null)
            return;

        int playerCount = PhotonNetwork.CurrentRoom.PlayerCount;
        PlayerCountText.text = playerCount + "/2 Players";

        if (StartButtonObj == null)
            return;

        if(playerCount == 2)
        {
            StartButtonObj.SetActive(true);
        }
        else
        {
            StartButtonObj.SetActive(false);
        }
    }
}
using System.Collections;
using System.Collections.Generic;
using UnityEngine;
using UnityEngine.SceneManagement;
using Photon.Pun;

public class StartButton : MonoBehaviour
{
    private PhotonView photonViewControl;

    private void Start()
    {
        photonViewControl = this.GetComponent<PhotonView>();
    }

    public void OnClick_StartGame()
    {
        bool isStartGame = true;
        photonViewControl.RPC("SendFunc", RpcTarget.All, isStartGame);
        SceneManager.LoadScene("GameScene"); //ゲーム画面のシーンの名前を指定してください。
    }

    [PunRPC]
    private void SendFunc(bool isStartedGame)
    {
        if (isStartedGame)
            SceneManager.LoadScene("GameScene");
    }
}
以上です。
まず、DDOL.cs、PlayerNetwork.cs、LobbyNetwork.csをそれぞれDDOL、PlayerNetwork、LobbyNetworkにアタッチしてください。
次に、CreateRoom.csをLobbyの子オブジェクトのCreateRoomにアタッチしてください。CreateRoom.csのRoomNameにはRoomNameオブジェクトの子オブジェクトTextAreaのTextを、Lobby、CurrentRoom、CurrentRoomClientにはそれぞれLobby、CurrentRoom、CurrentRoomClientをつっこんで下さい。
RoomLayoutGroup.csをLobbyの子オブジェクトのRoomListの子オブジェクトのViewportの子オブジェクトのRoomLayoutGroupにアタッチしてください。
RoomListingにはプレファブ化されたRoomListingを入れてください。
RoomListing.csをプレファブのRoomListingにアタッチしてください。
CurrentRoom.csをCurrentRoomにアタッチしてください。
PlayerCountTextには子オブジェクトのPlayerCountTextを、StartButtonObjには子オブジェクトのStartButtonを入れてください。
CurretRoom.csをCurrentRoomClientにアタッチしてください。
同じくPlayerCountTextには子オブジェクトのPlayerCountTextを入れてください。ただし、StartButtonObjはNoneのままにしてください。
これで終了です。
ビルドして、二つ実行してみると、動くはずです。
次回は、ゲームシーンの方に戻ります。
次回の記事はこちら