iOSアプリにおけるHUD(HeadUp-Display)を自作するためのライブラリを作ってみた
こんにちは、natmarkです。
今回、HUDMakerKitというHUDを自作するためのライブラリを作ってみたので、そちらを紹介します。
HUD(HeadUp-Display)とは
よくみる画面上にポップアップして、インジゲータなどを表示するやつです。
iOSでこのHUDを実装したいとき、以下のようなライブラリがよく使われます。
単純にくるくるを表示するだけであれば、上のようなライブラリを使うことで簡単に実現できますが、凝ったアニメーション付きのHUDを作ろうと思うと、自作する必要がでてきます。
そこで、凝ったアニメーション付きHUDの実装を助けるライブラリとして、アニメーションの描画をシンプルな描画関数で行えるProcessingKitを用いて作成してみました。
作ったもの
HUDMakerKit: https://github.com/natmark/HUDMakerKit
ProcessingKitを利用し、シンプルな描画関数でアニメータブルなHUDを実装できるようになっています。
ProcessingKitの説明はこちら
サンプル

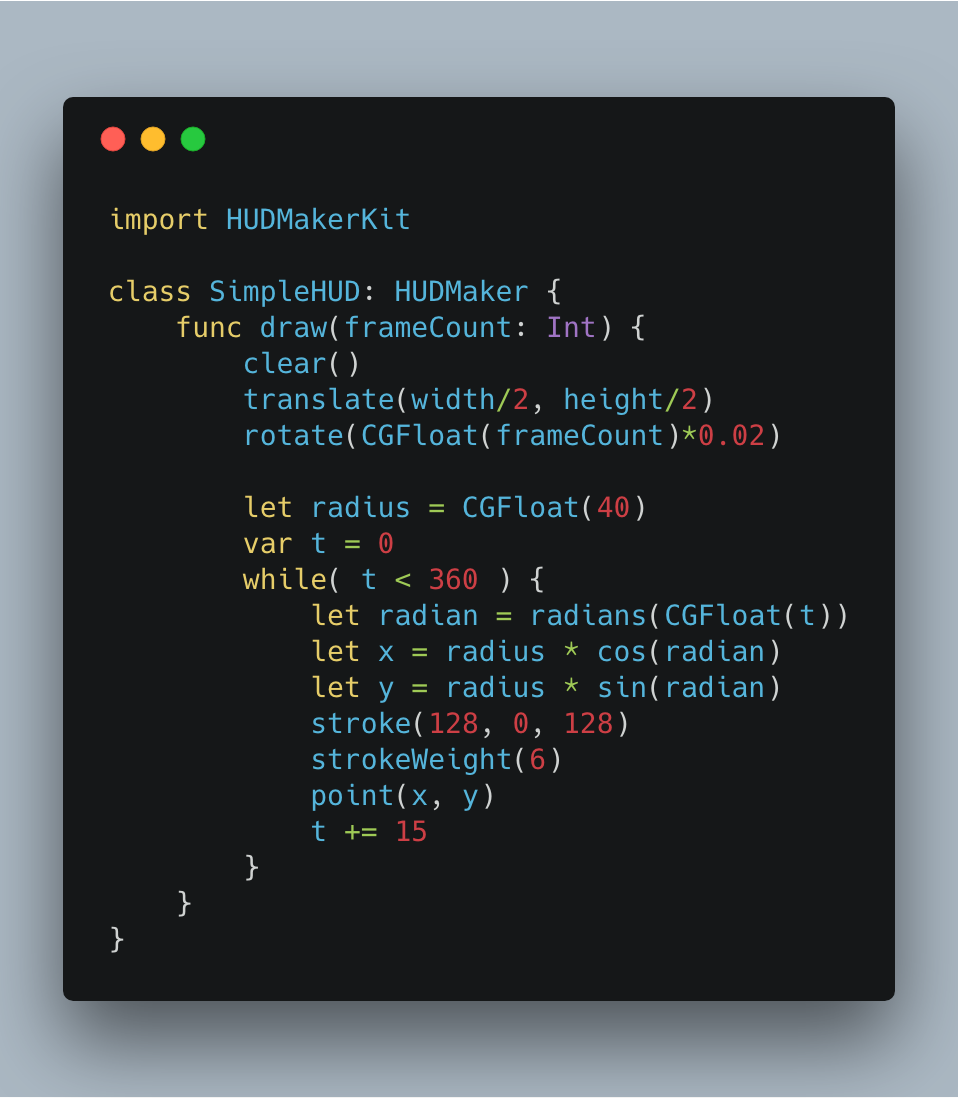
例えば、上のような動きをするHUDを作りたい場合、下のようなコードを書くことで実装可能です。

見慣れない関数が含まれていますが、clear()やtranslate()、point()などがProcessingKitが提供している描画関数になります。
ProcessingKitでは、Processingというプログラミング言語の描画関数を同じインタフェースで提供しているため、このようなシンプルな構文で描画や図形変換を行うことができます。
導入
CarthageもしくはCocoaPodsを使用して導入することができます。
Carthageを利用する場合
github "natmark/HUDMakerKit" ~> 0.2.4
$ carthage update --platform iOS --no-use-binaries
参考: https://qiita.com/yutat93/items/97fe9bc2bf2e97da7ec1
CocoaPodsを利用する場合
$ pod init
# Uncomment the next line to define a global platform for your project
# platform :ios, '9.0'

target 'HUDMakerKitExample' do
  # Comment the next line if you're not using Swift and don't want to use dynamic frameworks
  use_frameworks!

  # Pods for PKPodsExample
  pod "HUDMakerKit","~>0.2.4"
end
実装
-
HUDMakerを継承した、カスタムクラスを作る
import HUDMakerKit

class SampleHUD: HUDMaker {
    func draw(frameCount: Int) {
      // HUDが表示されている間、毎フレーム呼ばれる関数
    }
}
-
func draw(frameCount:Int)関数の中に、描画処理を書いていく
class SampleHUD: HUDMaker {
    func draw(frameCount: Int) {
        // MARK: Examples
        fill(255, 0, 0) // 赤色で塗りつぶす
        ellipse(50, 50, 100, 100) // x:50, y50を中心に、幅100、高さ100の円を描く
    }
}
-
HUDRunnerのcustomHUDプロパティに作成したカスタムHUDクラスを設定して、表示する
import UIKit
import HUDMakerKit

class ViewController: UIViewController {

    override func viewDidLoad() {
        super.viewDidLoad()
        let customHUD = SampleHUD(frame: CGRect(x: 0, y: 0, width: 150, height: 150)) // カスタムHUDクラスのインスタンスを作る
        customHUD.backgroundColor = UIColor(red: 0.1, green: 0.1, blue: 0.1, alpha: 0.3) // HUDの背景色を設定したり
        customHUD.layer.cornerRadius = 10 // 角丸にしたり

        HUDRunner.shared.customHUD = customHUD // HUDRunnerのcustomHUDにカスタムHUDクラスのインスタンスを設定する
    }

    @IBAction func didTapShowButton(_ sender: Any) {
        HUDRunner.shared.show() // HUDを表示する
    }
}
サンプルについて
- natmark/HUDMakerKitのなかにHUDMakerKitDemoというデモ用アプリを用意しています

