最近はVueCLIとかで何も考えずにプロジェクトが出来てしまう世の中ですが、とはいえプロジェクトの途中から導入したくなったり、どういう仕組みで動いているのか理解したくなるのはエンジニアとしては正しいことだと信じます。
なので、今回はTypeScriptでNuxt.jsをやる最小構成を順を追って解説していきたいと思います。
Nuxt.jsを動かす
まずNuxt.jsを動かします。最小構成なので本当に最低限の事しかしません。
まずはyarn init
$ yarn init
$ yarn add nuxt
$ mkdir pages
$ touch pages/index.vue
pages/index.vue を編集します。
<template>
  <div>hello nuxt</div>
</template>
package.json の scripts にNuxt.jsを起動するスクリプトを書いておきます。
{
  "name": "nuxt-typescript",
  "version": "1.0.0",
  "main": "index.js",
  "license": "MIT",
  "scripts": {
    "dev": "nuxt"
  },
  "dependencies": {
    "nuxt": "^2.3.4"
  }
}
次のコマンドを実行してNuxt.jsが動くことを確認します。
$ yarn run dev
次のように表示されれば大丈夫です。

TypeScriptを使えるようにする。
次にTypeScriptを使えるようにします。TypeScriptとts-loaderをインストールします。
$ yarn add -D typescript ts-loader
次にNuxt.jsでTypeScriptを使えるように設定を行います。
まずはTypeScriptの設定です。
{
  "compilerOptions": {
    "target": "es5", // コンパイルするJSのバージョン指定。
    "module": "esnext", // モジュールの形式の指定
    "moduleResolution": "node", // モジュールの解決方法の指定
    "allowSyntheticDefaultImports": true, // exportしていないモジュールのコンパイル時にエラーを出さないようにする
    "allowJs": true, // コンパイル対象にJSを含んでもエラーを出さないようにする
    "lib": ["esnext", "dom"], // コンパイルに含めるライブラリファイルの指定
  }
}
次にts-loaderの設定をmoduleに設定します。
module.exports = function() {
  // Webpackのビルド設定を拡張する
  this.extendBuild(config => {
    config.module.rules.push(
      {
        test: /((client|server)\.js)|(\.tsx?)$/,
        loader: 'ts-loader',
        options: {
          appendTsSuffixTo: [/\.vue$/]
        }
      }
    )

    for (let rule of config.module.rules) {
      if (rule.loader === 'vue-loader') {
        rule.options.loaders = {
          ts: 'ts-loader'
        }
      }
    }

    if (config.resolve.extensions.indexOf('.ts') === -1) {
      config.resolve.extensions.push('.ts')
    }
  })
}
ここで書くのはWebpackの設定の拡張なのでts-loaderとvue-loaderの拡張になります。
TypeScriptでSingleFileComponentを扱うにはShimsファイルという者をTypeScriptのルートディレクトリなどに配置する必要があります。
型定義ファイルを次のように設定し配置します。
declare module "*.vue" {
  import Vue from "vue";
  const _default: Vue;
  export default _default;
}
これでTypeScriptを使う準備は整いました。index.vueを次のように編集しTypeScriptらしくしてみます。
<template>
  <div>
    hello nuxt<br>
    {{message}}
  </div>
</template>

<script lang="ts">
import Vue from 'vue'

interface Data {
  message: string
}

export default Vue.extend({
  data(): Data {
    return {
      message: "Hello TypeScript"
    }
  }
})
</script>
この状態で実行してみます。
$ yarn run dev
次のように表示されていれば問題ありません。

ちゃんと型チェックされているか確認してみます。index.vueを次のように編集してみます。
export default Vue.extend({
  data(): Data {
    return {
      message: 1
    }
  }
})
String以外の値を淹れているので次のようにエラーが吐かれるようになると思います。
 ERROR  Failed to compile with 1 errors                                                                            friendly-errors 23:59:03


 ERROR  in /Users/masaya/src/github.com/nasum/nuxt-typescript/pages/index.vue.ts                                   friendly-errors 23:59:03

[tsl] ERROR in /Users/masaya/src/github.com/nasum/nuxt-typescript/pages/index.vue.ts(18,7)                         friendly-errors 23:59:03
      TS2322: Type 'number' is not assignable to type 'string'.
Lintツールを入れる
これまでので開発は出来ますが、Lintツールなしでの開発はもはや苦痛ですね。Lintツールを入れていきたいと思います。
今回はvueのリントもしてもらいたかったのでeslintですすめていきます。
次のパッケージをインストールします。
$ yarn add -D eslint eslint-loader eslint-plugin-typescript typescript-eslint-parser vue-eslint-parser eslint-config-typescript
eslintとeslint-loaderはおなじみですね。
eslint-plugin-typescriptはeslin用のTypeScriptのルールを導入できるようにするプラグインです。
typescript-eslint-parserはTypeScriptをESLintが解釈できる形にパースするパーサです。
vue-eslint-parserはSingleFileComponentをリントするためのパーサです。
eslint-config-typescriptはeslintで使うTypeScriptのルール集です。
これらのパッケージについてはjoe_reさんの記事を参考にしました。
これらのパッケージをインストールしたので設定を書いていきます。
{
  "parser": "vue-eslint-parser", // パーサにvue-eslint-parserを指定しSFCをリント可能に
  "parserOptions": {
    "parser": "typescript-eslint-parser" // オプションでTypeScriptをパースできるパーサを指定
  },
  "extends": [
    "eslint:recommended",
    "typescript" // eslint-config-typescriptのルールを追加
  ],
  "plugins": ["typescript"], // eslint-plugin-typescriptを指定
  "rules": {
    "semi": ["error", "never"] // 追加ルールでセミコロンの指摘を無視するようにする
  }
}
次にeslintのloaderの設定をmodulesに書きます。
module.exports = function() {
  this.extendBuild(config => {
    config.module.rules.push({
      enforce: 'pre',
      test: /\.(js|vue|ts)$/,
      loader: 'eslint-loader',
      exclude: /(node_modules)/,
    })
  })
}

これでリントされるようになります。

この状態で実行してみます。

```zsh
$ yarn run dev
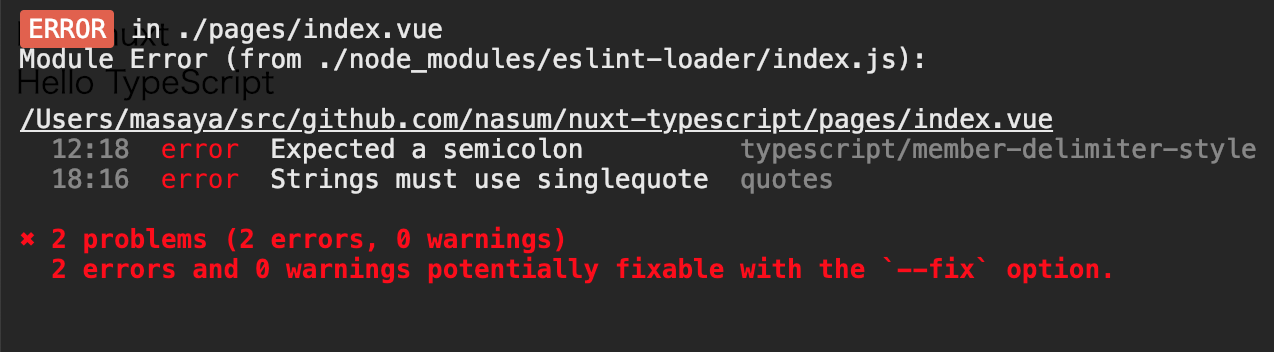
次のようにリントされエラーが出ていることが分かります。
 ERROR  Failed to compile with 1 errors                                                                            friendly-errors 00:32:00


 ERROR  in ./pages/index.vue                                                                                       friendly-errors 00:32:00

Module Error (from ./node_modules/eslint-loader/index.js):                                                         friendly-errors 00:32:00

/Users/masaya/src/github.com/nasum/nuxt-typescript/pages/index.vue
  12:18  error  Expected a semicolon          typescript/member-delimiter-style
  18:16  error  Strings must use singlequote  quotes

✖ 2 problems (2 errors, 0 warnings)
  2 errors and 0 warnings potentially fixable with the `--fix` option.
ブラウザの表示も同じようになります。
これでリントによる指摘でキレイなコードを描き続けることができるようになりました 。
prettierを使いたい
リントはされるようになりましたがもう一声欲しいところです。prettierを導入してコードフォーマットをキレイに保っていきます。
・・・と思ったのですがちょっとうまくいかず断念。うまくいき次第追記していきます。
まとめ
以上最小構成だと思う方法でNuxt.js + TypeScript + ESLintでプロジェクトを設定していきました。開発していく上でこれだけだとおそらく足りないと思いますが、育てていくことでまた学びになると思います。
今回はあえてVueCLIに頼らない形で頑張ってみました。