Bot Builder SDK V4リリース記念ということで、Adaptive CardでボタンをクリックされたときにHeroCardなどのImBackに準じたメッセージをBotサービス側に送る方法をシェアします。
ImBackとは?
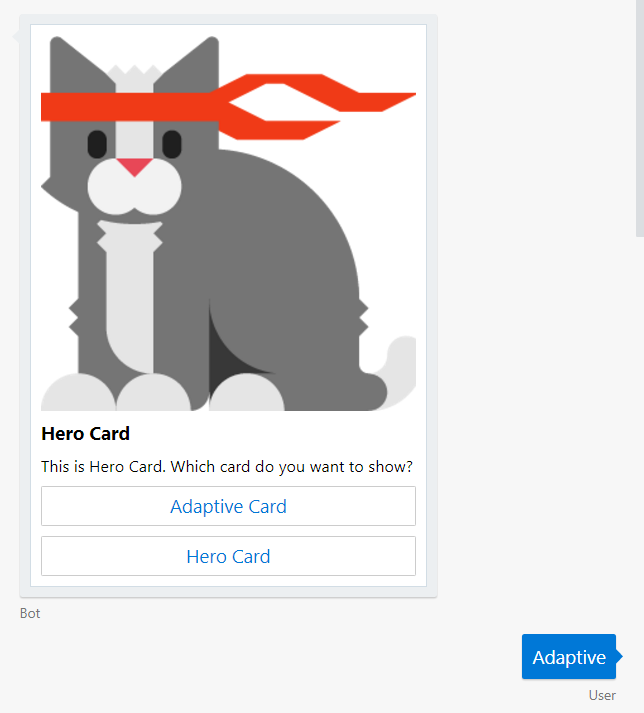
ImBackというのは、以下のようなHeroCardに付いている「Adaptive Card」ボタンをクリックすると、あたかもユーザー側から「Adaptive」というテキストが入力されたかのようにBot側にメッセージを返す仕掛けです。
HeroCardでImBackするには
コードで表すとこういった感じ。
// <copyright file="HeroCardSample.cs" company="Shunji Sumida">
// Copyright (c) Shunji Sumida. All rights reserved.
// </copyright>

namespace Shunji.AdaptiveCard.Cards
{
	using System.Collections.Generic;
	using Microsoft.Bot.Schema;

	/// <summary>
	/// The sample hero card.
	/// </summary>
	public class HeroCardSample : HeroCard
	{
		/// <summary>
		/// Initializes a new instance of the <see cref="HeroCardSample"/> class.
		/// </summary>
		public HeroCardSample()
		{
			this.Title = "Hero Card";
			this.Text = "This is Hero Card. Which card do you want to show?";
			this.Images = new List<CardImage>
            {
				new CardImage("http://adaptivecards.io/content/cats/2.png"),
			};
			this.Buttons = new List<CardAction>
            {
				new CardAction(ActionTypes.ImBack, "Adaptive Card", value: "Adaptive"),
				new CardAction(ActionTypes.ImBack, "Hero Card", value: "Hero"),
			};
		}
	}
}
new CardAction()内でActionTypes.ImBackとすることで、ボタンがクリックされた時にvalueに指定された文字列をBotに送信します。
Adaptive CardでImBackするには
一方、Adaptive CardでBotにデータを送信するためには、以下のようなAdaptive Cardの定義ファイル(JSON形式)のactionsで定義されたtypeにAction.Submitをセットします。
{
  "$schema": "http://adaptivecards.io/schemas/adaptive-card.json",
  "type": "AdaptiveCard",
  "version": "1.0",
  "body": [
    {
      "type": "Image",
      "url": "http://adaptivecards.io/content/cats/2.png",
      "size": "",
      "spacing": "none"
    },
    {
      "type": "TextBlock",
      "text": "Adaptive Card",
      "size": "medium",
      "weight": "bolder"
    },
    {
      "type": "TextBlock",
      "text": "This is Adaptive Card. Which do you want to show?"
    }
  ],
  "actions": [
    {
      "type": "Action.Submit",
      "title": "Adaptive Card",
      "data": "Adaptive!"
    },
    {
      "type": "Action.Submit",
      "title": "HeroCard",
      "data": "Hero"
    }
  ]
}
しかし、これだけではただHTMLのFormでPOSTするのと同様です。Input要素がなければ何もデータは送信されないので、ボタンクリック時にユーザー入力として送信したいテキストデータをactionsのdataにセットします。そうすると、従来のHeroCardのようなRich CardでImBackを設定した場合と同様に、Botにdataで設定したテキストがユーザー入力として送られます。
Botアプリケーション側では
data要素をつけると、他のRichCardと同様にユーザー入力としてBotに送られるということはとても大事なポイントです。もしも、AdaptiveCardでdata要素がない場合、SubmitされただけなのでBot側では受け取るActivity.Textはnullになります。例えば、押されたボタンの情報をInput要素として送るようにしても、それらのデータはActivity.Valueに格納されてしまうので同じロジックで従来のRichCardと同様に扱えないことを意味します。
public async Task OnTurnAsync(ITurnContext context, CancellationToken token = default(CancellationToken))
{
	if (context.Activity.Type == ActivityTypes.Message)
	{
		if (!string.IsNullOrWhiteSpace(context.Activity.Text))
		{
			Activity reply = context.Activity.CreateReply();
			reply.Attachments = new List<Attachment>();
			switch (context.Activity.Text)
			{
				case "Adaptive":
					reply.Attachments.Add(this.CreateAdaptiveCardAttachment());
					break;
				case "Hero":
					reply.Attachments.Add(new HeroCardSample().ToAttachment());
					break;
				default:
					break;
			}

			await context.SendActivityAsync(reply);
		}
	}
}
このAdaptive Cardで「HeroCard」ボタンをクリックすると、以下のように「Hero」というテキストがBotに送信されるようになりました。
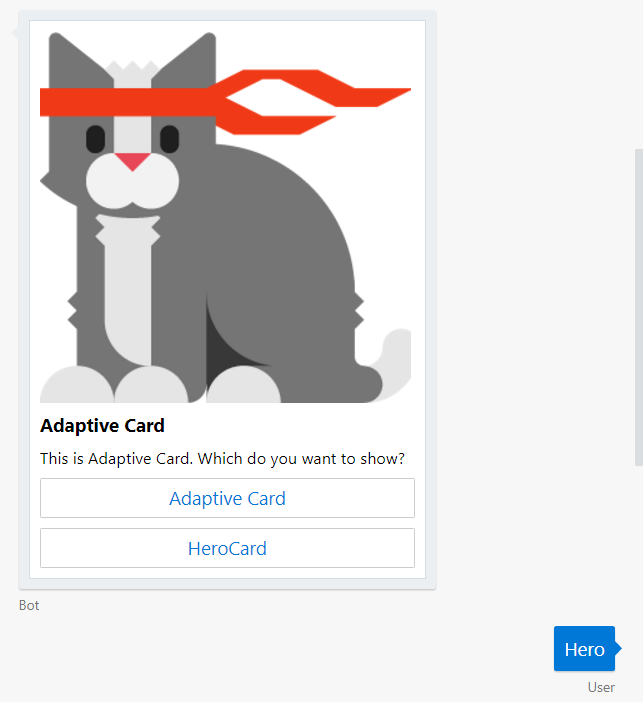
呼び出されたHeroCard。

以降、何度でもHeroCardとAdaptiveCardを行き来できるようになりました。Bot側のコードも従来のRichCardと同様のコードでAdaptiveCardに対応できています。
コード全体
コードの全体は以下のリポジトリにアップロードしてあります。
https://github.com/narista/BotBuilderSamples