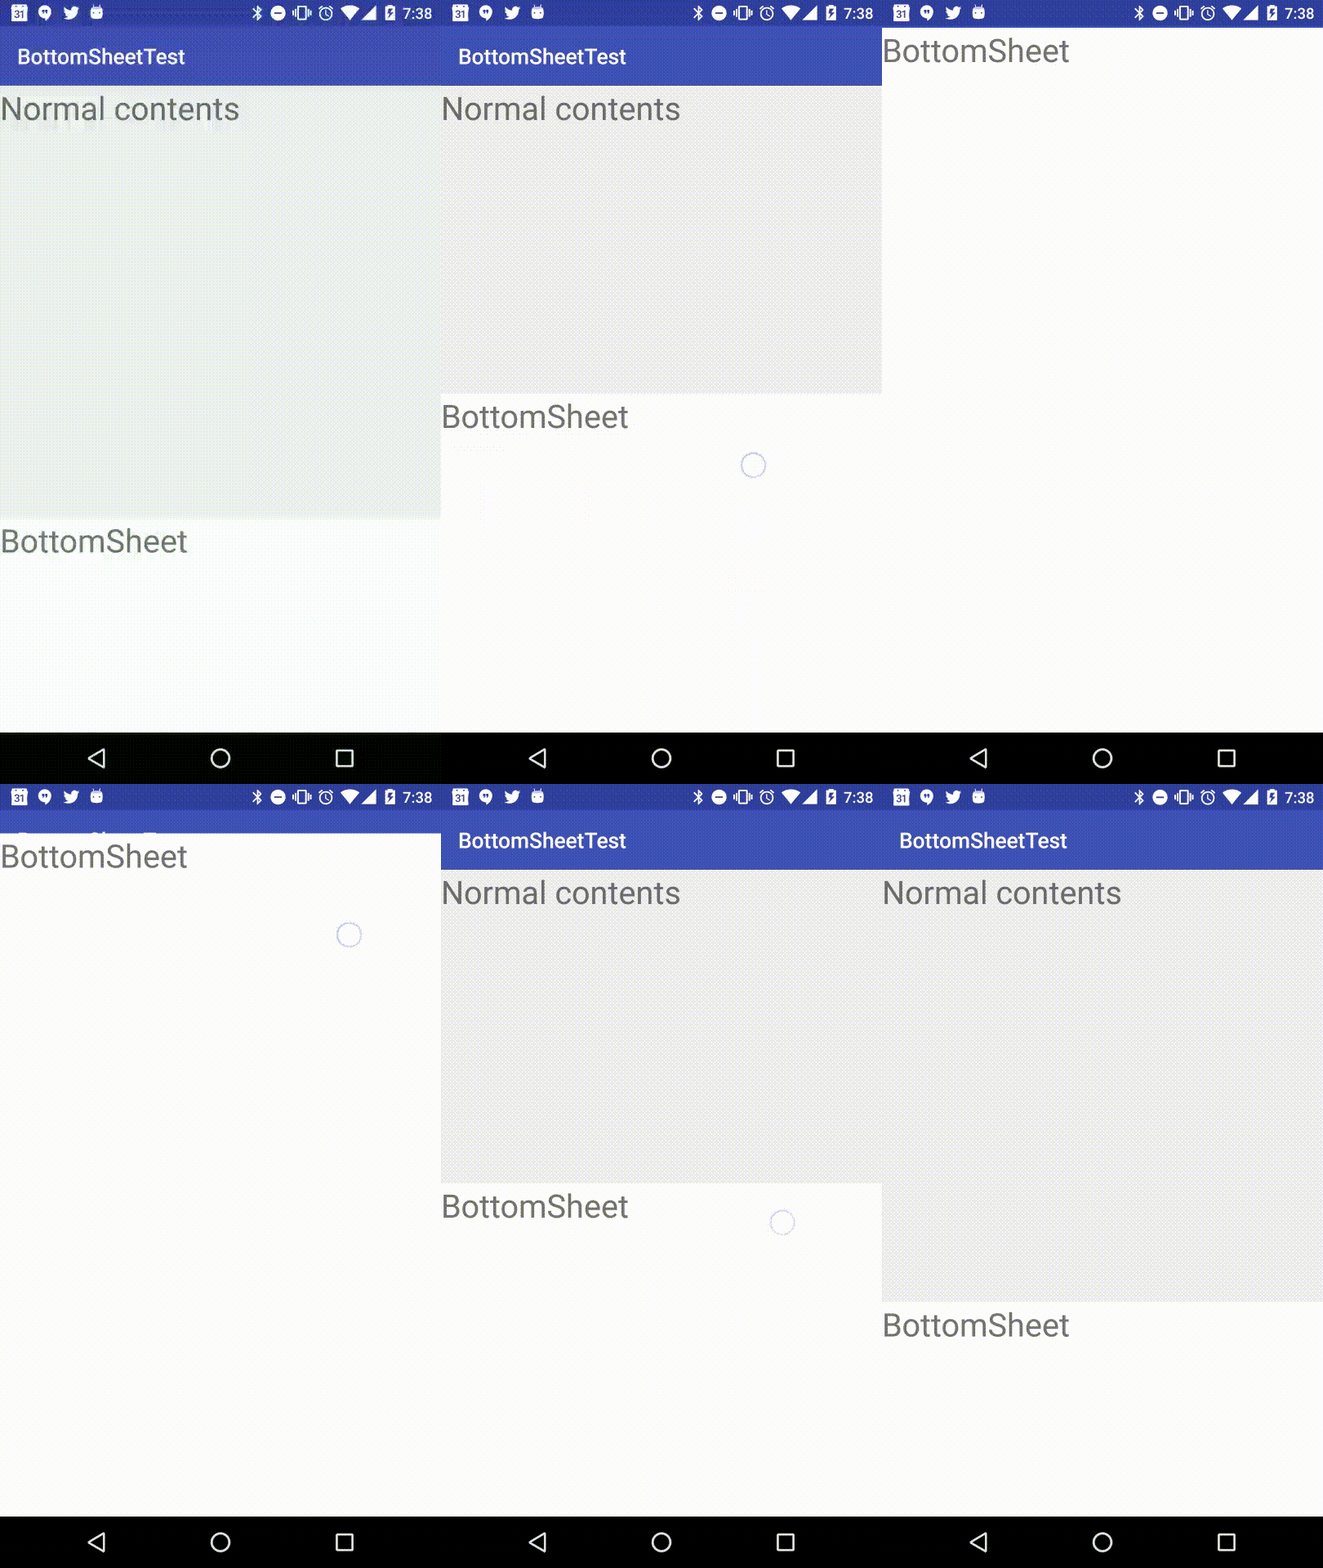
Support Library 23.2から、Design Support LibraryにBottomSheetが追加されました!
http://android-developers.blogspot.jp/2016/02/android-support-library-232.html
今回追加されたBottomSheetではMaterial DesignのガイドラインでいうところのPersistent Bottom SheetsとModal bottom sheetsを使うことが出来ます。
この記事では主にPersistent Bottom Sheets(BottomSheetBehavior)について説明します。
Persistent Bottom Sheets(BottomSheetBehavior)
Play Musicやマップアプリで使われているようなBottom Sheetを実現することが出来ます。
BottomSheetの表示方法
CoordinatorLayoutの直下のViewのBehaviorに、BottomSheetBehaviorを指定すると、そのViewをBottomSheetとして表示することが出来ます。
BottomSheetというViewが用意されているわけではありません。
具体的なレイアウトリソースは次のとおりです。
<?xml version="1.0" encoding="utf-8"?>
<android.support.design.widget.CoordinatorLayout
    xmlns:android="http://schemas.android.com/apk/res/android"
    xmlns:app="http://schemas.android.com/apk/res-auto"
    android:layout_width="match_parent"
    android:layout_height="match_parent"
    >
  <LinearLayout
      android:layout_width="match_parent"
      android:layout_height="match_parent"
      android:orientation="vertical"
      >
    <android.support.v7.widget.Toolbar
        android:id="@+id/toolbar"
        android:layout_height="wrap_content"
        android:layout_width="match_parent"
        android:minHeight="?attr/actionBarSize"
        android:background="?attr/colorPrimary"
        app:theme="@style/ThemeOverlay.AppCompat.Dark.ActionBar"
        />

    <TextView
        android:layout_width="match_parent"
        android:layout_height="match_parent"
        android:text="Normal contents"
        android:textSize="30sp"
        />
  </LinearLayout>
  <LinearLayout
      android:layout_width="match_parent"
      android:layout_height="match_parent"
      android:orientation="vertical"
      app:layout_behavior="@string/bottom_sheet_behavior"
      app:behavior_peekHeight="200dp"
      android:background="@android:color/white"
      >
    <TextView
        android:layout_width="match_parent"
        android:layout_height="match_parent"
        android:text="BottomSheet"
        android:textSize="30sp"
        />
  </LinearLayout>
</android.support.design.widget.CoordinatorLayout>
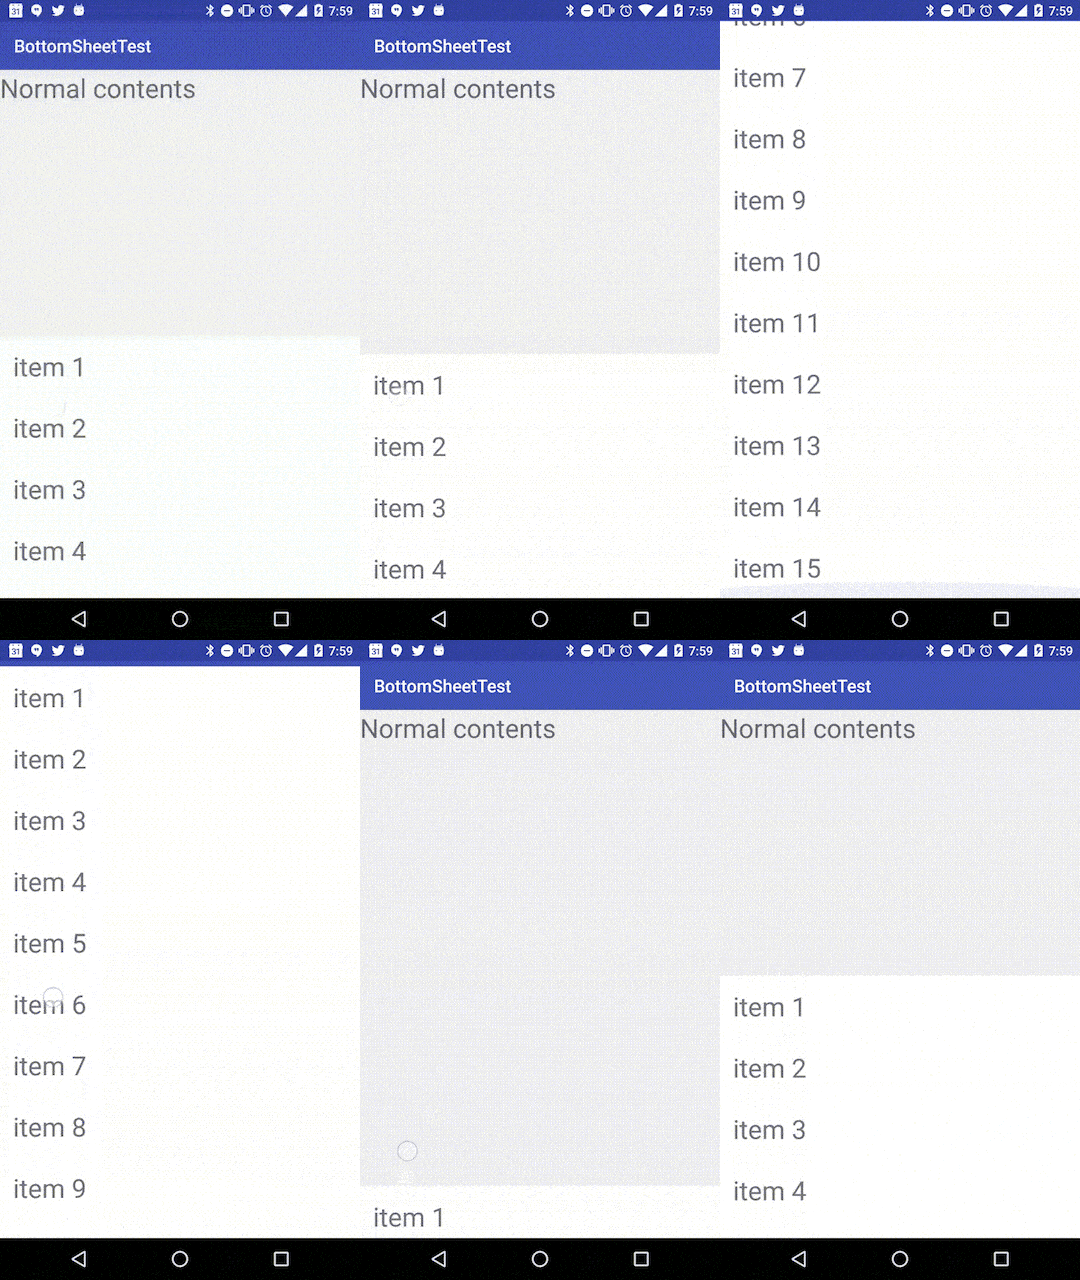
今回の例ではBottomSheetにLinearLayoutを使用していますが、BottomSheetを引っ張って最も大きく表示した時に、BottomSheet内のコンテンツをスクロールさせたい場合は、スクロールをネスト出来るView(RecyclerViewやNestedScrollView)を使うようにしましょう。
BottomSheetの表示位置を指定する
app:behavior_peekHeight属性をセットすることで、BottomSheetの表示位置を指定することが出来ます。
<android.support.v4.widget.NestedScrollView
    android:layout_width="match_parent"
    android:layout_height="match_parent"
    app:layout_behavior="@string/bottom_sheet_behavior"
    app:behavior_peekHeight="300dp"
    >
setPeekHeightメソッドを使ってコードから指定することも出来ます。
BottomSheetBehavior behavior = BottomSheetBehavior.from(bottomSheet);
behavior.setPeekHeight(300);
表示位置を指定しない場合、何もしない状態ではBottomSheetが表示されません。が、画面の下にいるのでがんばれが引っ張ってこれます。
また、後述するBottomSheetを操作する方法で画面に表示することも出来ます。
BottomSheetを隠すことが出来るようにする
app:behavior_hideable属性でtrueを指定すると、BottomSheetを下にスワイプした時に、BottomSheetを画面外に隠すことが出来ます。
<android.support.v4.widget.NestedScrollView
    android:layout_width="match_parent"
    android:layout_height="match_parent"
    app:layout_behavior="@string/bottom_sheet_behavior"
    app:behavior_hideable="true"
    app:behavior_peekHeight="300dp"
    >
setHideableメソッドを使ってコードから指定することも出来ます。
BottomSheetBehavior behavior = BottomSheetBehavior.from(bottomSheet);
behavior.setHideable(true);
動画を見ていただくと、3つの場所でBottomSheetを留めることが出来るとわかると思います。
これは次の3つの場所です
- 最大
- peek height
- hide
BottomSheetの状態を取得する
BehaviorにBottomSheetBehavior.BottomSheetCallbackをセットすることで、BottomSheetの状態を取得することが出来ます。
コードは次のようになります。
View bottomSheet = findViewById(R.id.bottom_sheet);
BottomSheetBehavior behavior = BottomSheetBehavior.from(bottomSheet);
behavior.setBottomSheetCallback(new BottomSheetBehavior.BottomSheetCallback() {

  @Override public void onStateChanged(View bottomSheet, int newState) {
    switch (newState) {
      case BottomSheetBehavior.STATE_DRAGGING:
        break;
      case BottomSheetBehavior.STATE_SETTLING:
        break;
      case BottomSheetBehavior.STATE_EXPANDED:
        break;
      case BottomSheetBehavior.STATE_COLLAPSED:
        break;
      case BottomSheetBehavior.STATE_HIDDEN:
        break;
    }
  }

  @Override public void onSlide(View bottomSheet, float slideOffset) {
  }
});
onStateChangedメソッド
onStateChangedメソッドにはボトムシートの状態がnewState変数として渡されます。
| 値 | 状態 |
|---|---|
| STATE_DRAGGING | BottomSheetをドラッグしている |
| STATE_SETTLING | STATE_EXPANDED、STATE_COLLAPSEDに移り変わる直前 |
| STATE_EXPANDED | BottomSheetが最大まで大きくなった時 |
| STATE_COLLAPSED | BottomSheetがpeek heightで指定した場所にいる時 |
| STATE_HIDDEN | BottomSheetが隠れた時 |
いくつか注意点が有ります
- STATE_EXPANDED、STATE_COLLAPSED、STATE_HIDDENは実際に呼ばれるまでに少し時間がかかる
- ドラッグし続けてBottomSheetを動かすと
STATE_SETTLINGが呼ばれないことがある - BottomSheetを指で弾いた時には、
STATE_DRAGGINGが呼ばれないことが有る
onSlideメソッド
onSlideメソッドには、BottomSheetがどの位置にいるのかslideOffset変数として渡されます。
slideOffsetの値は-1から1までのfloat型で、BottomSheetが動くたびに断続的に値が送られてきます。
値の意味は次の表の通りです。
| 値 | 状態 |
|---|---|
| -1 | STATE_HIDDENと同じ |
| 0 | STATE_COLLAPSEDと同じ |
| 1 | STATE_EXPANDEDと同じ |
onStateChangedメソッドよりも細かく値を取得したい場合に使えそうです。
コードからBottomSheetを操作する
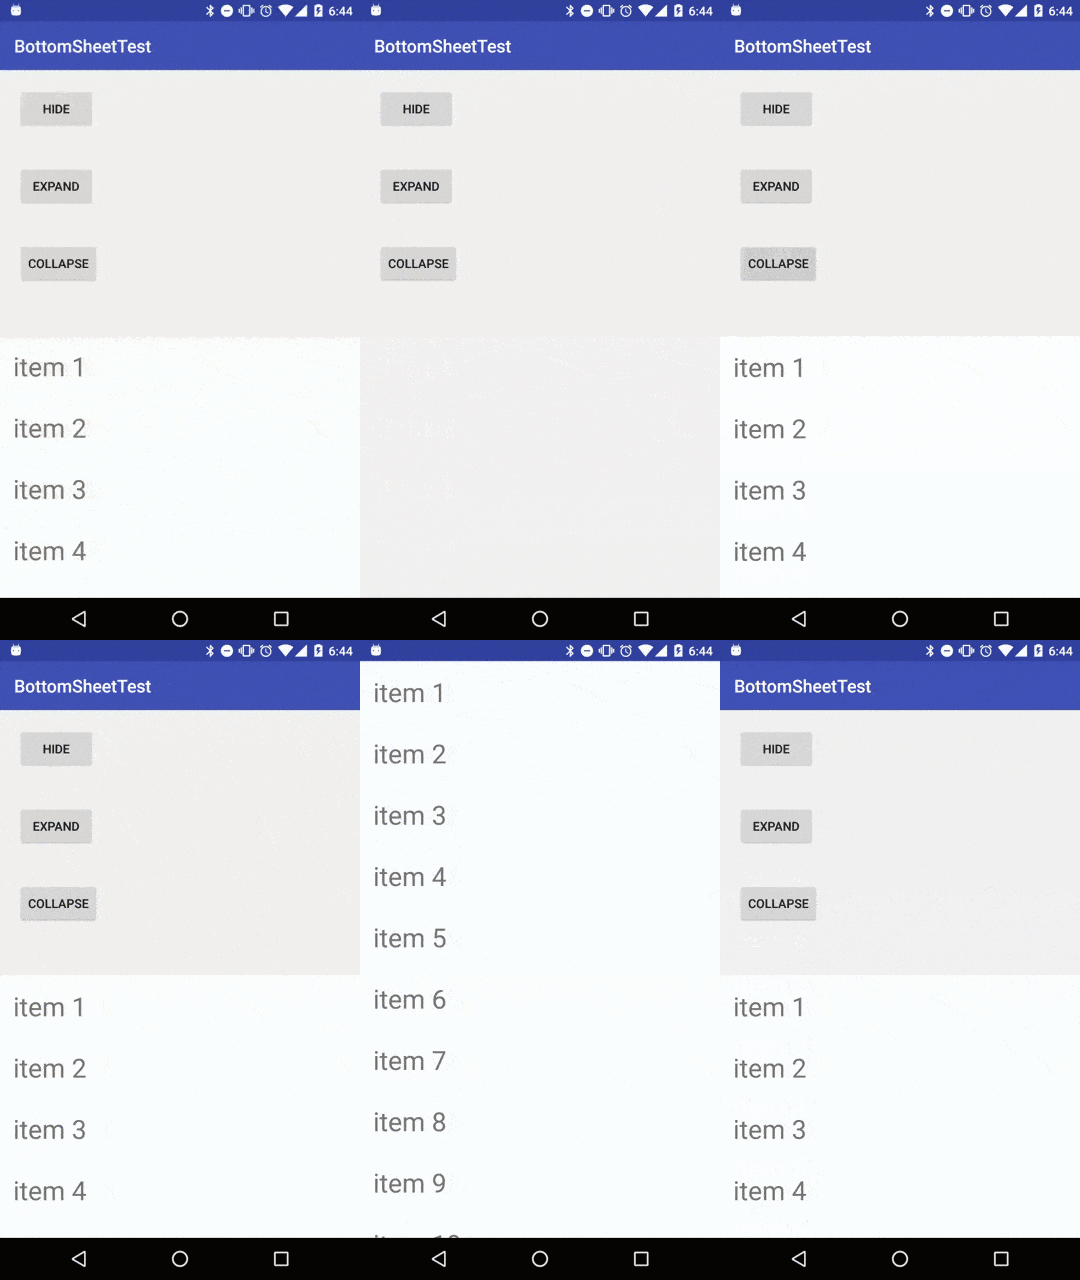
setStateメソッドを使うと、BottomSheetの状態を指定することが出来ます。
BottomSheetの状態をHideに指定するコードは次のとおりです。
View bottomSheet = findViewById(R.id.bottom_sheet);
BottomSheetBehavior behavior = BottomSheetBehavior.from(bottomSheet);
behavior.setState(BottomSheetBehavior.STATE_HIDDEN);
次の3つの状態を指定できます。
- Expande
- Hide
- Collapse
それぞれの状態の意味は既に説明済みですので省略します。
BottomSheetにFloatingActionBottonを連動させる
Mapアプリなどでよく見る、BottomSheetとFloatingActionButton(以下FAB)を組み合わせた画面を作ってみましょう。
今回はExpandeとHide状態ではFABが消えるようにします。
anchorを指定する
レイアウトリソース上で、FABにanchorとしてBottomSheetを指定します。
<?xml version="1.0" encoding="utf-8"?>
<android.support.design.widget.CoordinatorLayout
    xmlns:android="http://schemas.android.com/apk/res/android"
    xmlns:app="http://schemas.android.com/apk/res-auto"
    android:layout_width="match_parent"
    android:layout_height="match_parent"
    >
  <LinearLayout
      android:layout_width="match_parent"
      android:layout_height="match_parent"
      android:orientation="vertical"
      >
    <android.support.v7.widget.Toolbar
        android:id="@+id/toolbar"
        android:layout_height="wrap_content"
        android:layout_width="match_parent"
        android:minHeight="?attr/actionBarSize"
        android:background="?attr/colorPrimary"
        app:theme="@style/ThemeOverlay.AppCompat.Dark.ActionBar"
        />

    <TextView
        android:layout_width="match_parent"
        android:layout_height="match_parent"
        android:text="Normal contents"
        android:layout_margin="30dp"
        android:textSize="30sp"
        />
  </LinearLayout>
  <LinearLayout
      android:id="@+id/bottom_sheet"
      android:layout_width="match_parent"
      android:layout_height="match_parent"
      android:orientation="vertical"
      android:background="@android:color/white"
      app:layout_behavior="@string/bottom_sheet_behavior"
      app:behavior_peekHeight="200dp"
      app:behavior_hideable="true"
      >
    <TextView
        android:layout_width="match_parent"
        android:layout_height="match_parent"
        android:layout_margin="30dp"
        android:text="BottomSheet"
        android:textSize="30sp"
        />
  </LinearLayout>
  <android.support.design.widget.FloatingActionButton
      android:id="@+id/fab"
      android:layout_width="wrap_content"
      android:layout_height="wrap_content"
      android:src="@mipmap/ic_launcher"
      android:layout_margin="16dp"
      app:layout_anchor="@id/bottom_sheet"
      app:layout_anchorGravity="right|top"
      />
</android.support.design.widget.CoordinatorLayout>
このまま動かしてみると、動きは追従するものの、FABが画面の中に留まります。
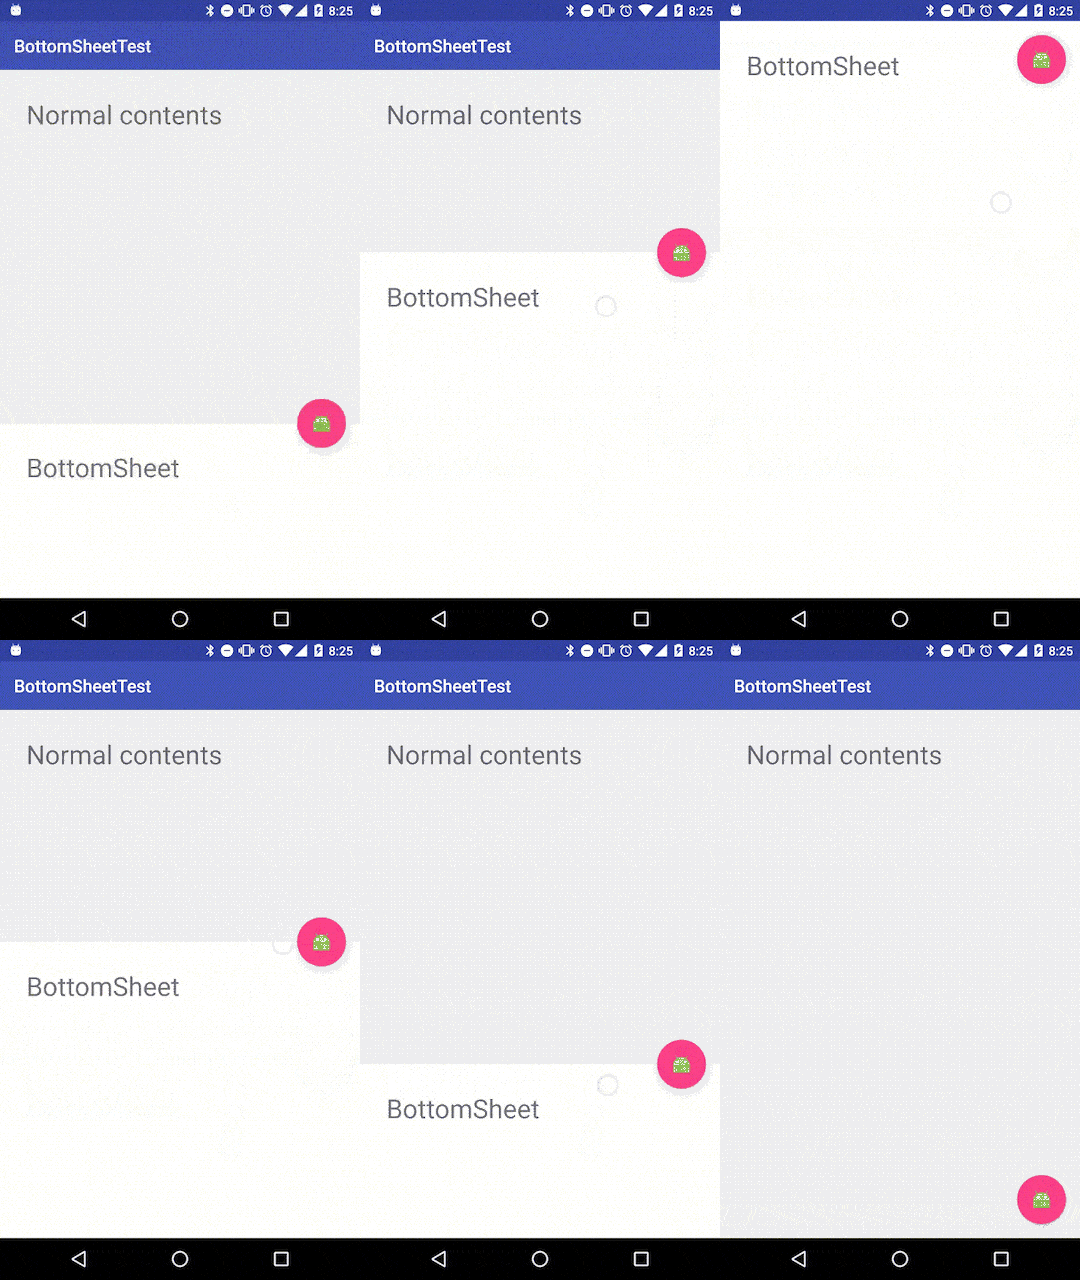
anchorを指定すると、画面の外には移動しない特性があるためこのままではFABが消えません。
BottomSheetの状態を取得してFABを制御する
当初FABのBehaviorにBottomSheet用の制御が増えたのかと思っていたのですが、どうやらそうではないようです。
独自Behaviorでも出来ると思いますので誰か試してみたください。
今回はアドバイス頂いたとおり、BottomSheetの状態を取得してFABを制御してみます。
ちょっと雑ですが、onSlideメソッドに渡されるslideOffsetの値を使ってFABを制御します。
private FloatingActionButton mFab;
private float mTmpSlideOffset;

@Override protected void onCreate(Bundle savedInstanceState) {
  super.onCreate(savedInstanceState);
  setContentView(R.layout.activity_fab);
  Toolbar toolbar = (Toolbar) findViewById(R.id.toolbar);
  setSupportActionBar(toolbar);

  mFab = (FloatingActionButton) findViewById(R.id.fab);
  View bottomSheet = findViewById(R.id.bottom_sheet);
  BottomSheetBehavior behavior = BottomSheetBehavior.from(bottomSheet);
  behavior.setBottomSheetCallback(new BottomSheetBehavior.BottomSheetCallback() {
    @Override public void onStateChanged(View bottomSheet, int newState) {
    }

    @Override public void onSlide(View bottomSheet, float slideOffset) {
      if (slideOffset > 0.8) {
        if (mTmpSlideOffset > slideOffset) {
          mFab.show();
        } else {
          mFab.hide();
        }
      } else if (slideOffset < -0.7) {
        // 今回はpeek heightとhideの幅が短く、値の重みが異なるため値を変える
        if (mTmpSlideOffset < slideOffset) {
          mFab.show();
        } else {
          mFab.hide();
        }
      }
      mTmpSlideOffset = slideOffset;
    }
  });
}
なんとか形になったと思います。
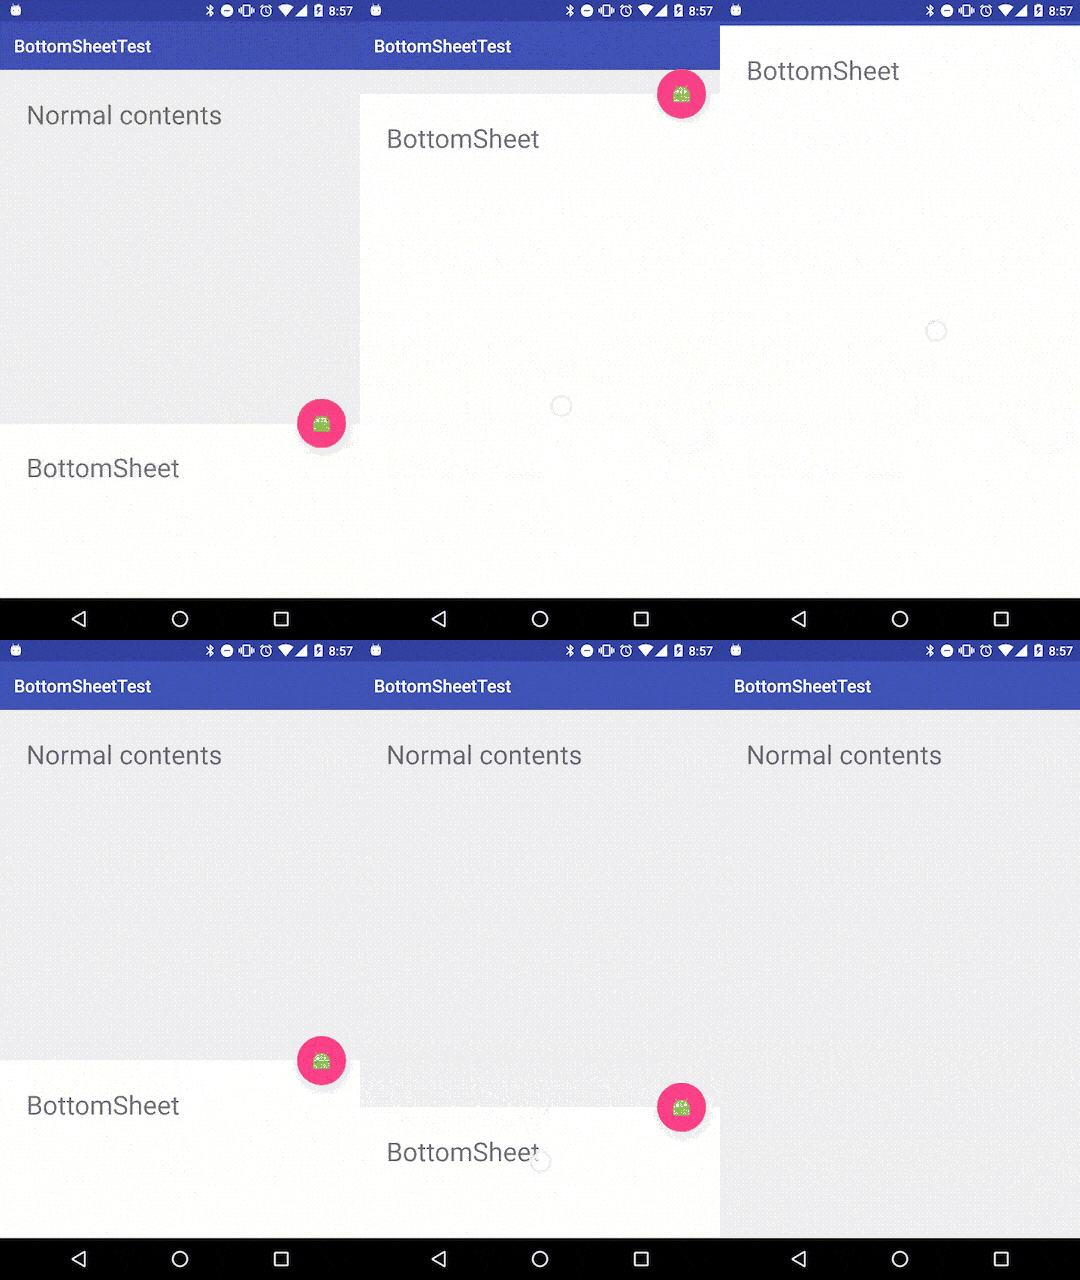
気になる人はもう少し調整してみてください。
Modal bottom sheets(BottomSheetDialog, BottomSheetDialogFragment)
ガイドラインでいうところの、Modal bottom sheetsがこれに当たります。
DirectShareのようなBottom Sheetです。
BottomSheetDialogFragmentあるいはBottomSheetDialogを用いてDialogとして実装します。
この説明はまた次回に・・・
