この記事では、ホモグラフィ変換の概念と
Numpy + PILを用いた、ホモグラフィ変換の実装例を紹介します。
OpenCVを使わないので、Google App EngineのPython環境でも実行が可能です。
ちなみに、PILもNumpyもC言語ベースなので、Pythonにしては軽快に動作します。
コードやサンプルスクリプトは Github にて公開しています。
ホモグラフィ変換とは
自分なりに一番わかりやすく説明しようとすると、
「ある四角形を、回転させたり引き伸ばしたりして、
他の四角形の形に当てはめるよう変換する処理のこと」をホモグラフィ変換と言います。
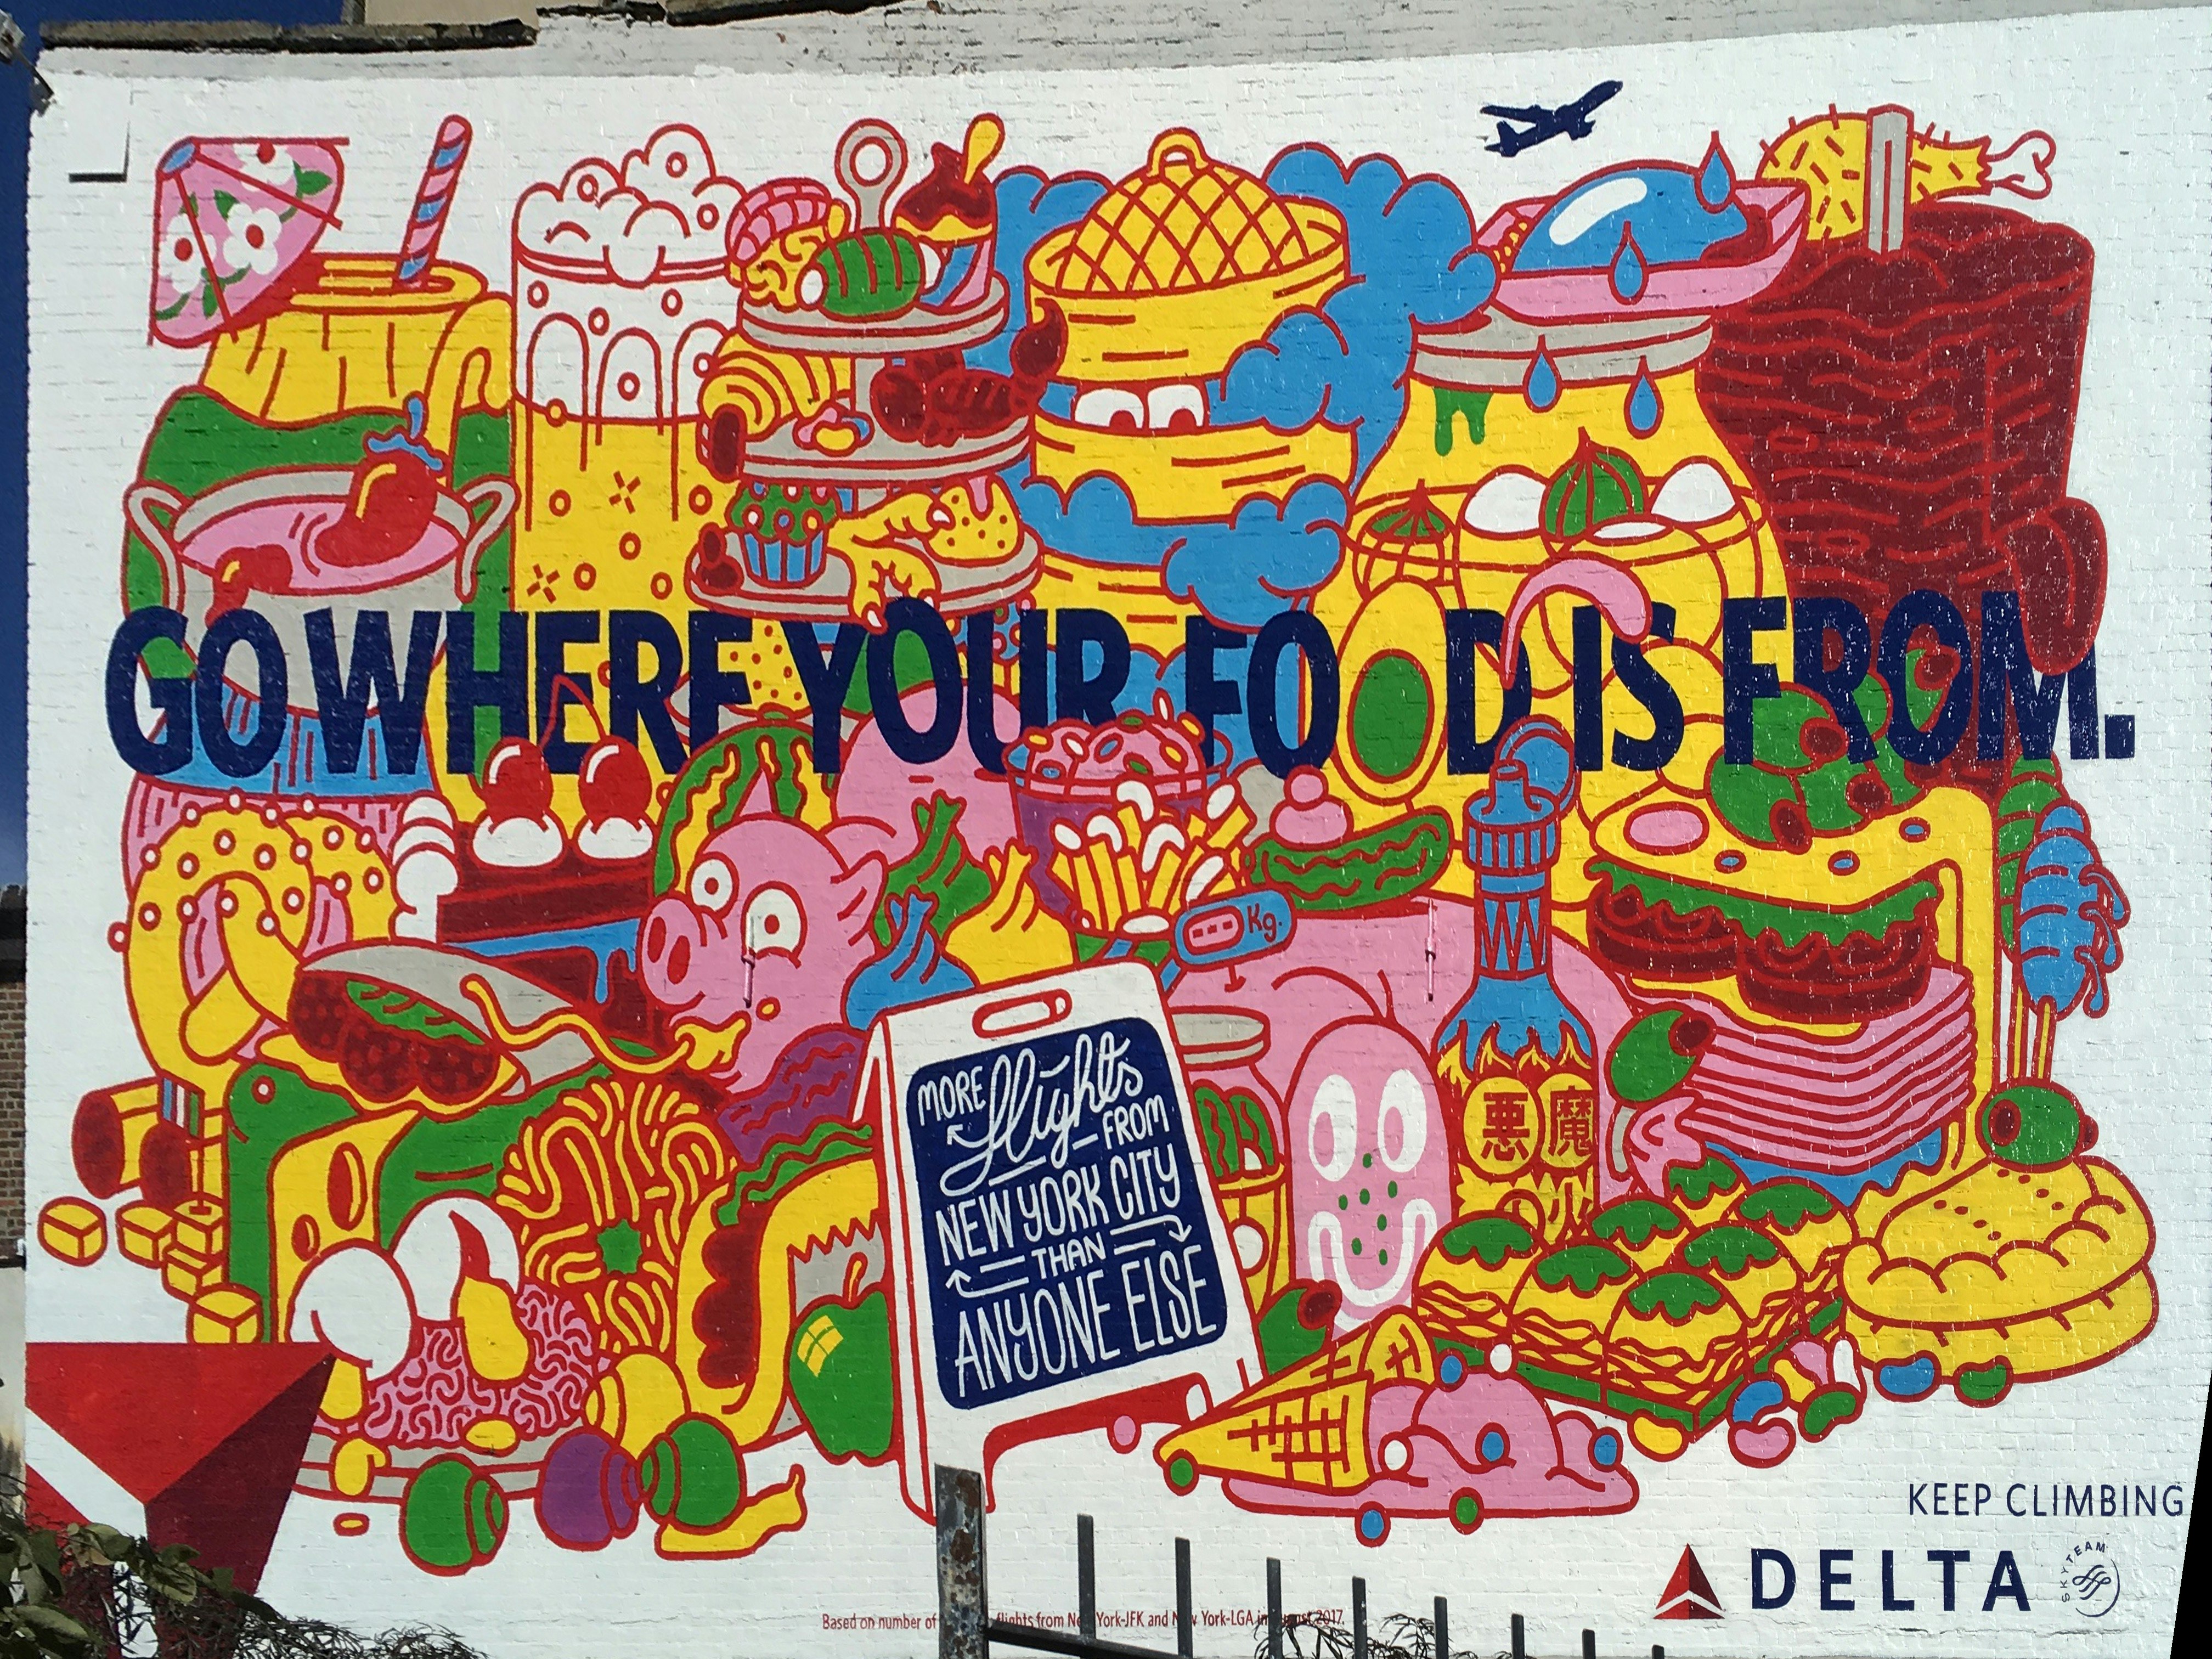
例えば、ある対象物を斜めから撮影した画像から、
その対象物を真正面から見た場合の画像へと変換する処理などで用いられます。
(利用例: 名刺管理アプリ, Google翻訳アプリ, 3D空間でのテクスチャマッピング(アフィン変換))
| 変換前 | 変換後 |
|---|---|
 |
 |
| (C)Delta Air Lines, lnc. |
詳細は、こちらの資料にて丁寧に解説されています。
(アフィン変換という類似変換もありますが、これは平行四辺形 x 拡大/縮小 x 回転まで対応できますが、台形には対応できません。原理/実装はとても似ています。)
ホモグラフィ変換の実装
実装環境
Python 2.7
必要なサードパーティライブラリの準備
行列計算ライブラリNumpyと、画像処理ライブラリPillow(PIL)をインストールします。
GAE上での制約を満たすよう、各ライブラリは少し古いものを指定しています(17/12/07現在)。
GAEで使用しないのであれば、Python2.7が対応する範囲であれば、
より新しいバージョンのNumpy, PILでも動作すると思います。(未検証)
pip install numpy==1.6.1
pip install Pillow==4.3.0
前提
以下の条件を満たす変換処理を実装します。
- 「切り取り範囲」と「変換後」、共に四角の座標を用いて指定。
- 「切り取り範囲」の座標指定にはマイナス値を許容
- 「変換後」の座標指定には0以上の値のみ許容。
- 四角の座標は、左上、左下、右下、右上の順番で指定。
- 画像はRGB/グレースケールどちらでも可。
実装例
# !/usr/bin/python
# -*- coding: utf-8 -*-
"""
ホモグラフィ変換のモジュール
以下の2点から、指定した切り出し範囲の描画内容を引き伸ばした画像を生成する。
変換後の画像サイズは、移動先の各座標にて囲まれる領域がちょうど収まるサイズとする。
1. 変換元画像
2. 変換元画像中の切り出し対象物の四隅(頂点)の座標と、各座標の移動先となる座標のペア
"""

import numpy as np
from PIL import Image


def transform(img, origin_corner_list, destination_corner_list=None):
    # type: (Image.Image, list, list) -> Image.Image
    """
    :param img: 元画像
    :param origin_corner_list: 切り出し対象物の4角の座標リスト [[x1, y1], [x2, y2], [x3, y3], [x4, y4]]
    :param destination_corner_list: 対象物の移動先となるの4角の座標リスト
    :return: 変換後の画像
    """
    assert len(origin_corner_list) == 4

    if destination_corner_list is None:
        # 移動先を指定されない場合、引数で受けた画像サイズまで引き延ばすよう処理
        width, height = img.size
        destination_corner_list = [[0, 0], [0, height], [width, height], [width, 0]]
    else:
        assert len(destination_corner_list) == 4

    # ホモグラフィ変換に必要な切り出し座標・変換先座標のパラメータを生成。
    origin_corner_list = np.array(origin_corner_list)
    destination_corner_list = np.array(destination_corner_list)

    # ホモグラフィ変換行列(変換先 -> 変換元 の変換用)を取得
    # いずれの切り出し座標にも通じる、変換後の座標との関係を示す数式(行列)を求めるイメージ。
    homography_matrix = calculate_homography_matrix(origin_corner_list, destination_corner_list)
    # 逆行列を作る(変換元 -> 変換先 の変換用)
    inv_homography_matrix = np.linalg.inv(homography_matrix)
    inv_homography_matrix /= inv_homography_matrix[2, 2]
    homography_param = inv_homography_matrix.ravel()

    # 出力する画像サイズを計算する。変換後の画像がすっぽりと収まるサイズへと変換する。
    x_list = destination_corner_list[:, 0]
    y_list = destination_corner_list[:, 1]
    new_width = np.max(x_list) - np.min(x_list)
    new_height = np.max(y_list) - np.min(y_list)

    # 精度と負荷のバランスから、BICUBICを採用(ケースバイケース)
    # BILINEAR だと 数百x数百px オーダーの画像処理で、数十ms程度高速にはなる。
    transformed_img = img.transform(
        size=(new_width, new_height),
        method=Image.PERSPECTIVE,
        data=homography_param,
        resample=Image.BICUBIC
    )
    return transformed_img


def calculate_homography_matrix(origin, dest):
    # type: (np.ndarray, np.ndarray) -> np.ndarray
    """
    線形DLT法にて、 変換元を変換先に対応づけるホモグラフィ行列を求める。先行実装に倣う。
    :param origin: ホモグラフィ行列計算用の初期座標配列
    :param dest: ホモグラフィ行列計算用の移動先座標配列
    :return: 計算結果のホモグラフィ行列(3 x 3)
    """
    assert origin.shape == dest.shape

    origin = __convert_corner_list_to_homography_param(origin.T)
    dest = __convert_corner_list_to_homography_param(dest.T)

    # 点を調整する(数値計算上重要)
    origin, c1 = __normalize(origin)  # 変換元
    dest, c2 = __normalize(dest)      # 変換先
    # 線形法計算のための行列を作る。
    nbr_correspondences = origin.shape[1]
    a = np.zeros((2 * nbr_correspondences, 9))
    for i in range(nbr_correspondences):
        a[2 * i] = [-origin[0][i], -origin[1][i], -1, 0, 0, 0, dest[0][i] * origin[0][i], dest[0][i] * origin[1][i],
                    dest[0][i]]
        a[2 * i + 1] = [0, 0, 0, -origin[0][i], -origin[1][i], -1, dest[1][i] * origin[0][i], dest[1][i] * origin[1][i],
                        dest[1][i]]
    u, s, v = np.linalg.svd(a)
    homography_matrix = v[8].reshape((3, 3))
    homography_matrix = np.dot(np.linalg.inv(c2), np.dot(homography_matrix, c1))
    homography_matrix = homography_matrix / homography_matrix[2, 2]
    return homography_matrix


def __normalize(point_list):
    # type: (np.ndarray) -> (np.ndarray, np.ndarray)
    """
    正規化処理
    :param point_list: 正規化対象の座標リスト
    :return: 正規化結果, 正規化に用いた係数行列(理解が怪しい)
    """
    m = np.mean(point_list[:2], axis=1)
    max_std = max(np.std(point_list[:2], axis=1)) + 1e-9
    c = np.diag([1 / max_std, 1 / max_std, 1])
    c[0][2] = -m[0] / max_std
    c[1][2] = -m[1] / max_std
    return np.dot(c, point_list), c


def __convert_corner_list_to_homography_param(point_list):
    # type: (np.ndarray) -> np.ndarray
    """
    点の集合(dim * n の配列)を同次座標系に変換する
    :param point_list: ホモグラフィ行列変換用に整形を行う座標リスト
    :return: ホモグラフィ変換用行列
    """
    return np.vstack((point_list, np.ones((1, point_list.shape[1]))))
# !/usr/bin/python
# -*- coding: utf-8 -*-

import path.to.homography as homography
import base64
from io import BytesIO

def some_method_to_process_uploaded_img(base64_img, corner_list, dest_list):
    base_img = Image.open(BytesIO(base64.b64decode(base64_img)))
    # ホモグラフィ変換実行 -> dest_list大まで、crop領域を引き伸ばす
    transformed_img = homography.transform(
        img=base_img,
        crop_corner_list=corner_list,
        destination_corner_list=dest_list
    )

    # もしくは、ホモグラフィ変換実行 -> base_img.size同様サイズまで、crop領域を引き伸ばす
    # transformed_img = homography.transform(
    #     img=base_img,
    #     crop_corner_list=corner_list
    # )

    # 必要に応じてbase64に戻す(このデータをもとに外部APIに問い合わせをする場合など)
    in_memory_file = BytesIO()
    transformed_img.save(in_memory_file, format="PNG")
    in_memory_file.seek(0)
    img_bytes = in_memory_file.read()
    transformed_base64_image = base64.b64encode(img_bytes).decode('ascii')
    # あとは煮るなり焼くなり
実行結果
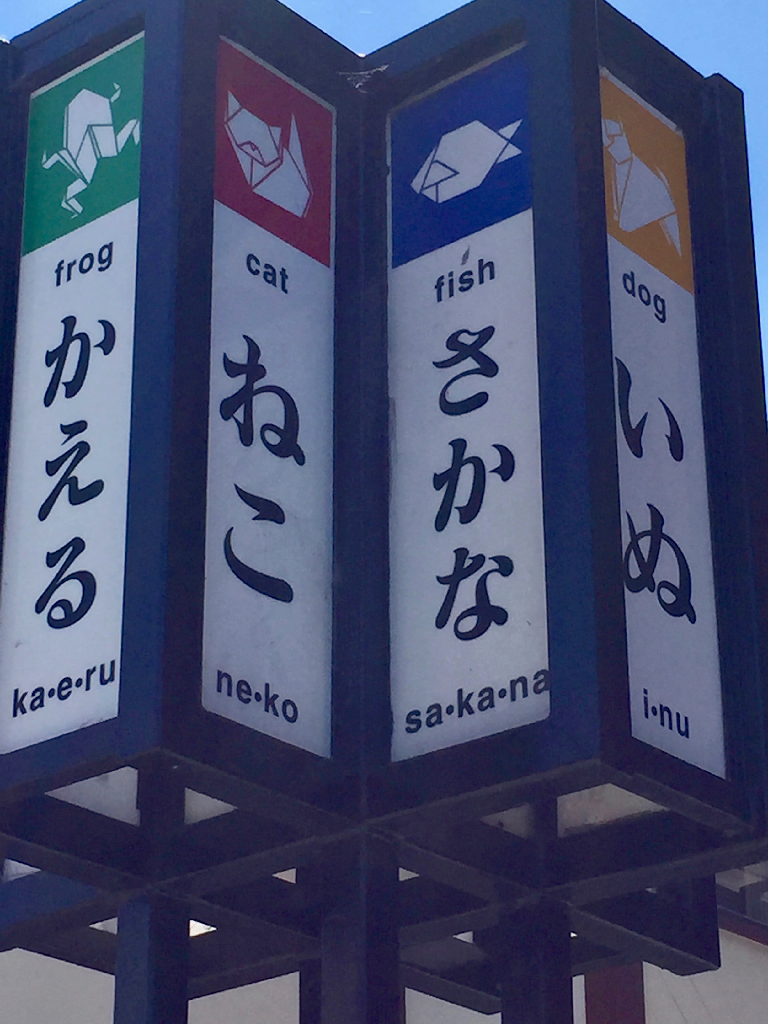
手元のMacBook Airで、試しに、とある街灯?から「ねこ」だけ抽出。
| 元画像 | 対象画像サイズ | 変換時カラースケール | 処理時間 | 変換後画像 |
|---|---|---|---|---|
 |
768x1024 | RGB | 14.5ms |  |
| 同上 | 768x1024 | グレー | 6.28ms |  |
 |
2448x3264 | RGB | 150ms |  |
| 同上 | 2448x3264 | グレー | 60.2ms |  |
"処理時間"には10回実行した平均値を記載
数百pxオーダーの画像(スマホから投稿されるようなサイズ感)なら
短いと数msで処理ができるので、業務で使い得るスコアかと。
ちなみに、元画像サイズの差が、そのまま処理時間に比例して影響するようです。
ホモグラフィ変換行列の計算あたりはややこしいものの、
総じて下処理も含め、ホモグラフィ変換自体は簡単に使えます。
おまけ
実装経緯
最初はPILでホモグラフィを実現できるという情報にすら全くたどり着けず、
Pure Pythonの自力ホモグラフィ変換の実装例も調べて試しました。
座標の変換[x,y] -> [x', y']までは、numpyで高速にできたのですが、
引き伸ばした画像の色味や欠落を補正する処理(リサンプリング)にて、
BILINEAR/BICUBICなどを高速に行列計算する方法を思いつけず、
当然、素直に1pxずつ計算してみると、計算時間が実用に耐え得るものではなかったです。
ということで、やはり、 PILのImage.transformは偉大 。
ここで得た豆知識が、Numpyは行列計算を高速で行える大黒柱的なライブラリなのですが、
np_array[0][0] などと、内包する個別データへのアクセスは遅いということ。
例えば、単純なlistよりも遅いです。向き、不向きがあるのですね。
ちなみに、直近アプリ作るのに使ってるFusetoolsというプロトタイピングツールでの、
ホモグラフィ変換の必要パラメータを集めるための実装例をこちらに記載していたりします。
Fusetools - 画像投稿フォームの実装例 - 射影変換(ホモグラフィ変換)
参考資料
- 実践コンピュータビジョン 3章 画像間の写像 /
yaju88 - 射影変換(ホモグラフィ)について理解してみる / デジタル・デザイン・ラボラトリーな日々
- アフィン変換 / 画像処理ソリューション
- Photoshopに慣れた人でも意外に知らない3つの圧縮モードの使い分け / 知る蔵
- 【コンピュータビジョン】3章「画像間の写像」 ホモグラフィ(特異値分解) / デジタル・デザイン・ラボラトリーな日々
- Pythonで特異値分解してみる / Qiita
- Github - marktao99/python
- How does perspective transformation work in PIL? / stack overflow