こんにちは、Ateam Brides Inc. Advent Calendar 2021の11日目は
株式会社エイチームブライズの![]() Qiitanかわいい芸人
Qiitanかわいい芸人![]() @naomunaomuが担当します。
@naomunaomuが担当します。

 これは何
これは何
Qiitanってかわいいですよね。
Qiitanがニコニコ動いていたら、絶対ぜったい、超かわいいですよね??
というわけで、私達のアイドルQiitanを、スペシャルかわいく動かしたいと思います!
 完成形
完成形
LottieとReactを使い、最終的にこのような画面をReact上で実装します。
(サンプルはGIFのため若干カクカクですが、実際のQiitanは5億倍かわいいです)

「Qiitan、ジャンプして!」等のボタンをクリックすることで、
パチパチとアニメーションと背景が切り替わっていく仕組みです。
Lottieなら簡単かつ軽量に、今すぐあなたのWEBサイトにも導入できますよ!
Lottieとは、Airbnbが開発した、iOSやWeb用のアニメーションライブラリです。
SVGアニメーションとして書き出せるので、軽量かつサイズを自由に変更できます。
![]() ソースコードはこちら
ソースコードはこちら
 使用ツール
使用ツール
- アニメーション作成
- Illustrator
- アニメーション素材を作成します。LottieのSVGアニメーションは、PNG等の画像は使用できないので注意! - After Effects
- アニメーションを作成します。作成後、Lottie用プラグインBodymovinで書き出します。
- Illustrator
- 実装
- Lottie
- ReactではReact-Lottieを使います。 - React
- みんな大好きなcreate-react-appです。 -
Emotion
- css Propでアニメーションの切り替えと同時にスタイルを変更します。
- Lottie
それではいってみましょう!
 アニメーションの作成
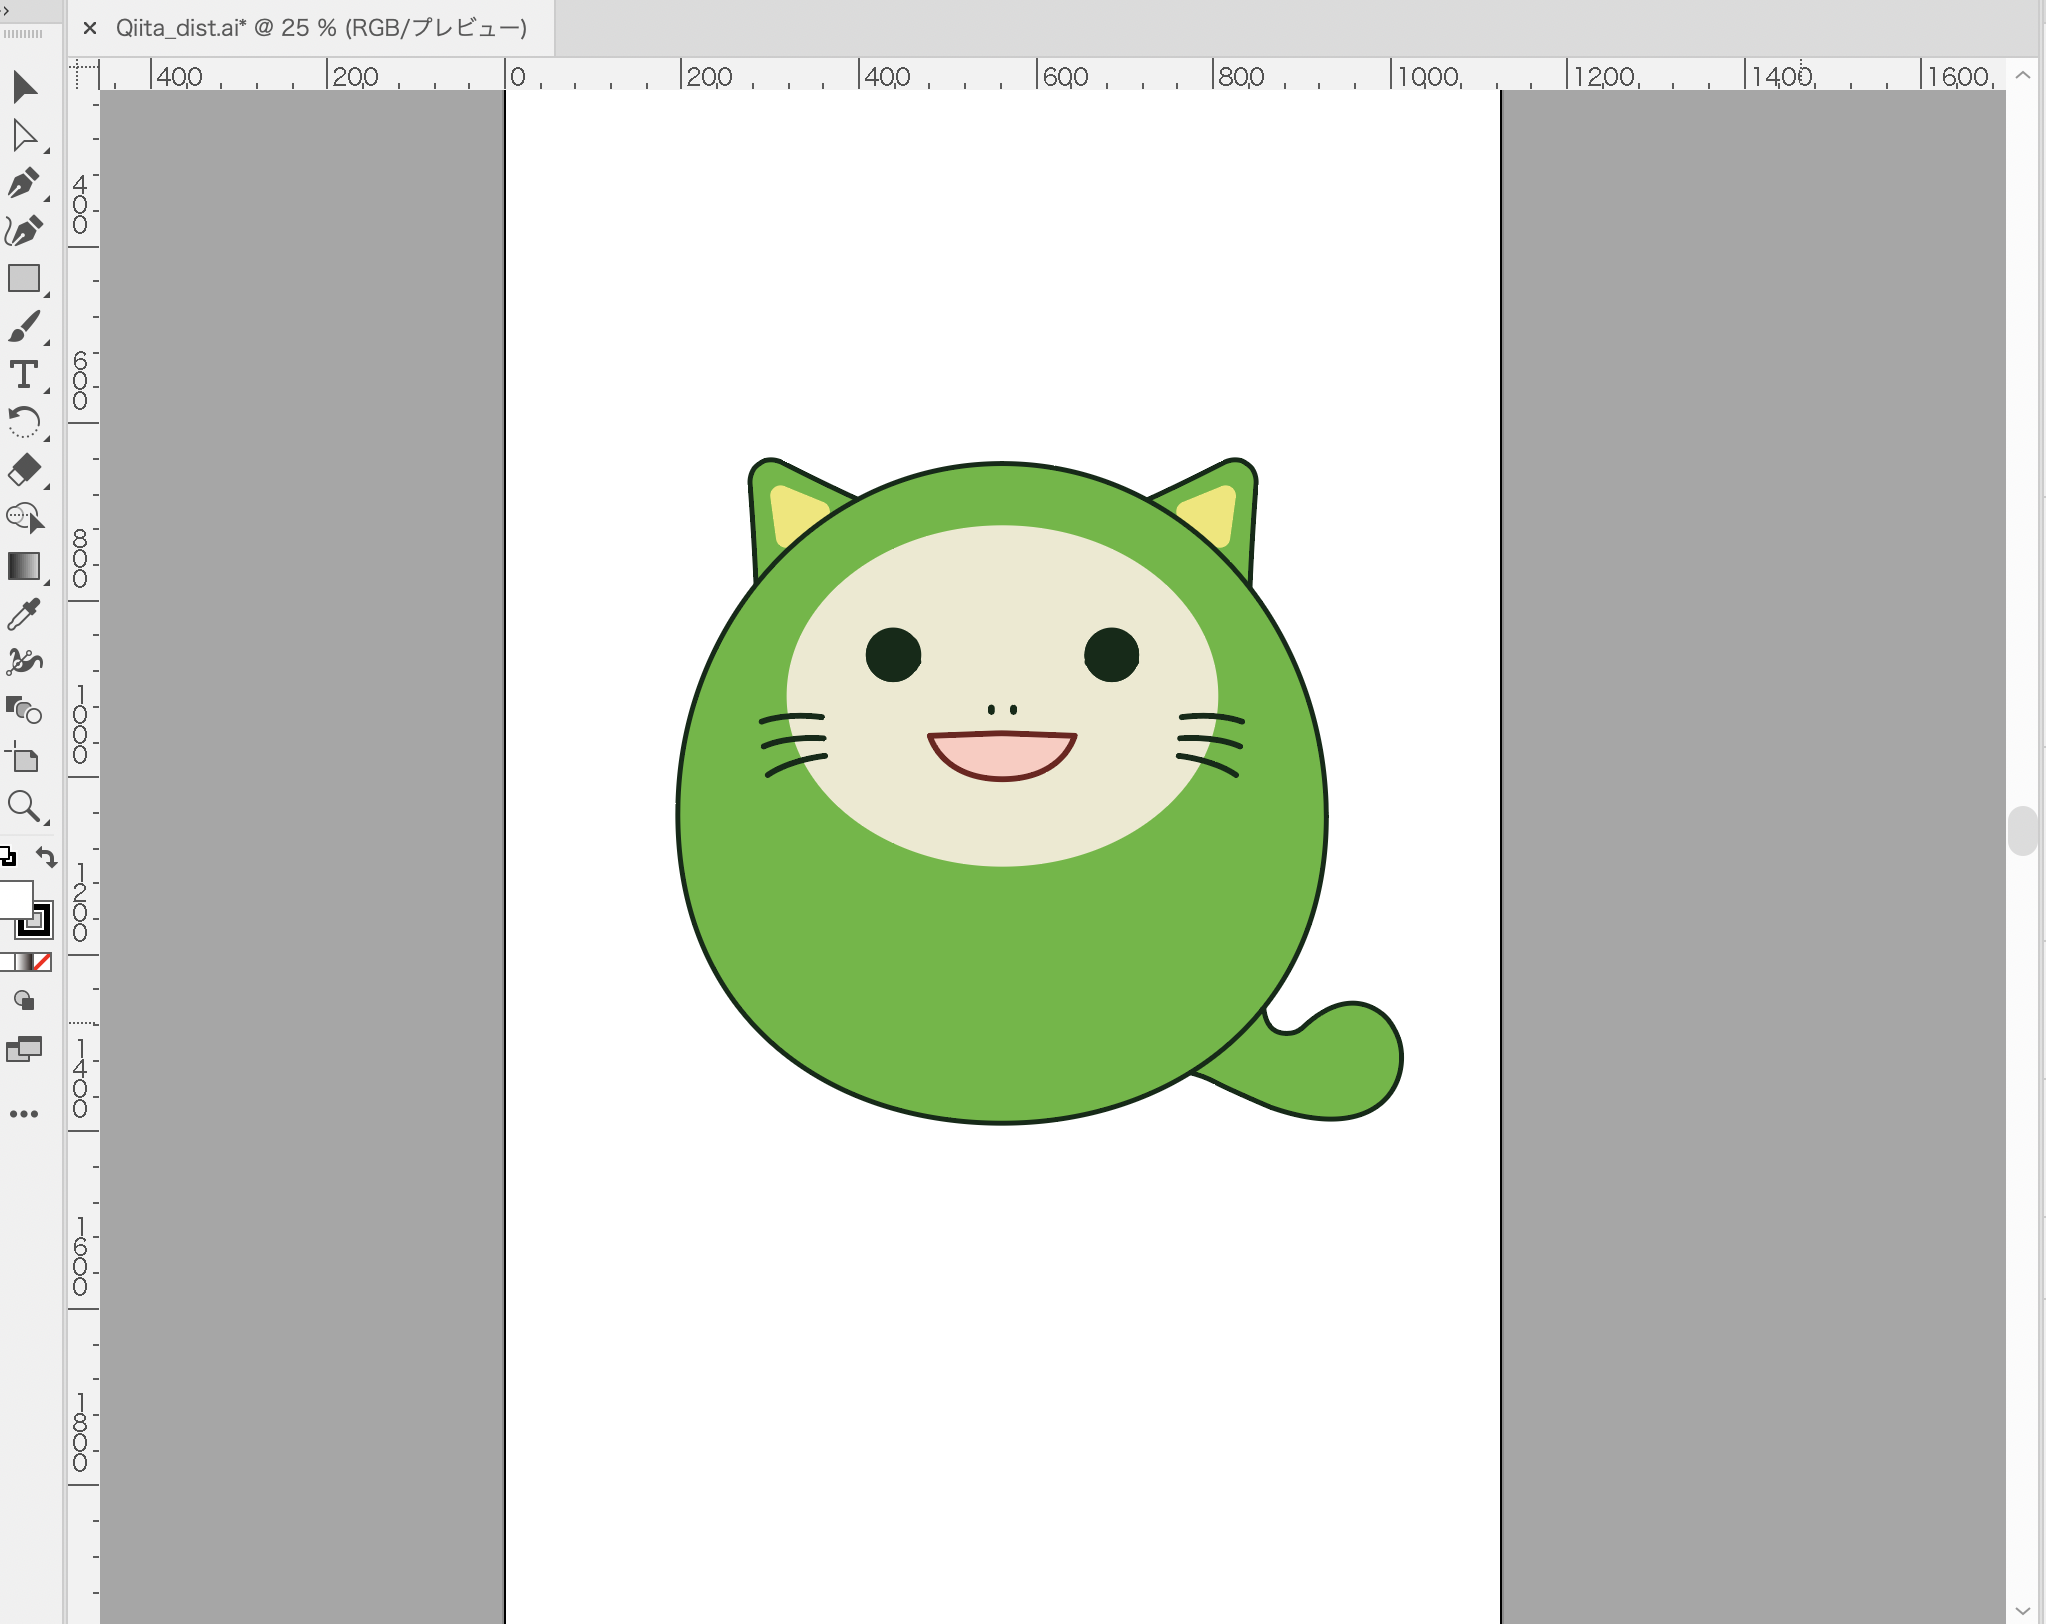
まずは完成形のアニメーションを。今回はこちらの3点を用意しました。
左から、ジャンプ / 笑顔 / 怒る です。


まずはIllustratorでアニメーションの元になるイラストデータを用意します。
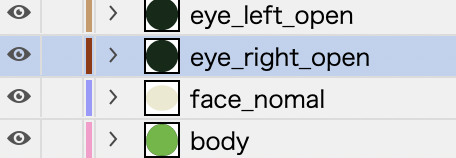
動かしたいパーツごとにレイヤーを分けて作成しましょう。
 
「eye_right_open」は右目(開)、「eye_left_open」は左目(開)ですね。

「eye_right_open」は右目(開)、「eye_left_open」は左目(開)ですね。
この時のレイヤー名・レイヤー構成がそのままAfter Effectsに反映されるため、きれいに整理しておきましょう。
aiデータが用意できたら、After Effectsに読み込みます。
 After Effectsで作成
新規プロジェクトを作成し、新規コンポジションに先程作成したaiデータを読み込みます。
読み込みの種類は「コンポジション」、フッテージサイズは「ドキュメントサイズ」です。

詳細な作成方法は省きますが、こちらの動画が非常に参考になります。ぜひ見てみてください!
![]() 参考:キャラクターが歩く!ウォークサイクルの作り方【After Effects チュートリアル】
参考:キャラクターが歩く!ウォークサイクルの作り方【After Effects チュートリアル】
 Bodymovinで書き出し
BodymovinはAfter Effects用の拡張プラグインです。作成したアニメーションをjson/html形式で書き出してくれます。
完成したらjsonデータに書き出し、Reactで実装していきましょう。
![]() ダウンロードはこちら
ダウンロードはこちら
Bodymovinhttps://exchange.adobe.com/creativecloud.details.12557.html
![]() Bodymovinの書き出し方法はこちらを参考にしてください。
Bodymovinの書き出し方法はこちらを参考にしてください。
参考:After Effectsで作ったアニメーションをreact-lottieで実装する
 うまく書き出しできない!?そんなときは要チェック!
 SVGで画像が書き出されない!?
- PNGやJPG/PSDの画像を読み込んでいるかも…
- SVGに変換できず、画像としてそのまま書き出されてしまいます。
- 必ずaiでベクターデータとして作成しましょう。
- aiデータをそのまま使用しているかも…
- ベクターデータを読み込んだだけでは、SVGとして書き出されません。ややこしい
- 作成 > ベクトルレイヤーからシェイプを作成 で、シェイプに変換しましょう。
 エフェクトが表示されない…
- Lottieでは、基本的にエフェクトは使用できません。
- 不透明度、回転、拡大縮小は使用できます。特殊なエフェクトは使用できませんので、下記を参考にエフェクトを見直してみてください。
 Lottieで簡単に実装する
ここからは実際にReact上でLottieを動かしていきます。
まずは、ReactプロジェクトにLottieをインストールしましょう。
今回はTypeScript用に@types/react-lottieも追加します。
yarn add react-lottie @types/react-lottie
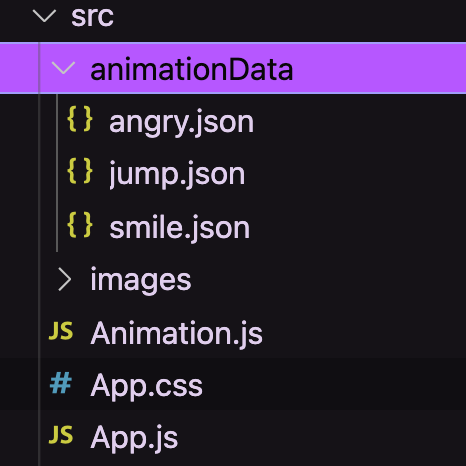
src配下にアニメーション用のフォルダを作成し、先程After Effectsで書き出したjsonデータを格納していきます。

 Component
まずはLottie用のコンポーネントLottieItem.tsxを作成し、optionを設定していきます。
animationDataに、使用するアニメーションデータファイルを指定すると、ページ上でアニメーションが再生されます。便利〜〜
今回はloopとanimationDataにpropsを渡せるように拡張しました。
import Lottie, { Options } from "react-lottie";
import { VFC } from "react";

type Props = {
  animation: Options["animationData"];
  loop: boolean;
};

export const LottieItem: VFC<Props> = ({ animation, loop }) => {
  return (
    <Lottie
      options={{
        loop: loop,
        autoplay: true,
        animationData: animation,
        rendererSettings: {
          preserveAspectRatio: "xMidYMid slice",
        },
      }}
      height={375}
      width={360}
      isClickToPauseDisabled={true}
    />
  );
};
Lottieデータは実装時、クリックされるとアニメーションが一時停止するのがデフォルトになっています。
これを止めたい場合は、isClickToPauseDisabledをtrueで渡してあげましょう。
preserveAspectRatioはアスペクト比が入ります。
sliceはボックスからはみ出したアニメーションをトリミングします。
次はLottieItem.tsxを呼び出す側のAnimation.tsxを作成します。
完成コードは長いので、一部抜粋して掲載します。
完成形はGithubをご確認ください。
/** @jsxImportSource @emotion/react */
import { css, keyframes } from "@emotion/react";
import React, { useState } from "react";
//Lottie用コンポーネント
import { LottieItem } from "./LottieItem";
//アニメーションデータ
import angry from "./animationData/angry.json";
import smile from "./animationData/smile.json";
import jump from "./animationData/jump.json";
//背景画像
import BackgroundRed from "./images/BackgroundRed.png";
import BackgroundAngry from "./images/BackgroundAngry.jpg";

//stateの型定義をします
type Action = "jump" | "smile" | "angry";

export const Animation: VFC = () => {
  //初期値はjumpです
  const [action, setAction] = useState<Action>("jump");
  const isJump = action === "jump";
  const isSmile = action === "smile";
  const isAngry = action === "angry";

  return (
    <div css={[backgroundImage(action === "angry")]}>
      <div css={container}>
        <div css={serif}>Qiitanに話しかけよう!</div>
        <div css={stage}>
          {isJump && <LottieItem animation={jump} loop={true} />}
          {isSmile && <LottieItem animation={smile} loop={false} />}
          {isAngry && <LottieItem animation={angry} loop={false} />}
        </div>

        <button onClick={() => setAction("jump")} css={button}>
          Qiitan、ジャンプして!
        </button>
        <button onClick={() => setAction("smile")} css={button}>
          Qiitan、笑って!
        </button>
        <button onClick={() => setAction("angry")} css={button}>
          Qiitan、怒った…?
        </button>
      </div>
    </div>
  );
};

const backgroundImage = (isAngry: boolean) => css`
  ${isAngry
    ? `
    background: url(${BackgroundAngry}) no-repeat top center/100%;
  ` : `
    background: url(${BackgroundRed}) repeat-x center center/100vw;
  `}
  animation: ${isAngry || scroll} 60s linear infinite;
  height: 812px;
  margin: auto;
  position: relative;
  width: 375px;
`;
ピックアップして解説していきます。
まずLottieと、After Effectsで書き出したjsonをimportします。
import Lottie from 'react-lottie';
import angry from "./animationData/angry.json"
import smile from "./animationData/smile.json"
import jump from "./animationData/jump.json"
 アニメーションの切り替え
今回はuseStateを使用し、各アニメーションと連動したボタンが押された時だけ表示されるようにしています。
//stateの型定義をします
type Action = "jump" | "smile" | "angry";

export const Animation: VFC = () => {
  //各アニメーションのクリックイベントをuseStateで管理します
  //初期値はjumpです
  const [action, setAction] = useState<Action>("jump");
  const isJump = action === "jump";
  const isSmile = action === "smile";
  const isAngry = action === "angry";

  //「Qiitan、ジャンプして!」を押した場合のみ、jumpのアニメーションがループで再生される
  {isJump && (<LottieItem animation={jump} loop={true} />)}
JSX側でLottie用コンポーネントのLottieItem.tsxを呼び出し、propsとしてanimationData、loopのtrue/falseを渡してあげます。
 Style
Style
最後に、スタイル側(Emotion)へも状態変化を渡し、再生されるアニメーションごとに背景画像を入れ替えましょう。
// 怒ったアニメーションの場合のみ、背景画像を差し替え、アニメーションをストップします
const backgroundImage = (isAngry: boolean) => css`
  ${isAngry
    ? `
    background: url(${BackgroundAngry}) no-repeat top center/100%;
  ` : `
    background: url(${BackgroundRed}) repeat-x center center/100vw;
  `}
…
 これで完成!
 最後に
最後に
いかがでしたか?
皆さんも宇宙一かわいいQiitanを作って、巨大Qiitanぬいぐるみを手にいれましょう♫
![]()
![]() キャンペーンページはこちら
キャンペーンページはこちら![]()
![]()
Ateam Brides Inc. Advent Calendar 2021の12日目は、
@hyshrがお送りします!!要チェックや!!
 素材
素材
 スペシャルサンクス
本記事の作成にあたり、下記の方々にご協力いただきました。皆様ありがとうございました!!🎉