概要
Three.js と (Three.js 未使用の) WebGL と OpenGL ES で三角形を描いて、違いを比較してみた、という話です。
以下のサンプルの WebGL、 OpenGL ES は PVRSDK から拝借しました。コードの構成が似ていて比較しやすいためです。
動機
概念としては Three.js, WebGL, OpenGL ES の違いは、
「WebGL は OpenGL ES のバインディングでしょ、Three.js は WebGL のラッパーでしょ、知ってるよそれくらい」
と理解したつもりになっていたが、コードレベルで何がどの程度違うのか知りたいなーと。
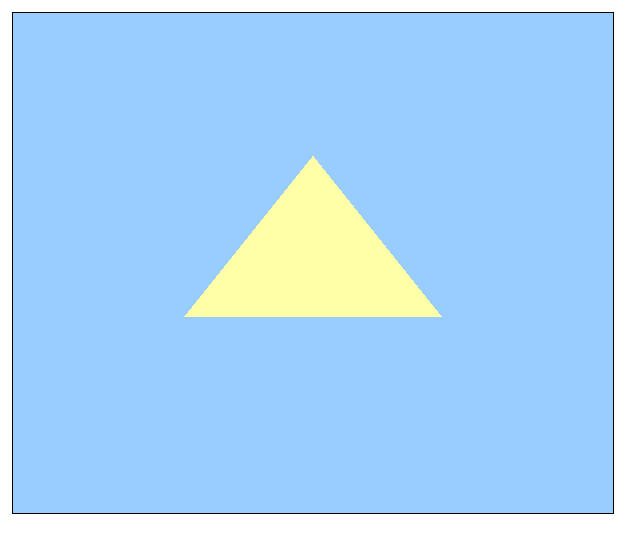
Three.js
<!DOCTYPE html>
<html>

<head>
  <meta charset='utf-8'>
  <script src="three.min.js"></script>
  <script src="http://ajax.googleapis.com/ajax/libs/jquery/2.0.3/jquery.min.js"></script>
  <script>
    $(document).ready( function() {
      // Rendererを用意
      renderer = new THREE.WebGLRenderer( { 'canvas' : $('#canvas')[0] } );

      // 背景色を指定
      renderer.setClearColor( new THREE.Color(0x99ccff) );

      renderer.setSize(600, 500);

      // Cameraを用意
      camera = new THREE.PerspectiveCamera();
      camera.position.z = 500;

      // Sceneを用意
      scene = new THREE.Scene();
      scene.add( camera );

      // 三角を作る
      var material = new THREE.MeshBasicMaterial( { color: 0xffffa8 } );
      var shape = new THREE.Shape();
      shape.moveTo(  0, 100 );
      shape.lineTo(  100, -50 );
      shape.lineTo( -100, -50 );
      shape.lineTo(  0, 100 );
      var geometry = new THREE.ShapeGeometry( shape );
      scene.add( new THREE.Mesh( geometry, material ) );

      // 描画
      renderer.render( scene, camera );
    } );
  </script>
</head>

<body>
  <canvas id="canvas" style="border:solid 1px; margin: 30px;"></canvas>
</body>
実行結果
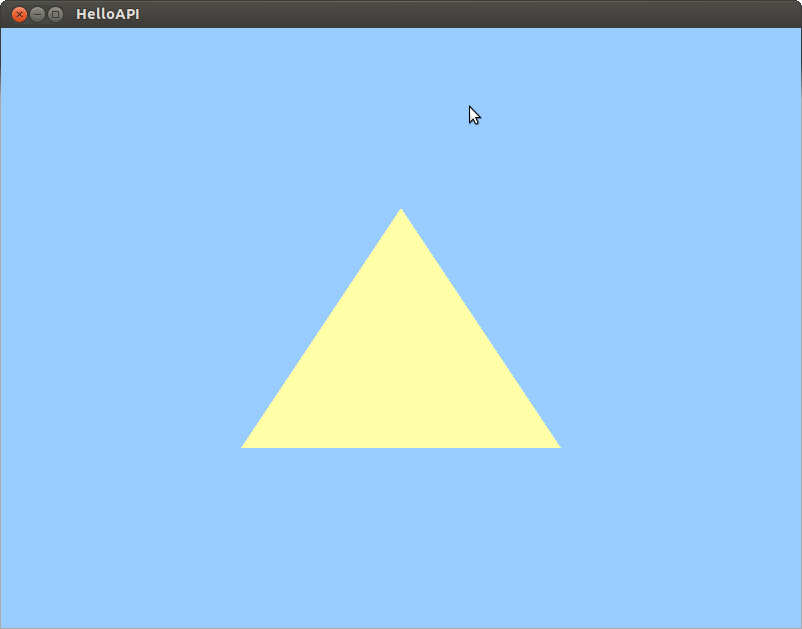
WebGL
<html>

<head>
<title>WebGLHelloAPI</title>
<meta http-equiv="content-type" content="text/html; charset=ISO-8859-1">

<script type="text/javascript" src="WebGLHelloAPI.js">
</script>


</head>

<body onload="main()">
    <canvas id="helloapicanvas" style="border: none;" width="800" height="600"></canvas>
</body>

</html>
var gl;

function testGLError(functionLastCalled) {
    /*
		gl.getError returns the last error that occurred using WebGL, not necessarily the status of the last called function. The user
		has to check after every single WebGL call or at least once every frame. Usually this would be for debugging only, but for this
		example is is enabled always.
	*/

    var lastError = gl.getError();

    if (lastError != gl.NO_ERROR) {
        alert(functionLastCalled + " failed (" + lastError + ")");
        return false;
    }

    return true;
}

function initialiseGL(canvas) {
    try {
        // Try to grab the standard context. If it fails, fallback to experimental
        gl = canvas.getContext("webgl") || canvas.getContext("experimental-webgl");
        gl.viewport(0, 0, canvas.width, canvas.height);
    }
    catch (e) {
    }

    if (!gl) {
        alert("Unable to initialise WebGL. Your browser may not support it");
        return false;
    }

    return true;
}

var shaderProgram;

function initialiseBuffer() {
    /*	Concept: Vertices
		When rendering a polygon or model to screen, WebGL has to be told where to draw the object, and more fundamentally what shape
		it is. The data used to do this is referred to as vertices, points in 3D space which are usually collected into groups of three
		to render as triangles. Fundamentally, any advanced 3D shape in WebGL is constructed from a series of these vertices - each
		vertex representing one corner of a polygon.
	*/
    /*	Concept: Buffer Objects
		To operate on any data, WebGL first needs to be able to access it. The GPU maintains a separate pool of memory it uses independent
		of the CPU. Whilst on many embedded systems these are in the same physical memory, the distinction exists so that they can use and
		allocate memory without having to worry about synchronising with any other processors in the device.
		To this end, data needs to be uploaded into buffers, which are essentially a reserved bit of memory for the GPU to use. By creating
		a buffer and giving it some data we can tell the GPU how to render a triangle.
	*/

    var vertexData = [
        -0.4, -0.4, 0.0, // Bottom left
         0.4, -0.4, 0.0, // Bottom right
         0.0, 0.4, 0.0  // Top middle
    ];

    // Generate a buffer object
    gl.vertexBuffer = gl.createBuffer();

    // Bind buffer as a vertex buffer so we can fill it with data
    gl.bindBuffer(gl.ARRAY_BUFFER, gl.vertexBuffer);

    /*
        Set the buffer's size, data and usage
        Note the last argument - gl.STATIC_DRAW. This tells the driver that we intend to read from the buffer on the GPU, and don't intend
        to modify the data until we've done with it.
    */
    gl.bufferData(gl.ARRAY_BUFFER, new Float32Array(vertexData), gl.STATIC_DRAW);

    return testGLError("initialiseBuffers");
}

function initialiseShaders() {
    /*	Concept: Shaders
        WebGL uses what are known as shaders to determine how to draw objects on the screen. Instead of the fixed function
        pipeline in early OpenGL or OpenGL ES 1.x, users can now programmatically define how vertices are transformed on screen, what
        data is used where, and how each pixel on the screen is coloured.
        These shaders are written in GL Shading Language ES: http://www.khronos.org/registry/gles/specs/2.0/GLSL_ES_Specification_1.0.17.pdf
        which is usually abbreviated to simply "GLSL ES".
        Each shader is compiled on-device and then linked into a shader program, which combines a vertex and fragment shader into a form
        that the OpenGL ES implementation can execute.
    */

    /*	Concept: Fragment Shaders
        In a final buffer of image data, each individual point is referred to as a pixel. Fragment shaders are the part of the pipeline
        which determine how these final pixels are coloured when drawn to the framebuffer. When data is passed through here, the positions
        of these pixels is already set, all that's left to do is set the final colour based on any defined inputs.
        The reason these are called "fragment" shaders instead of "pixel" shaders is due to a small technical difference between the two
        concepts. When you colour a fragment, it may not be the final colour which ends up on screen. This is particularly true when
        performing blending, where multiple fragments can contribute to the final pixel colour.
    */

    var fragmentShaderSource = '\
			void main(void) \
			{ \
				gl_FragColor = vec4(1.0, 1.0, 0.66, 1.0); \
			}';

    // Create the fragment shader object
    gl.fragShader = gl.createShader(gl.FRAGMENT_SHADER);

    // Load the source code into it
    gl.shaderSource(gl.fragShader, fragmentShaderSource);

    // Compile the source code
    gl.compileShader(gl.fragShader);

    // Check if compilation succeeded
    if (!gl.getShaderParameter(gl.fragShader, gl.COMPILE_STATUS)) {
        // It didn't. Display the info log as to why
        alert("Failed to compile the fragment shader.\n" + gl.getShaderInfoLog(gl.fragShader));
        return false;
    }

    /*	Concept: Vertex Shaders
        Vertex shaders primarily exist to allow a developer to express how to orient vertices in 3D space, through transformations like
        Scaling, Translation or Rotation. Using the same basic layout and structure as a fragment shader, these take in vertex data and
        output a fully transformed set of positions. Other inputs are also able to be used such as normals or texture coordinates, and can
        also be transformed and output alongside the position data.
    */

    // Vertex shader code
    var vertexShaderSource = '\
			attribute highp vec4 myVertex; \
			uniform mediump mat4 transformationMatrix; \
			void main(void)  \
			{ \
				gl_Position = transformationMatrix * myVertex; \
			}';

    // Create the vertex shader object
    gl.vertexShader = gl.createShader(gl.VERTEX_SHADER);

    // Load the source code into it
    gl.shaderSource(gl.vertexShader, vertexShaderSource);

    // Compile the source code
    gl.compileShader(gl.vertexShader);

    // Check if compilation succeeded
    if (!gl.getShaderParameter(gl.vertexShader, gl.COMPILE_STATUS)) {
        // It didn't. Display the info log as to why
        alert("Failed to compile the vertex shader.\n" + gl.getShaderInfoLog(gl.vertexShader));
        return false;
    }

    // Create the shader program
    gl.programObject = gl.createProgram();

    // Attach the fragment and vertex shaders to it
    gl.attachShader(gl.programObject, gl.fragShader);
    gl.attachShader(gl.programObject, gl.vertexShader);

    // Bind the custom vertex attribute "myVertex" to location 0
    gl.bindAttribLocation(gl.programObject, 0, "myVertex");

    // Link the program
    gl.linkProgram(gl.programObject);

    // Check if linking succeeded in a similar way we checked for compilation errors
    if (!gl.getProgramParameter(gl.programObject, gl.LINK_STATUS)) {
        alert("Failed to link the program.\n" + gl.getProgramInfoLog(gl.programObject));
        return false;
    }

    /*	Use the Program
        Calling gl.useProgram tells WebGL that the application intends to use this program for rendering. Now that it's installed into
        the current state, any further gl.draw* calls will use the shaders contained within it to process scene data. Only one program can
        be active at once, so in a multi-program application this function would be called in the render loop. Since this application only
        uses one program it can be installed in the current state and left there.
    */
    gl.useProgram(gl.programObject);

    return testGLError("initialiseShaders");
}

function renderScene() {
    /*
        Set the clear colour
        At the start of a frame, generally you clear the image to tell WebGL that you're done with whatever was there before and want to
        draw a new frame. In order to do that gowever, WebGL needs to know what colour to set in the image's place. gl.clearColor
        sets this value as 4 floating point values between 0.0 and 1.0, as the Red, Green, Blue and Alpha channels. Each value represents
        the intensity of the particular channel, with all 0.0 being transparent black, and all 1.0 being opaque white. Subsequent calls to
        gl.clear with the colour bit will clear the framebuffer to this vlaue.
        The functions gl.clearDepth and gl.clearStencil allow an application to do the same with depth and stencil values respectively.
    */
    gl.clearColor(0.6, 0.8, 1.0, 1.0);

    /*
        Clear the colour buffer
        gl.clear is used here with the colour buffer to clear the colour. It can also be used to clear the depth or stencil buffer using
        gl.DEPTH_BUFFER_BIT or gl.STENCIL_BUFFER_BIT, respectively.
    */

    gl.clear(gl.COLOR_BUFFER_BIT);

    // Get the location of the transformation matrix in the shader using its name
    var matrixLocation = gl.getUniformLocation(gl.programObject, "transformationMatrix");

    // Matrix used to specify the orientation of the triangle on screen
    var transformationMatrix = [
        1.0, 0.0, 0.0, 0.0,
        0.0, 1.0, 0.0, 0.0,
        0.0, 0.0, 1.0, 0.0,
        0.0, 0.0, 0.0, 1.0
    ];

    // Pass the identity transformation matrix to the shader using its location
    gl.uniformMatrix4fv(matrixLocation, gl.FALSE, transformationMatrix);

    if (!testGLError("gl.uniformMatrix4fv")) {
        return false;
    }

    // Enable the user-defined vertex array
    gl.enableVertexAttribArray(0);

    // Set the vertex data to this attribute index, with the number of floats in each position
    gl.vertexAttribPointer(0, 3, gl.FLOAT, gl.FALSE, 0, 0);

    if (!testGLError("gl.vertexAttribPointer")) {
        return false;
    }

    /*
        Draw the triangle
        gl.drawArrays is a draw call, and executes the shader program using the vertices and other state set by the user. Draw calls are the
        functions which tell WebGL when to actually draw something to the framebuffer gived the current state.
        gl.drawArrays causes the vertices to be submitted sequentially from the position given by the "first" argument until it has processed
        "count" vertices. Other draw calls exist, notably gl.drawElements which also accepts index data to allow the user to specify that
        some vertices are accessed multiple times, without copying the vertex multiple times.
        Others include versions of the above that allow the user to draw the same ovhect multiple times with slightly different data, and
        a version of gl.drawElements which allows a user to restrict the actuial indices accessed.
    */
    gl.drawArrays(gl.TRIANGLES, 0, 3);

    if (!testGLError("gl.drawArrays")) {
        return false;
    }

    return true;
}

function main() {
    var canvas = document.getElementById("helloapicanvas");

    if (!initialiseGL(canvas)) {
        return;
    }

    if (!initialiseBuffer()) {
        return;
    }

    if (!initialiseShaders()) {
        return;
    }

    // Render loop
    requestAnimFrame = (function () {
        return window.requestAnimationFrame || window.webkitRequestAnimationFrame || window.mozRequestAnimationFrame ||
			function (callback) {
			    window.setTimeout(callback, 1000, 60);
			};
    })();

    (function renderLoop() {
        if (renderScene()) {
            // Everything was successful, request that we redraw our scene again in the future
            requestAnimFrame(renderLoop);
        }
    })();
}
実行結果

OpenGL ES
コード
/*******************************************************************************************************************************************

 @File         OGLES2HelloAPI_LinuxX11.cpp

 @Title        OpenGL ES 2.0 HelloAPI Tutorial

 @Version

 @Copyright    Copyright (c) Imagination Technologies Limited.

 @Platform

 @Description  Basic Tutorial that shows step-by-step how to initialize OpenGL ES 2.0, use it for drawing a triangle and terminate it.
               Entry Point: main

*******************************************************************************************************************************************/
/*******************************************************************************************************************************************
 Include Files
*******************************************************************************************************************************************/
# include <stdio.h>
# include <stdlib.h>
# include <string.h>
# include "X11/Xlib.h"
# include "X11/Xutil.h"

# include <EGL/egl.h>
# include <GLES2/gl2.h>

/*******************************************************************************************************************************************
 Defines
*******************************************************************************************************************************************/
// Name of the application
# define APPLICATION_NAME "HelloAPI"

// Width and height of the window
# define WINDOW_WIDTH	800
# define WINDOW_HEIGHT	600

// Index to bind the attributes to vertex shaders
# define VERTEX_ARRAY	0

/*******************************************************************************************************************************************
 Helper Functions
*******************************************************************************************************************************************/

/*!*****************************************************************************************************************************************
 @Function		TestEGLError
 @Input			functionLastCalled          Function which triggered the error
 @Return		True if no EGL error was detected
 @Description	Tests for an EGL error and prints it.
*******************************************************************************************************************************************/
bool TestEGLError(const char* functionLastCalled)
{
	/*	eglGetError returns the last error that occurred using EGL, not necessarily the status of the last called function. The user has to
		check after every single EGL call or at least once every frame. Usually this would be for debugging only, but for this example
		it is enabled always.
	*/
	EGLint lastError = eglGetError();
	if (lastError != EGL_SUCCESS)
	{
		printf("%s failed (%x).\n", functionLastCalled, lastError);
		return false;
	}

	return true;
}

/*!*****************************************************************************************************************************************
 @Function		HandleX11Errors
 @Input			nativeDisplay               Handle to the display
 @Input			error                       The error event to handle
 @Return		Result code to send to the X window system
 @Description	Processes event messages for the main window
*******************************************************************************************************************************************/
int HandleX11Errors(Display *nativeDisplay, XErrorEvent *error)
{
	// Get the X Error
	char errorStringBuffer[256];
	XGetErrorText(nativeDisplay, error->error_code, errorStringBuffer, 256);

	// Print the error
	printf("%s", errorStringBuffer);

	// Exit the application
	exit(-1);

	return 0;
}

/*!*****************************************************************************************************************************************
 @Function		TestGLError
 @Input			functionLastCalled          Function which triggered the error
 @Return		True if no GL error was detected
 @Description	Tests for an GL error and prints it in a message box.
*******************************************************************************************************************************************/
bool TestGLError(const char* functionLastCalled)
{
	/*	glGetError returns the last error that occurred using OpenGL ES, not necessarily the status of the last called function. The user
		has to check after every single OpenGL ES call or at least once every frame. Usually this would be for debugging only, but for this
		example it is enabled always
	*/
	GLenum lastError = glGetError();
	if (lastError != GL_NO_ERROR)
	{
		printf("%s failed (%x).\n", functionLastCalled, lastError);
		return false;
	}

	return true;
}

/*******************************************************************************************************************************************
 Application Functions
*******************************************************************************************************************************************/

/*!*****************************************************************************************************************************************
 @Function		CreateNativeDisplay
 @Output		nativeDisplay				Native display to create
 @Return		Whether the function succeeded or not.
 @Description	Creates a native isplay for the application to render into.
*******************************************************************************************************************************************/
bool CreateNativeDisplay(Display** nativeDisplay)
{
	// Check for a valid display
	if (!nativeDisplay)
	{
		return false;
	}

	// Open the display
	*nativeDisplay = XOpenDisplay( 0 );
	if (!*nativeDisplay)
	{
		printf("Error: Unable to open X display\n");
		return false;
	}

	return true;
}

/*!*****************************************************************************************************************************************
 @Function		CreateNativeWindow
 @Input			nativeDisplay				Native display used by the application
 @Output		nativeWindow			    Native window type to create
 @Return		Whether the function succeeded or not.
 @Description	Creates a native window for the application to render into.
*******************************************************************************************************************************************/
bool CreateNativeWindow(Display* nativeDisplay, Window* nativeWindow)
{
	// Get the default screen for the display
	int defaultScreen = XDefaultScreen(nativeDisplay);

	// Get the default depth of the display
	int defaultDepth = DefaultDepth(nativeDisplay, defaultScreen);

	// Select a visual info
	XVisualInfo* visualInfo = new XVisualInfo;
	XMatchVisualInfo( nativeDisplay, defaultScreen, defaultDepth, TrueColor, visualInfo);
	if (!visualInfo)
	{
		printf("Error: Unable to acquire visual\n");
		return false;
	}

	// Get the root window for the display and default screen
	Window rootWindow = RootWindow(nativeDisplay, defaultScreen);

	// Create a colour map from the display, root window and visual info
	Colormap colourMap = XCreateColormap(nativeDisplay, rootWindow, visualInfo->visual, AllocNone);

	// Now setup the final window by specifying some attributes
	XSetWindowAttributes windowAttributes;

	// Set the colour map that was just created
	windowAttributes.colormap = colourMap;

	// Set events that will be handled by the app, add to these for other events.
	windowAttributes.event_mask = StructureNotifyMask | ExposureMask | ButtonPressMask;

	// Create the window
	*nativeWindow =XCreateWindow(nativeDisplay,               // The display used to create the window
	                             rootWindow,                   // The parent (root) window - the desktop
						  		 0,                            // The horizontal (x) origin of the window
								 0,                            // The vertical (y) origin of the window
								 WINDOW_WIDTH,                 // The width of the window
								 WINDOW_HEIGHT,                // The height of the window
								 0,                            // Border size - set it to zero
	                             visualInfo->depth,            // Depth from the visual info
								 InputOutput,                  // Window type - this specifies InputOutput.
								 visualInfo->visual,           // Visual to use
								 CWEventMask | CWColormap,     // Mask specifying these have been defined in the window attributes
								 &windowAttributes);           // Pointer to the window attribute structure

	// Make the window viewable by mapping it to the display
	XMapWindow(nativeDisplay, *nativeWindow);

	// Set the window title
	XStoreName(nativeDisplay, *nativeWindow, APPLICATION_NAME);

	// Setup the window manager protocols to handle window deletion events
	Atom windowManagerDelete = XInternAtom(nativeDisplay, "WM_DELETE_WINDOW", True);
	XSetWMProtocols(nativeDisplay, *nativeWindow, &windowManagerDelete , 1);

	// Delete the visual info
	delete visualInfo;

	return true;
}

/*!*****************************************************************************************************************************************
 @Function		CreateEGLDisplay
 @Input			nativeDisplay               The native display used by the application
 @Output		eglDisplay				    EGLDisplay created from nativeDisplay
 @Return		Whether the function succeeded or not.
 @Description	Creates an EGLDisplay from a native native display, and initialises it.
*******************************************************************************************************************************************/
bool CreateEGLDisplay( Display* nativeDisplay, EGLDisplay &eglDisplay )
{
	/*	Get an EGL display.
		EGL uses the concept of a "display" which in most environments corresponds to a single physical screen. After creating a native
		display for a given windowing system, EGL can use this handle to get a corresponding EGLDisplay handle to it for use in rendering.
		Should this fail, EGL is usually able to provide access to a default display.
	*/
	eglDisplay = eglGetDisplay((EGLNativeDisplayType)nativeDisplay);
	// If a display couldn't be obtained, return an error.
	if (eglDisplay == EGL_NO_DISPLAY)
	{
		printf("Failed to get an EGLDisplay");
		return false;
	}

	/*	Initialize EGL.
		EGL has to be initialized with the display obtained in the previous step. All EGL functions other than eglGetDisplay
		and eglGetError need an initialised EGLDisplay.
		If an application is not interested in the EGL version number it can just pass NULL for the second and third parameters, but they
		are queried here for illustration purposes.
	*/
	EGLint eglMajorVersion, eglMinorVersion;
	if (!eglInitialize(eglDisplay, &eglMajorVersion, &eglMinorVersion))
	{
		printf("Failed to initialise the EGLDisplay");
		return false;
	}

	return true;
}

/*!*****************************************************************************************************************************************
 @Function		ChooseEGLConfig
 @Input			eglDisplay                  The EGLDisplay used by the application
 @Output		eglConfig                   The EGLConfig chosen by the function
 @Return		Whether the function succeeded or not.
 @Description	Chooses an appropriate EGLConfig and return it.
*******************************************************************************************************************************************/
bool ChooseEGLConfig( EGLDisplay eglDisplay, EGLConfig& eglConfig )
{
	/*	Specify the required configuration attributes.
		An EGL "configuration" describes the capabilities an application requires and the type of surfaces that can be used for drawing.
		Each implementation exposes a number of different configurations, and an application needs to describe to EGL what capabilities it
		requires so that an appropriate one can be chosen. The first step in doing this is to create an attribute list, which is an array
		of key/value pairs which describe particular capabilities requested. In this application nothing special is required so we can query
		the minimum of needing it to render to a window, and being OpenGL ES 2.0 capable.
	*/
	const EGLint configurationAttributes[] =
	{
		EGL_SURFACE_TYPE,		EGL_WINDOW_BIT,
		EGL_RENDERABLE_TYPE,	EGL_OPENGL_ES2_BIT,
		EGL_NONE
	};

	/*	Find a suitable EGLConfig
		eglChooseConfig is provided by EGL to provide an easy way to select an appropriate configuration. It takes in the capabilities
		specified in the attribute list, and returns a list of available configurations that match or exceed the capabilities requested.
		Details of all the possible attributes and how they are selected for by this function are available in the EGL reference pages here:
		http://www.khronos.org/registry/egl/sdk/docs/man/xhtml/eglChooseConfig.html
		It is also possible to simply get the entire list of configurations and use a custom algorithm to choose a suitable one, as many
		advanced applications choose to do. For this application however, taking the first EGLConfig that the function returns suits
		its needs perfectly, so we limit it to returning a single EGLConfig.
	*/
	EGLint configsReturned;
	if (!eglChooseConfig(eglDisplay, configurationAttributes, &eglConfig, 1, &configsReturned) || (configsReturned != 1))
	{
		printf("Failed to choose a suitable config.");
		return false;
	}

	return true;
}

/*!*****************************************************************************************************************************************
 @Function		CreateEGLSurface
 @Input			nativeWindow                A native window that's been created
 @Input			eglDisplay                  The EGLDisplay used by the application
 @Input			eglConfig                   An EGLConfig chosen by the application
 @Output		eglSurface					The EGLSurface created from the native window.
 @Return		Whether the function succeeds or not.
 @Description	Creates an EGLSurface from a native window
*******************************************************************************************************************************************/
bool CreateEGLSurface( Window nativeWindow, EGLDisplay eglDisplay, EGLConfig eglConfig, EGLSurface& eglSurface)
{
	/*	Create an EGLSurface for rendering.
		Using a native window created earlier and a suitable eglConfig, a surface is created that can be used to render OpenGL ES calls to.
		There are three main surface types in EGL, which can all be used in the same way once created but work slightly differently:
		 - Window Surfaces  - These are created from a native window and are drawn to the screen.
		 - Pixmap Surfaces  - These are created from a native windowing system as well, but are offscreen and are not displayed to the user.
		 - PBuffer Surfaces - These are created directly within EGL, and like Pixmap Surfaces are offscreen and thus not displayed.
		The offscreen surfaces are useful for non-rendering contexts and in certain other scenarios, but for most applications the main
		surface used will be a window surface as performed below.
	*/
	eglSurface = eglCreateWindowSurface(eglDisplay, eglConfig, (EGLNativeWindowType)nativeWindow, NULL);
	if (!TestEGLError("eglCreateWindowSurface"))
	{
		return false;
	}

	return true;
}

/*!*****************************************************************************************************************************************
 @Function		SetupEGLContext
 @Input			eglDisplay                  The EGLDisplay used by the application
 @Input			eglConfig                   An EGLConfig chosen by the application
 @Input			eglSurface					The EGLSurface created from the native window.
 @Output		eglContext                  The EGLContext created by this function
 @Input			nativeWindow                A native window, used to display error messages
 @Return		Whether the function succeeds or not.
 @Description	Sets up the EGLContext, creating it and then installing it to the current thread.
*******************************************************************************************************************************************/
bool SetupEGLContext( EGLDisplay eglDisplay, EGLConfig eglConfig, EGLSurface eglSurface, EGLContext& eglContext )
{
	/*	Make OpenGL ES the current API.
	 EGL needs a way to know that any subsequent EGL calls are going to be affecting OpenGL ES,
	 rather than any other API (such as OpenVG).
	 */
	eglBindAPI(EGL_OPENGL_ES_API);
	if (!TestEGLError("eglBindAPI"))
	{
		return false;
	}

	/*	Create a context.
		EGL has to create what is known as a context for OpenGL ES. The concept of a context is OpenGL ES's way of encapsulating any
		resources and state. What appear to be "global" functions in OpenGL actually only operate on the current context. A context
		is required for any operations in OpenGL ES.
		Similar to an EGLConfig, a context takes in a list of attributes specifying some of its capabilities. However in most cases this
		is limited to just requiring the version of the OpenGL ES context required - In this case, OpenGL ES 2.0.
	*/
	EGLint contextAttributes[] =
	{
		EGL_CONTEXT_CLIENT_VERSION, 2,
		EGL_NONE
	};

	// Create the context with the context attributes supplied
	eglContext = eglCreateContext(eglDisplay, eglConfig, NULL, contextAttributes);
	if (!TestEGLError("eglCreateContext"))
	{
		return false;
	}

	/*	Bind the context to the current thread.
		Due to the way OpenGL uses global functions, contexts need to be made current so that any function call can operate on the correct
		context. Specifically, make current will bind the context to the thread it's called from, and unbind it from any others. To use
		multiple contexts at the same time, users should use multiple threads and synchronise between them.
	*/
	eglMakeCurrent(eglDisplay, eglSurface, eglSurface, eglContext);
	if (!TestEGLError("eglMakeCurrent"))
	{
		return false;
	}

	return true;
}

/*!*****************************************************************************************************************************************
 @Function		InitialiseBuffer
 @Output		vertexBuffer                Handle to a vertex buffer object
 @Return		Whether the function succeeds or not.
 @Description	Initialises shaders, buffers and other state required to begin rendering with OpenGL ES
*******************************************************************************************************************************************/
bool InitialiseBuffer(GLuint &vertexBuffer)
{
	/*	Concept: Vertices
		When rendering a polygon or model to screen, OpenGL ES has to be told where to draw the object, and more fundamentally what shape
		it is. The data used to do this is referred to as vertices, points in 3D space which are usually collected into groups of three
		to render as triangles. Fundamentally, any advanced 3D shape in OpenGL ES is constructed from a series of these vertices - each
		vertex representing one corner of a polygon.
	*/

	/*	Concept: Buffer Objects
		To operate on any data, OpenGL first needs to be able to access it. The GPU maintains a separate pool of memory it uses independent
		of the CPU. Whilst on many embedded systems these are in the same physical memory, the distinction exists so that they can use and
		allocate memory without having to worry about synchronising with any other processors in the device.
		To this end, data needs to be uploaded into buffers, which are essentially a reserved bit of memory for the GPU to use. By creating
		a buffer and giving it some data we can tell the GPU how to render a triangle.
	*/

	// Vertex data containing the positions of each point of the triangle
	GLfloat vertexData[] = {-0.4f,-0.4f, 0.0f,  // Bottom Left
	                         0.4f,-0.4f, 0.0f,  // Bottom Right
	                         0.0f, 0.4f, 0.0f}; // Top Middle

	// Generate a buffer object
	glGenBuffers(1, &vertexBuffer);

	// Bind buffer as an vertex buffer so we can fill it with data
	glBindBuffer(GL_ARRAY_BUFFER, vertexBuffer);

	/*	Set the buffer's size, data and usage
		Note the last argument - GL_STATIC_DRAW. This tells the driver that we intend to read from the buffer on the GPU, and don't intend
		to modify the data until we're done with it.
	*/
	glBufferData(GL_ARRAY_BUFFER, sizeof(vertexData), vertexData, GL_STATIC_DRAW);

	if (!TestGLError("glBufferData"))
	{
		return false;
	}

	return true;
}

/*!*****************************************************************************************************************************************
 @Function		InitialiseShaders
 @Output		fragmentShader              Handle to a fragment shader
 @Output		vertexShader                Handle to a vertex shader
 @Output		shaderProgram               Handle to a shader program containing the fragment and vertex shader
 @Return		Whether the function succeeds or not.
 @Description	Initialises shaders, buffers and other state required to begin rendering with OpenGL ES
*******************************************************************************************************************************************/
bool InitialiseShaders( GLuint &fragmentShader, GLuint &vertexShader, GLuint &shaderProgram)
{
	/*	Concept: Shaders
		OpenGL ES 2.0 uses what are known as shaders to determine how to draw objects on the screen. Instead of the fixed function
		pipeline in early OpenGL or OpenGL ES 1.x, users can now programmatically define how vertices are transformed on screen, what
		data is used where, and how each pixel on the screen is coloured.
		These shaders are written in GL Shading Language ES: http://www.khronos.org/registry/gles/specs/2.0/GLSL_ES_Specification_1.0.17.pdf
		which is usually abbreviated to simply "GLSL ES".
		Each shader is compiled on-device and then linked into a shader program, which combines a vertex and fragment shader into a form
		that the OpenGL ES implementation can execute.
	*/

	/*	Concept: Fragment Shaders
		In a final buffer of image data, each individual point is referred to as a pixel. Fragment shaders are the part of the pipeline
		which determine how these final pixels are coloured when drawn to the framebuffer. When data is passed through here, the positions
		of these pixels is already set, all that's left to do is set the final colour based on any defined inputs.
		The reason these are called "fragment" shaders instead of "pixel" shaders is due to a small technical difference between the two
		concepts. When you colour a fragment, it may not be the final colour which ends up on screen. This is particularly true when
		performing blending, where multiple fragments can contribute to the final pixel colour.
	*/
	const char* const fragmentShaderSource = "\
											 void main (void)\
											 {\
											 gl_FragColor = vec4(1.0, 1.0, 0.66 ,1.0);\
											 }";

	// Create a fragment shader object
	fragmentShader = glCreateShader(GL_FRAGMENT_SHADER);

	// Load the source code into it
	glShaderSource(fragmentShader, 1, (const char**)&fragmentShaderSource, NULL);

	// Compile the source code
	glCompileShader(fragmentShader);

	// Check that the shader compiled
	GLint isShaderCompiled;
	glGetShaderiv(fragmentShader, GL_COMPILE_STATUS, &isShaderCompiled);
	if (!isShaderCompiled)
	{
		// If an error happened, first retrieve the length of the log message
		int infoLogLength, charactersWritten;
		glGetShaderiv(fragmentShader, GL_INFO_LOG_LENGTH, &infoLogLength);

		// Allocate enough space for the message and retrieve it
		char* infoLog = new char[infoLogLength];
		glGetShaderInfoLog(fragmentShader, infoLogLength, &charactersWritten, infoLog);

		// Display the error in a dialog box
		infoLogLength>1 ? printf("%s", infoLog) : printf("Failed to compile fragment shader.");

		delete[] infoLog;
		return false;
	}

	/*	Concept: Vertex Shaders
		Vertex shaders primarily exist to allow a developer to express how to orient vertices in 3D space, through transformations like
		Scaling, Translation or Rotation. Using the same basic layout and structure as a fragment shader, these take in vertex data and
		output a fully transformed set of positions. Other inputs are also able to be used such as normals or texture coordinates, and can
		also be transformed and output alongside the position data.
	*/
	// Vertex shader code
	const char* const vertexShaderSource = "\
										   attribute highp vec4	myVertex;\
										   uniform mediump mat4	transformationMatrix;\
										   void main(void)\
										   {\
										   gl_Position = transformationMatrix * myVertex;\
										   }";

	// Create a vertex shader object
	vertexShader = glCreateShader(GL_VERTEX_SHADER);

	// Load the source code into the shader
	glShaderSource(vertexShader, 1, (const char**)&vertexShaderSource, NULL);

	// Compile the shader
	glCompileShader(vertexShader);

	// Check the shader has compiled
	glGetShaderiv(vertexShader, GL_COMPILE_STATUS, &isShaderCompiled);
	if (!isShaderCompiled)
	{
		// If an error happened, first retrieve the length of the log message
		int infoLogLength, charactersWritten;
		glGetShaderiv(vertexShader, GL_INFO_LOG_LENGTH, &infoLogLength);

		// Allocate enough space for the message and retrieve it
		char* infoLog = new char[infoLogLength];
		glGetShaderInfoLog(vertexShader, infoLogLength, &charactersWritten, infoLog);

		// Display the error in a dialog box
		infoLogLength>1 ? printf("%s", infoLog) : printf("Failed to compile vertex shader.");

		delete[] infoLog;
		return false;
	}

	// Create the shader program
	shaderProgram = glCreateProgram();

	// Attach the fragment and vertex shaders to it
	glAttachShader(shaderProgram, fragmentShader);
	glAttachShader(shaderProgram, vertexShader);

	// Bind the vertex attribute "myVertex" to location VERTEX_ARRAY (0)
	glBindAttribLocation(shaderProgram, VERTEX_ARRAY, "myVertex");

	// Link the program
	glLinkProgram(shaderProgram);

	// Check if linking succeeded in the same way we checked for compilation success
	GLint isLinked;
	glGetProgramiv(shaderProgram, GL_LINK_STATUS, &isLinked);
	if (!isLinked)
	{
		// If an error happened, first retrieve the length of the log message
		int infoLogLength, charactersWritten;
		glGetProgramiv(shaderProgram, GL_INFO_LOG_LENGTH, &infoLogLength);

		// Allocate enough space for the message and retrieve it
		char* infoLog = new char[infoLogLength];
		glGetProgramInfoLog(shaderProgram, infoLogLength, &charactersWritten, infoLog);

		// Display the error in a dialog box
		infoLogLength>1 ? printf("%s", infoLog) : printf("Failed to link shader program.");

		delete[] infoLog;
		return false;
	}

	/*	Use the Program
		Calling glUseProgram tells OpenGL ES that the application intends to use this program for rendering. Now that it's installed into
		the current state, any further glDraw* calls will use the shaders contained within it to process scene data. Only one program can
		be active at once, so in a multi-program application this function would be called in the render loop. Since this application only
		uses one program it can be installed in the current state and left there.
	*/
	glUseProgram(shaderProgram);

	if (!TestGLError("glUseProgram"))
	{
		return false;
	}

	return true;
}

/*!*****************************************************************************************************************************************
 @Function		RenderScene
 @Input			shaderProgram               The shader program used to render the scene
 @Input			eglDisplay                  The EGLDisplay used by the application
 @Input			eglSurface					The EGLSurface created from the native window.
 @Input			nativeDisplay				The native display used by the application
 @Return		Whether the function succeeds or not.
 @Description	Renders the scene to the framebuffer. Usually called within a loop.
*******************************************************************************************************************************************/
bool RenderScene( GLuint shaderProgram, EGLDisplay eglDisplay, EGLSurface eglSurface, Display* nativeDisplay )
{
	/*	Set the clear color
		At the start of a frame, generally you clear the image to tell OpenGL ES that you're done with whatever was there before and want to
		draw a new frame. In order to do that however, OpenGL ES needs to know what colour to set in the image's place. glClearColor
		sets this value as 4 floating point values between 0.0 and 1.0, as the Red, Green, Blue and Alpha channels. Each value represents
		the intensity of the particular channel, with all 0.0 being transparent black, and all 1.0 being opaque white. Subsequent calls to
		glClear with the colour bit will clear the frame buffer to this value.
		The functions glClearDepth and glClearStencil allow an application to do the same with depth and stencil values respectively.
	*/
	glClearColor(0.6f, 0.8f, 1.0f, 1.0f);

	/*	Clears the color buffer.
		glClear is used here with the Colour Buffer to clear the colour. It can also be used to clear the depth or stencil buffer using
		GL_DEPTH_BUFFER_BIT or GL_STENCIL_BUFFER_BIT, respectively.
	*/
	glClear(GL_COLOR_BUFFER_BIT);

	// Get the location of the transformation matrix in the shader using its name
	int matrixLocation = glGetUniformLocation(shaderProgram, "transformationMatrix");

	// Matrix used to specify the orientation of the triangle on screen.
	const float transformationMatrix[] =
	{
		1.0f,0.0f,0.0f,0.0f,
		0.0f,1.0f,0.0f,0.0f,
		0.0f,0.0f,1.0f,0.0f,
		0.0f,0.0f,0.0f,1.0f
	};

	// Pass the transformationMatrix to the shader using its location
	glUniformMatrix4fv( matrixLocation, 1, GL_FALSE, transformationMatrix);
	if (!TestGLError("glUniformMatrix4fv"))
	{
		return false;
	}

	// Enable the user-defined vertex array
	glEnableVertexAttribArray(VERTEX_ARRAY);

	// Sets the vertex data to this attribute index, with the number of floats in each position
	glVertexAttribPointer(VERTEX_ARRAY, 3, GL_FLOAT, GL_FALSE, 0, 0);
	if (!TestGLError("glVertexAttribPointer"))
	{
		return false;
	}

	/*	Draw the triangle
		glDrawArrays is a draw call, and executes the shader program using the vertices and other state set by the user. Draw calls are the
		functions which tell OpenGL ES when to actually draw something to the framebuffer given the current state.
		glDrawArrays causes the vertices to be submitted sequentially from the position given by the "first" argument until it has processed
		"count" vertices. Other draw calls exist, notably glDrawElements which also accepts index data to allow the user to specify that
		some vertices are accessed multiple times, without copying the vertex multiple times.
		Others include versions of the above that allow the user to draw the same object multiple times with slightly different data, and
		a version of glDrawElements which allows a user to restrict the actual indices accessed.
	*/
	glDrawArrays(GL_TRIANGLES, 0, 3);
	if (!TestGLError("glDrawArrays"))
	{
		return false;
	}

	/*	Present the display data to the screen.
		When rendering to a Window surface, OpenGL ES is double buffered. This means that OpenGL ES renders directly to one frame buffer,
		known as the back buffer, whilst the display reads from another - the front buffer. eglSwapBuffers signals to the windowing system
		that OpenGL ES 2.0 has finished rendering a scene, and that the display should now draw to the screen from the new data. At the same
		time, the front buffer is made available for OpenGL ES 2.0 to start rendering to. In effect, this call swaps the front and back
		buffers.
	*/
	if (!eglSwapBuffers(eglDisplay, eglSurface) )
	{
		TestEGLError("eglSwapBuffers");
		return false;
	}

	// Check for messages from the windowing system.
	int numberOfMessages = XPending(nativeDisplay);
	for( int i = 0; i < numberOfMessages; i++ )
	{
		XEvent event;
		XNextEvent(nativeDisplay, &event);

		switch( event.type )
		{
			// Exit on window close
		case ClientMessage:
			// Exit on mouse click
		case ButtonPress:
		case DestroyNotify:
			return false;
		default:
			break;
		}
	}

	return true;
}

/*!*****************************************************************************************************************************************
 @Function		DeInitialiseGLState
 @Input			fragmentShader              Handle to a fragment shader
 @Input			vertexShader                Handle to a vertex shader
 @Input			shaderProgram               Handle to a shader program containing the fragment and vertex shader
 @Input			vertexBuffer                Handle to a vertex buffer object
 @Description	Releases the resources created by "InitialiseGLState"
*******************************************************************************************************************************************/
void DeInitialiseGLState( GLuint fragmentShader, GLuint vertexShader, GLuint shaderProgram, GLuint vertexBuffer )
{
	// Frees the OpenGL handles for the program and the 2 shaders
	glDeleteShader(fragmentShader);
	glDeleteShader(vertexShader);
	glDeleteProgram(shaderProgram);

	// Delete the VBO as it is no longer needed
	glDeleteBuffers(1, &vertexBuffer);
}

/*!*****************************************************************************************************************************************
 @Function		ReleaseEGLState
 @Input			eglDisplay                   The EGLDisplay used by the application
 @Description	Releases all resources allocated by EGL
*******************************************************************************************************************************************/
void ReleaseEGLState(EGLDisplay eglDisplay)
{
	if(eglDisplay != NULL)
	{
		// To release the resources in the context, first the context has to be released from its binding with the current thread.
		eglMakeCurrent(eglDisplay, EGL_NO_SURFACE, EGL_NO_SURFACE, EGL_NO_CONTEXT);

		// Terminate the display, and any resources associated with it (including the EGLContext)
		eglTerminate(eglDisplay);
	}
}

/*!*****************************************************************************************************************************************
 @Function		ReleaseWindowAndDisplay
 @Input			nativeDisplay               The native display to release
 @Input			nativeWindow                The native window to destroy
 @Description	Releases all resources allocated by the windowing system
*******************************************************************************************************************************************/
void ReleaseNativeResources(Display* nativeDisplay, Window nativeWindow)
{
	// Destroy the window
	if (nativeWindow)
	{
		XDestroyWindow(nativeDisplay, nativeWindow);
	}

	// Release the display.
	if (nativeDisplay)
	{
		XCloseDisplay(nativeDisplay);
	}
}

/*!*****************************************************************************************************************************************
 @Function		main
 @Input			argc                        Number of arguments passed to the application, ignored.
 @Input			argv           Command line strings passed to the application, ignored.
 @Return		Result code to send to the Operating System
 @Description	Main function of the program, executes other functions.
*******************************************************************************************************************************************/
int main(int /*argc*/, char **/*argv*/)
{
	// X11 variables
	Display* nativeDisplay = NULL;
	Window nativeWindow = 0;

	// EGL variables
	EGLDisplay			eglDisplay = NULL;
	EGLConfig			eglConfig = NULL;
	EGLSurface			eglSurface = NULL;
	EGLContext			eglContext = NULL;

	// Handles for the two shaders used to draw the triangle, and the program handle which combines them.
	GLuint fragmentShader = 0, vertexShader = 0;
	GLuint shaderProgram = 0;

	// A vertex buffer object to store our model data.
	GLuint vertexBuffer = 0;

	// Get access to a native display
	if (!CreateNativeDisplay(&nativeDisplay))
	{
		goto cleanup;
	}

	// Setup the windowing system, create a window
	if (!CreateNativeWindow(nativeDisplay, &nativeWindow))
	{
		goto cleanup;
	}

	// Create and Initialise an EGLDisplay from the native display
	if (!CreateEGLDisplay(nativeDisplay, eglDisplay))
	{
		goto cleanup;
	}

	// Choose an EGLConfig for the application, used when setting up the rendering surface and EGLContext
	if (!ChooseEGLConfig(eglDisplay, eglConfig))
	{
		goto cleanup;
	}

	// Create an EGLSurface for rendering from the native window
	if (!CreateEGLSurface(nativeWindow, eglDisplay, eglConfig, eglSurface))
	{
		goto cleanup;
	}

	// Setup the EGL Context from the other EGL constructs created so far, so that the application is ready to submit OpenGL ES commands
	if (!SetupEGLContext(eglDisplay, eglConfig, eglSurface, eglContext))
	{
		goto cleanup;
	}

	// Initialise the vertex data in the application
	if (!InitialiseBuffer(vertexBuffer))
	{
		goto cleanup;
	}

	// Initialise the fragment and vertex shaders used in the application
	if (!InitialiseShaders(fragmentShader, vertexShader, shaderProgram))
	{
		goto cleanup;
	}

	// Renders a triangle for 800 frames using the state setup in the previous function
	for (int i = 0; i < 800; ++i)
	{
		if (!RenderScene(shaderProgram, eglDisplay, eglSurface, nativeDisplay))
		{
			break;
		}
	}

	// Release any resources we created in the Initialise functions
	DeInitialiseGLState(fragmentShader, vertexShader, shaderProgram, vertexBuffer);

cleanup:
	// Release the EGL State
	ReleaseEGLState(eglDisplay);

	// Release the windowing system resources
	ReleaseNativeResources(nativeDisplay, nativeWindow);

	// Destroy the eglWindow
	return 0;
}

/*******************************************************************************************************************************************
 End of file (OGLES2HelloAPI_LinuxX11.cpp)
*******************************************************************************************************************************************/
ビルド&実行
$ g++ OGLES2HelloAPI_LinuxX11.cpp -o OGLES2HelloAPI_LinuxX11 -lEGL -lGLESv2 -lX11
$ ./OGLES2HelloAPI_LinuxX11
環境: Ubuntu 12.04
実行結果
比較
三者の比較をします。
私が思う簡単な順は Three.js -> WebGL -> OpenGL ES なので、その逆の
- 「OpenGL ES と WebGL」
- 「WebGL と Three.js」
の順に比較します。
OpenGL ES と WebGL
一番大きな違いは、 初期化部分(三角形を描く前まで、特に描画領域を作るまで)が WebGL の方が簡単、ということでしょうか。
OpenGL ES: X や EGL を使用し Display を取得したり Window を生成したり、 Surface を生成したり。
WebGL: 基本的には Canvas タグ一個作るのみ
Native であればウインドウは何で作られているか環境依存ですが、 WebGL であれば実行環境は広い意味のブラウザ1つのみなので、Canvas タグで一発、ということですね。
という訳で早くお絵描き出来るようになりました。
その後の GL API の呼び出しはざっくり大きくは変わりません。
WebGL と Three.js
WebGL と Three.js の違いは、使用する GL API の数が Three.js の方が少ない、というところでしょうか。
WebGL で絵を描くときにお決まりのように GL API を複数呼び出し初期化しますが、Three.js はその部分をラップし、お作法部分を肩代わりしてくれます。
WebGL だと、gl.createBuffer で Buffer オブジェクトを作り、gl.bindBuffer し、gl.createShader と gl.shaderSource でシェーダを作り、 gl.compileShader して、 gl.createProgram, gl.attachShader, gl.linkProgram でシェーダプログラムを作り、、、 あれ、三角形描きたいだけなのにまだ描き始められない、、、
というところが、Three.js だと「Renderer 作って camera 作って scene 作って、はい三角形かけるよ!」となり簡単です。
まとめ
Three.js と WebGL と OpenGL ES で三角形を描いてみました。
OpenGL ES -> WebGL -> Three.js と進む毎に初期化量が減り、実際の描画(今回は三角形)にすぐ取りかかれるようになります。
参考
WebGL: WebGL Pre-Tutorial, Part 2: Drawing a 2d Triangle
Three.js: Three.jsでいろいろな図形を描いてみる
WebGL: powervr-graphics/WebGL_SDK
OpenGL ES: powervr-graphics/Native_SDK