概要
LIFF を開発する際、作成した Web アプリをインターネット上に公開した上でその URL を LINE Developer Console で LIFF の URL として設定する必要があります。
シンプルなのはソースコードを変更する度にデプロイするという方法ですが、プロジェクトによってはデプロイに時間がかかることもありもっと手軽に変更を試せると便利そうです。
このようなとき ngrok などが使えそうですが、最近 VS Code Port forwarding local services を知ったのでこちらを試してみたいと思います。
VS Code Port forwarding local services
簡単にいうとローカルで立ち上げたサーバに URL を割り振ってくれて、インターネットからアクセスできるようにしてくれる機能です。
まずは LIFF 関係なく、この機能を試してみます。
プロジェクトの作成
curl -sSL https://gist.githubusercontent.com/TakahashiShuuhei/a44f4e3d93bdc8c4e560db20881b8928/raw/ts-setup.sh | bash -s liffsample

cd liffsample
npm install express
npm install --save-dev @types/express
src/index.ts を以下の内容に修正
import express from 'express';
import path from 'path';
const __dirname = import.meta.dirname;

const app = express();
const port = 3000;

// 静的ファイルの提供
app.use(express.static(path.join(__dirname, 'public')));

app.get('/', (req, res) => {
  res.sendFile(path.join(__dirname, 'public', 'index.html'));
});

app.listen(port, () => {
  console.log(`Server is running at http://localhost:${port}`);
});
src/public ディレクトリを作成し、以下の内容で index.html を作成
<!DOCTYPE html>
<html lang="en">
<head>
  <meta charset="UTF-8">
  <meta name="viewport" content="width=device-width, initial-scale=1.0">
  <title>My TypeScript Web App</title>
</head>
<body>
  <h1>Hello, TypeScript!</h1>
</body>
</html>
package.json を修正
{
  ...
  "scripts": {
    "test": "jest",
    "build": "tsc && cp -r src/public dist",
    "start": "node dist/index.ts"
  },
  ...
}
以下で実行
npm run build
npm run start
これで http://localhost:3000/ にアクセスすると Web ページが表示されたと思います。
Port forwarding local services で公開
では、これを Port forwarding local services で公開してみます。
"Forward a Port" をクリック
ポート番号に 3000 を指定
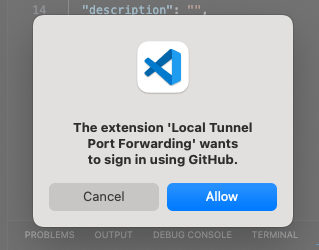
GitHub へのログインを求められるので Allow をクリック
Authorize Visual-Studio-Code をクリック
これで URL が発行されました
アクセスしてみると、ここでも認証が求められます。
Authorize Dev Tunnels をクリックするとアクセスできました。
LIFF
この Web アプリをLIFF化していきましょう。
まず LINE Developers Console で LINE ログインチャネル を選択し、LIFF を追加します。
エンドポイントURLには先程の Port forwarding local services の URL を指定します。
LIFF ID と LIFF URL をメモしておいてください。
src/public/main.js を作成
liff.init({ liffId: 'YOUR-LIFFID' })
    .then(() => {
      const idToken = liff.getDecodedIDToken();
      const elem = document.getElementById('userinfo');
      if (elem) {
        elem.innerHTML = JSON.stringify(idToken);
      }
    });
src/public/index.html を修正
<!DOCTYPE html>
<html lang="en">
<head>
  <meta charset="UTF-8">
  <meta name="viewport" content="width=device-width, initial-scale=1.0">
  <title>My TypeScript Web App</title>
  <script charset="utf-8" src="https://static.line-scdn.net/liff/edge/versions/2.22.3/sdk.js"></script>
</head>
<body>
  <h1>Hello, TypeScript!</h1>
  <div id="userinfo"></div>
  <script src="main.js"></script>
</body>
</html>
これでメモしておいた LIFF の URL にスマホからアクセスしてみましょう。
GitHub の認証画面が開いてしまいます。
これはちょっと面倒なので、Port forwarding local services の公開設定を変更します。
PORTSタブの該当の行を右クリック > Port Visibility を Public に変更します。
(セキュリティ的にリスクにはなりますので注意して利用してください)
これでローカルに立ち上げた Web アプリで LIFF SDK をつかってユーザー情報を取得し表示することができました。
最後に
実はこの後 LIFF Inspector とかも試して見ようと思っていたのですが、よく見たらこちらは ngrok の利用が前提のようなので一旦諦めます。


