プログラム
LED 点滅 ( Lチカ )
青LEDが0.5秒で点滅します
「ファイル」-「スケッチ例」-「01.Basics」-「Blink」で呼び出します。
void setup() {
  // initialize digital pin LED_BUILTIN as an output.
  pinMode(LED_BUILTIN, OUTPUT);
}

// the loop function runs over and over again forever
void loop() {
  digitalWrite(LED_BUILTIN, HIGH);   // turn the LED on (HIGH is the voltage level)
  delay(100);                       // wait for a second
  digitalWrite(LED_BUILTIN, LOW);    // turn the LED off by making the voltage LOW
  delay(100);                       // wait for a second
}
LEDストラップテストプログラム
NeoPixelのサンプルコードのPIN番号を6から8に変更しているだけです。
// NeoPixel Ring simple sketch (c) 2013 Shae Erisson
// Released under the GPLv3 license to matサンプルコードはch the rest of the
// Adafruit NeoPixel library

# include <Adafruit_NeoPixel.h>
# ifdef __AVR__
 #include <avr/power.h> // Required for 16 MHz Adafruit Trinket
# endif

// Which pin on the Arduino is connected to the NeoPixels?
# define PIN        8 // On Trinket or Gemma, suggest changing this to 1

// How many NeoPixels are attached to the Arduino?
# define NUMPIXELS 16 // Popular NeoPixel ring size

// When setting up the NeoPixel library, we tell it how many pixels,
// and which pin to use to send signals. Note that for older NeoPixel
// strips you might need to change the third parameter -- see the
// strandtest example for more information on possible values.
Adafruit_NeoPixel pixels(NUMPIXELS, PIN, NEO_GRB + NEO_KHZ800);

# define DELAYVAL 500 // Time (in milliseconds) to pause between pixels

void setup() {
  // These lines are specifically to support the Adafruit Trinket 5V 16 MHz.
  // Any other board, you can remove this part (but no harm leaving it):
# if defined(__AVR_ATtiny85__) && (F_CPU == 16000000)
  clock_prescale_set(clock_div_1);
# endif
  // END of Trinket-specific code.

  pixels.begin(); // INITIALIZE NeoPixel strip object (REQUIRED)
}

void loop() {
  pixels.clear(); // Set all pixel colors to 'off'

  // The first NeoPixel in a strand is #0, second is 1, all the way up
  // to the count of pixels minus one.
  for(int i=0; i<NUMPIXELS; i++) { // For each pixel...

    // pixels.Color() takes RGB values, from 0,0,0 up to 255,255,255
    // Here we're using a moderately bright green color:
    pixels.setPixelColor(i, pixels.Color(0, 150, 0));

    pixels.show();   // Send the updated pixel colors to the hardware.

    delay(DELAYVAL); // Pause before next pass through loop
  }
}
これを使うためには、Arduino開発環境をインストールした上で、上記コードをコピペします。コンパイルするには、NeoPixelライブラリをインストールする必要があります。
「スケッチ」-「ライブラリのインクルード」-「ライブラリの管理」でライブラリマネージャを起動します。
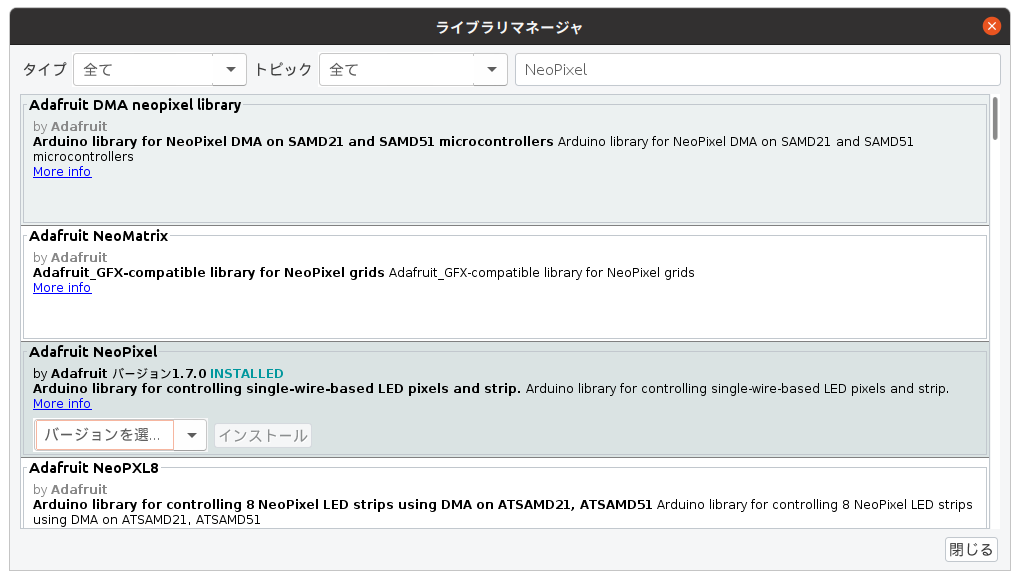
検索で NeoPixel で検索し、「Adafruit NeoPixel」を選んでインストールします。
書き込みできたらグリーンが光ります。
エモいLEDストラップのサンプルプログラム
確認できたら他のプログラムも試してみましょう。きれいなサンプルプログラム
「ファイル」-「スケッチ例」-「カスタムライブラリのスケッチ例」-「Adafruit NeoPixel」で「srandtest」を使うときれいな表示がなされます。
先程と同じように
// Which pin on the Arduino is connected to the NeoPixels?
# define PIN        6 // On Trinket or Gemma, suggest changing this to 1
を以下に変更します。
// Which pin on the Arduino is connected to the NeoPixels?
# define PIN        8 // On Trinket or Gemma, suggest changing this to 1