「Azure で Ubuntu / Apache2 で Web サーバを公開するまで」
https://qiita.com/nanbuwks/items/bb37057277cc8691a307
で設定したWebサーバで以下の設定を行います
- PHP
- UserDir
- VirtualHost
環境
- サーバ Microsoft Azure 上の Ubuntu 22.04
- ローカルPC Ubuntu 22.04
今回は、サーバは Azure 上の Virtual Server を使っていますが、特に Azure の機能は使っていません。
PHP インストール
azureuser@test-azure-gen:~$ sudo apt install php
テストスクリプトを作ります。
$ sudo vim /var/www/html/phpinfo.php
中身はこれだけ
<?php
phpinfo();
?>
ブラウザで確認すると、先の記事にあるようにドキュメントルートのファイル一覧が見えます。
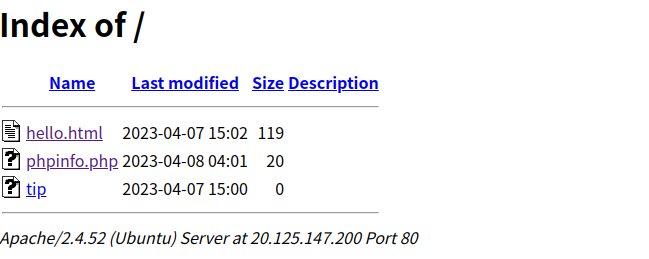
phpinfo.php を開くと、情報が表示されます。

php8.1 が入っているようです。
UserDir 機能を使用する
ユーザのローカル public_html フォルダを公開する機能です。
ローカルユーザとして、example を追加します。
$ sudo adduser example
Adding user `example' ...
Adding new group `example' (1001) ...
Adding new user `example' (1001) with group `example' ...
Creating home directory `/home/example' ...
Copying files from `/etc/skel' ...
New password:
Retype new password:
passwd: password updated successfully
Changing the user information for example
Enter the new value, or press ENTER for the default
	Full Name []:
	Room Number []:
	Work Phone []:
	Home Phone []:
	Other []:
Is the information correct? [Y/n] Y
example ユーザになります。
azureuser@test-azure-gen:~$  su - example
Password:
example@test-azure-gen:~$ pwd
/home/example
public_html フォルダを作成し、html ファイルを配置します。
example@test-azure-gen:~$ mkdir public_html
example@test-azure-gen:~$ cd public_html
example@test-azure-gen:~/public_html$ cp /var/www/html/hello.html example.html
example@test-azure-gen:~/public_html$ vim example.html
中身を以下のように変更しました。
<!DOCTYPE HTML>
<HTML><HEAD><META CHARSET=UTF-8><TITLE></TITLE></HEAD>
<BODY>
<H1>example Hello</H1>
</BODY>
</HTML>
http://<サーバIPアドレス>/~example
をブラウザで開いてみます。
現在は、Not Found と出ます。これを見えるようにする設定を以下のようにして行います。
example ユーザを抜けて azure-users ユーザに戻ります。
example@test-azure-gen:/etc/apache2/mods-enabled$ exit
apache は各種機能がモジュールで提供されていて、モジュールごとに enable / disable できます。
ユーザのローカル public_html フォルダを公開する機能は、UserDir モジュールで提供されていて、それを enable に設定する必要があります。
現在 apache2 に用意されているモジュールの一覧を確認します。
azureuser@test-azure-gen:~$ cd /etc/apache2
azureuser@test-azure-gen:/etc/apache2$ ls
apache2.conf  conf-available  conf-enabled  envvars  magic  mods-available  mods-enabled  ports.conf  sites-available  sites-enabled
azureuser@test-azure-gen:/etc/apache2$ ls mods-available/
access_compat.load    authz_user.load     dir.load                  log_debug.load       proxy_connect.load   session_crypto.load
actions.conf          autoindex.conf      dump_io.load              log_forensic.load    proxy_express.load   session_dbd.load
actions.load          autoindex.load      echo.load                 lua.load             proxy_fcgi.load      setenvif.conf
alias.conf            brotli.load         env.load                  macro.load           proxy_fdpass.load    setenvif.load
alias.load            buffer.load         expires.load              md.load              proxy_ftp.conf       slotmem_plain.load
allowmethods.load     cache.load          ext_filter.load           mime.conf            proxy_ftp.load       slotmem_shm.load
asis.load             cache_disk.conf     file_cache.load           mime.load            proxy_hcheck.load    socache_dbm.load
auth_basic.load       cache_disk.load     filter.load               mime_magic.conf      proxy_html.conf      socache_memcache.load
auth_digest.load      cache_socache.load  headers.load              mime_magic.load      proxy_html.load      socache_redis.load
auth_form.load        cern_meta.load      heartbeat.load            mpm_event.conf       proxy_http.load      socache_shmcb.load
authn_anon.load       cgi.load            heartmonitor.load         mpm_event.load       proxy_http2.load     speling.load
authn_core.load       cgid.conf           http2.conf                mpm_prefork.conf     proxy_scgi.load      ssl.conf
authn_dbd.load        cgid.load           http2.load                mpm_prefork.load     proxy_uwsgi.load     ssl.load
authn_dbm.load        charset_lite.load   ident.load                mpm_worker.conf      proxy_wstunnel.load  status.conf
authn_file.load       data.load           imagemap.load             mpm_worker.load      ratelimit.load       status.load
authn_socache.load    dav.load            include.load              negotiation.conf     reflector.load       substitute.load
authnz_fcgi.load      dav_fs.conf         info.conf                 negotiation.load     remoteip.load        suexec.load
authnz_ldap.load      dav_fs.load         info.load                 php8.1.conf          reqtimeout.conf      unique_id.load
authz_core.load       dav_lock.load       lbmethod_bybusyness.load  php8.1.load          reqtimeout.load      userdir.conf
authz_dbd.load        dbd.load            lbmethod_byrequests.load  proxy.conf           request.load         userdir.load
authz_dbm.load        deflate.conf        lbmethod_bytraffic.load   proxy.load           rewrite.load         usertrack.load
authz_groupfile.load  deflate.load        lbmethod_heartbeat.load   proxy_ajp.load       sed.load             vhost_alias.load
authz_host.load       dialup.load         ldap.conf                 proxy_balancer.conf  session.load         xml2enc.load
authz_owner.load      dir.conf            ldap.load                 proxy_balancer.load  session_cookie.load
userdir.load がありますね。
これらのうち、有効になっているモジュールは以下のようにして確認できます。
azureuser@test-azure-gen:/etc/apache2$ ls mods-enabled/
access_compat.load  authn_core.load  authz_user.load  deflate.load  filter.load       mpm_prefork.load  php8.1.load      setenvif.load
alias.conf          authn_file.load  autoindex.conf   dir.conf      mime.conf         negotiation.conf  reqtimeout.conf  status.conf
alias.load          authz_core.load  autoindex.load   dir.load      mime.load         negotiation.load  reqtimeout.load  status.load
auth_basic.load     authz_host.load  deflate.conf     env.load      mpm_prefork.conf  php8.1.conf       setenvif.conf
有効にするには、a2enmod コマンドで行います。
azureuser@test-azure-gen:/etc/apache2$ sudo a2enmod userdir
Enabling module userdir.
To activate the new configuration, you need to run:
  systemctl restart apache2
設定を反映するために、apache2 をリスタートします。
azureuser@test-azure-gen:/etc/apache2$ sudo systemctl restart apache2
さて、ブラウザでリロードすると表示が変わりました。
これは /home/nanbuwks/public_html のパーミッションが公開されていないからです。
azureuser@test-azure-gen:/etc/apache2$ su - example
Password:
example@test-azure-gen:~$ ls -alh
total 32K
drwxr-x--- 3 example example 4.0K Apr  8 04:13 .
drwxr-xr-x 4 root    root    4.0K Apr  8 04:09 ..
-rw------- 1 example example  208 Apr  8 04:13 .bash_history
-rw-r--r-- 1 example example  220 Apr  8 04:09 .bash_logout
-rw-r--r-- 1 example example 3.7K Apr  8 04:09 .bashrc
-rw-r--r-- 1 example example  807 Apr  8 04:09 .profile
-rw------- 1 example example  901 Apr  8 04:11 .viminfo
drwxrwxr-x 2 example example 4.0K Apr  8 04:11 public_html
example@test-azure-gen:~$ cd public_html/
example@test-azure-gen:~/public_html$ ls -alh
total 12K
drwxrwxr-x 2 example example 4.0K Apr  8 04:11 .
drwxr-x--- 3 example example 4.0K Apr  8 04:13 ..
-rw-r--r-- 1 example example  119 Apr  8 04:10 example.html
example.html は 644, public_html は 775 になっています。この2つは大丈夫ぽいですね。
実は . が 750 になってました。ディレクトリの実行権を追加しないと、ディレクトリの中身が読めなくなっているます。apache2 は www-data ユーザで実行しているので、パーミッションの3桁目が 0 になっているということは実行権が無いのでその配下の public_html とか example.html にアクセス権があってもブラウザから読めないということになっています。
example@test-azure-gen:~/public_html$ cd ..
example@test-azure-gen:~$ chmod 751 .
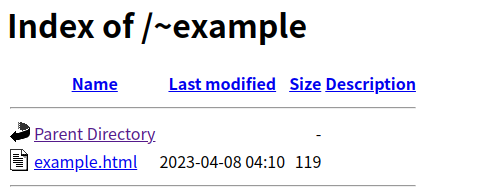
これで、ブラウザで見えるようになりました。

VirtualHost を設定する
apache で管理しているサイトは、モジュールと同じような考え方で enable / disable を個別に行います。
今回は、 example.com でアクセスすると /home/example/public_html の中身が見えるようにします。
azureuser@test-azure-gen:/etc/apache2$ ls sites-available/
000-default.conf  default-ssl.conf
azureuser@test-azure-gen:/etc/apache2$ ls sites-enabled/
000-default.conf
000-default.conf をコピーして、 example.com 用の設定を作ります。
azureuser@test-azure-gen:/etc/apache2$ sudo cp  sites-available/000-default.conf sites-available/example.com.conf
azureuser@test-azure-gen:/etc/apache2$ sudo vim sites-available/example.com.conf
中身を以下のように作りました。
<VirtualHost *:80>
        ServerName example.com
        ServerAlias www.example.com

        ServerAdmin webmaster@localhost
        DocumentRoot /home/example/public_html

        # Available loglevels: trace8, ..., trace1, debug, info, notice, warn,
        ErrorLog ${APACHE_LOG_DIR}/error.log
        CustomLog ${APACHE_LOG_DIR}/access.log combined

</VirtualHost>
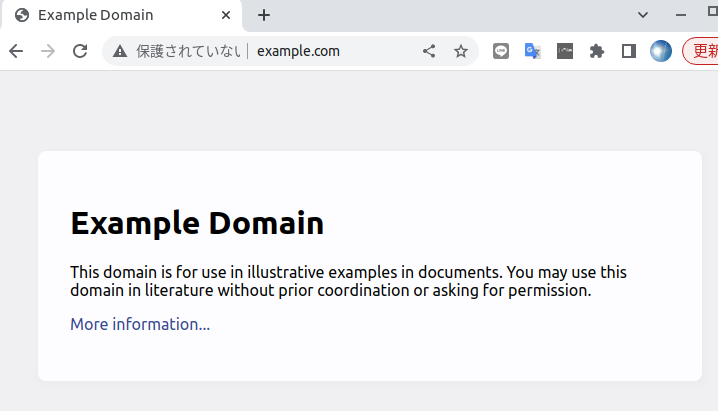
example.com は 例示ドメインとして、通常の状態では以下のように表示されます。
ドメイン情報は以下のようになっています。
手元の PC (今回は Ubuntu 22.04マシン)で dig コマンドを使いました。
$  dig example.com

; <<>> DiG 9.18.1-1ubuntu1.3-Ubuntu <<>> example.com
;; global options: +cmd
;; Got answer:
;; ->>HEADER<<- opcode: QUERY, status: NOERROR, id: 29884
;; flags: qr rd ra; QUERY: 1, ANSWER: 1, AUTHORITY: 2, ADDITIONAL: 5

;; OPT PSEUDOSECTION:
; EDNS: version: 0, flags:; udp: 65494
;; QUESTION SECTION:
;example.com.			IN	A

;; ANSWER SECTION:
example.com.		55	IN	A	93.184.216.34

;; AUTHORITY SECTION:
example.com.		55	IN	NS	b.iana-servers.net.
example.com.		55	IN	NS	a.iana-servers.net.

;; ADDITIONAL SECTION:
b.iana-servers.net.	55	IN	AAAA	2001:500:8d::53
b.iana-servers.net.	55	IN	A	199.43.133.53
a.iana-servers.net.	55	IN	AAAA	2001:500:8f::53
a.iana-servers.net.	55	IN	A	199.43.135.53

;; Query time: 0 msec
;; SERVER: 127.0.0.53#53(127.0.0.53) (UDP)
;; WHEN: Sat Apr 08 13:27:01 JST 2023
;; MSG SIZE  rcvd: 192
ローカルPC では Ubuntu 22.04 を使っています。これの /etc/hosts を以下のように編集しました。
(Azure上バーチャルサーバのIPアドレス)  example.com
(Azure上バーチャルサーバのIPアドレス)  www.example.com
127.0.0.1       localhost
127.0.1.1       nanbuwks-B550M-S2H

# The following lines are desirable for IPv6 capable hosts
::1     ip6-localhost ip6-loopback
fe00::0 ip6-localnet
ff00::0 ip6-mcastprefix
ff02::1 ip6-allnodes
ff02::2 ip6-allrouters
最初の2行を追加しています。
(Azure上バーチャルサーバのIPアドレス) が 123.456.789.012 とすると、
123.456.789.012   example.com
123.456.789.012   www.example.com
ということになります。
反映できているかどうか確認します。
$ dig example.com

; <<>> DiG 9.18.1-1ubuntu1.3-Ubuntu <<>> example.com
;; global options: +cmd
;; Got answer:
;; ->>HEADER<<- opcode: QUERY, status: NOERROR, id: 21189
;; flags: qr aa rd ra ad; QUERY: 1, ANSWER: 1, AUTHORITY: 0, ADDITIONAL: 1

;; OPT PSEUDOSECTION:
; EDNS: version: 0, flags:; udp: 65494
;; QUESTION SECTION:
;example.com.			IN	A

;; ANSWER SECTION:
example.com.		0	IN	A	(Azure上バーチャルサーバのIPアドレス)

;; Query time: 0 msec
;; SERVER: 127.0.0.53#53(127.0.0.53) (UDP)
;; WHEN: Sat Apr 08 13:28:20 JST 2023
;; MSG SIZE  rcvd: 56
ブラウザを再読込します。キャッシュを無効にするために、シフト押しながら再読込しました。
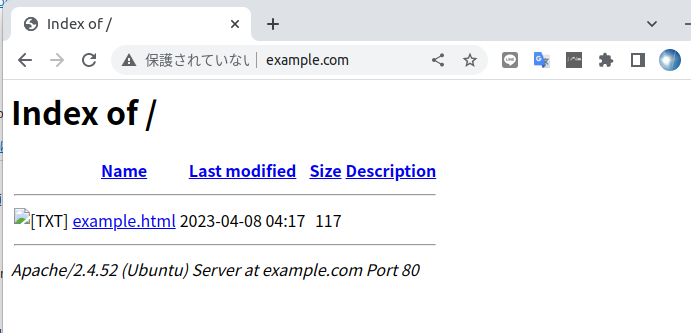
/home/example/public_html の中身が見えていることがわかります。