I2C のトラブルシューティング
温湿度気圧センサ BME280 を使おうとしましたが、データが全く取れません。
あれーおかしーなーと思ってI2Cのスキャンをかけてみることにしました。
ESP32 で I2C
I2C のデバイスは 3.3V 系のものが主流の昨今、5V 系の Arduino に接続するには何かと気を使います。3.3V 系のマイコンボードだと不安要素が一つ減るので、トラブルシューティングするにはもってこいです。
ESP32 でかつては I2C は調子悪かったらしいですが今は改善しているらしいのでデバッグ用に使っても良さそうですね。
また作例が多く参照しやすい、ESP32 は様々に使い回ししやすい、などから今回は トラブルシュートのために I2C デバイスをスキャンすることを記しておきます。
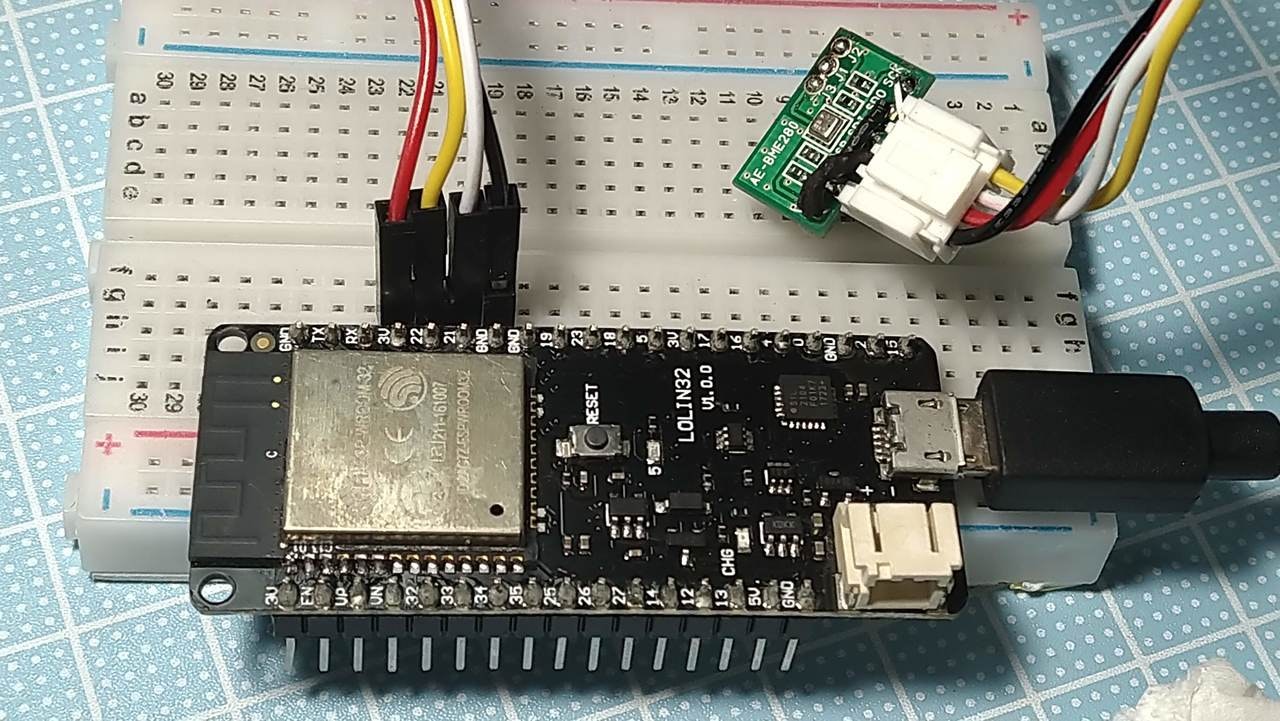
配線
| 信号 | ESP32 GPIO |
|---|---|
| SDA | 21 |
| SCL | 22 |
| (電源/VDDなど) | (3.3V) |
| (電源/GND) | (GND) |
プログラム
「Arduino Playground - I2cScanner」
https://playground.arduino.cc/Main/I2cScanner/
で公開されているプログラムがそのままESP32でも使用できます。
シリアル接続のボーレートのみ、ESP32 で使いやすい 115200bps に変更しています。
 // --------------------------------------
// i2c_scanner
//
// Version 1
//    This program (or code that looks like it)
//    can be found in many places.
//    For example on the Arduino.cc forum.
//    The original author is not know.
// Version 2, Juni 2012, Using Arduino 1.0.1
//     Adapted to be as simple as possible by Arduino.cc user Krodal
// Version 3, Feb 26  2013
//    V3 by louarnold
// Version 4, March 3, 2013, Using Arduino 1.0.3
//    by Arduino.cc user Krodal.
//    Changes by louarnold removed.
//    Scanning addresses changed from 0...127 to 1...119,
//    according to the i2c scanner by Nick Gammon
//    https://www.gammon.com.au/forum/?id=10896
// Version 5, March 28, 2013
//    As version 4, but address scans now to 127.
//    A sensor seems to use address 120.
// Version 6, November 27, 2015.
//    Added waiting for the Leonardo serial communication.
//
//
// This sketch tests the standard 7-bit addresses
// Devices with higher bit address might not be seen properly.
//

# include <Wire.h>


void setup()
{
  Wire.begin();

  Serial.begin(115200);        // for ESP32 (modify by nanbuwks /  original: 9600)
  while (!Serial);             // Leonardo: wait for serial monitor
  Serial.println("\nI2C Scanner");
}


void loop()
{
  byte error, address;
  int nDevices;

  Serial.println("Scanning...");

  nDevices = 0;
  for(address = 1; address < 127; address++ )
  {
    // The i2c_scanner uses the return value of
    // the Write.endTransmisstion to see if
    // a device did acknowledge to the address.
    Wire.beginTransmission(address);
    error = Wire.endTransmission();

    if (error == 0)
    {
      Serial.print("I2C device found at address 0x");
      if (address<16)
        Serial.print("0");
      Serial.print(address,HEX);
      Serial.println("  !");

      nDevices++;
    }
    else if (error==4)
    {
      Serial.print("Unknown error at address 0x");
      if (address<16)
        Serial.print("0");
      Serial.println(address,HEX);
    }
  }
  if (nDevices == 0)
    Serial.println("No I2C devices found\n");
  else
    Serial.println("done\n");

  delay(5000);           // wait 5 seconds for next scan
}
実行結果
Scanning...
I2C device found at address 0x77  !
done

Scanning...
I2C device found at address 0x77  !
done
スキャンの結果、アドレス 0x77 でデバイスが見つかりました。
あれ? 0x76 に設定していたはずだけどなー と思って見直したらデバイス側ではんだ付けミスしてました。やれやれ。絵に書いたようなトラブルシュートでした。
I2C とは
2線(+電源線)でデータのやり取りをする簡単な規格です。
I2C の他に、SPI や I2S などが似たような規格としてあります。
I2S は3線式の音声信号用のシリアル転送規格、SPIは3線式(片方向転送)ないし4線式(両方向転送)の規格です。
I2S,SPI は転送先が固定だったり、チップセレクト信号用のハードウェア配線で転送先を選択します。
I2C は上記規格とは異なり、ソフトウェア的にアドレスを指定して転送先を選択することが大きな違いです。
I2C は簡単?
I2C は「簡単」と書きました。例えば GROVE 端子対応のモジュールも I2C として接続するものがあります。
コネクタ1つでとっかえひっかえすればいいので、簡単・・・ではありますが、やっぱり気にしないといけないのが電圧。また、プルアップ抵抗も気にしないといけなかったり、1つのバスに複数のスレーブを接続する時の調整・・・
電子工作レベルだとこのくらいで何とかなりそうですが、もっと細かく追求するとかなり高度なところまで行ってしまい、かなり奥が深そうです。安定性などを追求するような場合は、I2C よりは SPI の方がまだ使い良いという声も聞きます。SPIはSPIで奥が深いのですけどね〜。