「nRF52840 を Segger Embedded Studio 開発環境で First Try」
https://qiita.com/nanbuwks/items/dd20dc4619af1d994f2c
の流れで、TWI(I2C)を使った実験。
TWIって何?
よく言われるI2C。I2Cは登録商標なので IIC とか TWI と言い換えられている。
環境
- Raytac の MDBT50Q–DB ボード
- nRF52840 搭載
- SEGGER Embedded Studio
- Nordic SDK との組み合わせ
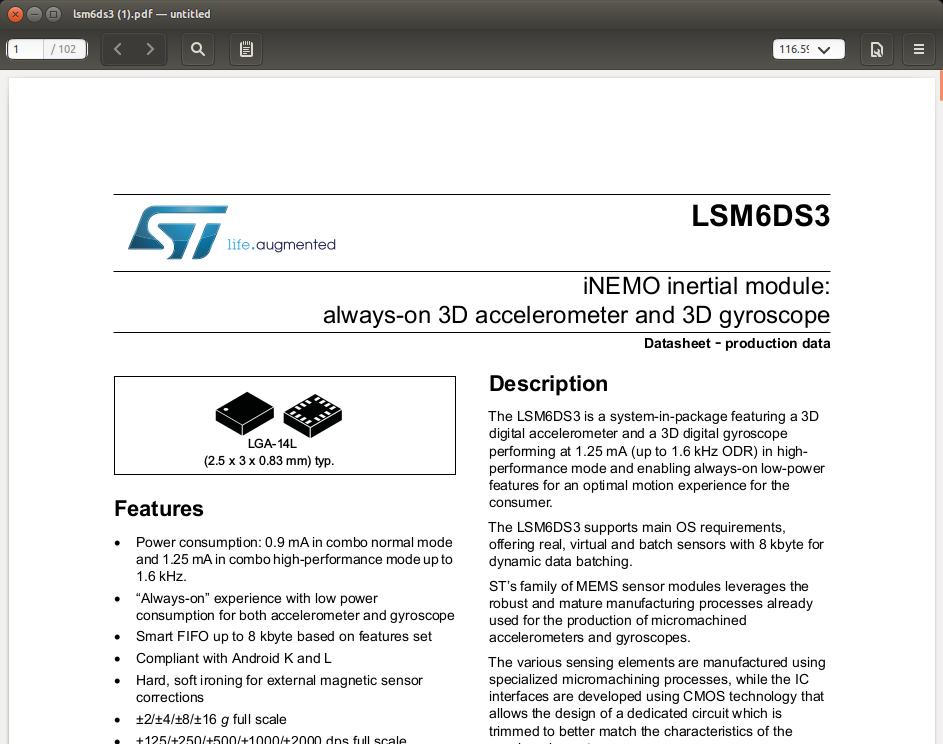
LSM6DS3
STMicroelectronics の6軸加速度センサ。
このブレークアウトボードを繋げてみました。
LSM6DS3 は I2C/SDIでつながりますが、今回は I2C の SDA と SCL として nRF52840 の 9 と 10 につなぎました。
バスをスキャンしてデバイスを検出する
SDKのサンプルプログラムを使って、デバイスを検出してみます。
examples/peripheral/twi_scanner
を使いました。
環境に合わせて以下を開きます。
examples/peripheral/twi_scanner/pca10056/blank/ses/twi_scanner_pca10056.emProject
サンプルプログラムはNordicの公式ボードであるPCA10056 (nRF52840 DK)を使うことになるのであれば配線が以下のようになることを前提としています。
SDA P0.26
SCL P0.27
今回は、SDAは9,SCLは10なので、プログラムに以下を書き加えることで違いに対処することにします。
# define ARDUINO_SCL_PIN 10
# define ARDUINO_SDA_PIN 9
(2019/2/18追記 上記9,10は Low Frequency I/O only 属性のピンでした。動くこともありますが不安定です。後に ARDUINO_SCL_PIN:30,: ARDUINO_SDA_PIN:31に変更したら安定しました。)
結果は、
NRF_LOG_INFO("TWI device detected at address 0x%x.", address);
ここから出力されるので、シリアルでPCに接続していると以下のように出ます。

0x6B で認識しました
通信してみる
WHOAMIコマンドを使って、一番基本的な通信を行ってみます。
このセンサは TWI で 0x0Fのレジスタを読めば、固有コード 0x69 が返ってきます。
# include <stdio.h>
# include "boards.h"
# include "nrf_drv_twi.h"
# include "nrf_delay.h"
# include "nrf_log.h"
# include "nrf_log_ctrl.h"
# include "nrf_log_default_backends.h"
# define DEVICE_ADDR 0x6BU
static volatile bool m_xfer_done = false;
const nrf_drv_twi_t m_twi= NRF_DRV_TWI_INSTANCE(0);
static uint8_t m_sample;
# define ARDUINO_SCL_PIN 10
# define ARDUINO_SDA_PIN 9
/*
__STATIC_INLINE void data_handler(uint8_t data)
{
NRF_LOG_INFO("Device Current Register Data: %d", data);
}
void twi_handler(nrf_drv_twi_evt_t const * p_event, void * p_context)
{
switch (p_event->type)
{
case NRF_DRV_TWI_EVT_DONE:
if (p_event->xfer_desc.type == NRF_DRV_TWI_XFER_RX)
{
data_handler(m_sample);
}
m_xfer_done = true;
break;
default:
break;
}
}
*/
void twi_init (void)
{
ret_code_t err_code;
const nrf_drv_twi_config_t twi_lm75b_config = {
.scl = ARDUINO_SCL_PIN,
.sda = ARDUINO_SDA_PIN,
.frequency = NRF_DRV_TWI_FREQ_100K,
.interrupt_priority = APP_IRQ_PRIORITY_HIGH,
.clear_bus_init = false
};
// non-blocking mode
// err_code = nrf_drv_twi_init(&m_twi, &twi_lm75b_config, twi_handler, NULL);
// blocking mode
err_code = nrf_drv_twi_init(&m_twi, &twi_lm75b_config, NULL, NULL);
APP_ERROR_CHECK(err_code);
nrf_drv_twi_enable(&m_twi);
}
ret_code_t read_register(nrf_drv_twi_t twi_instance, uint8_t device_addr, uint8_t register_addr, uint8_t *p_data, uint8_t bytes, bool no_stop)
{
ret_code_t err_code;
err_code = nrf_drv_twi_tx(&twi_instance, device_addr, ®ister_addr, 1, no_stop);
APP_ERROR_CHECK(err_code);
if(err_code != NRF_SUCCESS) {
return err_code;
}
err_code = nrf_drv_twi_rx(&twi_instance, device_addr, p_data, bytes);
return err_code;
}
int main(void)
{
ret_code_t err_code;
APP_ERROR_CHECK(NRF_LOG_INIT(NULL));
NRF_LOG_DEFAULT_BACKENDS_INIT();
twi_init(); // need aonodon
while (true)
{
err_code = read_register(m_twi, DEVICE_ADDR, 0x0f,&m_sample, sizeof(m_sample),false); // WHO AM I .. Return 0x69
NRF_LOG_INFO("WHO AM I %d.", m_sample);
NRF_LOG_FLUSH();
nrf_delay_ms(5000);
}
}
上記のコードで、以下のような反応が取れました。
<info> app: WHO AMI 105.
<info> app: WHO AMI 105.
<info> app: WHO AMI 105.
`
最初は、
// non-blocking mode
    err_code = nrf_drv_twi_init(&m_twi, &twi_lm75b_config, twi_handler, NULL);
// blocking mode
//    err_code = nrf_drv_twi_init(&m_twi, &twi_lm75b_config, NULL, NULL);
    APP_ERROR_CHECK(err_code);
としていたら 0 の値しか返ってきませんでした。
あれれーと思ってこちら見てみたら、
https://devzone.nordicsemi.com/f/nordic-q-a/21920/twi-nrf_drv_twi_rx-function-retun-error-3
ブロッキングモードについて書いてあり、そのようにしたらうまくいきました。
書き込み処理
書き込み方法はいくつかありますが、ここでは nrf_drv_twi_tx を使っています。
err_code = nrf_drv_twi_tx(&p_twi_sensors, DEVICE_ADDRESS, tx_data, sizeof(tx_data), false);
tx_data は転送バッファ、1バイト目がレジスタアドレス、2バイト目以降が転送データ。
書き込みエラー
DEVICE_ADDRESS に間違った値を入れたら err_code に 0x8201 が帰ってきました。
0x8201 って何かな? 先のリファレンスページには以下のようにありますが、
| Return values | |
|---|---|
| NRF_SUCCESS | If the procedure was successful. |
| NRF_ERROR_BUSY | If the driver is not ready for a new transfer. |
| NRF_ERROR_INTERNAL | If an error was detected by hardware. |
| NRF_ERROR_INVALID_ADDR | If the EasyDMA is used and memory adress in not in RAM. |
| NRF_ERROR_DRV_TWI_ERR_ANACK | If NACK received after sending the address in polling mode. |
| NRF_ERROR_DRV_TWI_ERR_DNACK | If NACK received after sending a data byte in polling mode. |
実際の値が何かというのは書いてなくてトホホ。
によると、以下のようになっているらしいです。
Found the eror by stepping through the twi code...NRF_TWI_ERROR_ADDRESS_NACK which results in a return code of DRV_TWI_ERR_ANACK = (01) + PERIPH_DRIVERS_ERR_BASE (0x8200)
データ取ってみる
(途中)
TWI使っていないプログラムに機能を追加
Nordic SDK のサンプルプログラムを使っていると、アクロバティックなマクロをどこで設定すればいいかがこんがらがってわけがわからなくなります。
大体は sdk_config.h で機能定義のマクロを設定しますが、どの機能がどの設定項目に対応しているかが見通しが悪いため、似た機能を持つサンプルプログラムの sdk_config.h を元に使うことになります。
TWI 使うプログラムは TWI 使っているサンプルプログラムから発展させますが、TWI 機能が入っていないサンプルプログラムに TWI 機能をつけるには?
例えば、
NRF_DRV_TWI_INSTANCE(0);
を追加すると、‘NRF_DRV_TWI_INSTANCE_0’ undeclared here (not in a function); did you mean ‘NRF_DRV_TWI_INSTANCE_’? というビルドエラーが出ます。
このエラーは nrf_drv_twi.h 中の以下の箇所から発生します。
# define NRF_DRV_TWI_INSTANCE(id)    NRF_DRV_TWI_INSTANCE_(id)
# define NRF_DRV_TWI_INSTANCE_(id)   NRF_DRV_TWI_INSTANCE_ ## id
以下を参考に、
https://devzone.nordicsemi.com/f/nordic-q-a/33621/error-nrf_drv_twi_instance_0-undeclared-here
sdk_config.h に必要な設定を足していきます。
// <h> nRF_Drivers
のディレクティブ内に足していきます。まず、
# ifndef NRFX_UART_CONFIG_DEBUG_COLOR
# define NRFX_UART_CONFIG_DEBUG_COLOR 0
# endif

// </e>

// </e>
の直下に以下を貼り付けます。
// <e> TWI_ENABLED - nrf_drv_twi - TWI/TWIM peripheral driver - legacy layer
//==========================================================
# ifndef TWI_ENABLED
# define TWI_ENABLED 1
# endif
// <o> TWI_DEFAULT_CONFIG_FREQUENCY  - Frequency

// <26738688=> 100k
// <67108864=> 250k
// <104857600=> 400k

# ifndef TWI_DEFAULT_CONFIG_FREQUENCY
# define TWI_DEFAULT_CONFIG_FREQUENCY 26738688
# endif

// <q> TWI_DEFAULT_CONFIG_CLR_BUS_INIT  - Enables bus clearing procedure during init


# ifndef TWI_DEFAULT_CONFIG_CLR_BUS_INIT
# define TWI_DEFAULT_CONFIG_CLR_BUS_INIT 0
# endif

// <q> TWI_DEFAULT_CONFIG_HOLD_BUS_UNINIT  - Enables bus holding after uninit


# ifndef TWI_DEFAULT_CONFIG_HOLD_BUS_UNINIT
# define TWI_DEFAULT_CONFIG_HOLD_BUS_UNINIT 0
# endif

// <o> TWI_DEFAULT_CONFIG_IRQ_PRIORITY  - Interrupt priority


// <i> Priorities 0,2 (nRF51) and 0,1,4,5 (nRF52) are reserved for SoftDevice
// <0=> 0 (highest)
// <1=> 1
// <2=> 2
// <3=> 3
// <4=> 4
// <5=> 5
// <6=> 6
// <7=> 7

# ifndef TWI_DEFAULT_CONFIG_IRQ_PRIORITY
# define TWI_DEFAULT_CONFIG_IRQ_PRIORITY 6
# endif

// <e> TWI0_ENABLED - Enable TWI0 instance
//==========================================================
# ifndef TWI0_ENABLED
# define TWI0_ENABLED 1
# endif
// <q> TWI0_USE_EASY_DMA  - Use EasyDMA (if present)


# ifndef TWI0_USE_EASY_DMA
# define TWI0_USE_EASY_DMA 1
# endif

// </e>

// <e> TWI1_ENABLED - Enable TWI1 instance
//==========================================================
# ifndef TWI1_ENABLED
# define TWI1_ENABLED 0
# endif
// <q> TWI1_USE_EASY_DMA  - Use EasyDMA (if present)


# ifndef TWI1_USE_EASY_DMA
# define TWI1_USE_EASY_DMA 0
# endif

// </e>

// </e>
nrf_drv_twi ライブラリは nrf_drv_twi.c 内で nrfx_twi / nrfx_twim ライブラリを呼び出しているので、
# ifndef NRFX_PRS_CONFIG_DEBUG_COLOR
# define NRFX_PRS_CONFIG_DEBUG_COLOR 0
# endif

// </e>

// </e>
の直下に以下を貼り付けます
// <e> NRFX_TWIM_ENABLED - nrfx_twim - TWIM peripheral driver
//==========================================================
# ifndef NRFX_TWIM_ENABLED
# define NRFX_TWIM_ENABLED 1
# endif
// <q> NRFX_TWIM0_ENABLED  - Enable TWIM0 instance


# ifndef NRFX_TWIM0_ENABLED
# define NRFX_TWIM0_ENABLED 0
# endif

// <q> NRFX_TWIM1_ENABLED  - Enable TWIM1 instance


# ifndef NRFX_TWIM1_ENABLED
# define NRFX_TWIM1_ENABLED 0
# endif

// <o> NRFX_TWIM_DEFAULT_CONFIG_FREQUENCY  - Frequency

// <26738688=> 100k
// <67108864=> 250k
// <104857600=> 400k

# ifndef NRFX_TWIM_DEFAULT_CONFIG_FREQUENCY
# define NRFX_TWIM_DEFAULT_CONFIG_FREQUENCY 26738688
# endif

// <q> NRFX_TWIM_DEFAULT_CONFIG_HOLD_BUS_UNINIT  - Enables bus holding after uninit


# ifndef NRFX_TWIM_DEFAULT_CONFIG_HOLD_BUS_UNINIT
# define NRFX_TWIM_DEFAULT_CONFIG_HOLD_BUS_UNINIT 0
# endif

// <o> NRFX_TWIM_DEFAULT_CONFIG_IRQ_PRIORITY  - Interrupt priority

// <0=> 0 (highest)
// <1=> 1
// <2=> 2
// <3=> 3
// <4=> 4
// <5=> 5
// <6=> 6
// <7=> 7

# ifndef NRFX_TWIM_DEFAULT_CONFIG_IRQ_PRIORITY
# define NRFX_TWIM_DEFAULT_CONFIG_IRQ_PRIORITY 6
# endif

// <e> NRFX_TWIM_CONFIG_LOG_ENABLED - Enables logging in the module.
//==========================================================
# ifndef NRFX_TWIM_CONFIG_LOG_ENABLED
# define NRFX_TWIM_CONFIG_LOG_ENABLED 0
# endif
// <o> NRFX_TWIM_CONFIG_LOG_LEVEL  - Default Severity level

// <0=> Off
// <1=> Error
// <2=> Warning
// <3=> Info
// <4=> Debug

# ifndef NRFX_TWIM_CONFIG_LOG_LEVEL
# define NRFX_TWIM_CONFIG_LOG_LEVEL 3
# endif

// <o> NRFX_TWIM_CONFIG_INFO_COLOR  - ANSI escape code prefix.

// <0=> Default
// <1=> Black
// <2=> Red
// <3=> Green
// <4=> Yellow
// <5=> Blue
// <6=> Magenta
// <7=> Cyan
// <8=> White

# ifndef NRFX_TWIM_CONFIG_INFO_COLOR
# define NRFX_TWIM_CONFIG_INFO_COLOR 0
# endif

// <o> NRFX_TWIM_CONFIG_DEBUG_COLOR  - ANSI escape code prefix.

// <0=> Default
// <1=> Black
// <2=> Red
// <3=> Green
// <4=> Yellow
// <5=> Blue
// <6=> Magenta
// <7=> Cyan
// <8=> White

# ifndef NRFX_TWIM_CONFIG_DEBUG_COLOR
# define NRFX_TWIM_CONFIG_DEBUG_COLOR 0
# endif

// </e>

// </e>

// <e> NRFX_TWI_ENABLED - nrfx_twi - TWI peripheral driver
//==========================================================
# ifndef NRFX_TWI_ENABLED
# define NRFX_TWI_ENABLED 1
# endif
// <q> NRFX_TWI0_ENABLED  - Enable TWI0 instance


# ifndef NRFX_TWI0_ENABLED
# define NRFX_TWI0_ENABLED 0
# endif

// <q> NRFX_TWI1_ENABLED  - Enable TWI1 instance


# ifndef NRFX_TWI1_ENABLED
# define NRFX_TWI1_ENABLED 0
# endif

// <o> NRFX_TWI_DEFAULT_CONFIG_FREQUENCY  - Frequency

// <26738688=> 100k
// <67108864=> 250k
// <104857600=> 400k

# ifndef NRFX_TWI_DEFAULT_CONFIG_FREQUENCY
# define NRFX_TWI_DEFAULT_CONFIG_FREQUENCY 26738688
# endif

// <q> NRFX_TWI_DEFAULT_CONFIG_HOLD_BUS_UNINIT  - Enables bus holding after uninit


# ifndef NRFX_TWI_DEFAULT_CONFIG_HOLD_BUS_UNINIT
# define NRFX_TWI_DEFAULT_CONFIG_HOLD_BUS_UNINIT 0
# endif

// <o> NRFX_TWI_DEFAULT_CONFIG_IRQ_PRIORITY  - Interrupt priority

// <0=> 0 (highest)
// <1=> 1
// <2=> 2
// <3=> 3
// <4=> 4
// <5=> 5
// <6=> 6
// <7=> 7

# ifndef NRFX_TWI_DEFAULT_CONFIG_IRQ_PRIORITY
# define NRFX_TWI_DEFAULT_CONFIG_IRQ_PRIORITY 6
# endif

// <e> NRFX_TWI_CONFIG_LOG_ENABLED - Enables logging in the module.
//==========================================================
# ifndef NRFX_TWI_CONFIG_LOG_ENABLED
# define NRFX_TWI_CONFIG_LOG_ENABLED 0
# endif
// <o> NRFX_TWI_CONFIG_LOG_LEVEL  - Default Severity level

// <0=> Off
// <1=> Error
// <2=> Warning
// <3=> Info
// <4=> Debug

# ifndef NRFX_TWI_CONFIG_LOG_LEVEL
# define NRFX_TWI_CONFIG_LOG_LEVEL 3
# endif

// <o> NRFX_TWI_CONFIG_INFO_COLOR  - ANSI escape code prefix.

// <0=> Default
// <1=> Black
// <2=> Red
// <3=> Green
// <4=> Yellow
// <5=> Blue
// <6=> Magenta
// <7=> Cyan
// <8=> White

# ifndef NRFX_TWI_CONFIG_INFO_COLOR
# define NRFX_TWI_CONFIG_INFO_COLOR 0
# endif

// <o> NRFX_TWI_CONFIG_DEBUG_COLOR  - ANSI escape code prefix.

// <0=> Default
// <1=> Black
// <2=> Red
// <3=> Green
// <4=> Yellow
// <5=> Blue
// <6=> Magenta
// <7=> Cyan
// <8=> White

# ifndef NRFX_TWI_CONFIG_DEBUG_COLOR
# define NRFX_TWI_CONFIG_DEBUG_COLOR 0
# endif

// </e>
更に、これらを使用する .c ファイルを emProjectファイルに追加します。
<folder Name="nRF_Drivers">
の配下に以下を追加します。
      <file file_name="../../../../../../../integration/nrfx/legacy/nrf_drv_twi.c" />
      <file file_name="../../../../../../../modules/nrfx/drivers/src/nrfx_twi.c" />
      <file file_name="../../../../../../../modules/nrfx/drivers/src/nrfx_twim.c" />
相対ディレクトリで指定しているので、階層位置は適宜調整します。