Raspberry pi で FAX 受信専用サーバをつくりました。
要件
- FAX受信 → プリンタ印刷およびメール送信
- ヘッドレス
いままでは、「まいと~く FAX 9 Pro」+ Windows8 で FAX受信→ プリンタ印刷およびメール送信を行っていた。
旧システムの問題点
- Windows8 が長期稼働に向いていない
- WindowsUpdateのリスク
- メモリリーク? でデスクトップ操作が著しく緩慢になる
- PC1台専有するのがもったいない(電気代、場所、コスト)
- システム管理としてデスクトップGUIが必要でもったいない(KVM機材)
元々、ナンバーディスプレイ対応ということでまいと~くシリーズを選択していた。
しかしナンバーディスプレイに由来した機能は現状使わなくなってしまった。なのでこだわらなくてもいいかなと。
環境
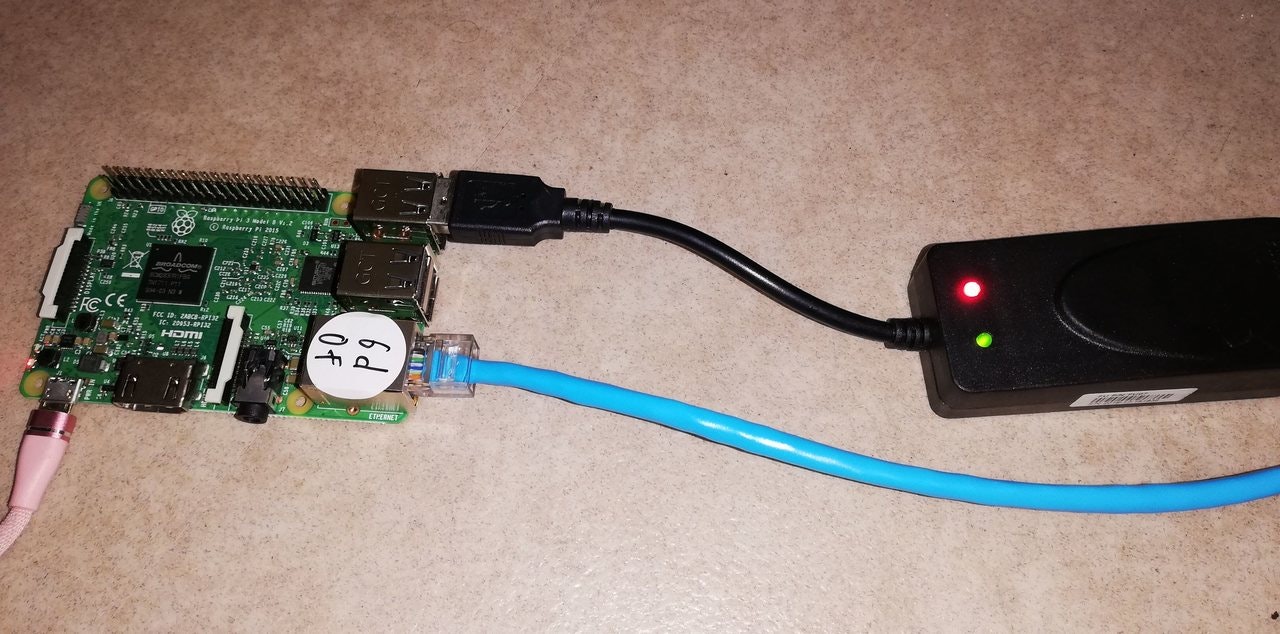
- Raspberry Pi 3 Model B
- Raspbian Stretch Lite 2018-11-13 版
- 電話回線 (旧来のモジュラー電話回線。SIPとかではない。)
- HylaFAXを使用します
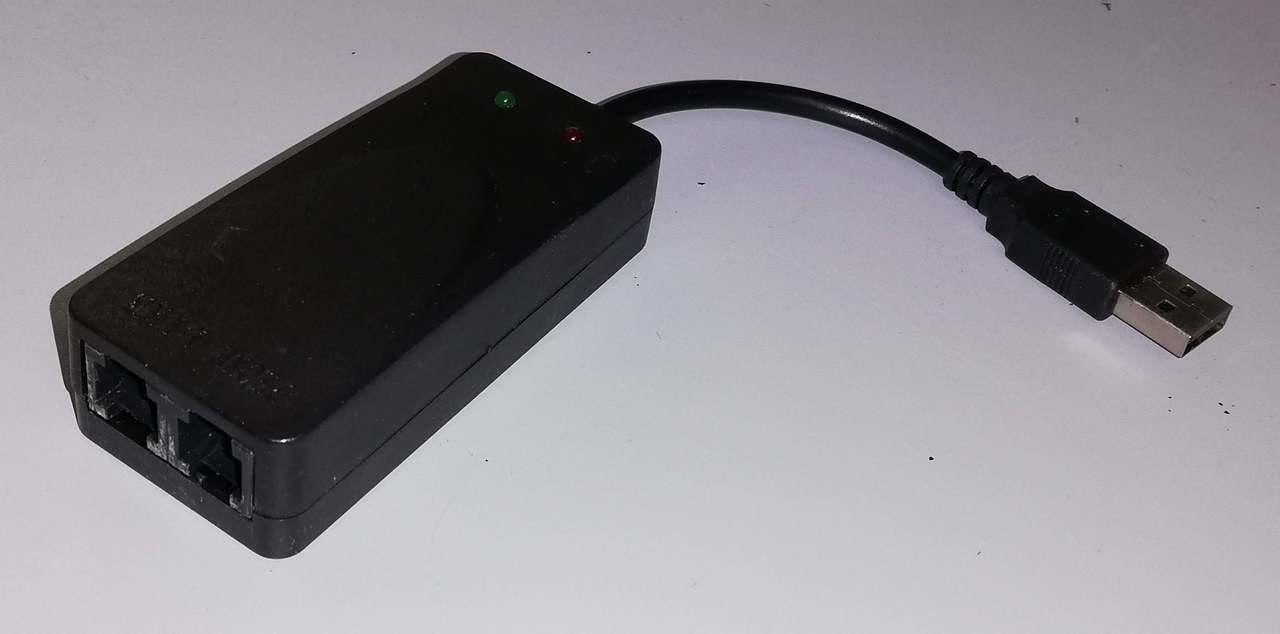
- USB FAXMODEM
FAXMODEM
AGPtek External USB2.0 FAX MODEMファックスモデム【IN/OUT端子付き】56K V.92 V.90 CX93010 win7RJ11 という名前でAmazon.jpで販売されているものを購入。
¥ 1,850 でした。
設定
あらかじめ、RaspberryPiの初期設定は終わらせておく。
- sshでログイン
- apt-get で最新の環境にアップデートは終わらせておく(執筆時2019/3/8時点)。
b
また、設定のために vim をインストール。他に、トラブルシュートのために nmap, telnet,picocomをインストールしている。
メール送信できるようにする
ヘッドレス環境で設定および運用するので、先に受信結果を確認できる方法を先に設定した。
Gmail サーバ を使って Raspberry Pi から メール送信 (「安全性の低いアプリの許可」を使う方法)
https://qiita.com/nanbuwks/items/28e444c7c31cd5e2a189
FAXモデムの認識
FAXモデムを Raspberry Pi のUSBコネクタに差し込みます。
dmesgしてみると、
[ 1387.411478] usb 1-1.4: new full-speed USB device number 4 using dwc_otg
[ 1387.568813] usb 1-1.4: New USB device found, idVendor=0572, idProduct=1340
[ 1387.568825] usb 1-1.4: New USB device strings: Mfr=1, Product=2, SerialNumber=3
[ 1387.568834] usb 1-1.4: Product: USB Modem
[ 1387.568842] usb 1-1.4: Manufacturer: Conexant
[ 1387.568850] usb 1-1.4: SerialNumber: 12345678
[ 1387.622691] cdc_acm 1-1.4:1.0: ttyACM0: USB ACM device
[ 1387.678659] usbcore: registered new interface driver cdc_acm
[ 1387.678671] cdc_acm: USB Abstract Control Model driver for USB modems and ISDN adapters
と出ました。うまく認識できているみたいです。
hylafax をインストール
sudo apt-get install hylafax-server
としてから、
sudo faxsetup
で設定します。
「すべてをカスタマイズせよ ハード、ソフト、プログラム、車など、自分色に染めてゆくのだ」
の 2016-06-11(Sat)「まいと~く から HylaFax に乗り換えて Windows から送信しちゃうぞ」
を参考にしました。
pi@raspberrypi:~ $ sudo faxsetup
Setup program for HylaFAX (tm) 6.0.6.

Created for armv7l-unknown-linux-gnueabihf on Tue, 18 Sep 2018 23:30:10 +0200.

Reading cached parameters from /var/spool/hylafax/etc/setup.cache.

Found base64 encoder: /usr/bin/base64
Found Quoted-Printable encoder: qp-encode
Found mimencode for compatibilty: mimencode
Checking system for proper server configuration.


Warning: /etc/hylafax/getty-link does not exist or is not an executable program!

The file:

    /etc/hylafax/getty-link

does not exist or this file is not an executable program.  The
HylaFAX software optionally uses this program and the fact that
it does not exist on the system is not a fatal error.  If the
program resides in a different location and you do not want to
install a symbolic link for /etc/hylafax/getty-link that points to your program
then you must reconfigure and rebuild HylaFAX from source code.


Warning: /etc/hylafax/vgetty-link does not exist or is not an executable program!

The file:

    /etc/hylafax/vgetty-link

does not exist or this file is not an executable program.  The
HylaFAX software optionally uses this program and the fact that
it does not exist on the system is not a fatal error.  If the
program resides in a different location and you do not want to
install a symbolic link for /etc/hylafax/vgetty-link that points to your program
then you must reconfigure and rebuild HylaFAX from source code.


Warning: /etc/hylafax/egetty-link does not exist or is not an executable program!

The file:

    /etc/hylafax/egetty-link

does not exist or this file is not an executable program.  The
HylaFAX software optionally uses this program and the fact that
it does not exist on the system is not a fatal error.  If the
program resides in a different location and you do not want to
install a symbolic link for /etc/hylafax/egetty-link that points to your program
then you must reconfigure and rebuild HylaFAX from source code.

Make /var/spool/hylafax/bin/ps2fax a link to /var/spool/hylafax/bin/ps2fax.gs.


Make /var/spool/hylafax/bin/pdf2fax a link to /var/spool/hylafax/bin/pdf2fax.gs.

Update /var/spool/hylafax/status/any.info.

	HylaFAX configuration parameters are:

	[1] Init script starts faxq:		yes
	[2] Init script starts hfaxd		yes
	[3] Start paging protocol:		no
Are these ok [yes]?

Modem support functions written to /var/spool/hylafax/etc/setup.modem.
Configuration parameters written to /var/spool/hylafax/etc/setup.cache.

Restarting HylaFAX server processes.
Should I restart the HylaFAX server processes [yes]?

/etc/init.d/hylafax start
-ne [ ok arting hylafax (via systemctl): hylafax.service
                                                        .

You do not appear to be using faxgetty to notify the HylaFAX scheduler
about new modems and/or their status.  This means that you must use the
faxmodem program to inform the new faxq process about the modems you
want to have scheduled by HylaFAX.  Beware that if you have modems that
require non-default capabilities specified to faxmodem then you should
read faxmodem(8) manual page and do this work yourself (since this
script is not intelligent enough to automatically figure out the modem
capabilities and supply the appropriate arguments).

Should I run faxmodem for each configured modem [yes]?
/usr/sbin/faxmodem ttyACM0

Done verifying system setup.
/var/spool/hylafax
FAX受信テスト
/etc/hylafax/FaxDispatch
を編集します。
FILETYPE=pdf;
SENDTO=(送信元メールアドレス);
FROMADDR=(送信先メールアドレス);
として、
sudo /etc/init.d/hylafax restart
で変更反映します。
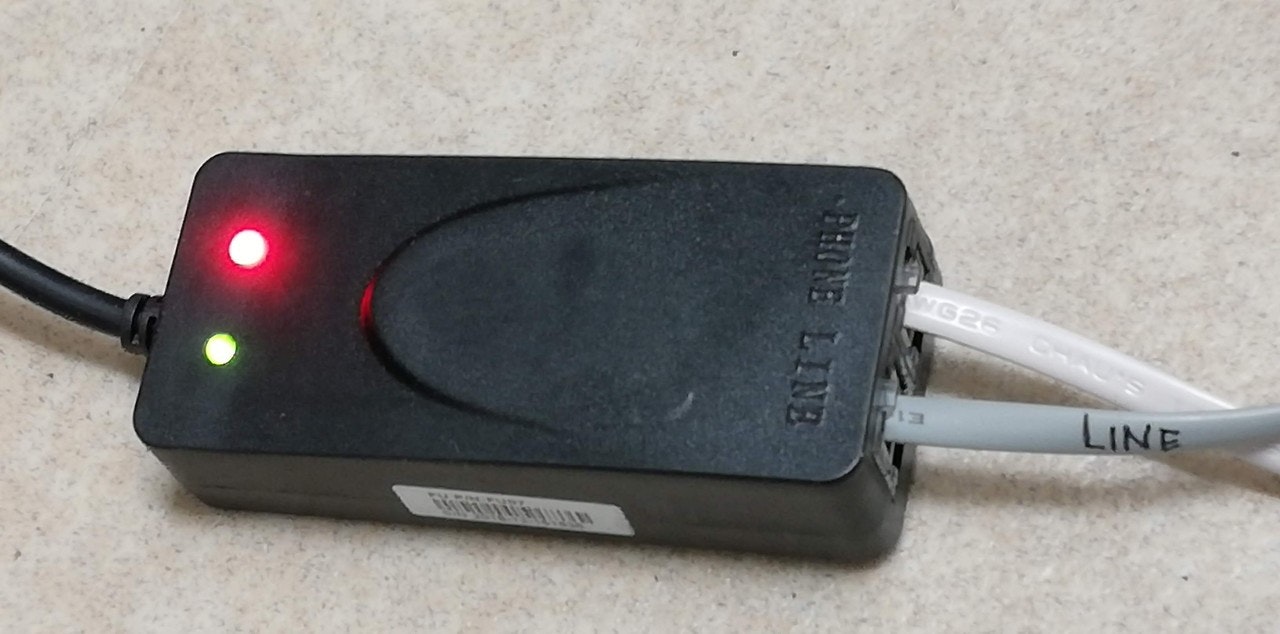
配線をして、他のFAX機からFAXを送信します。
この後、メールにファイルが正常に添付されていることが確認できました。
FaxMasterへのNotify抑制
FaxMasterへ「Fax received from "9999 99"」というタイトルで以下のメールが送信されていました。
recvq/fax000038709.tif (ftp://raspberrypi:4559/recvq/fax000038709.tif):
          Sender: 9999 99
           Pages: 2
         Quality: Fine
            Size: default
        Received: 2020:04:11 06:33:45
 Time To Receive: 0:01:24
     Signal Rate: 14400 bit/s
     Data Format: 2-D MMR
   Error Correct: Yes
         CallID1:
         CallID2:
     Received On: ttyACM0
          CommID: 000038702 (ftp://raspberrypi:4559/log/c000038702)
これを抑制するために、
/var/spool/hylafax/bin/faxrcvd
を編集します。
NOTIFY_FAXMASTER=always
となっているのを
NOTIFY_FAXMASTER=never
とします。
自動で印刷する
FAX を受信したら自動で印刷するようにします。
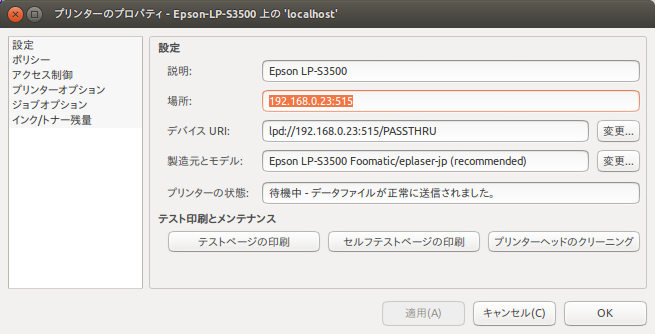
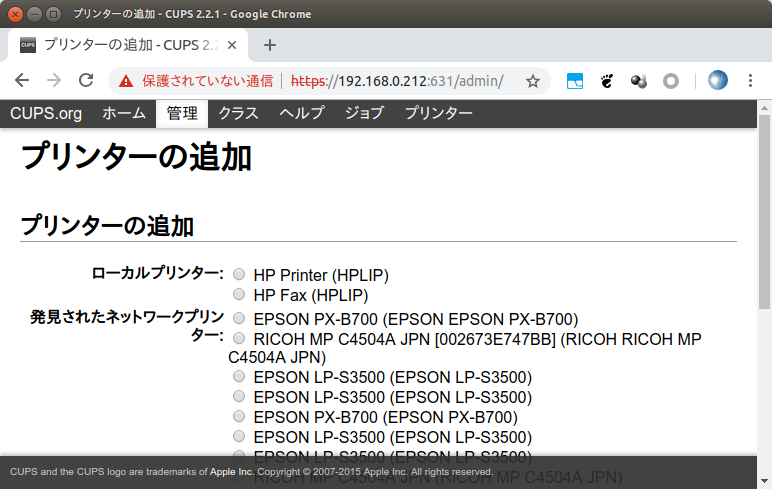
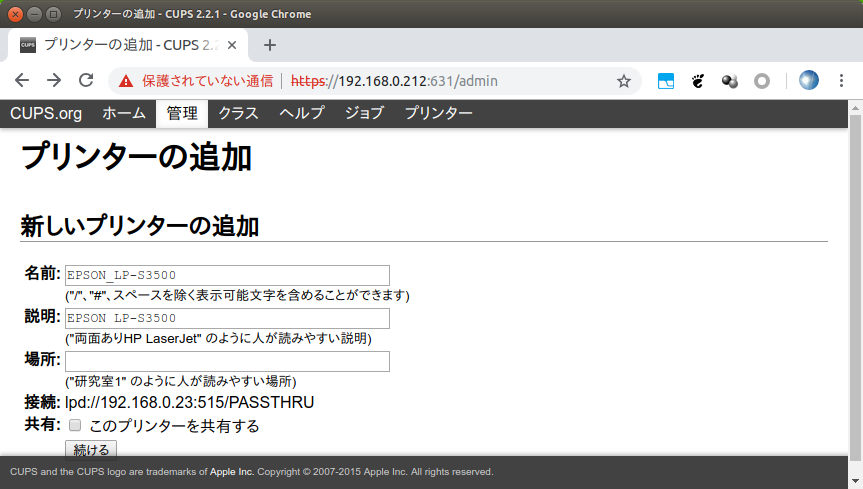
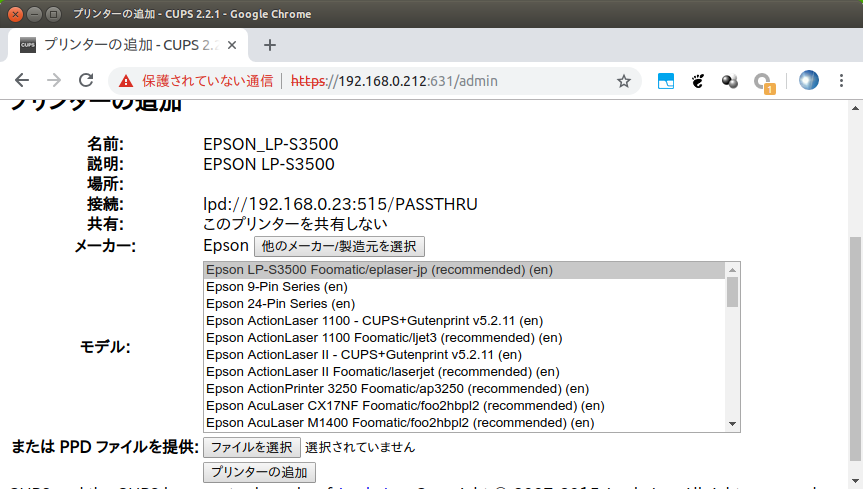
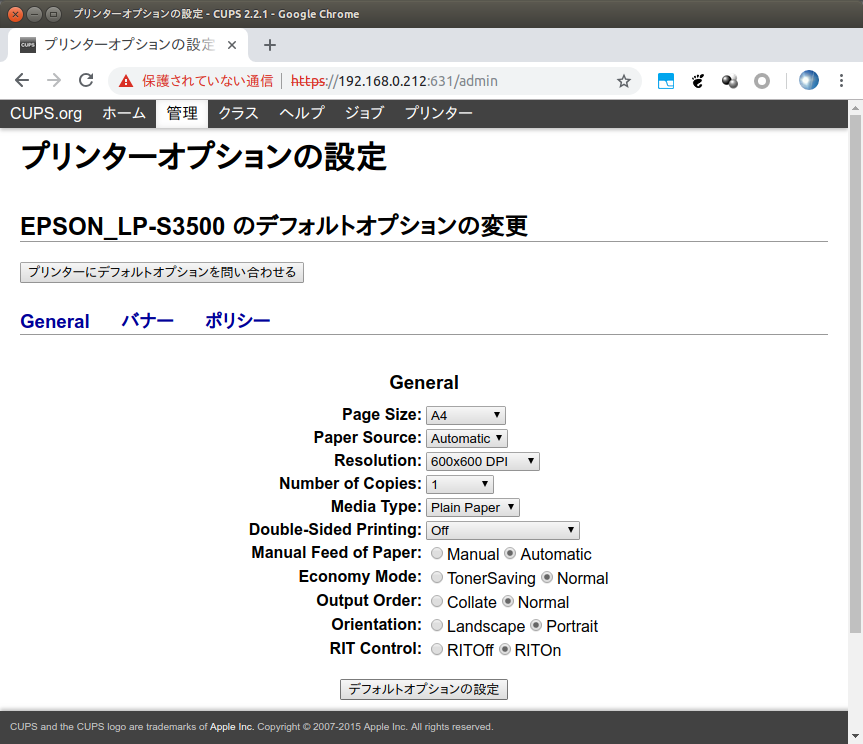
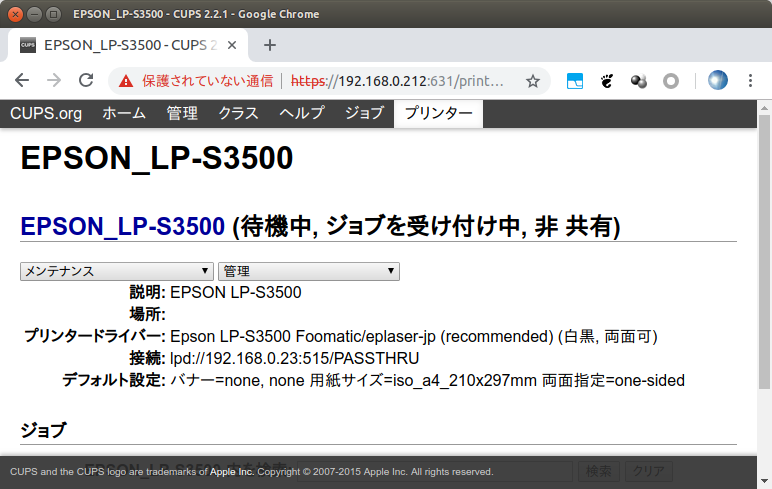
ネットワークプリンタ EPSON LP-S3500 を使います。
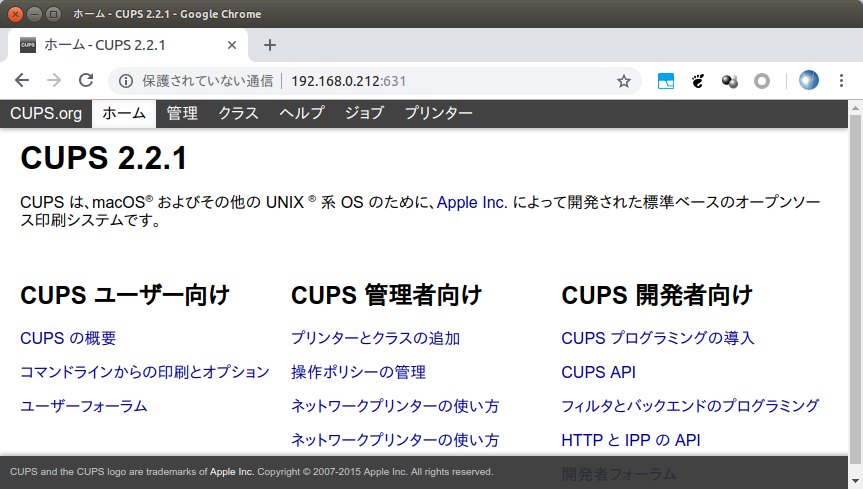
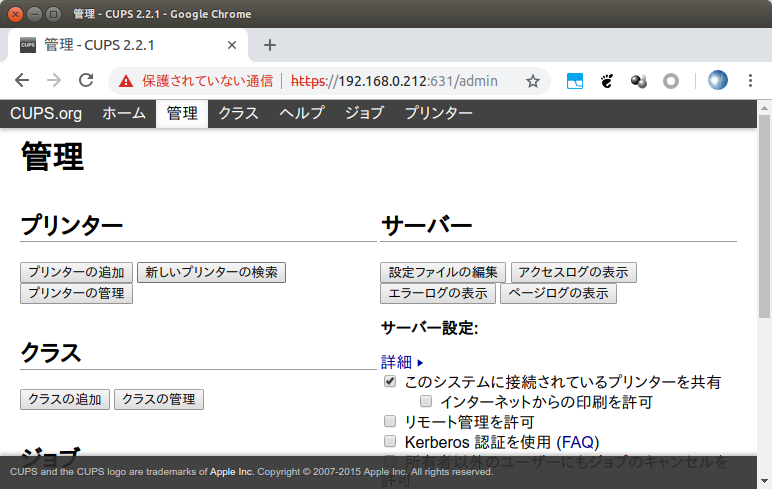
まず、PC 上の Ubuntu Linux で以下の設定で印刷できることが確認できました。
cups
Raspberry Pi から印刷するために、まずは cups をインストールします。
pi@raspberrypi:~ $ sudo apt-get install cups
Reading package lists... Done
Building dependency tree
Reading state information... Done
E: Unable to locate package cups
はて?
pi@raspberrypi:~ $ apt-cache search cups
apcupsd - APC UPS Power Management (daemon)
apcupsd-cgi - APC UPS Power Management (web interface)
apcupsd-doc - APC UPS Power Management (documentation/examples)
・
・
・
conky-std - highly configurable system monitor (default version)
conky-std-dbg - highly configurable system monitor (default version - debug)
cups - Common UNIX Printing System(tm) - PPD/driver support, web interface
cups-backend-bjnp - printer backend for Canon BJNP protocol
cups-browsed - OpenPrinting CUPS Filters - cups-browsed
cups-bsd - Common UNIX Printing System(tm) - BSD commands
cups-client - Common UNIX Printing System(tm) - client programs (SysV)
cups-common - Common UNIX Printing System(tm) - common files
cups-core-drivers - Common UNIX Printing System(tm) - PPD-less printing
cups-daemon - Common UNIX Printing System(tm) - daemon
cups-filters - OpenPrinting CUPS Filters - Main Package
cups-filters-core-drivers - OpenPrinting CUPS Filters - PPD-less printing
cups-ipp-utils - Common UNIX Printing System(tm) - IPP developer/admin utilities
cups-pdf - PDF writer backend for CUPS (dummy transitional package)
cups-pk-helper - PolicyKit helper to configure cups with fine-grained privileges
cups-ppdc - Common UNIX Printing System(tm) - PPD manipulation utilities
cups-server-common - Common UNIX Printing System(tm) - server common files
cups-tea4cups - Swiss Army's knife of advanced CUPS administrators
cups-x2go - Virtual X2Go printer for CUPS
escputil - maintenance utility for Epson Stylus printers
etw - arcade-style soccer game
etw-data - graphics and audio data for etw
foomatic-db - OpenPrinting pri
ありますね。再度やってみるとインストールできました。
sudo apt install cups
sudo apt install printer-driver-all
sudo gpasswd -a pi lpadmin
設定を行います。
sudo vi /etc/cups/cupsd.conf
# Only listen for connections from the local machine.
# Listen localhost:631
Listen raspberrypi.local:631

web

# Only listen for connections from the local machine.
# Listen localhost:631
Listen raspberrypi.local:631


#
# Configuration file for the CUPS scheduler.  See "man cupsd.conf" for a
# comp;lete description of this file.
#

# Log general information in error_log - change "warn" to "debug"
# for troubleshooting...
LogLevel warn
PageLogFormat

# Deactivate CUPS' internal logrotating, as we provide a better one, especially
# LogLevel debug2 gets usable now
MaxLogSize 0

:# Only listen for connections from the local machine.
Listen raspberrypi.local:631
Listen /var/run/cups/cups.sock

# Show shared printers on the local network.
Browsing On
BrowseLocalProtocols dnssd

# Default authentication type, when authentication is required...
DefaultAuthType Basic

# Web interface setting...
WebInterface Yes

# Restrict access to the server...
<Location />
#  Order allow,deny
</Location>

# Restrict access to the admin pages...
<Location /admin>
#  Order allow,deny
</Location>
とすると、外部からWebインターフェースにアクセスできるようになります。cupsサービスをリスタート。
sudo service cups restart
ブラウザから設定をしていきます。
自動印刷設定
/etc/hylafax/FaxDispatch
を編集します。
FILETYPE=pdf;
SENDTO=(送信元メールアドレス);
FROMADDR=(送信先メールアドレス);
if [ -f $FILE ]; then
fax2ps $FILE | lp -d EPSON_LP-S3500
fi
としました。テストすると、A4用紙からははみ出してしまいました。
どうやら、Letterサイズが標準になっているのが問題らしいです。
fax2ps $FILE | lp -o fitplot -o media=a4 -d EPSON_LP_S3500
とすると改善しましたが、まだ若干切れていたり、B4で送信されたデータを縮小印刷したときにうまくいかなかったりします。
結局以下のように調整しました。
fax2ps $FILE | lp -o fitplot -o media=a4 -d EPSON_LP-S3500
if [ -f $FILE ]; then
# fax2ps $FILE | lp -o fitplot -o media=a4 -d EPSON_LP-S3500
tiff2ps -a -w 9 -h 11 $FILE | lp -o fitplot -o media=a4 -d EPSON_LP_S3500
fi
その後
syslog に モデム関係のログが出ます
(調査中)
Unable to setup modem on /dev/ttyACM0; giving up after 2 attempts
EPSONレーザープリンタでの問題発生
上記のようにしてやれやれ・・・と思っていたら白黒反転したものが出力されました。
http://blog.nts-ltd.co.jp/archives/438
や
http://tyche.pu-toyama.ac.jp/~a-urasim/gs/
によると、二値画像を印刷する際の不具合ぽいです。
convert -negate として、反転処理を入れました。
http://blog.nts-ltd.co.jp/archives/438
参照
トラブルシューティング
突然受信できなくなりました。
FAXモデムが壊れたかな?
まずは、FAXモデムをPCにつなげて、通信ソフトで動作確認します。
$ picocom -b 9600 /dev/ttyACM0
at
OK
ATDT5555555
NO DIALTONE
ATコマンドは効いているみたいです。
FAX回線に電話をかけてみます
RING

RING

RING

RING

RING
回線は生きているみたいです。
ハードウェアに問題がないことがわかったので、
$ sudo /etc/init.d/hylafax restart
としたら動き始めました。なあんだ。
ユーザーが問題発生後に再起動を行った、というのを真に受けて最初にするべきことをしていませんでした。
