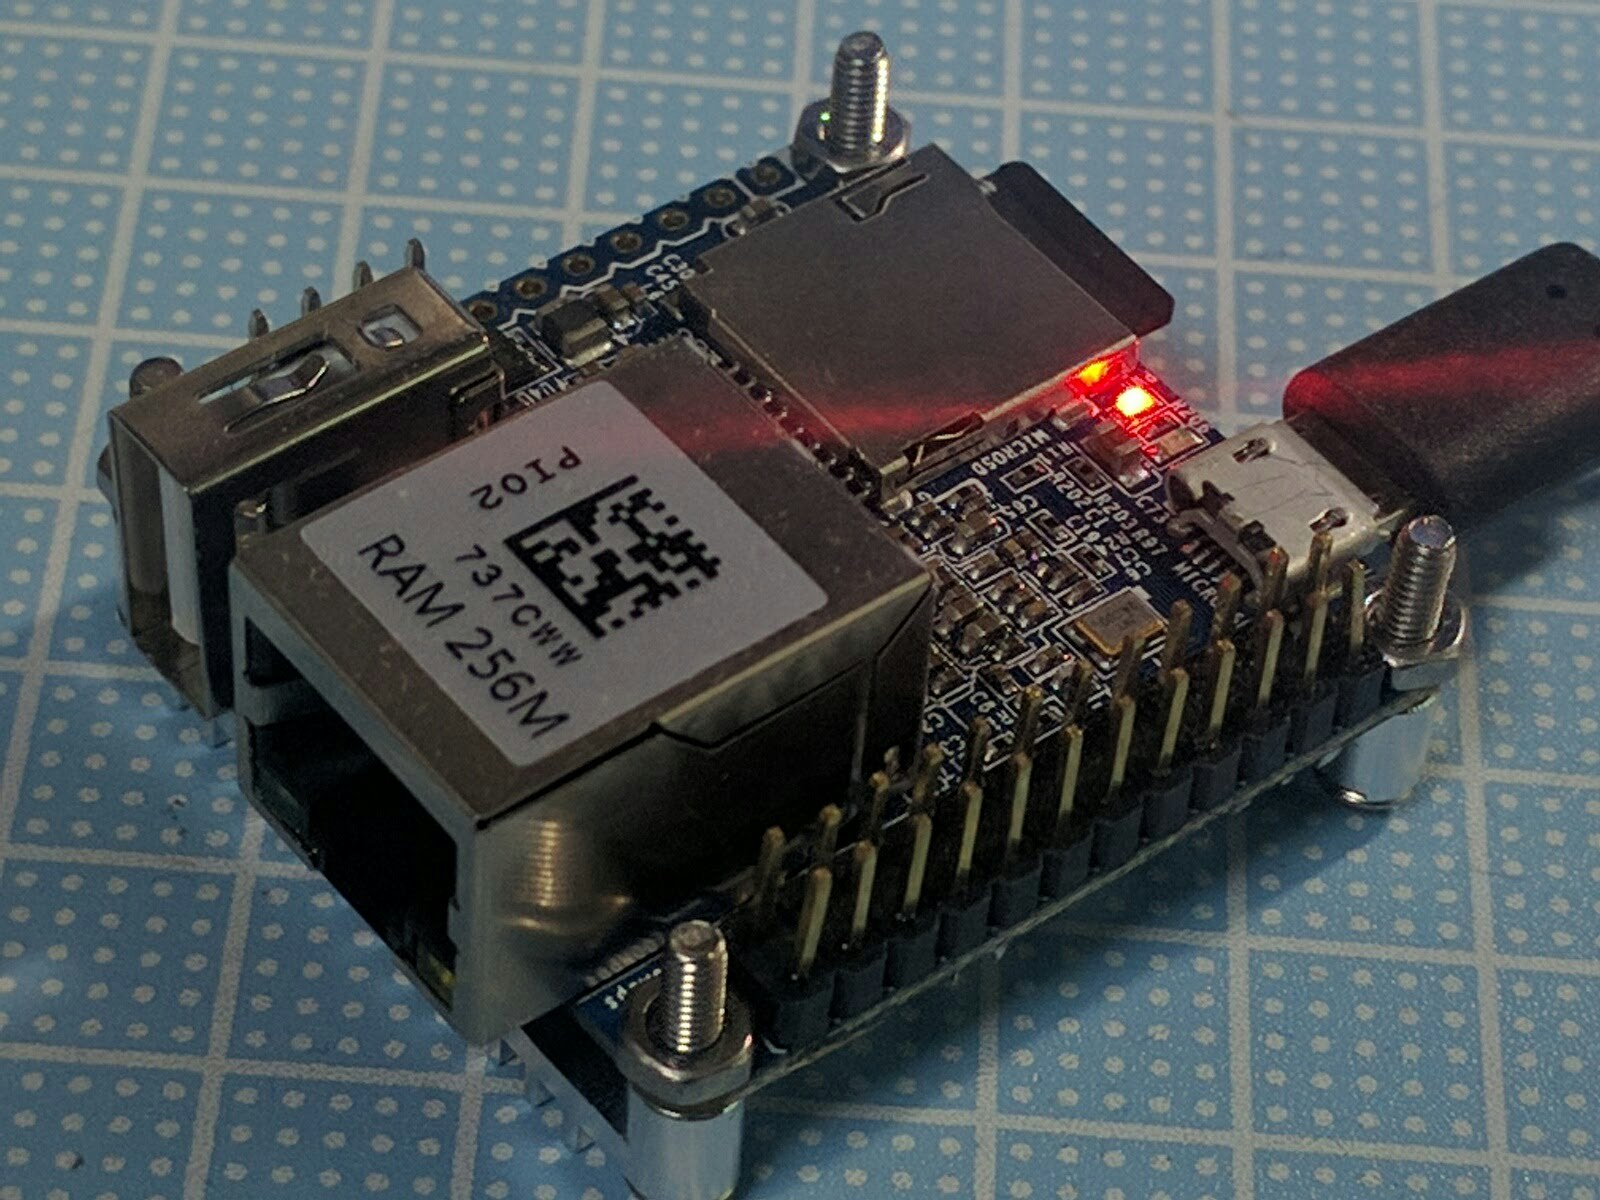
NanoPi Neoとは
-
RaspberryPiみたいなLinuxボード
-
CPU:Allwinner H3 Quad-Core Cortex-A7 ARM CPU
-
小さくて安い!
-
秋月電子で買える http://akizukidenshi.com/catalog/g/gM-12301/ (メモリ512Mバージョン)
-
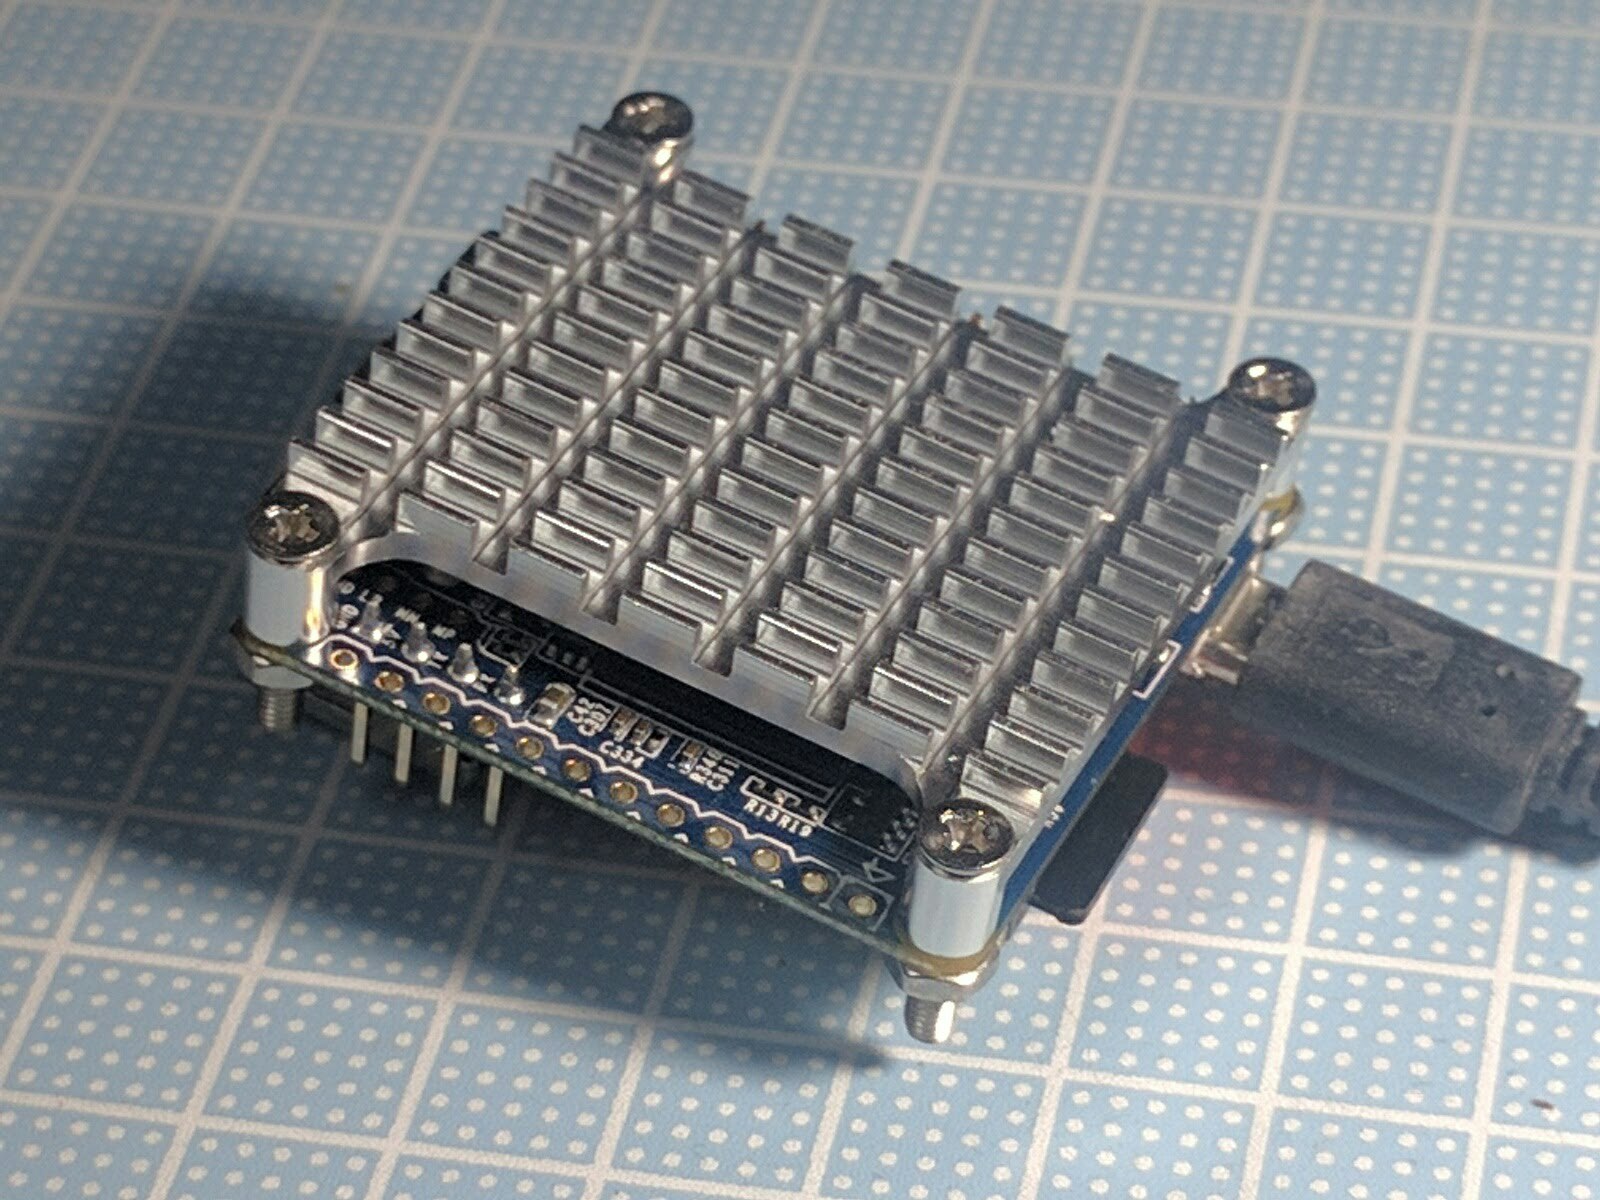
但し別売りのヒートシンクは必須
-
microSDカードにLinuxイメージをインストール
-
公式イメージよりもコミュニティ開発のArmbianの方がおススメ
Raspberry Piとの違い
- RaspberryPiのLinuxイメージ、例えばRaspbianはそのままでは使えない
- しかしながら双方ともDebianやUbuntuなどをベースにしたディストリビューションを使うことが多いので、Raspberry Pi に特化したようなもの以外は同じように使える
- HDMI端子が無い
- (Raspberry Pi Zeroに比べて)入手がしやすい
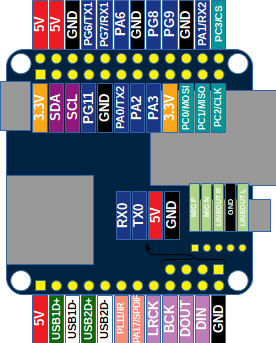
- GPIOピンが24ピン。Raspberry Pi の40ピンのうちの24ピン分とほぼ同じ
ピン配置チートシート
Armbianを書き込む
以下はUbuntu Linux 16.04 LTS で行いました。
Armbian_5.38_Nanopineo_Debian_stretch_next_4.14.14.7z を使用しました。
中身を確認します。
$ 7za l  Armbian_5.38_Nanopineo_Debian_stretch_next_4.14.14.7z

7-Zip (A) [64] 9.20  Copyright (c) 1999-2010 Igor Pavlov  2010-11-18
p7zip Version 9.20 (locale=ja_JP.UTF-8,Utf16=on,HugeFiles=on,4 CPUs)

Listing archive: Armbian_5.38_Nanopineo_Debian_stretch_next_4.14.14.7z

--
Path = Armbian_5.38_Nanopineo_Debian_stretch_next_4.14.14.7z
Type = 7z
Method = LZMA2
Solid = +
Blocks = 1
Physical Size = 256174798
Headers Size = 284

   Date      Time    Attr         Size   Compressed  Name
------------------- ----- ------------ ------------  ------------------------
2018-01-28 00:41:42 ....A   1396703232    256174514  Armbian_5.38_Nanopineo_Debian_stretch_next_4.14.14.img
2018-01-28 00:41:42 ....A        18576               armbian.txt
2018-01-28 00:42:00 ....A          819               armbian.txt.asc
2018-01-28 00:42:00 ....A          819               Armbian_5.38_Nanopineo_Debian_stretch_next_4.14.14.img.asc
2018-01-28 00:41:50 ....A          121               sha256sum.sha
------------------- ----- ------------ ------------  ------------------------
                            1396723567    256174514  5 files, 0 folders
今回は、イメージの解凍ファイルを作らずに 7z アーカイブからそのままmicroSDカードに書き込みます。
$ sudo su -
# cd /home/nanbuwks/Downloads/Armbian
# 7za x -so  Armbian_5.38_Nanopineo_Debian_stretch_next_4.14.14.7z Armbian_5.38_Nanopineo_Debian_stretch_next_4.14.14.img > /dev/mmcblk0

7-Zip (A) [64] 9.20  Copyright (c) 1999-2010 Igor Pavlov  2010-11-18
p7zip Version 9.20 (locale=ja_JP.UTF-8,Utf16=on,HugeFiles=on,4 CPUs)

Processing archive: Armbian_5.38_Nanopineo_Debian_stretch_next_4.14.14.7z

Everything is Ok

Size:       1396703232
Compressed: 256174798

#
5分ほどで書込。4.6MBytes/Secぐらい。
class4のmicroSDカードなので、まあこんなものか。
なお、 -so オプションは標準出力に出すオプション。しかしながらパイプやリダイレクトに出さないと
Error:
I won't write data and program's messages to same terminal
というエラーが出ます。
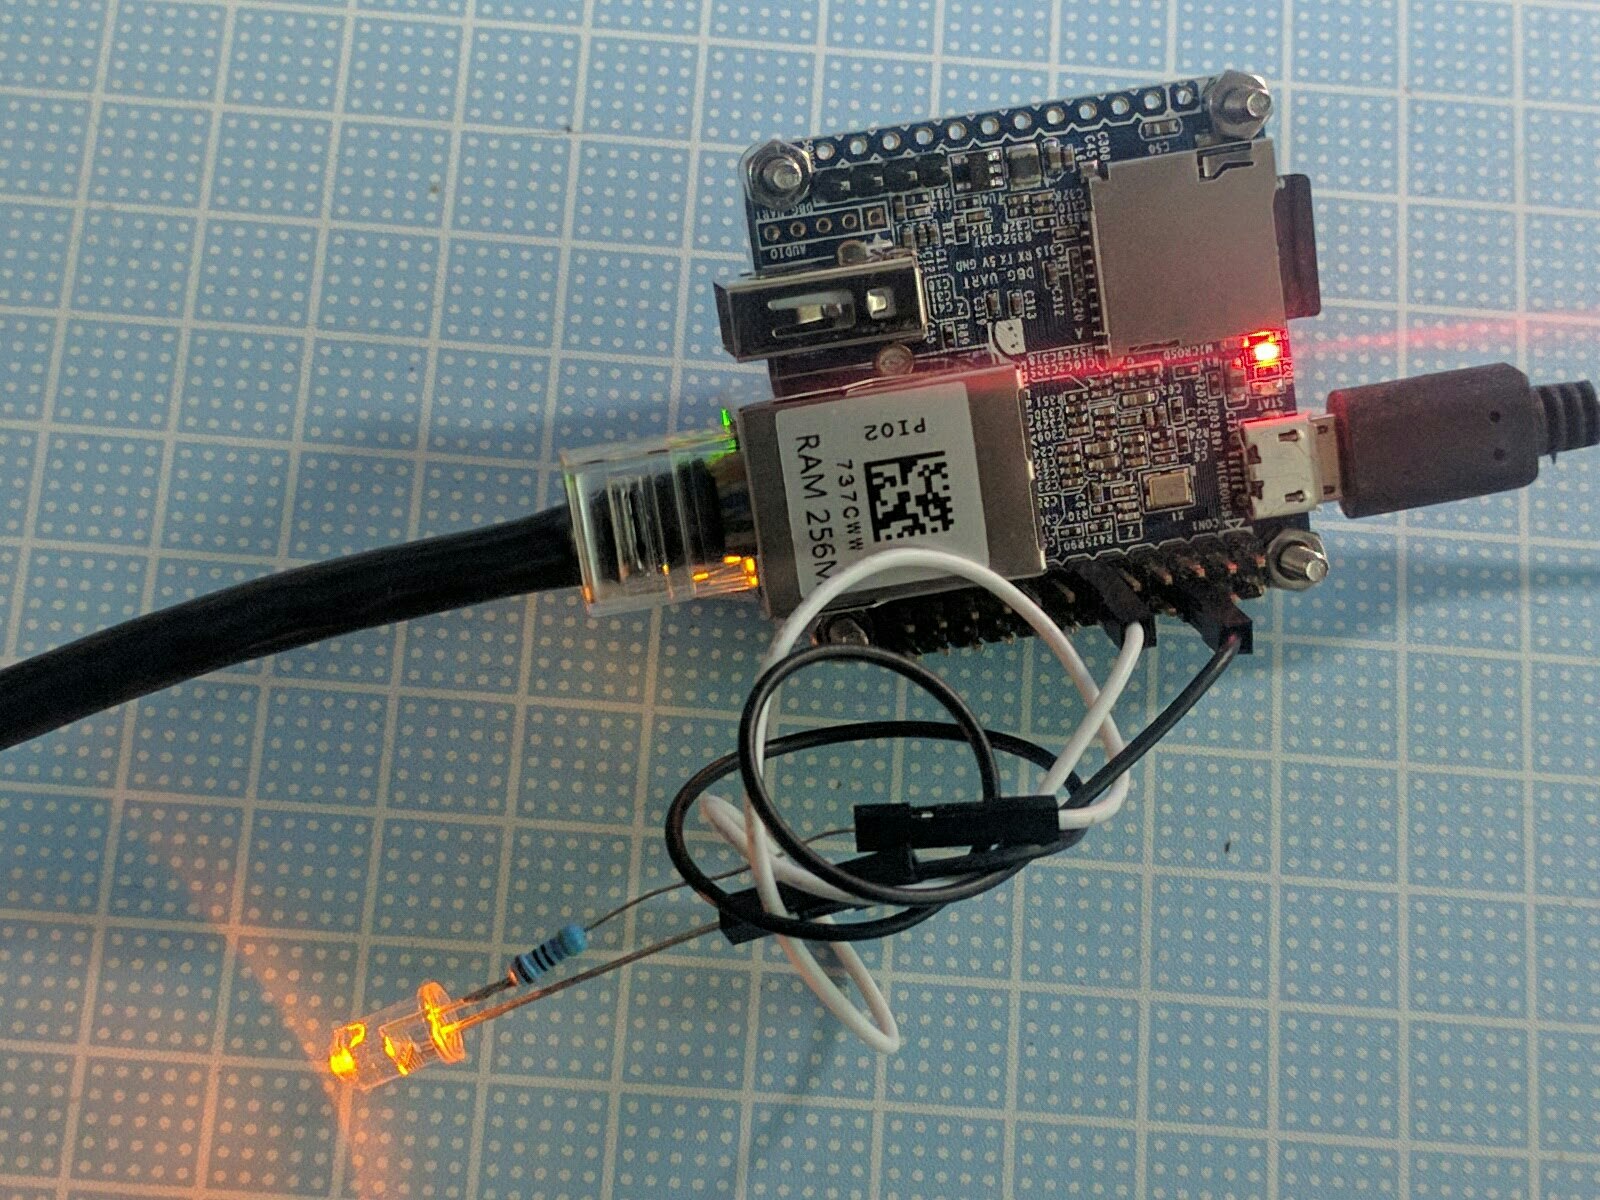
ログイン
書き込んだmicroSDカードをNanoPi Neoに装着し、有線LANと電源をつないで起動します。
DHCPでアドレスを取得するのでルータなどから割り出し、sshでログインします。
初期ユーザ、パスワードは root:1234で、初回ログイン後パスワード変更、一般ユーザ作成が要求されます。変更したパスワードなどは忘れずに。
WiringNP で GPIO操作(LED光らせる)
Raspberry Pi の WiringPiと同様のライブラリとしてWiringNPがある。githubからダウンロードしてインストール。
https://github.com/wertyzp/WiringNP
https://github.com/friendlyarm/WiringNP
ふたつのWiringNPがありますが、まずはwertyzpの方を試してみました。
# git clone https://github.com/wertyzp/WiringNP.git
Cloning into 'WiringNP'...
remote: Counting objects: 206, done.
remote: Total 206 (delta 0), reused 0 (delta 0), pack-reused 206
Receiving objects: 100% (206/206), 188.94 KiB | 318.00 KiB/s, done.
Resolving deltas: 100% (108/108), done.
root@nanopineo:~# cd WiringNP/
root@nanopineo:~/WiringNP# chmod 755 build
root@nanopineo:~/WiringNP# ./build
./build: 4: ./build: [[: not found
wiringPi Build script
=====================


WiringPi Library
[UnInstall]
[Compile] wiringPi.c
[Compile] wiringSerial.c
[Compile] wiringShift.c
[Compile] piHiPri.c
[Compile] piThread.c
[Compile] wiringPiSPI.c
[Compile] wiringPiI2C.c
[Compile] softPwm.c
[Compile] softTone.c
[Compile] softServo.c
[Compile] mcp23008.c
[Compile] mcp23016.c
[Compile] mcp23017.c
[Compile] mcp23s08.c
[Compile] mcp23s17.c
[Compile] sr595.c
[Compile] pcf8574.c
[Compile] pcf8591.c
[Compile] mcp3002.c
[Compile] mcp3004.c
[Compile] mcp4802.c
[Compile] mcp3422.c
[Compile] max31855.c
[Compile] max5322.c
[Compile] sn3218.c
[Compile] drcSerial.c
[Link (Dynamic)]
[Install Headers]
[Install Dynamic Lib]

WiringPi Devices Library
[UnInstall]
[Compile] ds1302.c
[Compile] maxdetect.c
[Compile] piNes.c
[Compile] gertboard.c
[Compile] piFace.c
[Compile] lcd128x64.c
[Compile] lcd.c
[Compile] piGlow.c
[Link (Dynamic)]
[Install Headers]
[Install Dynamic Lib]

GPIO Utility
[Compile] gpio.c
[Compile] extensions.c
[Compile] readall.c
[Compile] pins.c
[Link]
[Install]

All Done.

NOTE: To compile programs with wiringNP, you need to add:
    -lwiringPi
  to your compile line(s).
インストールできた。
# gpio
Usage: gpio -v
       gpio -h
       gpio [-g|-1] [-x extension:params] ...
       gpio <read/write/aread/awritewb/pwm/mode> ...
       gpio readall/reset
       gpio unexportall/exports
       gpio export/edge/unexport ...
       gpio pwm-bal/pwm-ms
       gpio pwmr <range>
       gpio pwmc <divider>
       gpio load spi/i2c
       gpio i2cd/i2cdetect
       gpio usbp high/low

# gpio readall
 +-----+-----+----------+------+---+-NanoPI M1+---+------+----------+-----+-----+
 |  H3 | wPi |   Name   | Mode | V | Physical | V | Mode | Name     | wPi |  H3 |
 +-----+-----+----------+------+---+----++----+---+------+----------+-----+-----+
 |     |     |     3.3v |      |   |  1 || 2  |   |      | 5v       |     |     |
 |  12 |   8 |    SDA.0 |  OFF | 0 |  3 || 4  |   |      | 5v       |     |     |
 |  11 |   9 |    SCL.0 |  OFF | 0 |  5 || 6  |   |      | 0v       |     |     |
 | 203 |   7 |   GPIO.7 |  OFF | 0 |  7 || 8  | 0 | OFF  | TxD1     | 15  | 198 |
 |     |     |       0v |      |   |  9 || 10 | 0 | OFF  | RxD1     | 16  | 199 |
 |   0 |   0 |     TxD2 |  OFF | 0 | 11 || 12 | 0 | OFF  | GPIO.1   | 1   | 6   |
 |   2 |   2 |     RTS2 |  OFF | 0 | 13 || 14 |   |      | 0v       |     |     |
 |   3 |   3 |     CTS2 |  OFF | 0 | 15 || 16 | 0 | OFF  | RTS1     | 4   | 200 |
 |     |     |     3.3v |      |   | 17 || 18 | 0 | OFF  | CTS1     | 5   | 201 |
 |  64 |  12 |     MOSI |  OFF | 0 | 19 || 20 |   |      | 0v       |     |     |
 |  65 |  13 |     MISO |  OFF | 0 | 21 || 22 | 0 | OFF  | RxD2     | 6   | 1   |
 |  66 |  14 |     SCLK |  OFF | 0 | 23 || 24 | 0 | OFF  | SPI0_CS  | 10  | 67  |
 |     |     |       0v |      |   | 25 || 26 | 0 | OFF  | SPDIFOUT | 11  | 17  |
 |  19 |  30 |    SDA.1 |  OFF | 0 | 27 || 28 | 0 | OFF  | SCL.1    | 31  | 18  |
 |  20 |  21 | PCM0DOUT |  OFF | 0 | 29 || 30 |   |      | 0v       |     |     |
 |  21 |  22 |  PCM0DIN |  OFF | 0 | 31 || 32 | 0 | OFF  | GPIO.26  | 26  | 7   |
 |   8 |  23 |  GPIO.23 |  OFF | 0 | 33 || 34 |   |      | 0v       |     |     |
 |  16 |  24 |     CTS3 |  OFF | 0 | 35 || 36 | 0 | OFF  | TxD3     | 27  | 13  |
 |   9 |  25 |  GPIO.25 |  OFF | 0 | 37 || 38 | 0 | OFF  | RTS3     | 28  | 15  |
 |     |     |       0v |      |   | 39 || 40 | 0 | OFF  | RxD3     | 29  | 14  |
 +-----+-----+----------+------+---+----++----+---+------+----------+-----+-----+
 |  H3 | wPi |   Name   | Mode | V | Physical | V | Mode | Name     | wPi |  H3 |
 +-----+-----+----------+------+---+-NanoPI M1+---+------+----------+-----+-----+

 +-----+----NanoPI M1 Debug UART---+----+
 |  H3 | wPi |   Name   | Mode | V | Ph |
 +-----+-----+----------+------+---+----+
 |     |     |       0v |      |   | 41 |
 |     |     |       5v |      |   | 42 |
 |   4 |  32 |     TxD0 | ALT5 | 0 | 43 |
 |   5 |  33 |     RxD0 | ALT5 | 0 | 44 |
 +-----+-----+----------+------+---+----+
NanoPi M1と出ています。NanoPi Neoは2列配置の方のGPIOは24ピンしかありませんが40ピン分出てますね!
https://github.com/friendlyarm/WiringNP の方も試してみました。
# git clone https://github.com/friendlyarm/WiringNP.git
Cloning into 'WiringNP'...
remote: Counting objects: 235, done.
remote: Total 235 (delta 0), reused 0 (delta 0), pack-reused 235
Receiving objects: 100% (235/235), 203.11 KiB | 213.00 KiB/s, done.
Resolving deltas: 100% (130/130), done.
root@nanopineo:~# cd WiringNP
root@nanopineo:~/WiringNP# chmod 755 build
root@nanopineo:~/WiringNP# ./build
wiringPi Build script
=====================


WiringPi Library
[UnInstall]
[Compile] wiringPi.c
wiringPi.c:142:0: warning: "BLOCK_SIZE" redefined
 #define BLOCK_SIZE  (4*1024)

In file included from boardtype_friendlyelec.h:12:0,
                 from wiringPi.h:212,
                 from wiringPi.c:76:
/usr/include/linux/fs.h:32:0: note: this is the location of the previous definition
 #define BLOCK_SIZE (1<<BLOCK_SIZE_BITS)

wiringPi.c: In function ‘piBoardId’:
wiringPi.c:1113:11: warning: unused variable ‘c’ [-Wunused-variable]
     char *c;
           ^
wiringPi.c:1112:10: warning: unused variable ‘line’ [-Wunused-variable]
     char line [120];
          ^~~~
wiringPi.c:1111:11: warning: unused variable ‘cpuFd’ [-Wunused-variable]
     FILE *cpuFd;
           ^~~~~
wiringPi.c: In function ‘pinMode’:
wiringPi.c:1398:16: warning: ‘return’ with a value, in function returning void
         return -1;
                ^
wiringPi.c:1389:6: note: declared here
 void pinMode(int pin, int mode) {
      ^~~~~~~
wiringPi.c: In function ‘digitalRead’:
wiringPi.c:1524:9: warning: ‘return’ with no value, in function returning non-void
         return;
         ^~~~~~
wiringPi.c:1517:5: note: declared here
 int digitalRead(int pin) {
     ^~~~~~~~~~~
wiringPi.c: In function ‘waitForInterrupt’:
wiringPi.c:1839:9: warning: ‘return’ with no value, in function returning non-void
         return;
         ^~~~~~
wiringPi.c:1832:5: note: declared here
 int waitForInterrupt(int pin, int mS) {
     ^~~~~~~~~~~~~~~~
[Compile] wiringSerial.c
[Compile] wiringShift.c
[Compile] piHiPri.c
[Compile] piThread.c
[Compile] wiringPiSPI.c
[Compile] wiringPiI2C.c
[Compile] softPwm.c
[Compile] softTone.c
[Compile] softServo.c
[Compile] mcp23008.c
[Compile] mcp23016.c
[Compile] mcp23017.c
[Compile] mcp23s08.c
[Compile] mcp23s17.c
[Compile] sr595.c
[Compile] pcf8574.c
[Compile] pcf8591.c
[Compile] mcp3002.c
[Compile] mcp3004.c
[Compile] mcp4802.c
[Compile] mcp3422.c
[Compile] max31855.c
[Compile] max5322.c
[Compile] sn3218.c
[Compile] drcSerial.c
[Compile] boardtype_friendlyelec.c
boardtype_friendlyelec.c: In function ‘getFieldValueInCpuInfo’:
boardtype_friendlyelec.c:97:21: warning: suggest parentheses around assignment used as truth value [-Wparentheses]
                     if (p = strtok(line, ":")) {
                     ^~
boardtype_friendlyelec.c:99:29: warning: suggest parentheses around assignment used as truth value [-Wparentheses]
                             if (p = strtok(0, ":")) {
                             ^~
boardtype_friendlyelec.c:110:21: warning: suggest parentheses around assignment used as truth value [-Wparentheses]
                     if (p2 = strtok(line, ":")) {
                     ^~
boardtype_friendlyelec.c:112:29: warning: suggest parentheses around assignment used as truth value [-Wparentheses]
                             if (p2 = strtok(0, ":")) {
                             ^~
boardtype_friendlyelec.c: In function ‘getAllwinnerBoardID’:
boardtype_friendlyelec.c:161:17: warning: suggest parentheses around assignment used as truth value [-Wparentheses]
                 if (p = strtok(line, ":")) {
                 ^~
boardtype_friendlyelec.c:164:25: warning: suggest parentheses around assignment used as truth value [-Wparentheses]
                         if (p = strtok(0, ":")) {
                         ^~
[Link (Dynamic)]
[Install Headers]
[Install Dynamic Lib]

WiringPi Devices Library
[UnInstall]
[Compile] ds1302.c
[Compile] maxdetect.c
[Compile] piNes.c
[Compile] gertboard.c
[Compile] piFace.c
[Compile] lcd128x64.c
[Compile] lcd.c
[Compile] piGlow.c
[Link (Dynamic)]
[Install Headers]
[Install Dynamic Lib]

GPIO Utility
[Compile] gpio.c
[Compile] extensions.c
[Compile] readall.c
[Compile] pins.c
[Link]
[Install]

All Done.

NOTE: To compile programs with wiringNP, you need to add:
    -lwiringPi
  to your compile line(s).
#  gpio mode 0 out
piBoardRev: Unable to determine board revision from /proc/cpuinfo
 -> Is not NanoPi based board.
 ->  You may want to check:
 ->  http://www.lemaker.org/
となりました。
http://nopnop2002.webcrow.jp/NanoPi-M1/NanoPi-M1-2.html
を参考に直してみましたが、治らないのでこちらはあきらめ、wertyzp版を使うことにしました。
GPIOを操作してみる
# gpio mode 0 out
# gpio write 0 1
# gpio readall
 +-----+-----+----------+------+---+-NanoPI M1+---+------+----------+-----+-----+
 |  H3 | wPi |   Name   | Mode | V | Physical | V | Mode | Name     | wPi |  H3 |
 +-----+-----+----------+------+---+----++----+---+------+----------+-----+-----+
 |     |     |     3.3v |      |   |  1 || 2  |   |      | 5v       |     |     |
 |  12 |   8 |    SDA.0 |  OFF | 0 |  3 || 4  |   |      | 5v       |     |     |
 |  11 |   9 |    SCL.0 |  OFF | 0 |  5 || 6  |   |      | 0v       |     |     |
 | 203 |   7 |   GPIO.7 |  OFF | 0 |  7 || 8  | 0 | OFF  | TxD1     | 15  | 198 |
 |     |     |       0v |      |   |  9 || 10 | 0 | OFF  | RxD1     | 16  | 199 |
 |   0 |   0 |     TxD2 |  OUT | 1 | 11 || 12 | 0 | OFF  | GPIO.1   | 1   | 6   |
 |   2 |   2 |     RTS2 |  OFF | 0 | 13 || 14 |   |      | 0v       |     |     |
 |   3 |   3 |     CTS2 |  OFF | 0 | 15 || 16 | 0 | OFF  | RTS1     | 4   | 200 |
 |     |     |     3.3v |      |   | 17 || 18 | 0 | OFF  | CTS1     | 5   | 201 |
 |  64 |  12 |     MOSI |  OFF | 0 | 19 || 20 |   |      | 0v       |     |     |
 |  65 |  13 |     MISO |  OFF | 0 | 21 || 22 | 0 | OFF  | RxD2     | 6   | 1   |
 |  66 |  14 |     SCLK |  OFF | 0 | 23 || 24 | 0 | OFF  | SPI0_CS  | 10  | 67  |
 |     |     |       0v |      |   | 25 || 26 | 0 | OFF  | SPDIFOUT | 11  | 17  |
 |  19 |  30 |    SDA.1 |  OFF | 0 | 27 || 28 | 0 | OFF  | SCL.1    | 31  | 18  |
 |  20 |  21 | PCM0DOUT |  OFF | 0 | 29 || 30 |   |      | 0v       |     |     |
 |  21 |  22 |  PCM0DIN |  OFF | 0 | 31 || 32 | 0 | OFF  | GPIO.26  | 26  | 7   |
 |   8 |  23 |  GPIO.23 |  OFF | 0 | 33 || 34 |   |      | 0v       |     |     |
 |  16 |  24 |     CTS3 |  OFF | 0 | 35 || 36 | 0 | OFF  | TxD3     | 27  | 13  |
 |   9 |  25 |  GPIO.25 |  OFF | 0 | 37 || 38 | 0 | OFF  | RTS3     | 28  | 15  |
 |     |     |       0v |      |   | 39 || 40 | 0 | OFF  | RxD3     | 29  | 14  |
 +-----+-----+----------+------+---+----++----+---+------+----------+-----+-----+
 |  H3 | wPi |   Name   | Mode | V | Physical | V | Mode | Name     | wPi |  H3 |
 +-----+-----+----------+------+---+-NanoPI M1+---+------+----------+-----+-----+

 +-----+----NanoPI M1 Debug UART---+----+
 |  H3 | wPi |   Name   | Mode | V | Ph |
 +-----+-----+----------+------+---+----+
 |     |     |       0v |      |   | 41 |
 |     |     |       5v |      |   | 42 |
 |   4 |  32 |     TxD0 | ALT5 | 0 | 43 |
 |   5 |  33 |     RxD0 | ALT5 | 0 | 44 |
 +-----+-----+----------+------+---+----+
#
LEDが点いた
I2C
いくつかの機能はデフォルトではOFFになっているぽい
https://docs.armbian.com/Hardware_Allwinner_overlays/
overlayというやり方で、有効にする必要がある。
まず、
/boot/dtb/overlay/README.sun8i-h3-overlays
を確認。
### i2c0

Activates TWI/I2C bus 0

I2C0 pins (SCL, SDA): PA11, PA12
という内容が入っていたので、
/boot/armbianEnv.txt
を編集して、i2c0を有効にする。
verbosity=1
logo=disabled
console=both
disp_mode=1920x1080p60
overlay_prefix=sun8i-h3
overlays=usbhost1 usbhost2
rootdev=UUID=fe4142df-92e9-489c-9752-d9350590f882
rootfstype=ext4
usbstoragequirks=0x2537:0x1066:u,0x2537:0x1068:u
↓
verbosity=1
logo=disabled
console=both
disp_mode=1920x1080p60
overlay_prefix=sun8i-h3
overlays=usbhost1 usbhost2 i2c0
rootdev=UUID=fe4142df-92e9-489c-9752-d9350590f882
rootfstype=ext4
usbstoragequirks=0x2537:0x1066:u,0x2537:0x1068:u
再起動すると、/dev配下にそれらしいものができている。
# ls /dev/i2c-0
/dev/i2c-0
チェックプログラムをインストール
# apt-get install i2c-tools
Reading package lists... Done
Building dependency tree
Reading state information... Done
Suggested packages:
  libi2c-dev python-smbus
Recommended packages:
  read-edid
The following NEW packages will be installed:
  i2c-tools
0 upgraded, 1 newly installed, 0 to remove and 0 not upgraded.
Need to get 57.6 kB of archives.
After this operation, 196 kB of additional disk space will be used.
Get:1 http://cdn-fastly.deb.debian.org/debian stretch/main armhf i2c-tools armhf 3.1.2-3 [57.6 kB]
Fetched 57.6 kB in 1s (50.7 kB/s)
Selecting previously unselected package i2c-tools.
(Reading database ... 32834 files and directories currently installed.)
Preparing to unpack .../i2c-tools_3.1.2-3_armhf.deb ...
Unpacking i2c-tools (3.1.2-3) ...
Setting up i2c-tools (3.1.2-3) ...
Processing triggers for man-db (2.7.6.1-2) ...
今回使ったのはこれ
CCS811 エアークオリティセンサモジュール
https://strawberry-linux.com/catalog/items?code=11811
はんだづけし、配線。プルアップ必要ということで外部に抵抗付けた。
# i2cdetect -y 0
     0  1  2  3  4  5  6  7  8  9  a  b  c  d  e  f
00:          -- -- -- -- -- -- -- -- -- -- -- -- --
10: -- -- -- -- -- -- -- -- -- -- -- -- -- -- -- --
20: -- -- -- -- -- -- -- -- -- -- -- -- -- -- -- --
30: -- -- -- -- -- -- -- -- -- -- -- -- -- -- -- --
40: -- -- -- -- -- -- -- -- -- -- -- -- -- -- -- --
50: -- -- -- -- -- -- -- -- -- -- 5a -- -- -- -- --
60: -- -- -- -- -- -- -- -- -- -- -- -- -- -- -- --
70: -- -- -- -- -- -- -- --
認識した。
2つつないでみる
# i2cdetect -y 0
     0  1  2  3  4  5  6  7  8  9  a  b  c  d  e  f
00:          -- -- -- -- -- -- -- -- -- -- -- -- --
10: -- -- -- -- -- -- -- -- -- -- -- -- -- -- -- --
20: -- -- -- -- -- -- -- -- -- -- -- -- -- -- -- --
30: -- -- -- -- -- -- -- -- -- -- -- -- -- -- -- --
40: -- -- -- -- -- -- -- -- -- -- -- -- -- -- -- --
50: -- -- -- -- -- -- -- -- -- -- 5a 5b -- -- -- --
60: -- -- -- -- -- -- -- -- -- -- -- -- -- -- -- --
70: -- -- -- -- -- -- -- --
動作確認
# i2cget -y 0 0x5A 0x20
0x81
0x81はHW_ID。これが出ればOK.
# i2cget -y 0 0x5A 0x21
0x12
0x12はHW Version。これもOK.
コマンド 0xF4 を送って APP_START する
# i2cset -y 0 0x5A 0xF4
1秒ごとの測定モードを設定する
# i2cset -y 0 0x5A 0x01 0x10
データ取ってみる
root@nanopineo:/home/pi/I2C# i2cget -y 0 0x5A 0x02 w
0x7509
同様にして、0x5B側も初期化した後データ取ってみる
root@nanopineo:/home/pi/I2C# i2cget -y 0 0x5B 0x02 w
0x9001
2バイト読み込むと、CO2のppm値になる。
出てくる値はリトルエンディアン。
シェルスクリプトだとエンディアンめんどくさいし、本来は8バイト読み込むとTVCOsとかSTATUSとか読めるのだけど、i2cgetだと8バイト読むのができなさそう。
pythonプログラムで解決。
# !/usr/bin/env python3

import smbus
import time
import datetime

bus = smbus.SMBus(0)
# I2C address, 0x5A and 0x5B
data0 = bus.read_byte_data(0x5A,0x20) # may be 0x81
data1 = bus.read_byte_data(0x5A,0x21) # may be 0x12
bus.write_byte(0x5A, 0xF4)
bus.write_byte_data(0x5A, 0x01,0x10)

data0 = bus.read_byte_data(0x5B,0x20) # may be 0x81
data1 = bus.read_byte_data(0x5B,0x21) # may be 0x12
bus.write_byte(0x5B, 0xF4)
bus.write_byte_data(0x5B, 0x01,0x10)
while(1):
  data0 = bus.read_i2c_block_data(0x5A,0x02,8)
  data1 = bus.read_i2c_block_data(0x5B,0x02,8)
 # print ("%4d CO2ppm %4d VCOppb %X %X" % (data0[0]*256+data0[1], data0[2]*256+data0[3],data0[4],data0[5] ))
 # print ("%4d CO2ppm %4d VCOppb %X %X" % (data1[0]*256+data1[1], data1[2]*256+data1[3],data1[4],data1[5] ))
  print ("%4d-%4d CO2ppm" % (data0[0]*256+data0[1], data1[0]*256+data1[1] ))
  print ("%4d-%4d VCOppb" % (data0[2]*256+data0[3], data1[2]*256+data1[3] ))
  time.sleep(1)
  print()
キャラクタLCDを繋げる
秋月電子 SC1602BBWB-XS-LB-Gを使った。
一般的なSD1602と呼ばれるものならほぼ同じようにできるはず。
接続
1 VDD 3.3V
2 VSS GND
3 Vo
4 E 10
5 R/W GND
6 RS 2
7 DB0 N.C.
8 DB1 N.C.
9 DB2 N.C.
10 DB3 N.C.
11 DB4 4
12 DB5 5
13 DB6 6
14 DB7 7
# include <stdio.h>
# include <string.h>
# include <stdlib.h>
# include <wiringPi.h>
# include <lcd.h>

int main(int argc, char **argv) {
    int fd;
    int c;
    int i;

    if(wiringPiSetup() == -1) {
        printf("Setup Fail\n");
        exit(1);
    }
    fd = lcdInit(2,16,4,2,10,4,5,6,7,0,0,0,0);

    while (1){
      lcdClear(fd);
      lcdPuts(fd,"ABCDEFGHIJKLMNOP");
      lcdPosition(fd,0,1);
      lcdPuts(fd,"abcdefghijklmnop");
      sleep(1);
   }
}
無限ループにしているのは、ジャンパーケーブルでつなげたら接触不良が起こったのでトラブルシューティングのため。