はじめに
この記事は『Unityゆるふわサマーアドベントカレンダー2019』の17日の記事です。今回はVRのでの移動で加速度センサを使用した移動に関する内容になります。
あまねくVRの移動で記事にされているのが
・ワープ移動
・タッチやスティックを使った移動
の内容ですが、他の移動方法として提示できるのが加速度センサを使用した移動方法になります。
実際に体を動かす事によりVR酔いしにくい移動方法かと思われます。
歩く or 走る際に必要な動き
まずは立ってみて手足を動かしてみると

欽ちゃん走りとか意識して手の動作を制御しない限り
大体の人が手を前後に振り、足を地から離して進みます
東西南北どちらに歩くにしても共通するのが、手足どちらにしても
Y座標方向に大きく動く事です
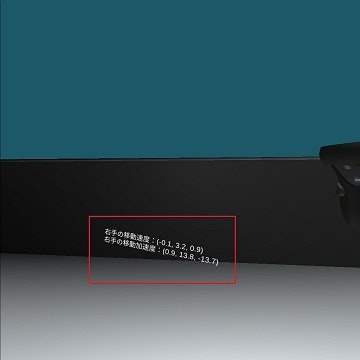
コントローラの移動量と加速量
ひとまず右手のコントローラから試してみる
下記により右手のコントローラを設定する
OVRInput.Controller RightCon;
RightCon = OVRInput.Controller.RTouch; //右手のコントローラ
■コントローラの移動量
Vector3 moveRight = OVRInput.GetLocalControllerVelocity(RightCon);
空間上で進んだ距離分を取得する
例えば手を上に3上げた時は、Y方向に3進んだ値が取得される
速度に関わらず動かした分だけ進む(例えば壁を手を使ってよじ登る等)のに使う事が出来る
■コントローラの加速量
Vector3 accRight = OVRInput.GetLocalControllerAcceleration(RightCon);
空間上で進んだ速さを取得する
例えば手を上に3上げた時、ゆっくり上げればY方向に0~1と小さな加速値が取得されるが
勢い付けて早く上げると10以上の大きな加速値が取得できる
加速量を使用すると歩いているのか手を動かしているだけなのかを使い分ける事が出来る

実際に動いてみよう
まずは歩いてみよう
右手または左手を前後振って前進する
{
    OVRInput.Controller LeftCon;
    OVRInput.Controller RightCon;
     void Start()
    {
        LeftCon = OVRInput.Controller.LTouch;
        RightCon = OVRInput.Controller.RTouch;
    }

    // Update is called once per frame
    void Update()
    {

        Vector3 accLeft = OVRInput.GetLocalControllerAcceleration(LeftCon) ;
        Vector3 accRight = OVRInput.GetLocalControllerAcceleration(RightCon);

        float walkSpeed = 10;
        float moveSpeed;
        moveSpeed = accLeft.y + accRight.y;
        if ( moveSpeed <= -walkSpeed||  moveSpeed >= walkSpeed )
        {
            var moveDirect = PlayerCamera.transform.rotation.eulerAngles.y;
            var moveQuate = Quaternion.Euler(0, moveDirect, 0);
            transform.position += (moveQuate * Vector3.forward).normalized * Time.deltaTime;
        }
}
これにより手を振ってる間は向いてる方向に進めるようになりました。

歩くことが出来るようになったが走った勢いなどを付けてみたいとなったら
Rigidbodyなどを使用する事で簡単に表現できるようになります。
{
    OVRInput.Controller LeftCon;
    OVRInput.Controller RightCon;
      Rigidbody rd;
    // Use this for initialization
    // Start is called before the first frame update
    void Start()
    {
        LeftCon = OVRInput.Controller.LTouch;
        RightCon = OVRInput.Controller.RTouch;
        rd = GetComponent<Rigidbody>();
    }

    // Update is called once per frame
    void Update()
    {
        Vector3 accLeft = OVRInput.GetLocalControllerAcceleration(LeftCon) ;
        Vector3 accRight = OVRInput.GetLocalControllerAcceleration(RightCon);

        float walkSpeed = 10;
        float moveSpeed;
        moveSpeed = accLeft.y + accRight.y;
        if ( moveSpeed <= -walkSpeed||  moveSpeed >= walkSpeed )
        {
            var moveDirect = PlayerCamera.transform.rotation.eulerAngles.y;
            var moveQuate = Quaternion.Euler(0, moveDirect, 0);
            rd.AddForce((moveQuate * Vector3.forward).normalized);
        }
}
勢いがつき、手を振り終わってもスイーっと進めるようになりました。
後はRigidbodyの空気抵抗の値を設定する事やブレーキ用のボタンを用意して
止まれるように設定しましょう。

参考文献