プルリクをマージしてもサイトがちゃんと見える・動く事は保証したい,
でも逐一手動で確かめるのはイヤだ!
→ E2Eテストを書いてさらに自動化させておこう!
すること
- Nightwatch.jsを利用してE2Eテストを行う.
- 上記をCircleCIで自動実行させる.
1.Nightwatch.jsを利用したE2Eテスト
必要パッケージインストール
npm install --save-dev nightwatch babel-register selenium-server-standalone-jar chromedriver
nightwatch.jsの設定
ここでは特にseleniumサーバーのjarとchromeのドライバを指定します.
またES6でテストコードが記述できるようbabelを設定しておきます.
test/e2e/globals.json
{
  "src_folders" : ["test/e2e/specs"],
  "output_folder" : "test/reports/",
  "custom_commands_path" : "",
  "custom_assertions_path" : "",
  "page_objects_path" : "",
  "globals_path" : "node_modules/babel-register",
  "selenium" : {
    "start_process" : true,
    "server_path" : "node_modules/selenium-server-standalone-jar/jar/selenium-server-standalone-3.0.1.jar",
    "log_path" : "test/logs",
    "host" : "127.0.0.1",
    "port" : 4444,
    "cli_args" : {
      "webdriver.chrome.driver" :"node_modules/.bin/chromedriver",
    }
  },
  "test_settings" : {
    "default" : {
      "launch_url" : "http://localhost",
      "selenium_port"  : 4444,
      "selenium_host"  : "localhost",
      "silent": true,
      "screenshots" : {
        "enabled" : true,
        "on_failure" : true,
        "on_error" : false,
        "path" : "test/screenshots"
      },
      "desiredCapabilities": {
        "browserName": "chrome",
        "javascriptEnabled": true,
        "acceptSslCerts": true
      },
      "globals": {
        "baseUrl": "http://localhost:8888",
        "waitTime": 10000
      },
      "use_xpath": false
    }
  }
}
加えてpackage.jsonにスクリプトを追加しておきましょう
package.json
"scripts": {
  ...略
  "e2e" : "nightwatch -c test/e2e/globals.json"
}
nigthwatch.jsを利用して下記のような適当なテストコードを書きます
test/e2e/specs/google.js
module.exports = {
  tag: 'demo',
  'Demo test Google' : (client) => {
    client
      .url('http://www.google.com')
      .waitForElementVisible('body', 1000)
      .assert.title('Google')
      .assert.visible('input[type=text]')
      .end()
  }
}
例としてgoogleにアクセスしてタイトルと入力フォームが存在するかチェックするだけのデモです.
これでテストが実行できるはずです.
試しにPC上で
npm run e2e
として実行してみましょう. chromeが立ち上がってgoogleが表示されたかと思います.
2.CircleCI上での実行.
circleCIでは特に何もしなくてもchromeとかが入っていますのでcircle.ymlに書けばそのまま実行できます.
ただcircle-ciではバックグラウンド実行を&で記述出来ないのでバックグラウンドの指定が必要です.
また実行レポートとスクリーンショットはちゃんと回収しておきましょう.
circle.yml
machine:
    node:
      version: 7.4.0
    post:
      - curl -o- -L https://yarnpkg.com/install.sh | bash
    timezone: Asia/Tokyo

dependencies:
    cache_directories:
      - ~/.cache/yarn
    pre:
      - yarn --version
    override:
      - yarn install
test:
    override:
      - yarn run build
      # e2e テスト
      - yarn start: # express lunch
          background: true
      - sleep 5
      - yarn run e2e
    post:
      - mv test/reports $CIRCLE_ARTIFACTS
      - mkdir -p test/screenshots
      - mv test/screenshots $CIRCLE_ARTIFACTS
3.結果
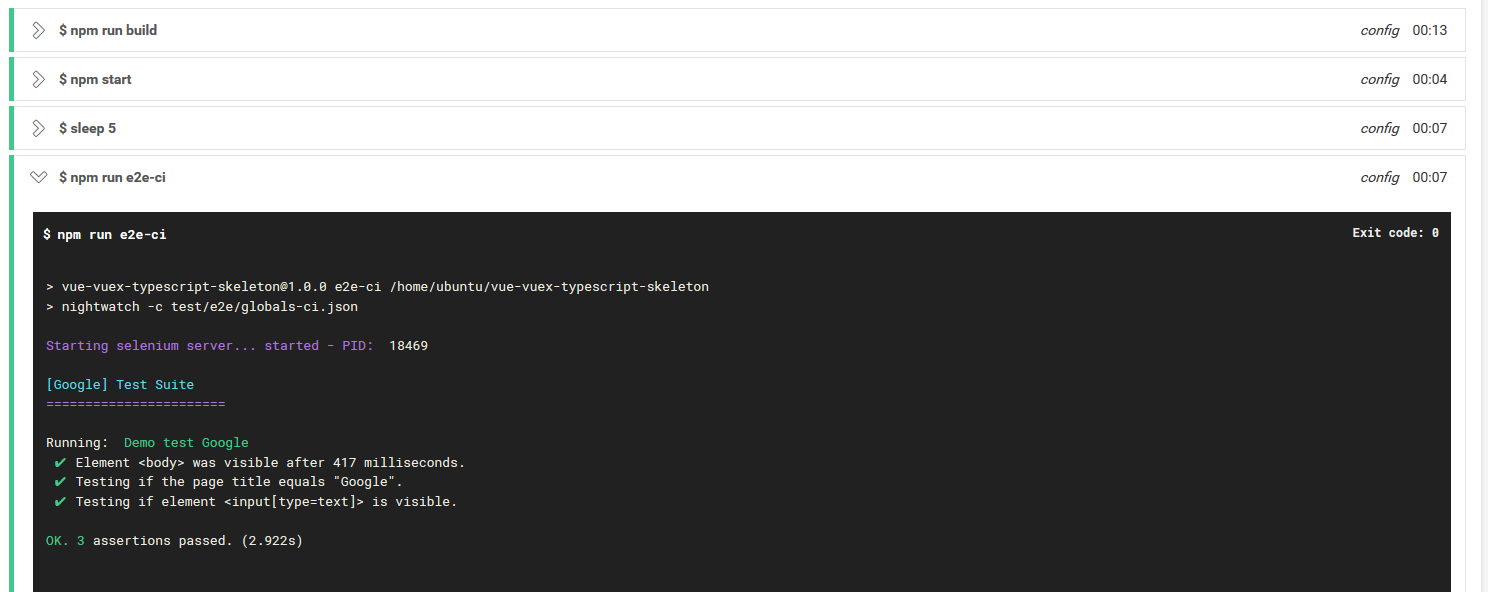
こんな感じにCircleCIでプッシュ毎にテストが自動でできます.
しっかりテストを書いておけばマージボタン押すとき気が楽になりますね.
4.ソース等
今回のは手持ちのWebサイトテンプレにE2Eテストの設定を加えたときのことをベースにしてます.
その際のソースコードはこちら