概要
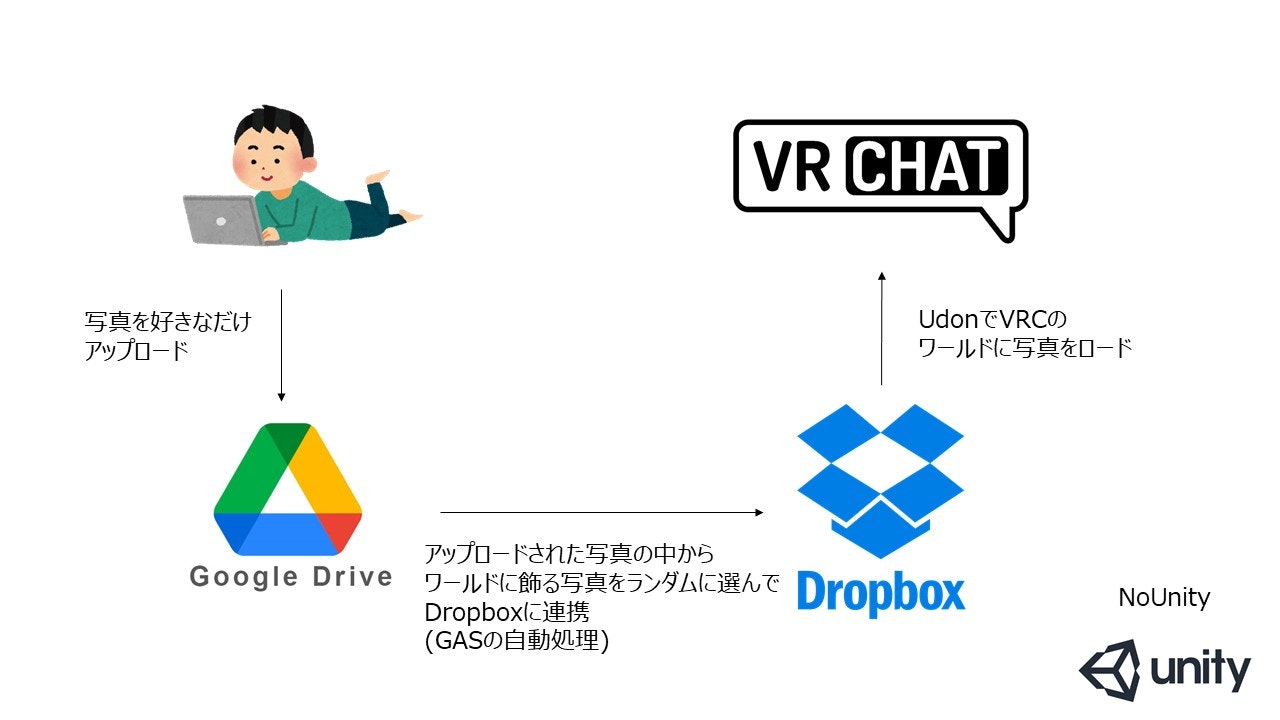
VRChatにImage Loadingが公開され、Webから画像を取得できるようになりました。
VRChatterはみんな写真が大好きで、ホームワールドに写真をたくさん飾る習性があります。
Unityを開かなくても飾った写真が自動的に更新できると嬉しいですね。
こんな感じです。
ChatGPTに頼んでGoogledriveに突っ込んだ写真から週替わりでランダムに飾ってくれるやつ作ってもらった
— なまのなまこ (@Iiron_Lung) April 9, 2023
超便利🥳
(動画4倍速) pic.twitter.com/H2DtpuUTpF
作ってみましょう。
ステップ1 手動で差し替えできる写真立てを置く
使うサービス
- DropBox
VRChatの許可リストに入っている。
かつファイルのURLがフォルダ・ファイル名によって一意に決まるのでワールドを更新することなく画像の差し替えが可能。
作り方
Udonの部分は省略します。
ImageLoadingを使ってWebから画像を読み込める機能を作ってください。
ここにサンプルを置いておきます。
DropBoxに飾りたい写真をアップロードし、リンクをコピーします。

コピーしたリンクのURLを編集します。
「www.dropbox.com」を「dl.dropboxusercontent.com」に変更し、末尾の「?dl=0」を削除してください。
https://www.dropbox.com/s/hogefuga/1.png?dl=0
↓
https://dl.dropboxusercontent.com/s/hogefuga/1.png
編集後のURLをImageLoadingで読み込んでください。
差し替える際はDropboxの元のファイルを削除し、差し替えたいファイルを元のファイルと同じ名前にしてアップロードすることでワールド更新なしで反映されます。
ステップ2 自動で定期更新されるようにする
Dropboxの写真をGoogleDriveからランダムに選んで差し替えるようにします。
使うサービス
- GAS
無料のスクリプトサービス。スケジュールで自動実行してくれる。
GASを作る
GoogleDriveを開き「新規→その他→GoogleAppsScript」を選び新規スクリプトを作成します。
コード.gsに以下のコードをコピペしてください。
コードはChatGPTが作りました。
var auth_code = 'AUTH_CODE';
var folderId = 'FOLDER_ID';
var CLIENT_ID = 'CLIENT_ID';
var CLIENT_SECRET = 'CLIENT_SECRET';
var dropboxFolderName = 'FOLDER_NAME';
var reflesh_token = 'REFLESH_TOKEN';

// Google Driveのフォルダからランダムに10枚の画像を取得し、Dropboxにアップロード
function getRandomImagesAndUploadToDropbox() {
  var folder = DriveApp.getFolderById(folderId);
  var files = folder.getFiles();
  var imageUrls = [];

  var dropboxAccessToken = requestToken(CLIENT_ID, CLIENT_SECRET, reflesh_token);

  // Google Driveのフォルダ内の画像URLを取得
  while (files.hasNext()) {
    var file = files.next();
    var mimeType = file.getMimeType();
    if (mimeType.startsWith('image/')) {
      imageUrls.push({url: file.getUrl(), id: file.getId(), name: file.getName()});
    }
  }

  // 画像URLからランダムに10枚選択
  var randomImages = [];
  for (var i = 0; i < 10 && imageUrls.length > 0; i++) {
    var randomIndex = Math.floor(Math.random() * imageUrls.length);
    randomImages.push(imageUrls.splice(randomIndex, 1)[0]);
  }

  // ランダムに選択された画像をDropboxにアップロード
  for (var i = 0; i < randomImages.length; i++) {
    var image = randomImages[i];
    var file = DriveApp.getFileById(image.id);
    var blob = file.getBlob();
    var fileName = (i + 1) + '.png';
    uploadToDropbox(dropboxAccessToken, dropboxFolderName, fileName, blob);
  }
}

function requestToken(key, secret, token) {
  // Request a token
  const message = "grant_type=refresh_token&refresh_token=" + token + "&client_id=" + key + "&client_secret=" + secret;
  const options = {
    method: "post",
    contentType: "application/x-www-form-urlencoded",
    payload: message,
    muteHttpExceptions: true,
  };
  const response = UrlFetchApp.fetch("https://api.dropboxapi.com/oauth2/token", options);

  // Decode the response body (json format)
  const responseData = JSON.parse(response.getContentText());
  const access_token = responseData["access_token"];

  if (access_token !== undefined) {
    return access_token;
  } else {
    const error = responseData["error_description"];
    console.log("Failed to get access token. Error: " + response.getResponseCode() + ": " + error);
    return null;
  }
}

function GetRefreshToken(){
    // Request a token
  const message = "grant_type=authorization_code&code=" + auth_code + "&client_id=" + CLIENT_ID + "&client_secret=" + CLIENT_SECRET;
  const options = {
    method: "post",
    contentType: "application/x-www-form-urlencoded",
    payload: message,
    muteHttpExceptions: true,
  };
  const response = UrlFetchApp.fetch("https://api.dropboxapi.com/oauth2/token", options);

  // Decode the response body (json format)
  const responseData = JSON.parse(response.getContentText());
  const access_token = responseData["access_token"];

  if (access_token !== undefined) {
    console.log(responseData);
  } else {
    const error = responseData["error_description"];
    console.log("Failed to get access token. Error: " + response.getResponseCode() + ": " + error);
    return null;
  }
}

// 画像をDropboxにアップロードする関数
function uploadToDropbox(accessToken, folderName, fileName, blob) {
  var url = 'https://content.dropboxapi.com/2/files/upload';
  var headers = {
    'Authorization': 'Bearer ' + accessToken,
    'Content-Type': 'application/octet-stream',
    'Dropbox-API-Arg': JSON.stringify({
      path: '/' + folderName + '/' + fileName,
      mode: 'overwrite', // 上書きモードに設定
      autorename: false, // 自動リネームを無効に設定
      mute: false
    })
  };

  var options = {
    method: 'post',
    headers: headers,
    payload: blob.getBytes(),
    muteHttpExceptions: true
  };

  var response = UrlFetchApp.fetch(url, options);
  var statusCode = response.getResponseCode();
  var responseBody = JSON.parse(response.getContentText());

  if (statusCode === 200) {
    Logger.log('File uploaded successfully: ' + responseBody.name);
  } else {
    Logger.log('Error uploading file: ' + responseBody.error_summary);
  }
}
各種情報の取得
上記コードの認証情報部分を書き換えていきます。
- GoogleDrive
飾りたい写真を入れたGoogleDriveのフォルダを開きURLの最後の部分をコピーし、folderIdに設定します。
https://drive.google.com/drive/u/5/folders/hogefugaの場合
 var folderId = 'hogefuga';
- ドロップボックス
Dropbox開発者向け情報のページのCreatappsをクリックし、以下のように設定してAPPとフォルダを作成します。
名前は任意で入れてください。
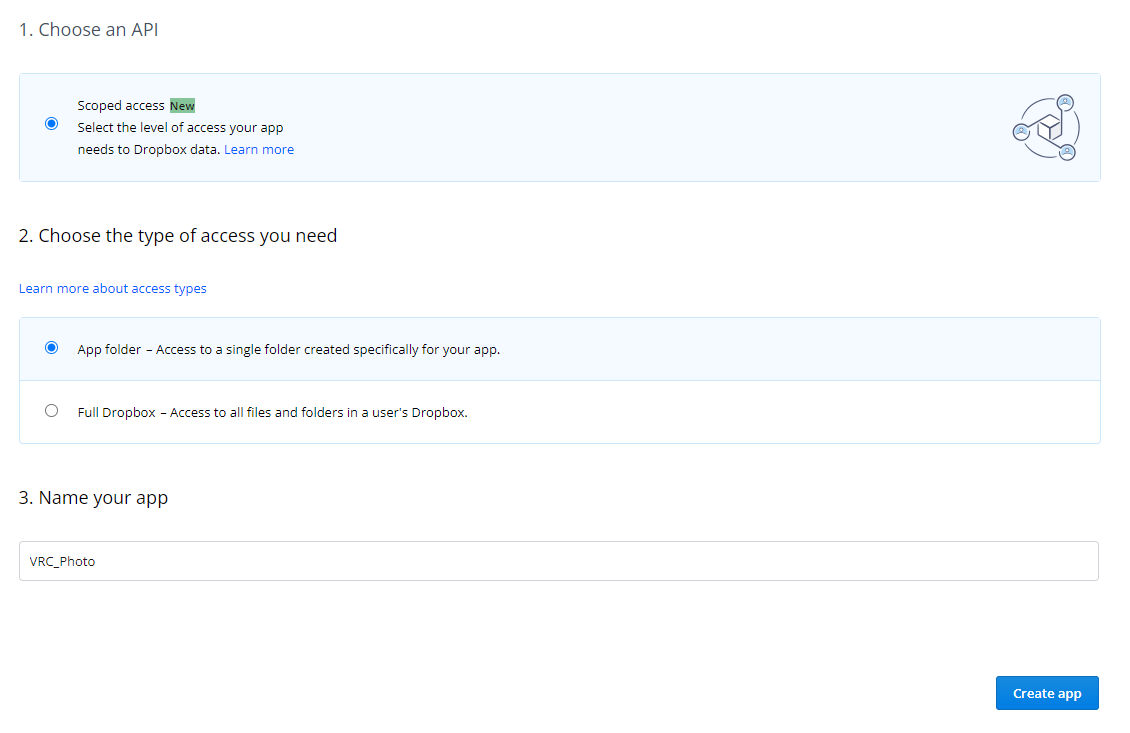
AppConsoleから作ったAppを選びApp keyとApp secret を取得します。
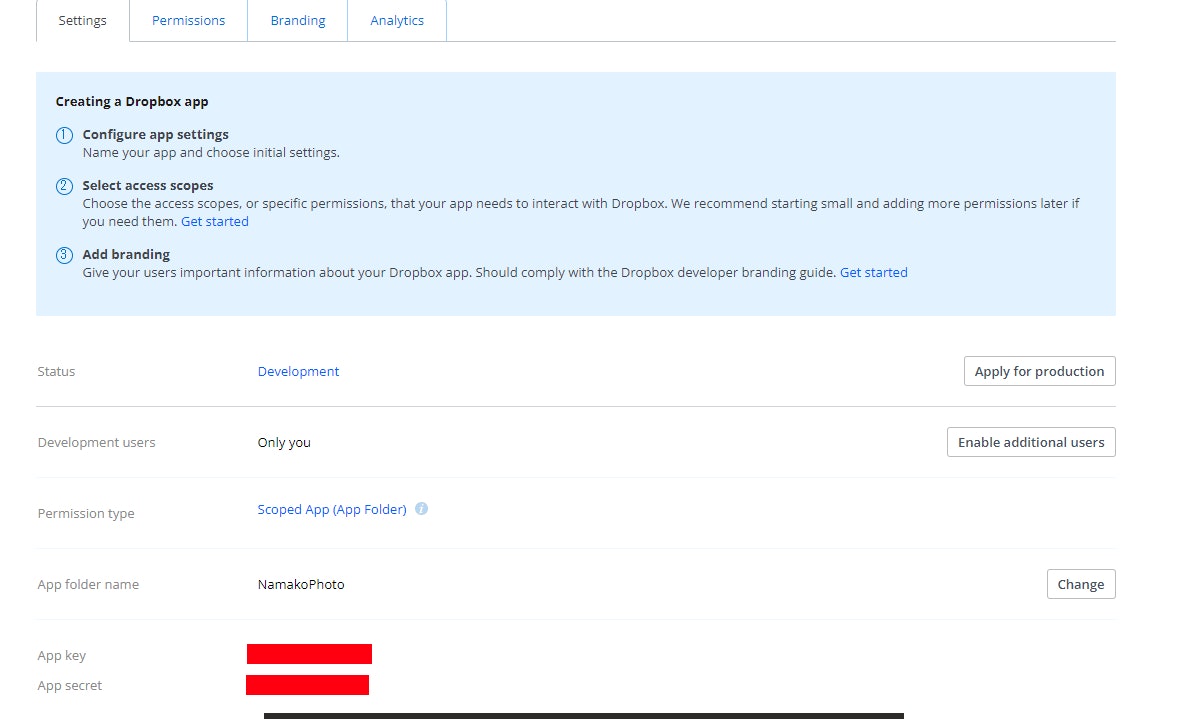
  var CLIENT_ID = '取得したApp key';
  var CLIENT_SECRET = '取得したApp secret';
Permissionsのタブを開き「files.content.write」にチェックを入れたうえで画面下部のSubmitボタンを押します。

RefleshTokenの取得
DropboxのTokenの有効時間が4時間に設定されているため、refleshTokenを取得し処理毎にTokenを再取得できるようにします。
auth_codeは使い切りなので途中で中断・コピペを失敗した等があった場合auth_codeの取得からやり直してください。
取得したApp keyをもとに以下のURLを修正し、Webブラウザでアクセスしてください。
https://www.dropbox.com/oauth2/authorize?client_id=hoge&response_type=code&token_access_type=offline
画面の「許可」をクリックし、出てきたauthorization codeをGASのauth_codeに入力します。
var auth_code = 'FOO_BAR'
デバッグの右側にある▼マークを押し「GetRefleshToken」を選んだうえで「実行」ボタンを押します。

画面下部のLogに情報として文字列が出てきます。
その中で refresh_token:と書かれている部分の右側の文字列をGASに張り付けます。
var reflesh_token = 'hoge';
dropboxFolderNameは好きな名前を入れてください。
var dropboxFolderName = 'nekochan';
実行
再度GASを保存し、getRandomImagesAndUploadToDropboxを選択して「実行」ボタンを押してください。
順次ファイルがDropBoxにアップロードされます。
DropBoxには『アプリ/アプリ名/GASのdropboxFolderNameで設定したフォルダ名』の中にアップロードされているので、ステップ1の手順でURLを取得しVRChatから読み込めば完了です。
スケジュール
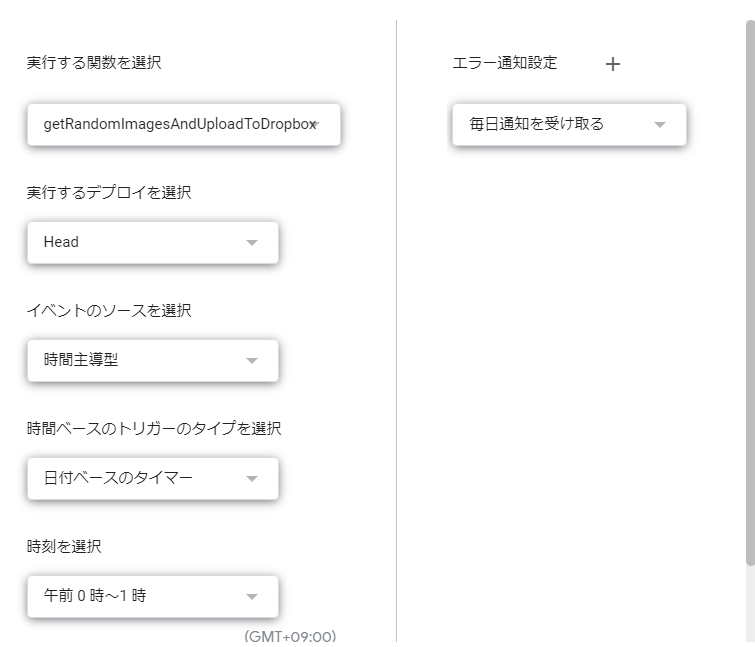
GASはスケジュールで自動実行してくれる機能があります。
画面左側の時計マーク、トリガーを選びます。
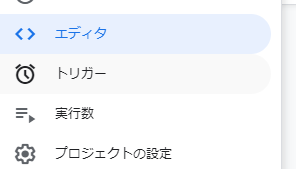
好きなタイミングでgetRandomImagesAndUploadToDropboxが動くようにすれば自動更新が始まります。
山のような写真を厳選することもUnityを触る必要もなく、毎日違った思い出に浸ることができます。
Happy!
参考文献
