★2021/11/3追記
この記事よりも簡単なサーバー構築手順を以下のページに書きました。
とにかく簡単なのが良い方はこちらもご覧ください。
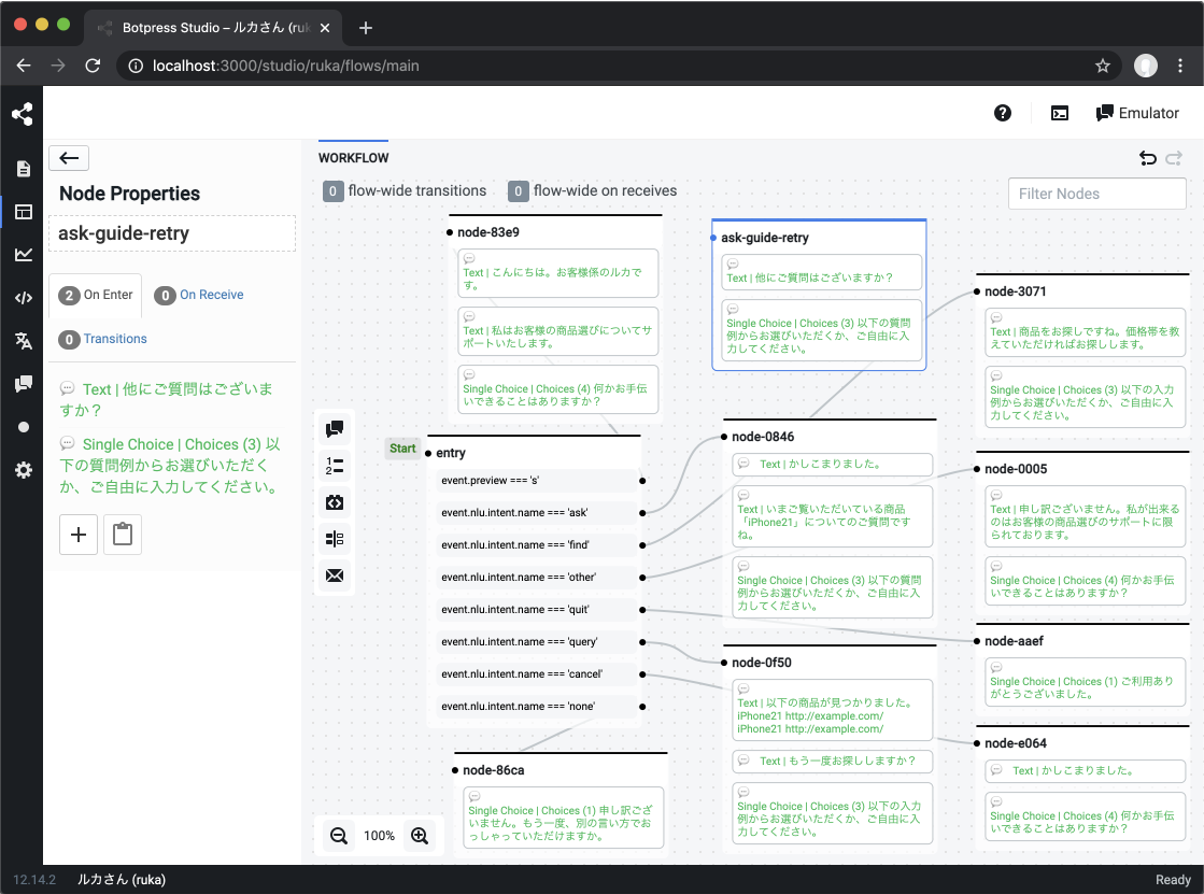
Botpressとは
Botpressは、チャットボット開発プラットフォームのソフトウェアです。チャットボット開発に必要なツールが一通り入ったパッケージソフトウェアであり、Botpress社によってオープンソースソフトウェアとして開発・提供されています。
Botpressを利用すれば誰でも、自分のPCにインストールしてチャットボットを作ったり、サーバーにインストールしてチャットボットを公開できます。また、ソフトウェアエンジニアにとっては「チャットボット型アプリ」の開発フレームワークとして利用できます。Pythonで書かれた他の多くのツールと違ってTypeScriptで書かれていてNode.jsで動作するため、JavaScriptのスキルと資産が生かせる点がポイントです。
開発したボットは、自分自身のサーバーでホスティングでき、Webサイトに公開できるほか、FacebookやLINE、SlackやTeamsへ接続できます。(LINEコネクタはこちら)
Botpressを使ったチャットボット開発については、以下の書籍にまとめました。チャットボットについて知りたい方や、まだBotpressを使ったことがない方には、おすすめします。
この記事では、書籍には記載できなかったサーバー構築の詳細について紹介します。
Botpressサーバーの準備
Botpressは、自分のPCでも簡単に動かすことができるため、試してみるだけならサーバーは必要ありません。作ったボットをLINEなどに繋げてみるだけなら、ngrokなどのトンネリングサービスを使えばPCだけでも乗り切れます。しかし、作ったボットを公開して他の人に利用してもらうには、サーバーへインストールする必要があります。
最も安価にBotpressサーバーを立てるには、VPSが選択肢になります。ここでは、Amazon Lightsailへのインストールメモを簡単に共有します。
費用
用途によって最低必要なメモリがあり、それによって選ぶべきインスタンスタイプと費用が決まります。
1. 本番環境ではないサーバー(開発/テスト用や個人的な利用など)
512MBプランでもギリギリ動きます。その場合、月3.5ドル(約380円)。ただし、言語サーバーを自前ホストせず、デフォルトであるBotpress社のサーバーを使うことが必要です。1
この記事の構築手順に従う場合、言語サーバーの設定や起動はしないでください。
2. 本番環境(ビジネス以外)
2GBプラン以上が必要です。その場合、月10ドル(約1000円)。これは、言語サーバーとして100dimのモデルをホスティングする前提です。NLUの精度があまり重要でないケースを指しています。
3. 本番環境(ビジネス利用)
4GBプラン以上が必要です。その場合、月20ドル(約2000円)。これは、言語サーバーとして300dimのモデルをホスティングする前提です。NLUの精度が重要となるケースを指しています。
この記事の構築手順に従う場合、利用する言語モデルを bp.ja.300.bin へ読み替えてください。
構築手順1(事前準備)
Lightsail
- Lightsailへアカウント登録してホーム画面を開き、インスタンス作成画面へ
- プラットフォームは「Linux/Unix」、設計図は「Nginx」を選択
- インスタンスタイプは、予め決めたものを選択
- インスタンス作成後、「ネットワーキング」タブで「静的IPの作成」をする
DNS
- Botpressサーバー用のドメイン(サブドメインでも可)を用意する
- そのドメインのDNS管理ツールにアクセスし、Lightsailで作成した静的IPをAレコードとして登録する
SSHでの作業
サーバーへsshで接続する(Lightsailの管理ツールで「SSHを使用して接続」)
Bitnamiイメージのタイプの判定
まず、Bitnamiイメージのタイプが「アプローチA」か「アプローチB」か調べる。
test ! -f "/opt/bitnami/common/bin/openssl" && echo "Approach A: Using system packages." || echo "Approach B: Self-contained installation."
詳細:https://docs.bitnami.com/aws/faq/get-started/understand-upcoming-changes/
以下、アプローチAの場合を前提として書きます。
不要なプロセスの停止
Nginxイメージに入っている不要なプロセスを停止し、起動しないようにする。
sudo /opt/bitnami/ctlscript.sh stop php-fpm
sudo /opt/bitnami/ctlscript.sh stop mariadb
sudo mv /etc/monit/conf.d/php-fpm.conf /etc/monit/conf.d/php-fpm.conf.disabled
sudo mv /etc/monit/conf.d/mariadb.conf /etc/monit/conf.d/mariadb.conf.disabled
sudo gonit reload
SSL証明書のインストール
Let's Encryptのクライアント lego をダウンロードする。
curl -Ls https://api.github.com/repos/xenolf/lego/releases/latest | grep browser_download_url | grep linux_amd64 | cut -d '"' -f 4 | wget -i -
ダウンロードされたファイル名を確認して、インストールする。(ここではlego_v4.2.0_linux_amd64.tar.gzとする)
tar xvzf lego_v4.2.0_linux_amd64.tar.gz  #ダウンロードされたファイル名に合わせる
sudo mkdir -p /opt/bitnami/letsencrypt
sudo mv lego /opt/bitnami/letsencrypt/lego
Let's EncryptでSSL証明書をインストールする。まずNginxを止める。
sudo /opt/bitnami/ctlscript.sh stop nginx
Legoを実行する。(自分のメールアドレス、ドメインの情報を与える)
sudo /opt/bitnami/letsencrypt/lego --tls --email="自分のメールアドレス" --domains="適用したドメイン" --path="/opt/bitnami/letsencrypt" run
インストールされた証明書をNginxに設定する(証明書とキーのファイル名は、自分のドメイン名に合わせる)
sudo mv /opt/bitnami/nginx/conf/bitnami/certs/server.crt /opt/bitnami/nginx/conf/bitnami/certs/server.crt.old
sudo mv /opt/bitnami/nginx/conf/bitnami/certs/server.key /opt/bitnami/nginx/conf/bitnami/certs/server.key.old
sudo mv /opt/bitnami/nginx/conf/bitnami/certs/server.csr /opt/bitnami/nginx/conf/bitnami/certs/server.csr.old
sudo ln -sf /opt/bitnami/letsencrypt/certificates/適用したドメイン.key /opt/bitnami/nginx/conf/bitnami/certs/server.key
sudo ln -sf /opt/bitnami/letsencrypt/certificates/適用したドメイン.crt /opt/bitnami/nginx/conf/bitnami/certs/server.crt
sudo chown root:root /opt/bitnami/nginx/conf/bitnami/certs/server*
sudo chmod 600 /opt/bitnami/nginx/conf/bitnami/certs/server*
Nginxをまた起動する。
sudo /opt/bitnami/ctlscript.sh start nginx
証明書の自動更新の設定
証明書を自動更新するスクリプトを作成する。
sudo mkdir -p /opt/bitnami/letsencrypt/scripts
sudo vi /opt/bitnami/letsencrypt/scripts/renew-certificate.sh
renew-certificate.shの内容は以下の通り。
# !/bin/bash

sudo /opt/bitnami/ctlscript.sh stop nginx
sudo /opt/bitnami/letsencrypt/lego --tls --email="自分のメールアドレス" --domains="適用したドメイン" --path="/opt/bitnami/letsencrypt" renew --days 90
sudo /opt/bitnami/ctlscript.sh start nginx
更新スクリプトが、cronで定期実行されるようにする。
sudo chmod +x /opt/bitnami/letsencrypt/scripts/renew-certificate.sh
sudo crontab -e
crontabに記入する内容は以下の通り。
0 0 1 * * /opt/bitnami/letsencrypt/scripts/renew-certificate.sh 2> /dev/null
スワップ領域の作成
Lightsailインスタンスにスワップ領域を設定する。スワップ容量の目安はメモリの2倍。(ここではメモリ2GBとして、スワップは4GB)
sudo dd if=/dev/zero of=/swapfile bs=128M count=32
sudo chmod 600 /swapfile
sudo mkswap /swapfile
sudo swapon /swapfile
sudo vi /etc/fstab
fstabに以下の行を追記する。
/swapfile swap swap defaults 0 0
構築手順2(Botpressのインストール)
Botpressファイルの取得
botpress.comからLinux版バイナリをダウンロード。
https://botpress.com/download
※以下、ダウンロードしたファイルを botpress-v12_17_1-linux-x64.zip とする。(自分のバージョンに読み替えてください)
scpコマンドでLightsailインスタンスのホームディレクトリへ転送する。
scp -i pemファイル botpress-v12_17_1-linux-x64.zip bitnami@適用したドメイン:~/
SSHでの作業
Botpressの起動テスト
Botpressバイナリをホームディレクトリへ展開する。
mkdir botpress
cd botpress
unzip ../botpress-v12_17_1-linux-x64.zip
起動してみる。(初回起動時に圧縮が展開される)
./bp
起動完了したら、Ctrl-Cで一度終了する。
Node.jsのインストール
Node.jsのバイナリをインストールする。(ここではv12系)
curl -fsSL https://deb.nodesource.com/setup_12.x | sudo bash -
sudo apt-get install -y nodejs
pm2のインストール
npmパッケージをグローバルインストールできるようにする。
mkdir ~/.npm-global
npm config set prefix '~/.npm-global'
vi ~/.profile
.profileの末尾に以下の行を追記する。
export PATH=~/.npm-global/bin:$PATH
pm2をグローバルへインストールして、OS起動時に起動するようにする。
source ~/.profile
npm i pm2 -g
sudo /home/bitnami/.npm-global/bin/pm2 startup
Nginxの設定
Nginxの設定ファイルを、Botpress用の設定に差し替える。
cd ~/stack/nginx/conf/
mv nginx.conf nginx.conf.bitnami
sudo vi nginx.conf
nginx.confの内容は以下のとおり。(Botpressのドキュメントにあるものと、Bitnamiのデフォルト設定を合成)
# Based on https://www.nginx.com/resources/wiki/start/topics/examples/full/#nginx-conf
user               daemon daemon;

worker_processes  auto;
error_log         "/opt/bitnami/nginx/logs/error.log";
pid               "/opt/bitnami/nginx/tmp/nginx.pid";

events {
    worker_connections  1024;
}

http {
  # Disable sending the server identification
  server_tokens off;

  # Prevent displaying Botpress in an iframe (clickjacking protection)
  add_header X-Frame-Options SAMEORIGIN;

  # Prevent browsers from detecting the mimetype if not sent by the server.
  add_header X-Content-Type-Options nosniff;

  # Force enable the XSS filter for the website, in case it was disabled manually
  add_header X-XSS-Protection "1; mode=block";

  # Configure the cache for static assets
  proxy_cache_path /tmp/nginx_cache levels=1:2 keys_zone=my_cache:10m max_size=10g
                inactive=60m use_temp_path=off;

  # Set the max file size for uploads (make sure it is larger than the configured media size in botpress.config.json)
  client_max_body_size 10M;

  # Configure access
  log_format  main  '$remote_addr - $remote_user [$time_local] "$request" '
                    '$status $body_bytes_sent "$http_referer" '
                    '"$http_user_agent" "$http_x_forwarded_for"';

  access_log  logs/access.log  main;
  error_log  logs/error.log;

  # Redirect unsecure requests to the HTTPS endpoint
  server {
    listen 80 default;
    server_name  localhost;

    return 301 https://$server_name$request_uri;
  }

  server {
    listen 443 http2 ssl;
    server_name bot.chatbot.today;

    ssl_certificate      bitnami/certs/server.crt;
    ssl_certificate_key  bitnami/certs/server.key;

    #include  "/opt/bitnami/nginx/conf/bitnami/*.conf";

    location /status {
      stub_status on;
      access_log   off;
      allow 127.0.0.1;
      deny all;
    }

    # Force the use of secure protocols only
    ssl_prefer_server_ciphers on;
    ssl_protocols TLSv1 TLSv1.1 TLSv1.2;

    # Enable session cache for added performances
    ssl_session_cache shared:SSL:50m;
    ssl_session_timeout 1d;
    ssl_session_tickets off;

    # Added security with HSTS
    add_header Strict-Transport-Security "max-age=31536000; includeSubdomains; preload";

    # Enable caching of assets by NGINX to reduce load on the server
    location ~ .*/assets/.* {
      proxy_cache my_cache;
      proxy_ignore_headers Cache-Control;
      proxy_hide_header Cache-Control;
      proxy_hide_header Pragma;
      proxy_pass http://localhost:3000;
      proxy_cache_valid any 30m;
      proxy_set_header Cache-Control max-age=30;
      add_header Cache-Control max-age=30;
    }

    # We need to add specific headers so the websockets can be set up through the reverse proxy
    location /socket.io/ {
      proxy_pass http://localhost:3000/socket.io/;
      proxy_http_version 1.1;
      proxy_set_header Upgrade $http_upgrade;
      proxy_set_header Connection "Upgrade";
    }

    # All other requests should be directed to the server
    location / {
      proxy_pass http://localhost:3000;
    }
  }
}
Nginxプロセスを再起動。
sudo /opt/bitnami/ctlscript.sh restart nginx
Botpress言語サーバーの設定
Botpress言語サーバーの日本語モデルをインストール。(ここでは100dimのデータ。4GB以上のメモリがあれば300dimを推奨)
cd ~/botpress
mkdir lang
cd lang
wget http://botpress-public.nyc3.digitaloceanspaces.com/embeddings/bp.ja.bpe.model
wget http://botpress-public.nyc3.digitaloceanspaces.com/embeddings/bp.ja.100.bin
言語サーバーとしてこのサーバーのプロセスが使われるようにする。また、Duckling(エンティティ抽出サーバー)は利用しない設定をする。
cd ..
vi data/global/config/nlu.json
以下の変更をする。
- ducklingEnabledをfalseにする
- languageSourcesのendpointを http://localhost:3100 にする
変更後のnlu.jsonは以下の通り。
{
  "$schema": "../../assets/modules/nlu/config.schema.json",
  "ducklingURL": "https://duckling.botpress.io",
  "ducklingEnabled": false,
  "preloadModels": true,
  "languageSources": [
    {
      "endpoint": "http://localhost:3100"
    }
  ],
  "modelCacheSize": "850mb"
}
Botpressの起動
言語サーバーのプロセスを起動する。
pm2 start './bp lang --offline --dim 100 --langDir lang'
言語サーバーが完全に起動するまで待つ(pm2 logsコマンドでログを見て、以下のような表示が出たら起動完了)
Service [JA] Took 177197ms to load 990mb into RAM (lang/bp.ja.100.bin)
Service [JA] Took 921ms to load 43mb into RAM (lang/bp.ja.bpe.model)
Botpressサーバーを起動。(環境変数EXTERNAL_URLで、設定したドメインのURLを与える)
EXTERNAL_URL=https://あなたのドメイン pm2 start './bp -p'
これで設定完了です。 https://あなたのドメイン にアクセスして、Botpress管理ツールが開くか確認してください。
注意事項
- 手順の詳細は、公式ドキュメントを参照ください。
- サーバーのセキュリティ対策に関する手順は記載していません。ご自身の責任で補ってください。
Botpressをもっと知りたい
Botpressでのチャットボット開発については、下記の本にまとめました。
-
Botpress社のサーバーは本番利用がNG ↩
