webpackのモードについて解説します。
最後に、実際に本番環境で使用するプラグインについても紹介します。
1.設定ファイルに記述
webpack.config.js.modeを記述します。
module.exports = {
  mode: 'development',  //これを追加するとモードを指定できる(デフォルトはproductionになっている)

  entry: './src/main.ts',

  output: {
    filename: 'bundle.js',
    path: path.resolve(__dirname, 'dist'),
    publicPath: '/dist/'
  },
  devtool: 'inline-source-map',
  module: {
    rules: [{
      test: /\.ts$/,
      use: 'ts-loader',
      exclude: /node_modules/
    }]
  },
  resolve: {
    extensions: ['.ts','.js']
  }
}
2.buildを実行
以下のコマンドを実行し、dist/bundle.jsを作成
npm run build
デフォルトの設定でwebpackでbuildすると、1行のコードになりますが、modeをdevelopmentに指定すると見やすいコードになります。
/******/ (function(modules) { // webpackBootstrap
/******/ 	// The module cache
/******/ 	var installedModules = {};
/******/
/******/ 	// The require function
/******/ 	function __webpack_require__(moduleId) {
/******/
/******/ 		// Check if module is in cache
/******/ 		if(installedModules[moduleId]) {
/******/ 			return installedModules[moduleId].exports;
/******/ 		}
/******/ 		// Create a new module (and put it into the cache)
/******/ 		var module = installedModules[moduleId] = {
/******/ 			i: moduleId,
/******/ 			l: false,
/******/ 			exports: {}
/******/ 		};
/******/
/******/ 		// Execute the module function
/******/ 		modules[moduleId].call(module.exports, module, module.exports, __webpack_require__);
/******/
/******/ 		// Flag the module as loaded
/******/ 		module.l = true;
/******/
/******/ 		// Return the exports of the module
/******/ 		return module.exports;
/******/ 	}
/******/
/******/
/******/ 	// expose the modules object (__webpack_modules__)
/******/ 	__webpack_require__.m = modules;
/******/
/******/ 	// expose the module cache
/******/ 	__webpack_require__.c = installedModules;
/******/
/******/ 	// define getter function for harmony exports
/******/ 	__webpack_require__.d = function(exports, name, getter) {
/******/ 		if(!__webpack_require__.o(exports, name)) {
/******/ 			Object.defineProperty(exports, name, { enumerable: true, get: getter });
/******/ 		}
/******/ 	};
/******/
/******/ 	// define __esModule on exports
/******/ 	__webpack_require__.r = function(exports) {
/******/ 		if(typeof Symbol !== 'undefined' && Symbol.toStringTag) {
/******/ 			Object.defineProperty(exports, Symbol.toStringTag, { value: 'Module' });
/******/ 		}
/******/ 		Object.defineProperty(exports, '__esModule', { value: true });
/******/ 	};
/******/
/******/ 	// create a fake namespace object
/******/ 	// mode & 1: value is a module id, require it
/******/ 	// mode & 2: merge all properties of value into the ns
/******/ 	// mode & 4: return value when already ns object
/******/ 	// mode & 8|1: behave like require
/******/ 	__webpack_require__.t = function(value, mode) {
/******/ 		if(mode & 1) value = __webpack_require__(value);
/******/ 		if(mode & 8) return value;
/******/ 		if((mode & 4) && typeof value === 'object' && value && value.__esModule) return value;
/******/ 		var ns = Object.create(null);
/******/ 		__webpack_require__.r(ns);
/******/ 		Object.defineProperty(ns, 'default', { enumerable: true, value: value });
/******/ 		if(mode & 2 && typeof value != 'string') for(var key in value) __webpack_require__.d(ns, key, function(key) { return value[key]; }.bind(null, key));
/******/ 		return ns;
/******/ 	};
/******/
/******/ 	// getDefaultExport function for compatibility with non-harmony modules
/******/ 	__webpack_require__.n = function(module) {
/******/ 		var getter = module && module.__esModule ?
/******/ 			function getDefault() { return module['default']; } :
/******/ 			function getModuleExports() { return module; };
/******/ 		__webpack_require__.d(getter, 'a', getter);
/******/ 		return getter;
/******/ 	};
/******/
/******/ 	// Object.prototype.hasOwnProperty.call
/******/ 	__webpack_require__.o = function(object, property) { return Object.prototype.hasOwnProperty.call(object, property); };
/******/
/******/ 	// __webpack_public_path__
/******/ 	__webpack_require__.p = "/dist/";
/******/
/******/
/******/ 	// Load entry module and return exports
/******/ 	return __webpack_require__(__webpack_require__.s = "./src/main.ts");
/******/ })
/************************************************************************/
/******/ ({

/***/ "./src/food.ts":
/*!*********************!*\
  !*** ./src/food.ts ***!
  \*********************/
/*! exports provided: Food */
/***/ (function(module, __webpack_exports__, __webpack_require__) {

ーー以下省略ーー
しかし、これだと毎回書き換えなければならないので面倒ですよね。
例えば、devサーバーで使用する時はdevelopmentにして、buildする時は、productionにする。
といった方法があります。
それでは実際にやり方について解説します。
developmentとproductionの使い分け
developmentとproductionを使い分ける方法について解説していきます。
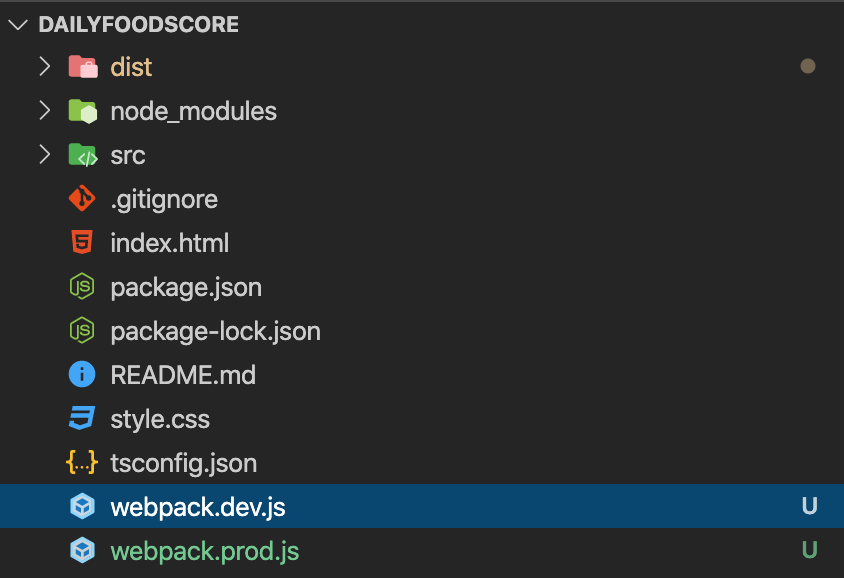
1.webpack.dev.jsとwebpack.prod.jsを作成
以下のように2つのファイルを作成します
(webpack.prod.jsを新規作成し、webpack.config.jsをwebpack.dev.jsに改名)

2."build"と"start"のそれぞれのコマンド実行時に使用するconfigファイルを指定
package.jsonに以下を記述し使用するconfigファイルを指定する
  "scripts": {
    "test": "echo \"Error: no test specified\" && exit 1",
    "build": "webpack --config webpack.prod.js",
    "start": "webpack-dev-server --config webpack.dev.js"
  },
こうすることで開発環境ではwebpack.dev.jsが読み込まれて、本番環境ではwebpack.prod.jsが読み込まれるようになる。
3.webpack.dev.jsとwebpack.prod.jsの中身を記述
それぞれの中身を記述します。
const path = require('path'); //requireはimportと同じ扱い

module.exports = {
  mode: 'production',

  entry: './src/main.ts', //一番最初に読み込ませるjsファイル

  output: {  //生成したファイルをどこに格納するかを指定
    filename: 'bundle.js', //生成されるファイル名
    path: path.resolve(__dirname, 'dist'),  //生成されるファイルの格納ディレクトリ
  },
  devtool: 'none',
  module: {
    rules: [{
      test: /\.ts$/, //どういうファイルに対して
      use: 'ts-loader',//何をする
      exclude: /node_modules/ //このファイルは例外だよ
    }]
  },
  resolve: {
    extensions: ['.ts','.js'] //左側から拡張子があるかを調べてくれる
  }
}
const path = require('path'); //requireはimportと同じ扱い

module.exports = {
  mode: 'development',

  entry: './src/main.ts', //一番最初に読み込ませるjsファイル

  output: {  //生成したファイルをどこに格納するかを指定
    filename: 'bundle.js', //生成されるファイル名
    path: path.resolve(__dirname, 'dist'),  //生成されるファイルの格納ディレクトリ
    publicPath: '/dist/' //これを記述するとwebpackがどこにbundle.jsを返すかを指定できる
  },
  devtool: 'inline-source-map',
  module: {
    rules: [{
      test: /\.ts$/, //どういうファイルに対して
      use: 'ts-loader',//何をする
      exclude: /node_modules/ //このファイルは例外だよ
    }]
  },
  resolve: {
    extensions: ['.ts','.js'] //左側から拡張子があるかを調べてくれる
  }
}
これで問題なくそれぞれ実行できるようになりました。
3.応用編(本番環境でよく使用するプラグイン)
ここからは、本番環境で実際によく使われるプラグインについて解説します。
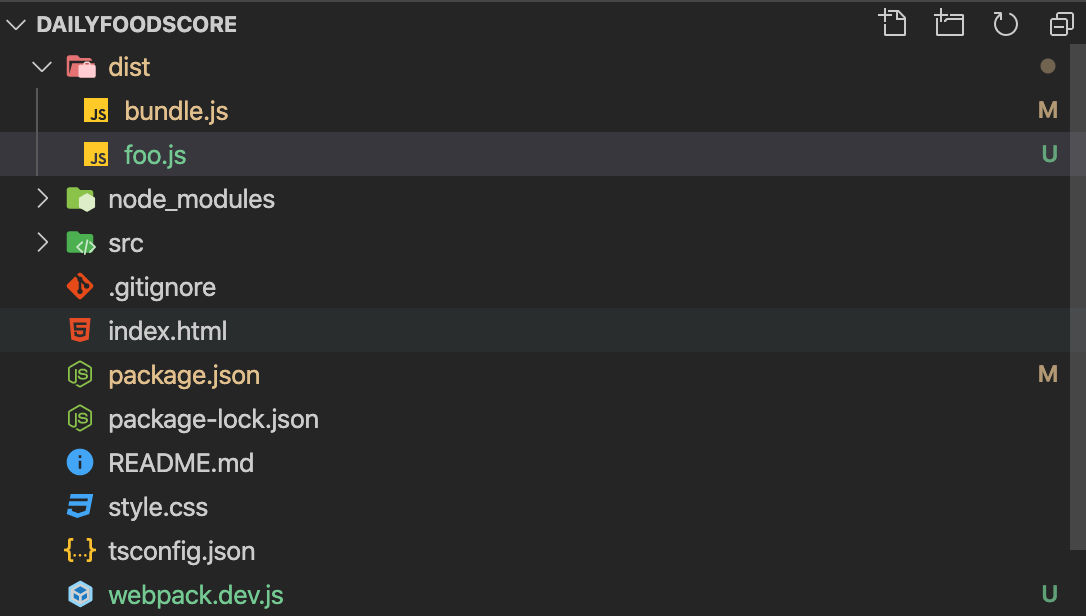
現状、新たにjsファイルを作成した後に
npm run build
のコマンドを実行したら、もちろんbundle.jsは作成されますが、新しく作成したファイルはそのままになります。

そこで今回紹介するプラグインを使うと、build実行時に毎回ファイルを削除後に新規作成してくれるのでフォルダ内がごちゃごちゃしません。
そのプラグインをproductionで使用することはよくあるのでやっていきましょう。
1.プラグインをインストール
今回使用するプラグインは、clean-webpackです。
以下のコマンドでインストールします。
npm install --save-dev clean-webpack-plugin
2.プラグインを使用する
webpack.prod.jsに以下を記述します。
const path = require('path');
const { CleanWebpackPlugin } = require('clean-webpack-plugin'); //追加


module.exports = {
  mode: 'production',

  entry: './src/main.ts',

  output: {
    filename: 'bundle.js',
    path: path.resolve(__dirname, 'dist'),
  },
  devtool: 'none',
  module: {
    rules: [{
      test: /\.ts$/,
      use: 'ts-loader',
      exclude: /node_modules/
    }]
  },
  resolve: {
    extensions: ['.ts','.js']
  }
  plugins : [ //追加
    new CleanWebpackPlugin()
  ]
}
これでプラグインを使えるようになりました。
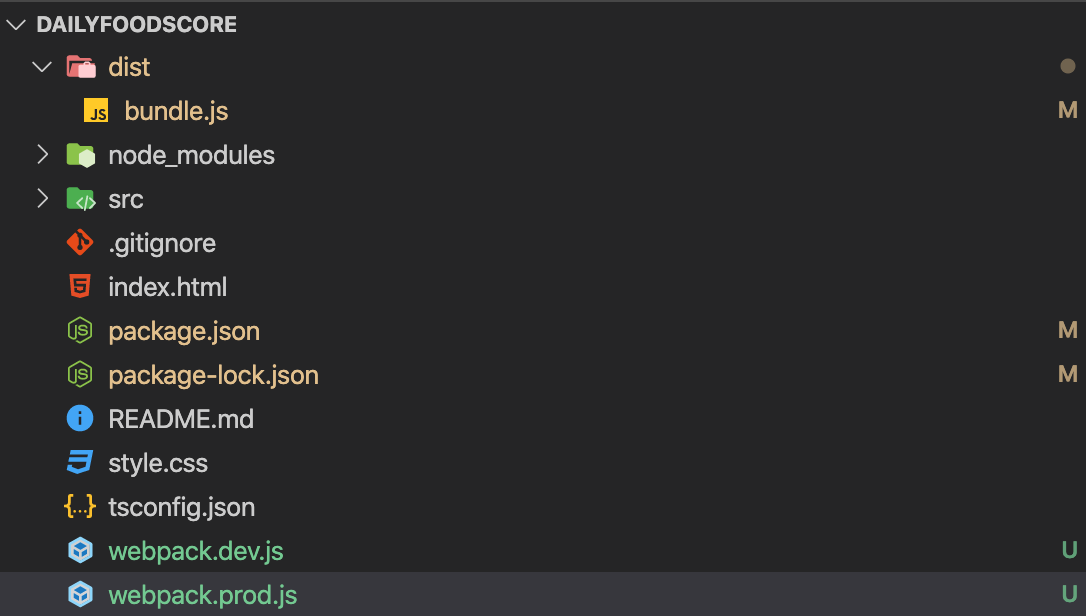
以下のコマンドで確認してみましょう。
npm run build

整理されましたね!!!
以上です。