はじめに
人材系ベンチャーでシステムの開発をしている私ですが、「UI/UX色々変えちゃおうぜ!!」ってなったので
その一つを紹介していきますううううう![]()
![]()
ちなみにフロントはNuxtでRailsAPI叩いてますううううう![]()
![]()
環境
- MacOS
- yarn 1.21.1
- node 12.0.0
- vue 2.6.1
- vue-awesome-swiper 2.1.3
解決したい問題
以前のデザイン
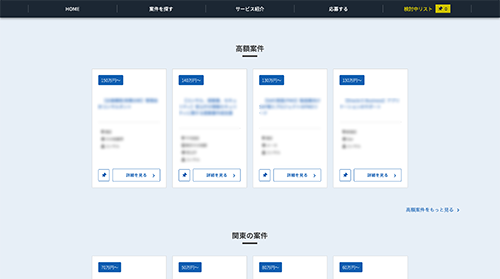

新デザイン

「案件の数がトップページで4つしか出ないのは微妙だなー」
「スマホでの冗長化えぐいなあ」
って思っていました。
これを解決するには**「スライダーの導入や!!!」**となり、実装するに至りました。
※ついでに中のカードのデザインも変えちゃいました(笑)
vue-awesome-swiperの導入
yarn add vue-awesome-swiper
今回はvue-awesome-swiperを使用しましたー
pluginに追加
import Vue from 'vue'
import VueAwesomeSwiper from 'vue-awesome-swiper'

Vue.use(VueAwesomeSwiper)
pluginフォルダーの中にvue-awesome-swiper.jsを作成しましょう。
コードの中身は"Vue"とか「"VueAwesomeSwiper"を読み込んで、VueAwesomeSwiperとしてプラグインを使用します」みたいな感じです。
nuxt.config.jsに追記
module.exports = {
  plugins: [
    { src: '@/plugins/vue-awesome-swiper', ssr: false }
  ],
  build: {
    vendor: [
      'vue-awesome-swiper'
    ]
  }
}
こんな感じですね。
index.vueに記載
<template>
  <div>
    <swiper>
      <swiper-slide>スライダー1</swiper-slide>
      <swiper-slide>スライダー2</swiper-slide>
      <swiper-slide>スライダー3</swiper-slide>
    </swiper>
  </div>
</template>
swiper-slide(スライドさせたい子要素)をswiper(親要素)で囲う感じですね。
<template>
  <div>
    <swiper>
      <swiper-slide>
        <img
          src="~/assets/images/top-sample1.png"
          alt="sample1">
      </swiper-slide>

      <swiper-slide>
        <img
          src="~/assets/images/top-sample2.png"
          alt="sample2">
      </swiper-slide>

      <swiper-slide>
        <img
          src="~/assets/images/top-sample3.png"
          alt="sample3">
      </swiper-slide>
    </swiper>
  </div>
</template>
画像をスライドさせたいならこんな感じです。
optionを追加する
ここからがvue-awesome-swiperの凄さが実感できます。
<template>
  <div>
    <swiper
      :options="swiperOption">
      <swiper-slide>スライダー1</swiper-slide>
      <swiper-slide>スライダー2</swiper-slide>
      <swiper-slide>スライダー3</swiper-slide>
    </swiper>
  </div>
</template>

<script>
export default {
  data() {
    return {
      swiperOption: {
        speed: 1000,//スライドの切り替わりスピード
        spaceBetween: 30,//各スライドの余白
        centeredSlides: true,//スライダーを真ん中に
        loop: true, //無限ループ
        autoplay: { //スライドの自動切り替え
          delay: 5000,//スライドの自動切り替えの秒数
          disableOnInteraction: false//何らかのアクション後の自動切り替えを再開
        }
      }
    }
  }
}
</script>
よくあるスライドだとこんな感じです。
data内のswiperOptionにあれこれ記載してくだけでスライダーをカスタマイズできるんですね。
素晴らしい![]()
![]()
カスタマイズ(パラメーター)はここでは説明しきれないくらいたくさん種類があるので、是非公式を見て試してみてください。
公式ドキュメント
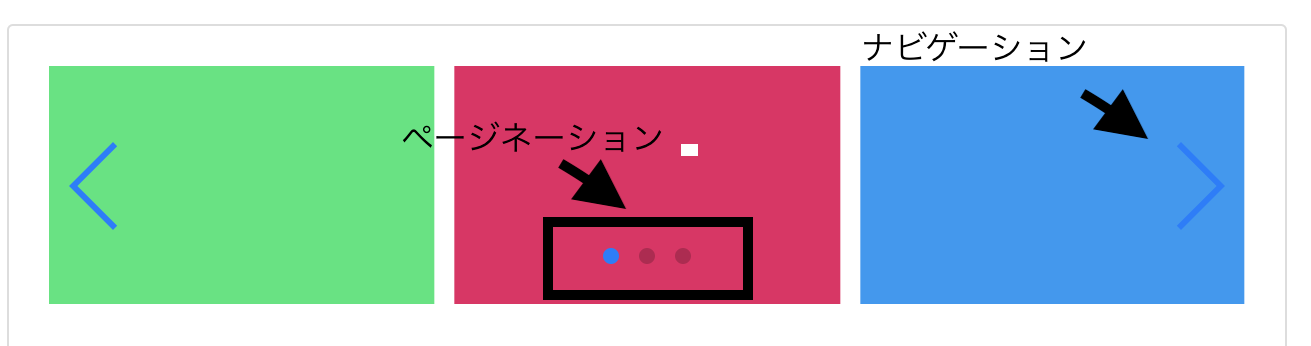
ページネーションとナビゲーション
<template>
  <div>
    <swiper
      :options="swiperOption">
      <swiper-slide>スライダー1</swiper-slide>
      <swiper-slide>スライダー2</swiper-slide>
      <swiper-slide>スライダー3</swiper-slide>
    </swiper>
    <div
      slot="pagination"
      class="swiper-pagination"/>
    <div
      slot="button-prev"
      class="swiper-button-prev"/>
    <div
      slot="button-next"
      class="swiper-button-next"/>
  </div>
</template>

<script>
export default {
  data() {
    return {
      swiperOption: {
        ~省略~
      },
        pagination: { //ページネーション設定
          el: '.swiper-pagination',
          clickable: true
        },
        navigation: { //ナビゲーション設定
          nextEl: '.swiper-button-next',
          prevEl: '.swiper-button-prev'
        }
      }
    }
  }
}
</script>
ページネーションとかナビゲーションもめちゃめちゃ簡単につけられます。
ちなみに<swiper>の中に入れることもできるのでお好みでどうぞ。
レスポンシブ対応
<script>
export default {
  data() {
    return {
      swiperOption: {
          ~省略~
        },
        pagination: {
          ~省略~
        },
        navigation: {
          ~省略~
        },
        breakpoints: {
          1200: {
            slidesPerView: 2
          },
          600: {
            slidesPerView: 1.2,
            spaceBetween: 0
          }
        }
      }
    }
  }
}
</script>
レスポンシブも超簡単です。
画面サイズごとに表示するスライド数や、スペース間隔を設定できます。swiperOptionにbreakpointsを追加し、画面サイズ毎に定義します。
例えば1200px以下になると「スライド数が2つ」、600px以下になると「スライド数が1つ」「スライドの余白ゼロ」にするみたいな感じでできます。
(補足)v-forでAPIデータをスライドさせる
※このセクションは今回の私の実装例の話ですので、簡単なスライダーを使いたいだけという方は飛ばしてください。
<template>
  <div>
    <swiper>
      <swiper-slide
        v-for="project in projects"
        :key="project.id">
        <JobCard
          :project="project" />
      </swiper-slide>
    </swiper>
  </div>
</template>

<script>
import JobCard from '~/components/parts/JobCard.vue'

export default {
  components: {
    JobCard
  },
  computed: {
    projects() {
      return this.$store.state.projects
    }
  },
  async mounted() {
    ~省略~
  }
}
</script>
今回の実装ではAPIで取得したprojectsデータをv-forで展開してます。
つまりprojectsの配列に入っている値の数だけswiper-slideが作られる感じですね。
そのデータを今回はJobCardコンポーネントに入れて、カードを作っています。
ここは状況によってかなり異なるので各自カスタマイズしてください。
おわりに
こんな感じでvue-awesome-swiperを使ってスライダーの実装を行いました!!!
社内でも「デザイン良くなった!!」と言われて喜んでます![]()
![]()
フリエンというフリーランスエンジニアの案件サイトを作っているので興味があったら覗いてみてください!!!
結構色々案件あります![]()
![]()