この記事でやること
ここではDuckDBに取り込んだCloudTrailの証跡データをSteampipeで取得したAWS構成情報とを紐づけてより詳細に分析してみます。
参考にしたページ
Steampipeとは
Steampipe, a new open source project from Turbot, enables cloud pros (e.g. software developers, operations engineers and security teams) to query their favorite cloud services with SQL. It has quickly become one of our favorite tools in-house and we hope it finds a way into your tool box as well.
Steampipe: select * from cloud; | Steampipe Blogより
SteampipeはクラウドやSaaSなどの構成やリソースの情報をSQLで取得・分析できるプロダクトです。Steampipeの導入方法や使い方についてはこちらが参考になります。
ここではSteampipeのAWSプラグインでAWSの構成情報を取得して利用します。
CloudTrail証跡とAWS構成情報をJOINするモチベーション
①、②ではDuckDBでCloudTrail証跡へSQLを実行できるようにしましたが、CloudTrail証跡にはイベントが発生したリソース(EC2インスタンスやEBSボリュームetc)のIDしか含まれないため、より実用的に分析するには所有者や用途を示すタグなどリソースの詳細情報を紐づけて照会したいところです。
SteampipeはAWSリソースの詳細情報をあたかもデータベース(PostgreSQL)のテーブルとして見せてくれるので、DuckDBにSteampipeのテーブルを取り込んでCloudTrailの証跡テーブルとJOINすればこのニーズを満たすことができます。
環境準備
②で利用した環境をベースにセットアップしていきます。
Steampipeをインストール
こちらの手順に沿ってWSL2のUbuntuにSteampipeをインストールします。
$ sudo /bin/sh -c "$(curl -fsSL https://steampipe.io/install/steampipe.sh)"
$ steampipe -v
steampipe version 1.0.1
また、AWS構成情報を取得するAWSプラグインをインストールします。
$ steampipe plugin install aws
Steampipeをサービスモードで起動
SteampipeにはPostgresSQLデータベースとして起動してDBeaver,pgAdmin4等のSQLクライアントやアプリケーションから接続できる「サービスモード」があります。ここではDuckDBから接続できるようにサービスモードでSteampipeを起動します。
$ steampipe service start
Steampipe service is running:

Database:

  Host(s):            127.0.0.1, ::1, 172.26.212.218
  Port:               9193
  Database:           steampipe
  User:               steampipe
  Password:           ********* [use --show-password to reveal]
  Connection string:  postgres://steampipe@127.0.0.1:9193/steampipe

Managing the Steampipe service:

  # Get status of the service
  steampipe service status

  # View database password for connecting from another machine
  steampipe service status --show-password

  # Restart the service
  steampipe service restart

  # Stop the service
  steampipe service stop
なお、起動したデータベースへ接続するDBパスワードはsteampipe service status --show-passwordを実行すれば確認できます。
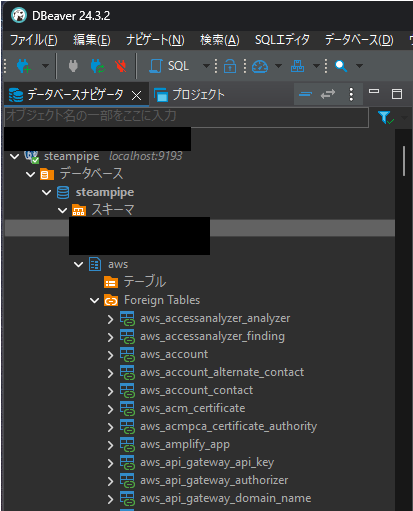
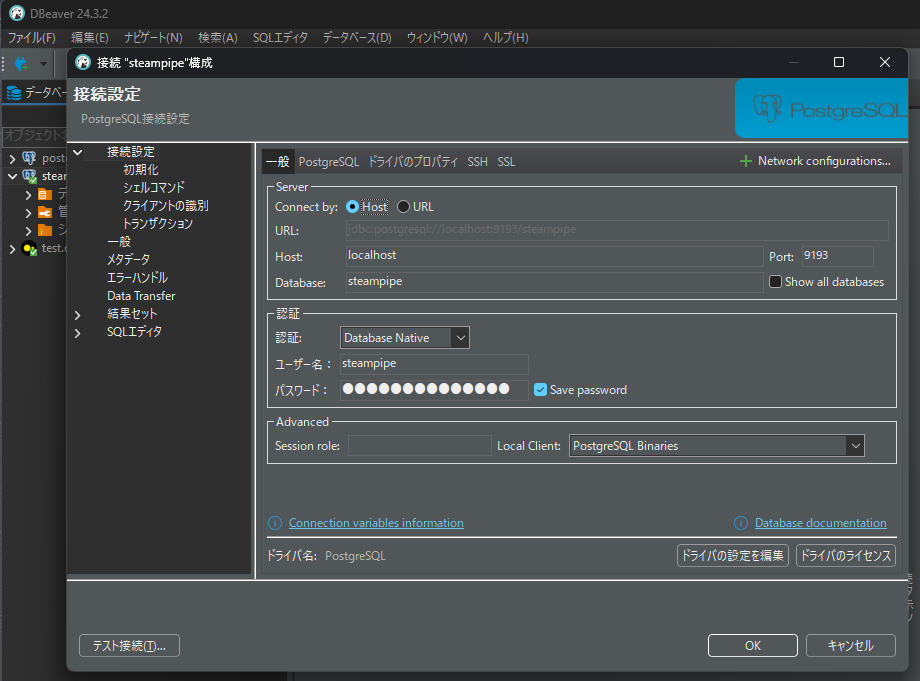
試しにDBeaverで接続してみます。
サービスモード起動時に表示された情報を入力して接続します。
接続に成功するとsteampipeデータベースのawsスキーマ内に存在する外部テーブルとして参照できます。

DuckDBにSteampipeのデータを取り込む
Steampipeの動作を確認したら、SteampipeのデータをDuckDBに取り込んでいきます。
ここでは②で作成したdbtプロジェクトに新たなモデルを追加します。
SteampipeのデータベースをATTACHする
DuckDBには外部のデータベースを参照する機能があり、ATTACHステートメントを実行すると外部データベースのテーブルをあたかもDuckDB内に存在するテーブルの様に参照できます。
dbtのDuckDBパッケージ(dbt-duckdb)でもATTACHする機構はサポートされており、ここでは~/.dbt/profiles.ymlにattachブロックを定義しておきます。
Attaching Additional Databases
duckdb_test:
  outputs:
    dev:
      type: duckdb
      path: test.duckdb
      threads: 1
      attach:
        - path: postgres://steampipe@127.0.0.1:9193/steampipe
          type: postgres
  target: dev
dbtのモデルを作成
②で作成したdbtプロジェクトのmodels/配下に新たなモデルファイルを作成します。
ここではSteampipeのaws_ec2_instanceテーブルの全量をDuckDBに持ってきますが、その後の分析に必要な列、行に絞り込んでもよいと思います。
{{ config(materialized='table') }}

SELECT *
FROM steampipe.aws.aws_ec2_instance
定義したモデルのテーブルをDuckDBへ作成
'dbt run`コマンドを実行してモデルに定義したaws_ec2_instanceテーブルをDuckDBに作成します。
(dbt-py3.13) $ dbt run
05:36:43  Running with dbt=1.9.1
05:36:43  Registered adapter: duckdb=1.9.1
05:36:43  Found 3 models, 424 macros
05:36:43
05:36:43  Concurrency: 1 threads (target='dev')
05:36:43
05:36:44  1 of 3 START sql table model main.aws_ec2_instance ............................. [RUN]
05:36:47  1 of 3 OK created sql table model main.aws_ec2_instance ........................ [OK in 3.21s]
05:36:47  2 of 3 START sql table model main.ct_raw ....................................... [RUN]
05:36:53  2 of 3 OK created sql table model main.ct_raw .................................. [OK in 6.32s]
05:36:53  3 of 3 START sql view model main.ct_detail ..................................... [RUN]
05:36:53  3 of 3 OK created sql view model main.ct_detail ................................ [OK in 0.20s]
05:36:54
05:36:54  Finished running 2 table models, 1 view model in 0 hours 0 minutes and 10.44 seconds (10.44s).
05:36:54
05:36:54  Completed successfully
05:36:54
05:36:54  Done. PASS=3 WARN=0 ERROR=0 SKIP=0 TOTAL=3
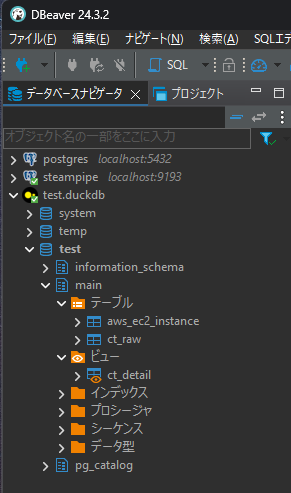
DBeaverでDuckDBに接続するとaws_ec2_instanceテーブルが存在しています。
DuckDBとSteampipeをJOINするSQLを実行
例えば②で実行したSQLを拡張して、以下の様にaws_ec2_instanceテーブルをJOINするSQLを実行すれば、イベントが発生したEC2インスタンスの詳細情報(タグやインスタンスタイプ、インスタンス名、起動状態)を付与した結果を得ることができます。
WITH ec2Events AS (
	SELECT
		CASE WHEN eventName = 'RunInstances'
			THEN UNNEST (json_extract_string(responseElements, '$.instancesSet.items[*].instanceId'))
			ELSE UNNEST (json_extract_string(requestParameters, '$.instancesSet.items[*].instanceId'))
		END AS instanceId,
		eventTime,
		CASE WHEN userName IS NULL
			THEN json_extract_string(sessionContext , '$.sessionIssuer.userName')
			ELSE userName
		END AS userName,
		eventName,
	FROM main.ct_detail
	WHERE eventName IN ('StartInstances', 'StopInstances', 'RunInstances')
	AND errorCode IS NULL
	ORDER BY instanceId, eventTime
)
SELECT
	event.instanceId,
	event.eventTime,
	event.userName,
	event.eventName,
	ec2.title AS instanceName,
	ec2.instance_type AS instanceType,
	ec2.instance_state AS instanceState,
	ec2.tags AS instanceTags
FROM ec2Events AS event
LEFT OUTER JOIN main.aws_ec2_instance AS ec2
ON event.instanceId = ec2.instance_id
まとめ
ここではSteampipeで取得したAWS構成情報をDuckDBに取り込んで、先に取り込んだCloudTrailの証跡データとJOINできるようにしました。様々なソースからDuckDBに取り込んだデータをJOINで紐づけられると、より高度なニーズに答えられるデータ分析基盤を実現できそうに感じます。
次はCLIコマンドの実行結果をDuckDBで分析してみようと思います。

