25
25

Delete article

Deleted articles cannot be recovered.

Draft of this article would be also deleted.

Are you sure you want to delete this article?

More than 5 years have passed since last update.

iOS開発入門〜storyboardでのScrollViewの配置法〜

Last updated at Posted at 2017-01-21

##Scroll Viewの配置

  1. ViewControllerを配置する

  2. ViewController内のViewにScrollViewを配置する

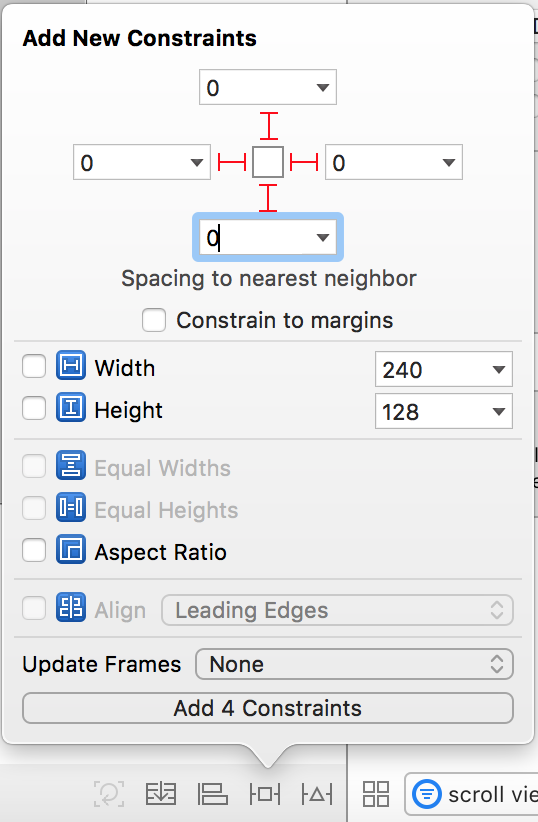
  3. ScrollViewに上下左右のマージンが0ptの制約を設定する

スクリーンショット 2017-01-20 13.28.28.png
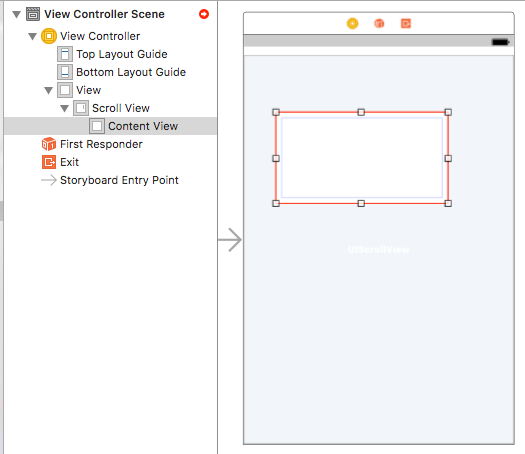
  1. ScrollViewに新たなViewを配置する

  2. わかりやすいようにScrollView内に配置したViewの名前をContentViewとしておく。
    スクリーンショット 2017-01-20 13.08.51.png

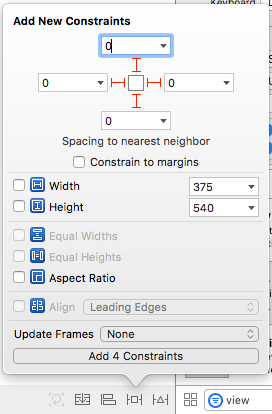
  3. ContenViewを選択して上下左右のマージンが0ptの制約を設定する。
    スクリーンショット 2017-01-20 13.10.43.png

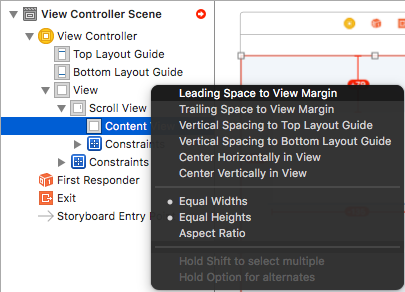
  4. ContentViewをCtrlを押しながらViewにドラッグし、「Equal Widths」と「Equal Heigths」の制約を設定する。
    スクリーンショット 2017-01-20 13.15.02.png

  5. 「Equal Heigth」のConstaraintsを選択してサイズインスペクタを開きPriorityを 250 に設定。

スクリーンショット 2017-01-20 13.37.46.png
  1. ContentViewの高さの制約を設定する、今回は1000ptにしておく。
スクリーンショット 2017-01-20 13.39.12.png
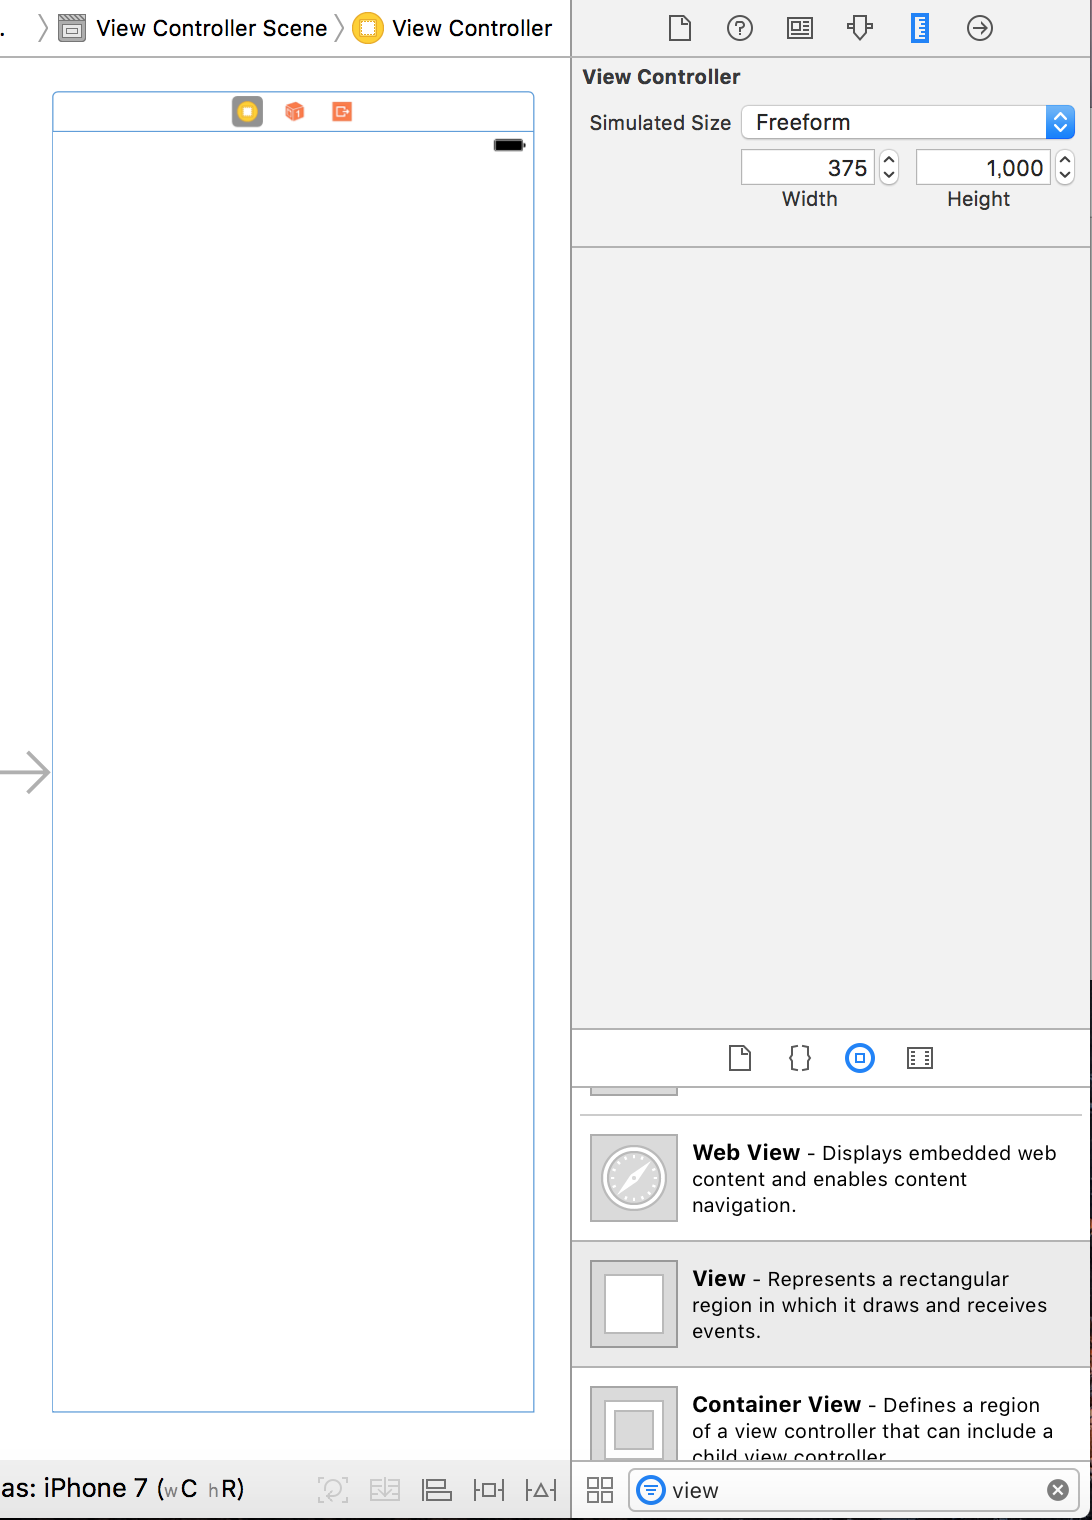
  1. コントロールを配置しやすいようにView ControllerのSimulated SizeをFreedomに設定して、Content Viewと高さを合わせる。今回は1000pt。
スクリーンショット 2017-01-20 13.41.43.png

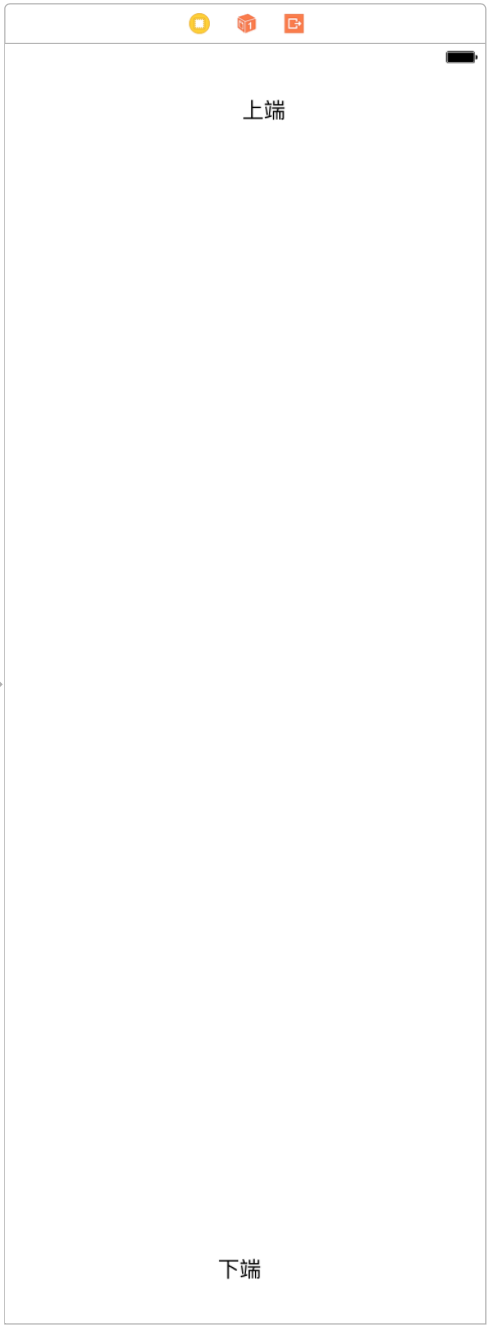
11.Content Viewの上端と下端にLabelを配置してみる。
スクリーンショット 2017-01-20 13.43.55.png

※ 制約を追加した後は適宜UpdateFramesを行う。

25
25
0

Register as a new user and use Qiita more conveniently

  1. You get articles that match your needs
  2. You can efficiently read back useful information
  3. You can use dark theme
What you can do with signing up
25
25

Delete article

Deleted articles cannot be recovered.

Draft of this article would be also deleted.

Are you sure you want to delete this article?