目次
- 前書き
- CLIとは
- まずは実行してみる
- サンプルプログラム
- 解説
- 自分でプログラムをカスタマイズ
1. 前書き
この記事はReality Capture を既に使ったことがある方を想定して書いています。
ただ、どのフォトグラメトリソフトウェアを選ぶうえでの判断材料にもなると考えています。
皆様、Reality Captureは使っておられますでしょうか?自分は正直あんまり使っていません。Metashapeのほうが使ってます。ただ、所属の研究室でEducational Licence を取っていて、無料で動かせる環境にあってたまには使用しています。なんか一説によると、日本ではReality Captureのほうが人気で、世界的にはMetashapeのほうが人気らしいです。一説によると。
個人的にはMetashapeのほうがアラインメントが繋がる気がしていて、Metashape推しなんですが、Twitterとかでフォトグラメトリ界隈の強い方々をフォローしてると、やっぱりReality Captureの画面をよく見ます。その影響もあってか、もしくは、Epic Gamesの買収とか支払い方式も変わったりしてか根拠はわからないですけど、少なくとも日本では、Reality Captureの人口が増える流れなんだろうなと感じています。
そこで!
Reality Captureをする方!GUIでの操作じゃなくて、プログラムで処理をかけられるから、知っとくといいし、オススメですよ!
ってことを伝えたいし、「Reality Capture CLI」で調べても日本語がでてこないんで、
CLIを使った手順の導入をやって記事にしときたいと思います。
予め断っとくと、繰り返しになりますが、自分はEducationalライセンスでやっています。
CLIでの処理は、もしかしたらPPIのライセンスの方はできないかもしれないです。エンタープライズ ライセンスをお持ちの方は流石に問題なくできるかと思います。
2. CLIとは
「Command Line Interface」の略。
CLIについてこちらのサイトがわかりやすいです。
スクリプトからCLIコマンドを実行したい場合、CLIバッチを使用します。
バッチファイルについてはこちらのサイトがわかりやすいです。
まあコマンドでいろいろ動かしましょう的なノリでふわっとしか自分は理解してないです。
CUIとCLIの違いは?とか聞かれても僕は説明できないです。()
3. まずは実行してみる
こちらの公式サイトからこの記事で使用するサンプルプログラム等をダウンロードできます。
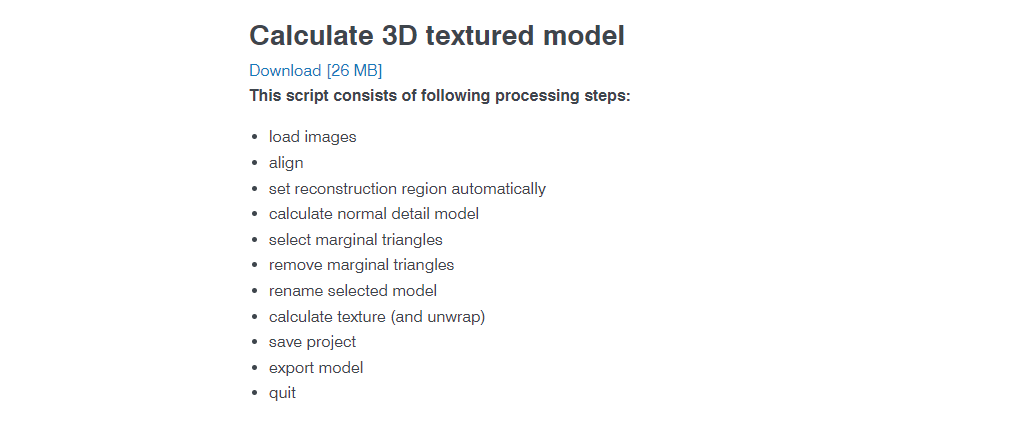
その中でも、Calculate 3D textured model の項目のサンプルプログラムは過不足なく丁度よいワークフローをカバーしているので、こちらにフィーチャーを当ててみます。

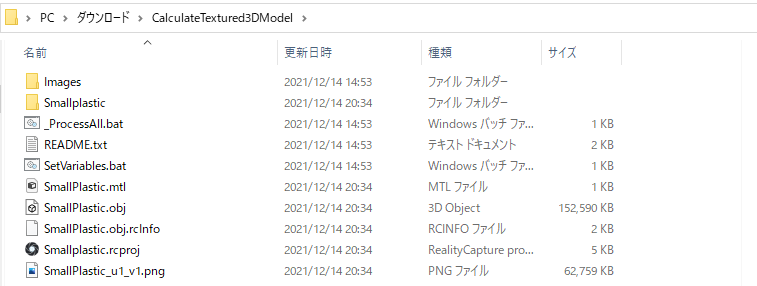
ダウンロードして展開すると以下のようなファイル、フォルダが入っています。

_ProcessALL.batファイルを右クリックして、開く(O)で実行します。

もしくは、コマンドプロンプト(もしくはPowerShell)から以下のように指定しても実行できます。(パスは適宜変更してください)

Reality Captureが開かれ、一連のプロセスが行われます。
全てのワークフローが終わると以下のように出力されています。

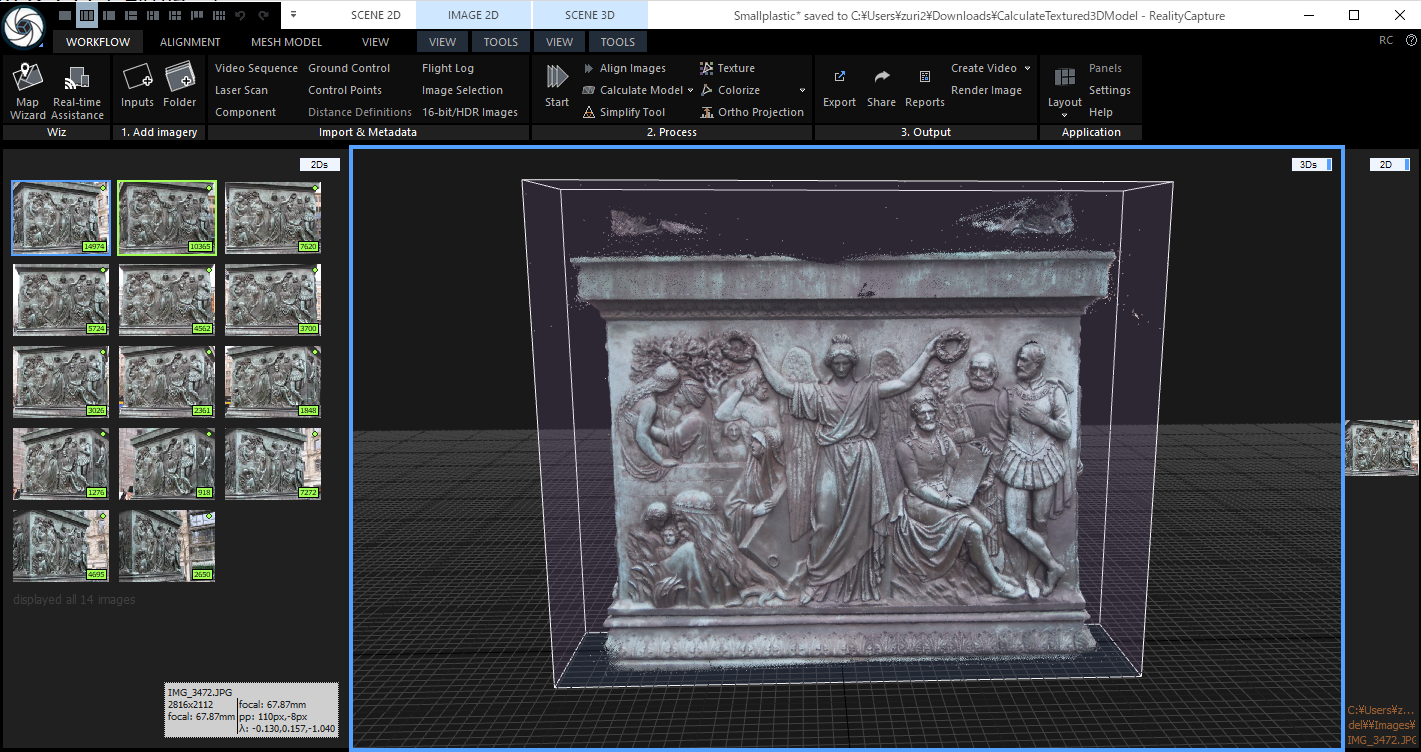
ちなみに、プロジェクトを開いてみるとこんな感じできちんと処理されているのがわかります。

エラーがでる方もいらっしゃると思いますが、大丈夫です。まずは脳死でやってみただけなので、これから解説します。
4. サンプルプログラム
それぞれ以下のような内容になってます。
These scripts were created by Epic Games Slovakia, who doesn't carry any liability in case issues related to the sample occur.
These scripts can be used to align images, create and export textured 3D model.

All you need to do is:

1. change the path to the source folders in the SetVariables.bat as follows:

RealityCaptureExe - path to the installation folder where RealityCapture.exe is stored
RootFolder - path to all source folders (where this README.txt file is located)

2. run _ProcessAll.bat (doubleclick)

DESCRIPTION OF A BATCH FILE
- - - - - - - - - - - - - - - - - - - - - - - - - - - - - - - - - - - - - - - - - - - - - - - - - - - -
_ProcessAll.bat

In this batch file the actual processing inside RealityCapture is defined.
This batch file contains:

Setting the variables (if the original data structure and naming is preserved, no need to change them):

This batch file contains:

	Images		A path to the folder which contains images.
	ModelName	A new name for the created model.
	Model		A path where model is going to be exported.
	Project		A path where project is going to be stored.

Processing in RealityCapute:
- load images
- align
- set reconstruction region automatically
- calculate normal detail model
- select marginal triangles
- remove marginal triangles
- rename selected model
- calculate texture (and unwrap)
- save project
- export model
- quit
※バッチファイルにおいて、「:: 」以降改行されるまではコメントを意味します。
※「set 変数名」で変数を定義して代入し、「%~%」のように%で囲むことで変数を引っ張っています。
::CapturingReality

:: switch off console output
@echo off

call SetVariables.bat

:: variable storing path to images for creating model
set Images="%RootFolder%\Images"

:: set a new name for calculated model
set ModelName="SmallPlastic"

:: set the path, where model is going to be saved, and its name
set Model="%RootFolder%\SmallPlastic.obj"

:: variable storing path to images for texturing model
set Project="%RootFolder%\Smallplastic.rcproj"

:: run RealityCapture
%RealityCaptureExe% -addFolder %Images% ^
        -align ^
        -setReconstructionRegionAuto ^
        -calculateNormalModel ^
        -selectMarginalTriangles ^
        -removeSelectedTriangles ^
        -renameSelectedModel %ModelName% ^
        -calculateTexture ^
        -save %Project% ^
        -exportModel %ModelName% %Model% ^
        -quit
::CapturingReality

:: switch off console output
@echo off

:: path to RealityCapture application
set RealityCaptureExe="C:\Program Files\Capturing Reality\RealityCapture\RealityCapture.exe"

:: root path to work folders where all the datasets are stored (%~dp0 means the flder in which this script is stored)
set RootFolder=%~dp0
5. 解説
README.txtの中段の指示に従い、
SetVariables.batファイル内の
① Reality Capture のパスの指定
② RootFolder のパスの指定
を最初にする必要があります。
とはいえ、おそらく大半の方は①に関してはもうすでに正しいパスになっていると思います。
先ほど脳死で一回やった際にエラーがでてしまった方は恐らく、Reality Captureのパスが他のところにあるか、ライセンスの問題だと思います。
②に関してと、_ProcessAll.batファイルの中の変数Imagesのフォルダ指定はプロジェクトごとにする必要があります。
でも、サンプルプロジェクト同様、
root/
├ Images/
├ Image1
│ ├ Image2
│ ├ .
│ ├ .
│ ├ .
├ SetVariables.bat
└ _ProcessAll.bat
というディレクトリ階層にすれば、パスの変更なしで済んでしまいます。具体的にはこんな感じ。
別にImagesフォルダ内のファイル名はなんでもいいです。

メインの処理の部分だけ解説すると以下のようになります。
::Reality Captureを実行(%%間の変数にしていされたものを実行)
%RealityCaptureExe% ^
::フォルダをインポート(引数にフォルダ名)
-addFolder %Images% ^
::アラインメント
-align ^
::再構築領域(Bounding Box)の自動設定
-setReconstructionRegionAuto ^
::詳細度ノーマルで3Dメッシュを作成
-calculateNormalModel ^
::再構築領域内でかつ、再構築領域の枠と結ばれたポリゴンを選択
-selectMarginalTriangles ^
::選択されたポリゴンを取り除く
-removeSelectedTriangles ^
::選択状態にあるモデルに名前をつける (引数に名前適当)
-renameSelectedModel %ModelName% ^
::テクスチャの作成
-calculateTexture ^
::プロジェクトの保存 (引数にファイル名.rcproj)
-save %Project% ^
::モデルの出力 (モデルの名前と拡張子も含めたファイル名を引数にもつ)
-exportModel %ModelName% %Model% ^
::終了
-quit
これぞチュートリアルとして「過不足ない」ってやつっすね。
6. 自分でプログラムをカスタマイズ
コマンド一覧は公式がまとめてくれています。
List of CLI commands
また、公式のYoutubeチャンネルにも解説動画があがってました。
RealityCapture tutorial: Complete Model Using CLI
正直自分はあんまりいじってません!
複数のプロジェクトでパスを指定して繰り返すとかでも、複数のプロジェクトでの処理を順番に寝てても実行してくれるので、それだけでもおすすめです。
あとは、exportModelコマンドの引数を点群ファイルのフォーマットにして点群を出力したり、calculateNormalModelコマンドをcalculateHighModelにしたりしてます。そんな感じですね。一先ず。
あとそもそものReality CaptureのGUIでの使い方、用語等に関してはこちらのサイトが参考になります。
こんな感じでCLIでReality Captureをいじる導入をまとめてみました。
誰かの役にたてたら嬉しいです。