TestCafeとは?
end-to-end testをnode.jsで自動化させたフレームワークです。
記事内容
今回、キャプチャ、cvポイントのテストにあたって、
これ多分次も使うかも?というやつを紹介していきます。
case.1 Basic認証のサイトのテスト
テスト対象サイトがBasic認証がかかっているサイトだと、
認証が通らなかった時の画面をスクリーンショットをとった結果が返ってくる。
こちらはドキュメントに全てが載っていました。
fixture('スクリーンショット')
  .page('https://example.com')
  // 追加
  .httpAuth({
    username: 'example', //ユーザー名を設定
    password: 'password' //パスワードを設定
  })

test('スクリーンショット', async t => {
  await t
    .takeScreenshot({
      path: 'example.png'
    })
})
case.2 devlopment環境とproduction環境分けたい
case1にて Basic認証の際での対応を知ったのですが、
本番環境ではBasic認証がいらないので条件分けしたパターンがありました。
cross-envを使用して、解決しました
※今回はこのパターンでいきましたがその他効率良さそうなものがあればご教授お願いいたします
cross-envとは?
npmスクリプト実行時に任意の環境変数を変更できるもの。
cross-env npm
//cross-env パッケージをインストール
$ npm i --save-dev cross-env
"scripts": {
    "screenshot:dev": "cross-env NODE_ENV=development testcafe chrome screenshotExample.js --page-load-timeout 10000 --skip-js-errors",
    "screenshot:prod": "cross-env NODE_ENV=production testcafe chrome screenshotExample.js --page-load-timeout 10000 --skip-js-errors",
},
このように scriptの中で cross-envを記述し、 NODE_ENV=環境名とすると
process.env.NODE_ENV === 指定した環境名とすることができる。
const processENV = process.env.NODE_ENV
const testUrl = processENV === 'production' ? 'https://example.com' : 'https://dev-example.com'
if (processENV === 'development') {
  fixture('スクリーンショット')
    .page(testUrl)
    .httpAuth({
      username: 'example', //ユーザー名を設定
      password: 'password' //パスワードを設定
     })
 } else {
  fixture('スクリーンショット')
    .page(testUrl)
 }
test('スクリーンショット', async t => {
  await t
    .takeScreenshot({
      path: 'example.png'
    })
})
これで環境別で、条件分岐が可能になりました。
case.3 1つのフォームで送信パターンが複数存在する。
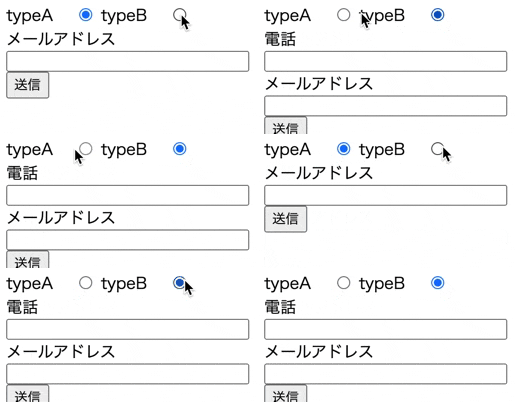
ラジオボタンを押すとフォームの中身が切り替わる場合があります。
その際は2回テストを行わないといけません。
2つ関数を用意したり、2つファイルを作成するという方法もあると思われるのですが、
それだとコードが冗長になってしまいます。
今回はそれをeach文でまわして解決しました。
コード例
import { Selector } from 'testcafe';

const takeContactTest = (testType) => {
  fixture('テストフォーム')
    .page('https://example.com');

  test('必須項目を入力し送信', async (t) => {
    const dataTarget = await Selector('input');
    const radioButtonTarget = await Selector('[data-target-radio]');
    const typeB = radioButtonTarget.withAttribute('value', '1');
    const mail = dataTarget.withAttribute('name', 'email');
    const phone = dataTarget.withAttribute('name', 'phone_number');
   // typeごとに処理を分ける
   switch (testType) {
      case 'type1':
        await t
          .typeText(mail, 'test_sample@gmail.com')
          .click(submitBtn.withExactText('送信'))
        break;
      case 'type2':
        await t
          .click(typeB)
          .typeText(phone, '08012345678')
          .typeText(mail, 'test_sample@gmail.com')
          .click(submitBtn.withExactText('送信'))
        break;
    }
  });
}

const testName = ['type1', 'type2'] //こちらは判別する値です。任意の名前を設定。

testName.forEach(testType => takeContactTest(testType))
このようにして今回は実装しました。
今回はeach文で回したのですがほかにもパターンがあると思われます。
実装次第良作でしたら 内容を追加したいと思います。
おわり
今回は実装してみて、お!これは覚えないといけないかもというやつを内容にしました。
まだまだTestCafe初級者ですので、もっとテストケースを増やして、知見をアウトプットできたらいいなと思ってます。
