やること
- k8s上にArgo CDをDeploy
- アプリケーションをArgo CDに登録して動す
- 登録したアプリケーションのコードRepoが変更されるとk8s上で動いているアプリケーションが更新される
k8sクラスタの準備
すでにk8sクラスタがある人は、スキップ。
今回は、kind (https://github.com/kubernetes-sigs/kind) を使う。 (もちろんminikubeでもよい)
goがあればひとコマンドで立つ。
GO111MODULE="on" go get sigs.k8s.io/kind@v0.5.1 && kind create cluster
Creating cluster "kind" ...
 ✓ Ensuring node image (kindest/node:v1.15.3) 🖼
 ✓ Preparing nodes 📦
 ✓ Creating kubeadm config 📜
 ✓ Starting control-plane 🕹️
 ✓ Installing CNI 🔌
 ✓ Installing StorageClass 💾
Cluster creation complete. You can now use the cluster with:

export KUBECONFIG="$(kind get kubeconfig-path --name="kind")"
kubectl cluster-info
kind: command not found と言われたらpathが通ってないので、kindのおいてあるパスを通す。デフォルトでは、kindという名前のclusterができる
kind get clusters
kind
支持通り以下を実行し, kube contextをkindで立てたclusterにする
export KUBECONFIG="$(kind get kubeconfig-path --name="kind")"
kubectl cluster-info
kubectl cluster-info
Kubernetes master is running at https://127.0.0.1:59925
KubeDNS is running at https://127.0.0.1:59925/api/v1/namespaces/kube-system/services/kube-dns:dns/proxy

To further debug and diagnose cluster problems, use 'kubectl cluster-info dump'
nodesなどを適当にチェック
kubectl get nodes
NAME                 STATUS   ROLES    AGE     VERSION
kind-control-plane   Ready    master   3m57s   v1.15.3
Argo CD 基本
https://argoproj.github.io/argo-cd/getting_started/
このドキュメントを読めば大体わかる
基本は、以下の通り
-
インストール
kubectl create namespace argocd kubectl apply -n argocd -f https://raw.githubusercontent.com/argoproj/argo-cd/stable/manifests/install.yaml -
cli入れる
brew tap argoproj/tap brew install argoproj/tap/argocd -
cliでloginする → password変更
port-forward
kubectl port-forward svc/argocd-server -n argocd 8080:443
Forwarding from 127.0.0.1:8080 -> 8080
Forwarding from [::1]:8080 -> 8080
```
```:login
argocd login localhost:8080
WARNING: server certificate had error: x509: certificate signed by unknown authority. Proceed insecurely (y/n)? y
Username: admin
Password:
'admin' logged in successfully
Context 'localhost:8080' updated
```
```:update-password
argocd account update-password
*** Enter current password:
*** Enter new password:
*** Confirm new password:
Password updated
Context 'localhost:8080' updated
```
4. GUI (https://localhost:8080/login) でログイン


-
clusterの登録 (今回は、ArgoCDがDeployされてるClusterを使うのでスキップ)
argocd cluster add <kube context> -
applicationを作成
deploy先のnamespace
test-nsを作る (練習レポ: https://github.com/nakamasato/k8s-deploy-test)kubectl create namespace test-nsアプリの作成
argocd app create guestbook \
--repo https://github.com/nakamasato/k8s-deploy-test.git \
--path apps/guestbook \
--dest-server https://kubernetes.default.svc \
--dest-namespace test-ns \
--auto-prune \
--sync-policy automated
Dashboard上にデプロイされたのが確認できる
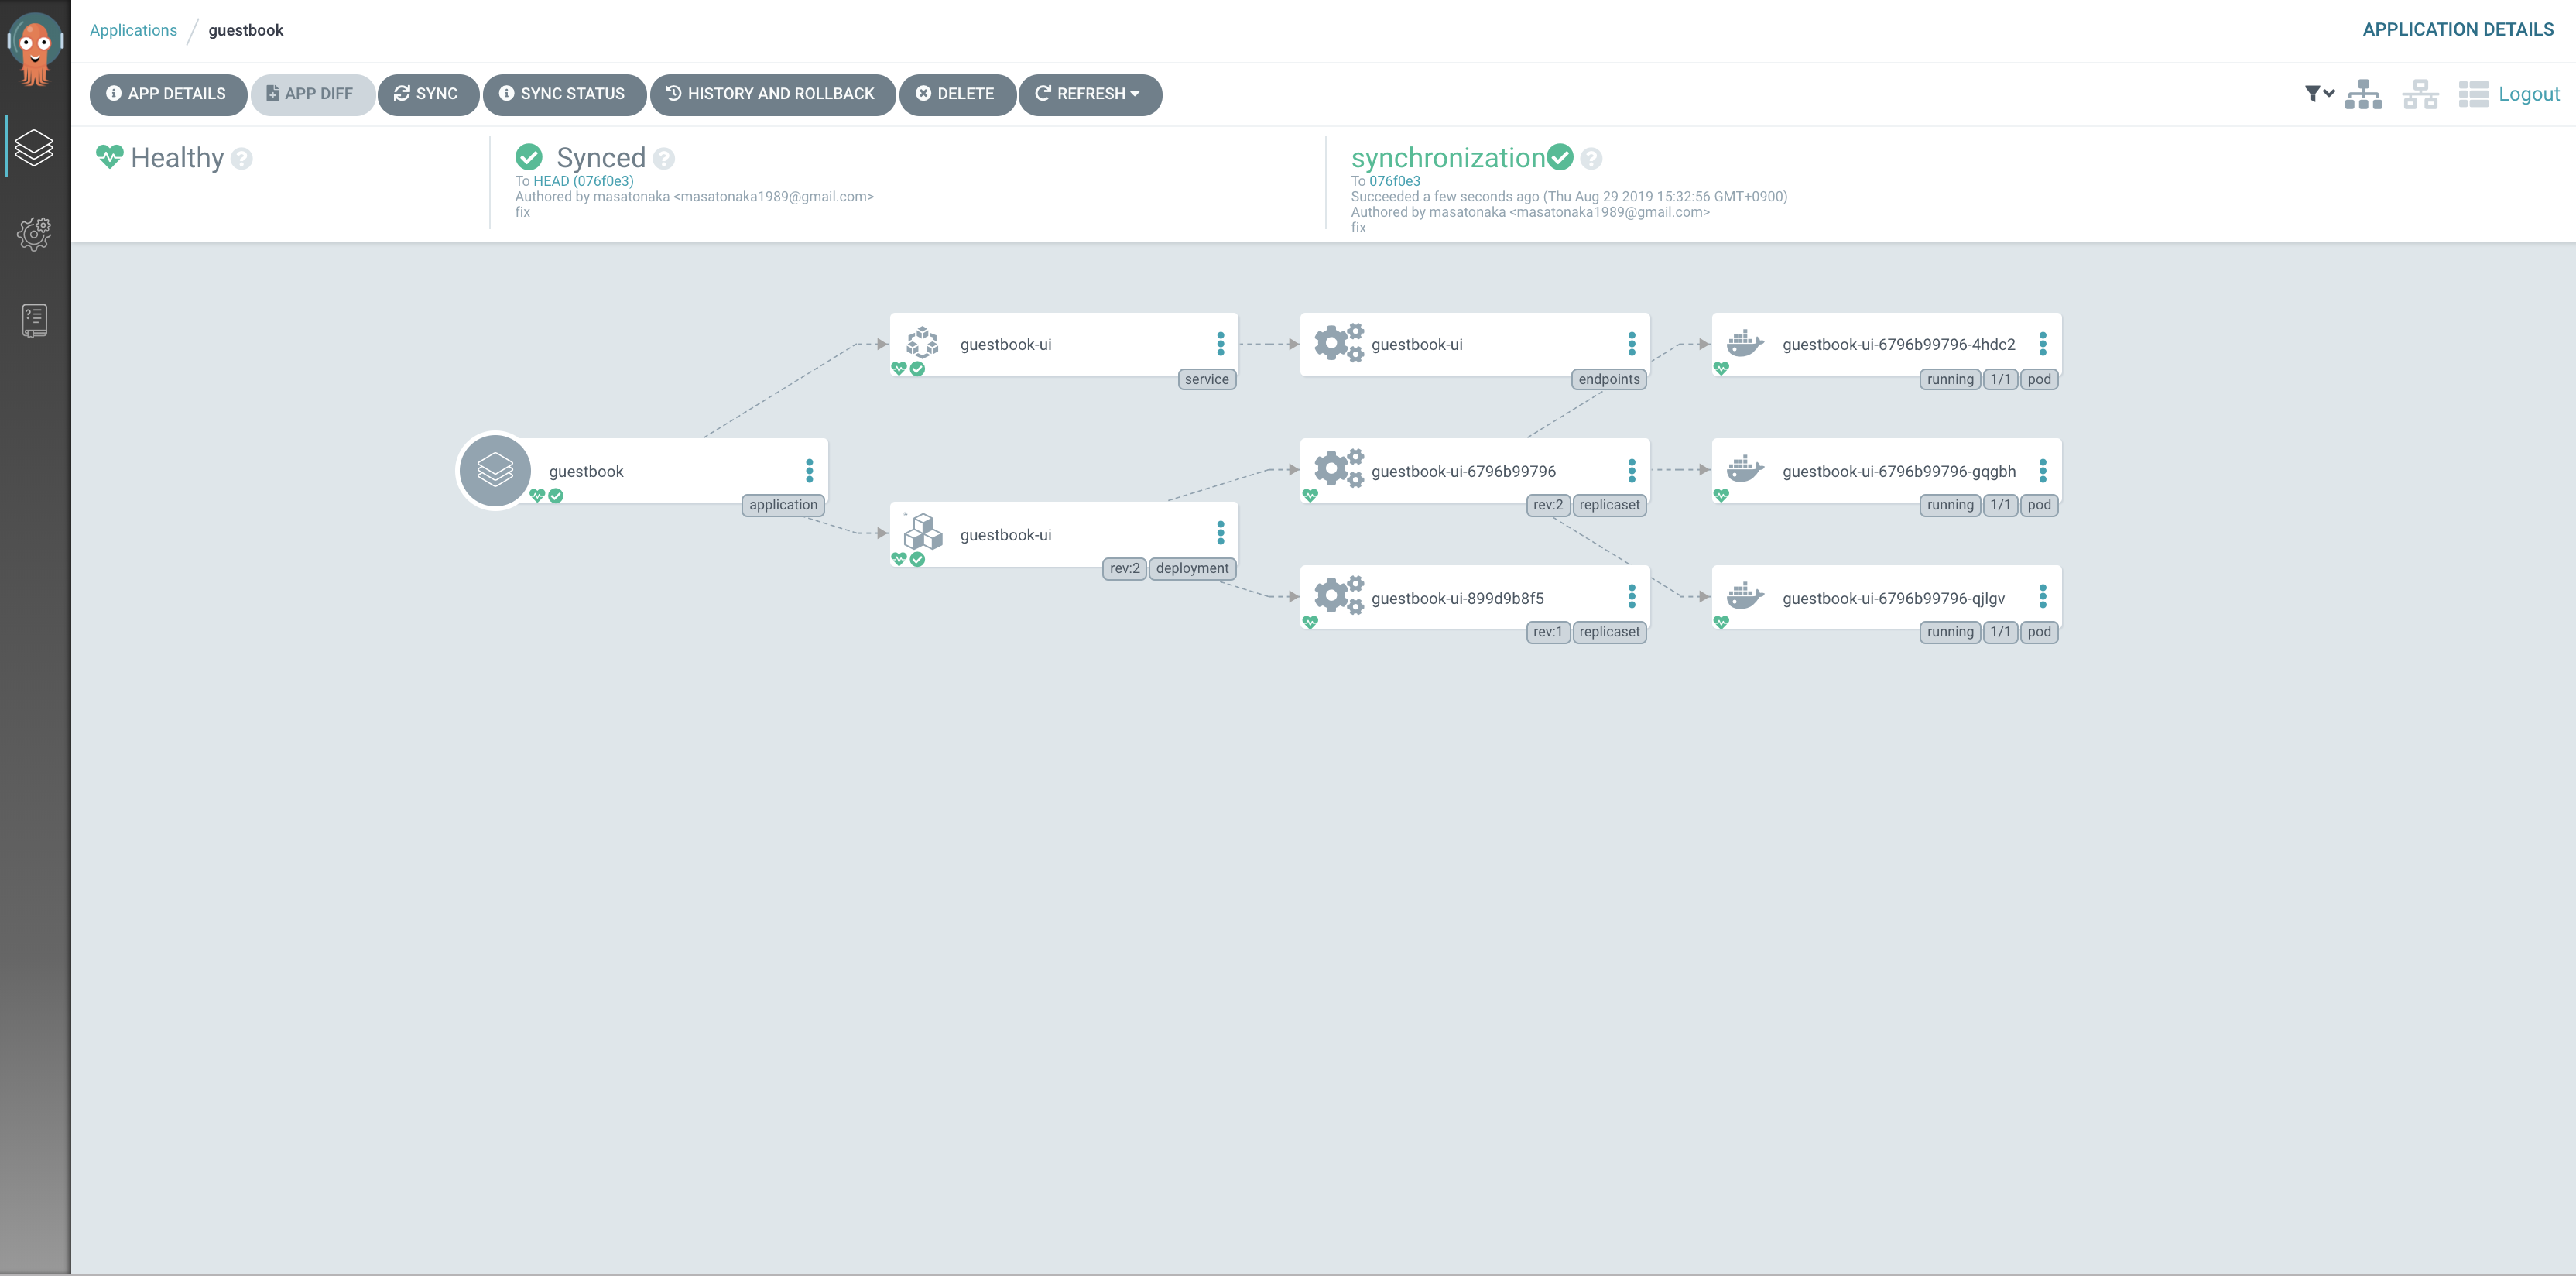
deployした中身は、以下の構成のprod部分
test-ns/guestbook/overlays/prod(kustomizeを使っているのでちょっと複雑)tree . ├── README.md ├── guestbook-ui-deployment.yaml └── guestbook-ui-svc.yaml 0 directories, 3 files -
gitを更新 → Argo CDが自動で更新
例えば、guestbook-ui-deployment.yamlのreplicasを5などに変更してPushすると、Argo CDはDefaultで3分ごと(?)に自動Syncしてアプライしてくれる (--sync-policy automatedの場合)
その他
- kustomize, helmなどのテンプレートエンジン
- repoの切り方
- sealed secretなどの秘匿情報管理
- canary, blue greenなどdeployment strategy
これらは別で