こちらのは2026年4月でサービスを終了する旧SkyWayについての記事です
現在のSkyWayとはAPI仕様が異なります
現在のSkyWayの仕様については、以下開発者ドキュメントをご覧ください。
https://skyway.ntt.com/ja/docs/user-guide/
ハンズオン のChapter 2
Chapter 2 - MediaStream
この章ではMediaのやり取りについて実装します。
最初の図の通り、今回はWebRTC Gatewayからブラウザへのビデオの送信のみのケースです。
SkyWayではcallメソッドを実行することでビデオ通話の確立を開始し、answerメソッドで応答することで通話が開始されます。
片方向通信の場合、ビデオを受信する側からcallする必要があります。
完成したソースコードはgithubを確認して下さい。
尚、chapter1で作成したコードのうち、peer.rb, util.rbには変更はありません。
JavaScript側
call
<!DOCTYPE html>
<html>
<head lang="ja">
    <meta http-equiv="Content-Type" content="text/html; charset=utf-8"/>
    <title>SkyWay JS SDK Tutorial</title>
    <link rel="stylesheet" href="style.css">
    <script type="text/javascript" src="https://cdn.webrtc.ecl.ntt.com/skyway-latest.js"></script>
    <script type="text/javascript" src="script.js"></script>
</head>

<input type="text" id="target_id_box"></input><button id="call_button">call</button>
<br />
<video id="remote_video" muted="true" autoplay playsinline="true"></video>
</html>
接続相手のPeer IDの入力のためのテキストボックスとボタン、あとは映像表示のためのvideoタグを追加しています。
    document.getElementById("call_button").onclick = function() {
        const target_id = document.getElementById("target_id_box").value;
        // (1)
        const call = peer.call(target_id, null, {
            videoReceiveEnabled: true,
        });

        // (2)
        call.on('stream', (stream) => {
            document.getElementById("remote_video").srcObject = stream;
        });
    };
テキストボックスにWebRTC GW側のpeer_idを入れ、callボタンを押したらcallメソッドを呼ぶようにします。今回ブラウザ側からビデオは送らないので、第二引数はnull、第三引数でビデオを受信することを指定しています。(1)
WebRTC Gateway側でanswerを行うとstreamイベントが発火するため、ここで実際のMediaStreamを受けとり描画を行います。(2)
JavaScriptはこれで終わりです
WebRTC GW側
Mainの処理
if __FILE__ == $0
  if ARGV.length != 1
    p "please input peer id"
    exit(0)
  end
  peer_id = ARGV[0]
  skyway_api_key = ENV['API_KEY']
  peer_token = create_peer(skyway_api_key, peer_id)
  media_connection_id = ""
  process_id = ""

# ======================本章での追加部分1 start==========================
  media_connection_id = ""
  process_id = ""
  # OPENイベントの監視
  th_onopen = listen_open_event(peer_id, peer_token) {|peer_id, peer_token|
    # 1章の記述はon_openメソッドに移動
    (media_connection_id, process_id) = on_open(peer_id, peer_token)
  }

  # 別スレッドでOPENイベントを監視しているので待ち合わせを行う
  th_onopen.join
# ======================本章での追加部分1 end==========================

  # ターミナルから
  exit_flag = false
  while !exit_flag
    input = STDIN.readline().chomp!
    exit_flag = input == "exit"
  end

# ======================本章での追加部分2 start==========================
  # 開放処理
  close_media_connection(media_connection_id)
  close_peer(peer_id, peer_token)
  Process.kill(:TERM, process_id)
# ======================本章での追加部分2 end==========================
end
Peer ObjectがSkyWayと接続されていないとMediaStreamの確立処理に入れないため、Chapter 1のOPENイベントの後から開始します。
また最後に開放処理が必要です。
MediaConnection, PeerObjectの開放と、gStreamerの終了処理を行います。
これらがそれぞれ何なのかは後ほど説明します。
def on_open(peer_id, peer_token)
  # (1)
  (video_id, video_ip, video_port) = create_media(true)

  p_id = ""
  m_id = ""
  # (2)
  th_call = listen_call_event(peer_id, peer_token) {|media_connection_id|
    m_id = media_connection_id
    # (3)
    answer(media_connection_id, video_id)
    # (4)
    cmd = "gst-launch-1.0 -e rpicamsrc ! video/x-raw,width=640,height=480,framerate=30/1 ! videoconvert ! vp8enc deadline=1  ! rtpvp8pay pt=96 ! udpsink port=#{video_port} host=#{video_ip} sync=false"
    #(5)
    p_id = Process.spawn(cmd)
  }

  th_call.join
  [m_id, p_id]
end
まず送信するMediaの定義をします。今回はVideoを送信するので、VideoをWebRTC Gatewayに送り込むポートの設定だけ作成します。 (1)
ブラウザ側からの着信を待ち受けます。 (2)
着信したらmedia_connection_idが割り当てられるため、このidを指定してanswerを行います。 (3)
相手側へ送信するビデオを送るため、gstreamerの起動スクリプトを作成します。
RTPを指定のIPアドレスとポートに送信するスクリプトに、(1)でcreate_mediaで割り当てたWebRTC Gatewayの受信ポートを設定します。(4)
あとで終了させるため、pidを取得しておきます。(5)
これで一連の処理は終わりです。以下詳細を見ていきます。
Media系
media.rbに切り出して実装します
media.rbの一部
def create_media(is_video)
  params = {
      is_video: is_video,
  }
  # (1)
  res = request(:post, "/media", JSON.generate(params))

  # (2)
  if res.is_a?(Net::HTTPCreated)
    json = JSON.parse(res.body)
    media_id = json["media_id"]
    ip_v4 = json["ip_v4"]
    port = json["port"]
    [media_id, ip_v4, port]
  else
    # 異常動作の場合は終了する
    p res
    exit(1)
  end
end
POST /mediaを行いメディアの受信ポートを開放させます。(1) (http://35.200.46.204/#/3.media/media)
成功すると、割り当てられたmedia_id、ビデオを送り込むIPアドレスとポート番号が帰ってくるので確認します。(2)
次は先方からの着信を待ち受けます。
media.rbの一部
def listen_call_event(peer_id, peer_token, &callback)
  async_get_event("/peers/#{peer_id}/events?token=#{peer_token}", "CALL") { |e|
    media_connection_id = e["call_params"]["media_connection_id"]
    callback.call(media_connection_id)
  }
end
相手側からの着信はGET /peer/{peer_id}/eventで取得できます。CALLイベントが帰って来た場合が着信です。
(http://35.200.46.204/#/1.peers/peer_event)
着信したら次は応答します。
media.rbの一部
def answer(media_connection_id, video_id)
  # (1)
  constraints =   {
      "video": true,
      "videoReceiveEnabled": false,
      "audio": false,
      "audioReceiveEnabled": false,
      "video_params": {
          "band_width": 1500,
          "codec": "VP8",
          "media_id": video_id,
          "payload_type": 96,
      }
  }
  params = {
      "constraints": constraints,
      "redirect_params": {} # 相手側からビデオを受け取らないため、redirectの必要がない
  }
  (2)
  res = request(:post, "/media/connections/#{media_connection_id}/answer", JSON.generate(params))
  if res.is_a?(Net::HTTPAccepted)
    JSON.parse(res.body)
  else
    # 異常動作の場合は終了する
    p res
    exit(1)
  end
end
応答はPOST /media/{media_connection_id/answerで行えます。
Videoだけ送信するので、送信するVideoの情報を与えます。(1)
POST /media/{media_connection_id}/answerを叩いて実際にanswerを行います。(2)
ここまででビデオの送信とブラウザ側での表示が行えました。
今回はブラウザ側からcallすることを前提にしていますが、もちろんWebRTC Gateway側からcallすることもできます。
ハンズオン中余裕があればやってみてください。
実行
まずWebRTC Gatewayを動かします
$ ./gateway_linux_arm
コントローラーを動かします。API_KEYを忘れずに設定して下さい。
$ export API_KEY=YOUR_API_KEY
$ ruby webrtc_control.rb PEER_ID
index.htmlとJavaScriptのあるディレクトリでWebサーバを立ち上げます。サーバプログラムはなんでもいいですが今回はpythonで動かしています
$python -m SimpleHTTPServer 9000
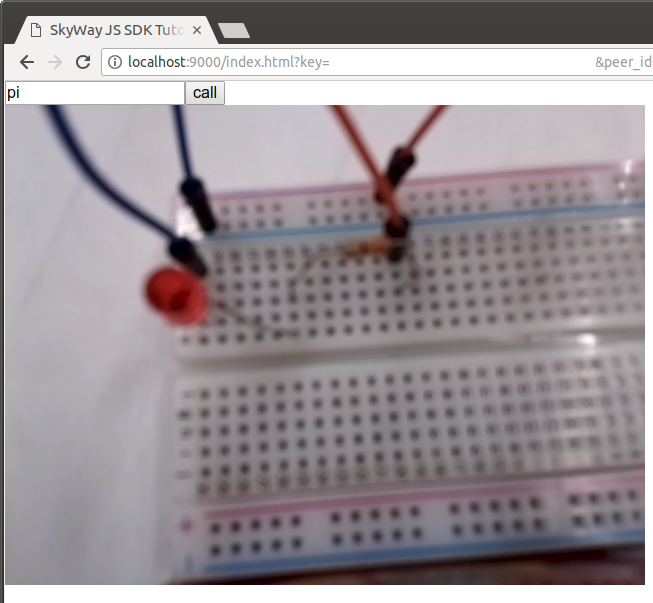
あとはブラウザで http://localhost:9000/index.html?key=YOUR_API_KEY を開き、ラズパイ側のpeer_idを入れてcallボタンを押して下さい
基盤が遠隔から確認できました!
ただまだLEDは真っ暗です。寂しいですね。
次章でDataの送受信と最初に作ったLチカプログラムとの結合を行って動かせるようにします。
