目的
↑ 以前の記事で『徐々にLEDの色が変化する』を実装しました。
また、↑ 前回の記事で、Raspberry Pi Picoを PC の GPIO として利用しました。
今回は、この 2つの記事の応用として、CPU 使用率に応じて RGB LED を『緑〜赤に 変化させる』ようにしてみました。
CPU負荷 (低) 緑 →→ 黄 →→ 赤 (高)
接続
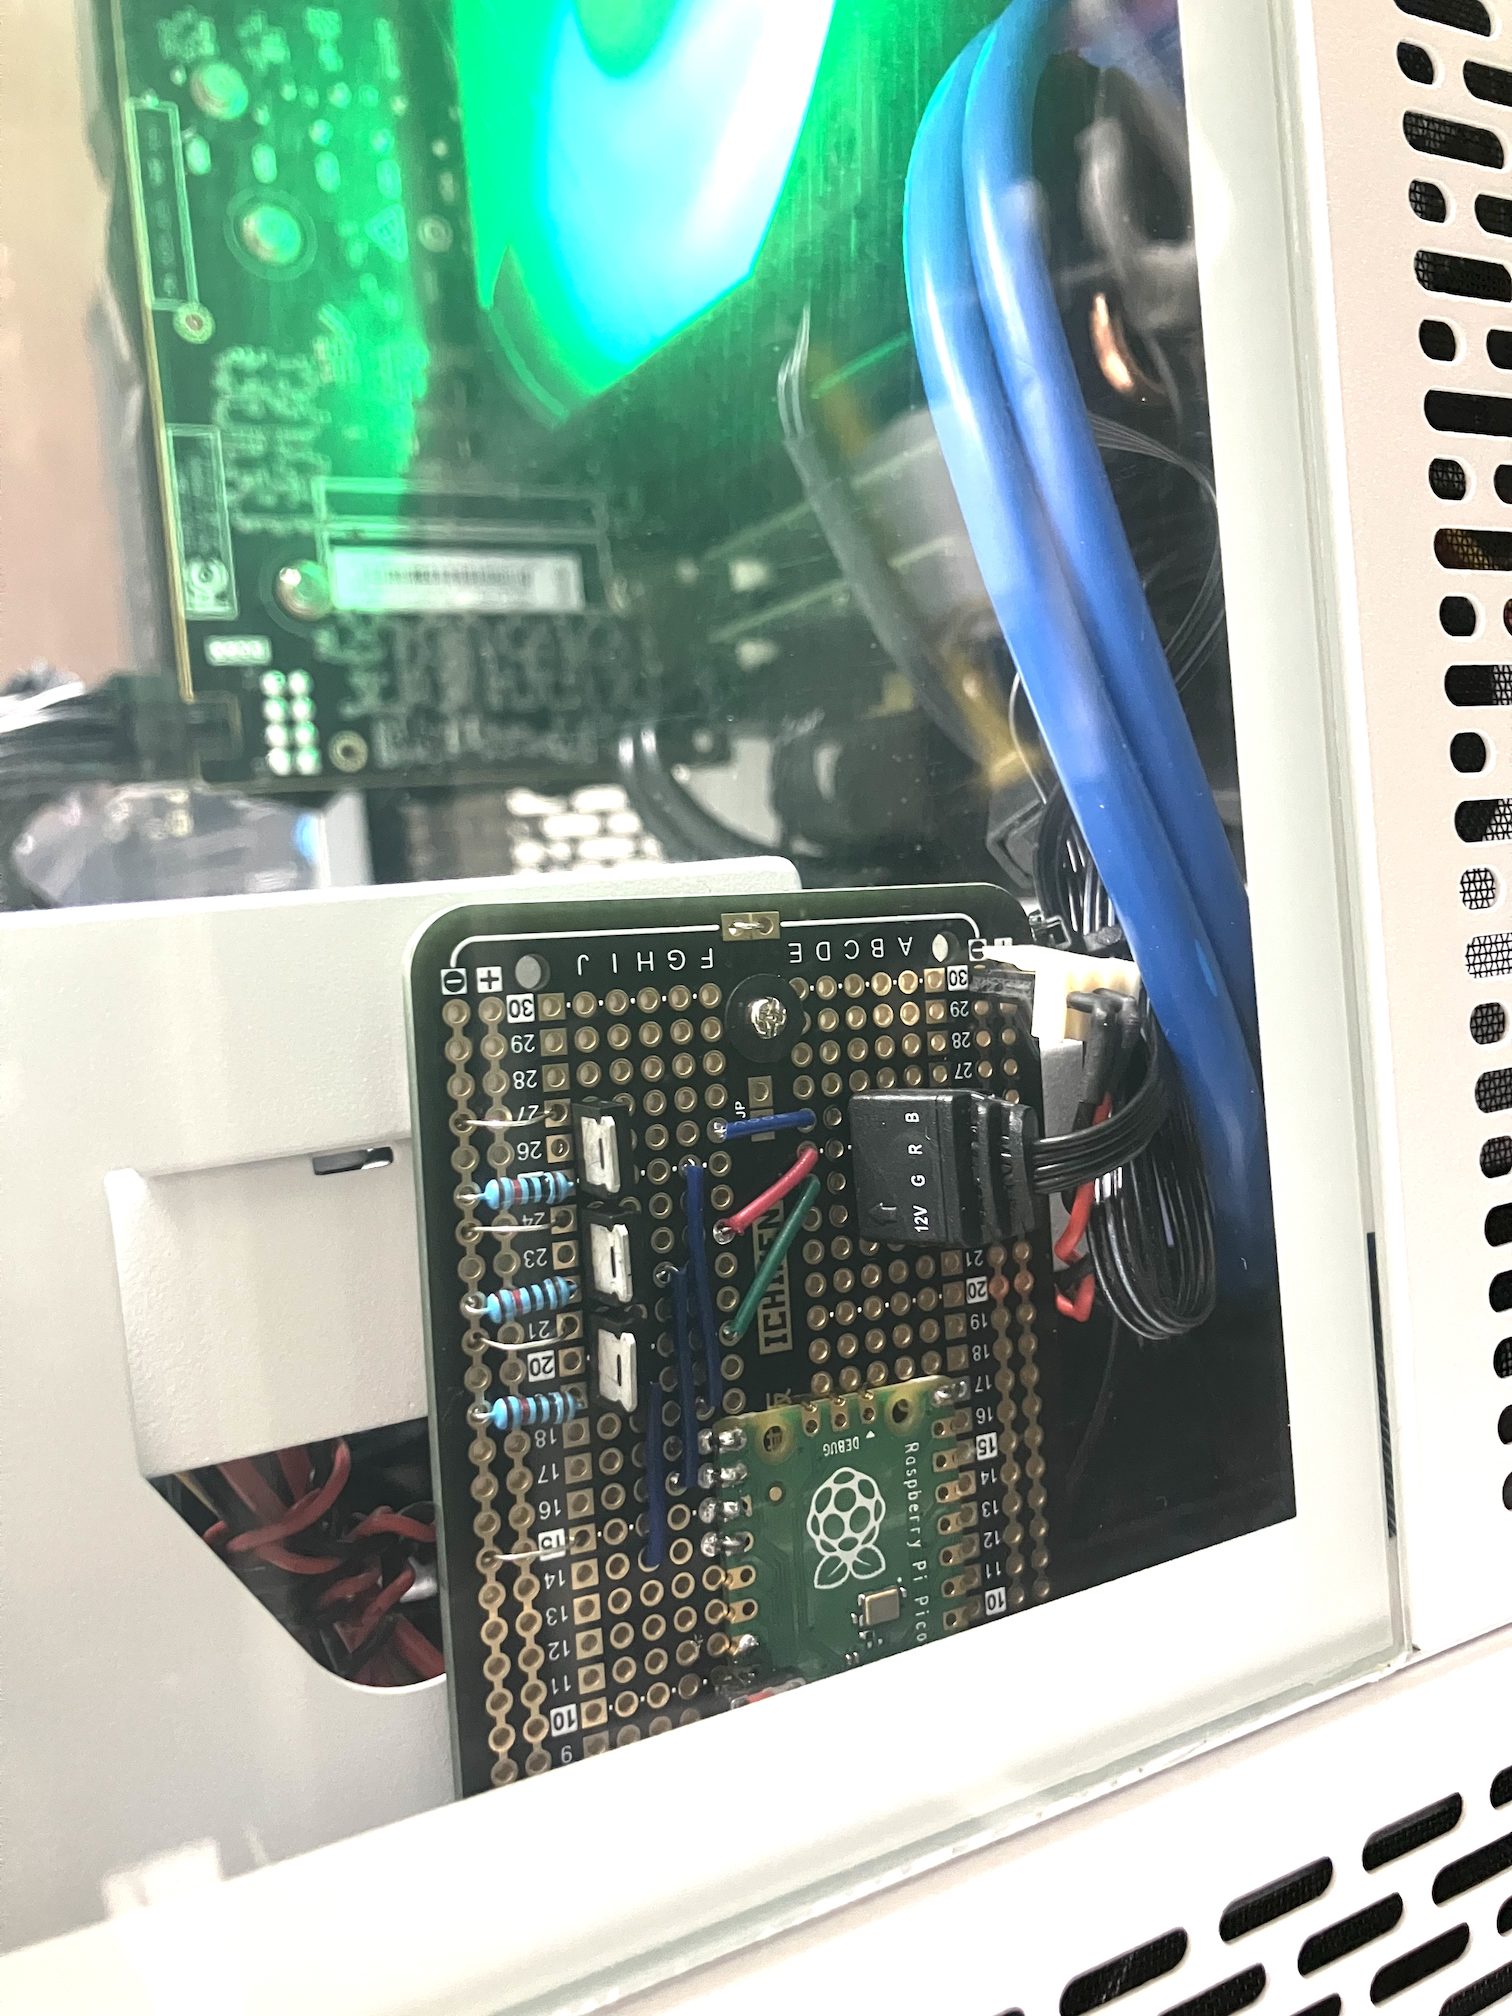
Raspberry Pi Picoを使用し、ブレッドボード風ユニバーサル基板 に回路を組み、PCケース内に収めました。PC と USBケーブルで接続します。(回路図は 前回記事 と同じ)
Raspberry Pi Pico側のコード
MicroPython をインストールしておきます。
main.py
from machine import Pin, PWM

pwm_g = PWM(Pin(18), freq=25000, duty_u16=0)
pwm_r = PWM(Pin(17), freq=25000, duty_u16=0)
pwm_b = PWM(Pin(16), freq=25000, duty_u16=0)

def rgb(color):
    R, G, B = color
    pwm_r.duty_u16(int(25000 * (R / 255))) # R 256階調 (0-255)
    pwm_g.duty_u16(int(25000 * (G / 255))) # G 256階調 (0-255)
    pwm_b.duty_u16(int(25000 * (B / 255))) # B 256階調 (0-255)

rgb((255, 255, 255)) # initial white

try:
    while True:
        s = input()
        # RGB r g b
        item = s.split(' ')
        if len(item) != 4: continue
        if item.pop(0) == 'RGB':
            rgb(tuple([int(x) for x in item]))
            print('ok!')
        else:
            print('?', s)

except:
    import machine
    machine.reset() #restart
PC側のコード
import platform
import serial
import threading
import psutil

match platform.system():
    case 'Darwin':  PORT = '/dev/cu.usbmodem1201' # for macOS
    case 'Linux':   PORT = '/dev/ttyACM0' # for Ubuntu
    case 'Windows': PORT = 'COM5' # for Windows
    case _: PORT = None

ser = serial.Serial(port=PORT, baudrate=115200, timeout=1)
done = False

def serial_read():
    cnt = 0
    while not done:
        buf = ser.readline().decode().strip()
        if len(buf) == 0: continue
        cnt += 1
        print(cnt, buf)

def write(cmd):
    if len(cmd) == 0: return
    _ = ser.write((cmd + '\r\n').encode('utf-8'))

def map(val, lo_val, hi_val, to_low, to_high):
    return (val - lo_val) / (hi_val - lo_val) * (to_high - to_low) + to_low

thread_read = threading.Thread(target=serial_read)
thread_read.start()

try:
    while True:
        cpu_percent = psutil.cpu_percent(interval=1)
        if cpu_percent > 100: cpu_percent = 100
        print(f'CPU Usage: {cpu_percent}%')
        r = map(cpu_percent, 0, 100, 0, 255)
        g = map(cpu_percent, 0, 100, 255, 0)
        write(f'RGB {int(r)} {int(g)} 0')

except:
    done = True
    ser.close()
    print('stop')
Windows と Ubuntu で同じコードを確認しました。問題なく動作します。
Windows11 Pro 24H2 64bit の場合、psutil.cpu_percent()で得られるCPU使用率が、タスクマネージャーで見るCPU使用率と倍半分違う!! 何故だろう??
おまけ
スレッド数を指定してCPU負荷をかけることができるツールです。ブラウザで動くため OSを選びません。
おまけ(その2)
今回の記事とは直接の関係はありませんが、
Windowsで pyserialをインストールすると、一緒にインストールされるpyserial-miniterm.exeが、screenライクで使いやすい。
pyserialインストール
$ pip install pyserial
usage
$ pyserial-miniterm.exe COM5 115200
minitermから抜ける場合は、 Ctrl+T z して、Ctrl+]
以上