はじめに
この記事はシスコの有志による Cisco Systems Japan Advent Calendar 2020 (1枚目)の 4 日目として投稿しています。
2017年版: https://qiita.com/advent-calendar/2017/cisco
2018年版: https://qiita.com/advent-calendar/2018/cisco
2019年版: https://qiita.com/advent-calendar/2019/cisco
2020年版 1枚目: https://qiita.com/advent-calendar/2020/cisco <---
2020年版 2枚目: https://qiita.com/advent-calendar/2020/cisco2
今回やりたいこと
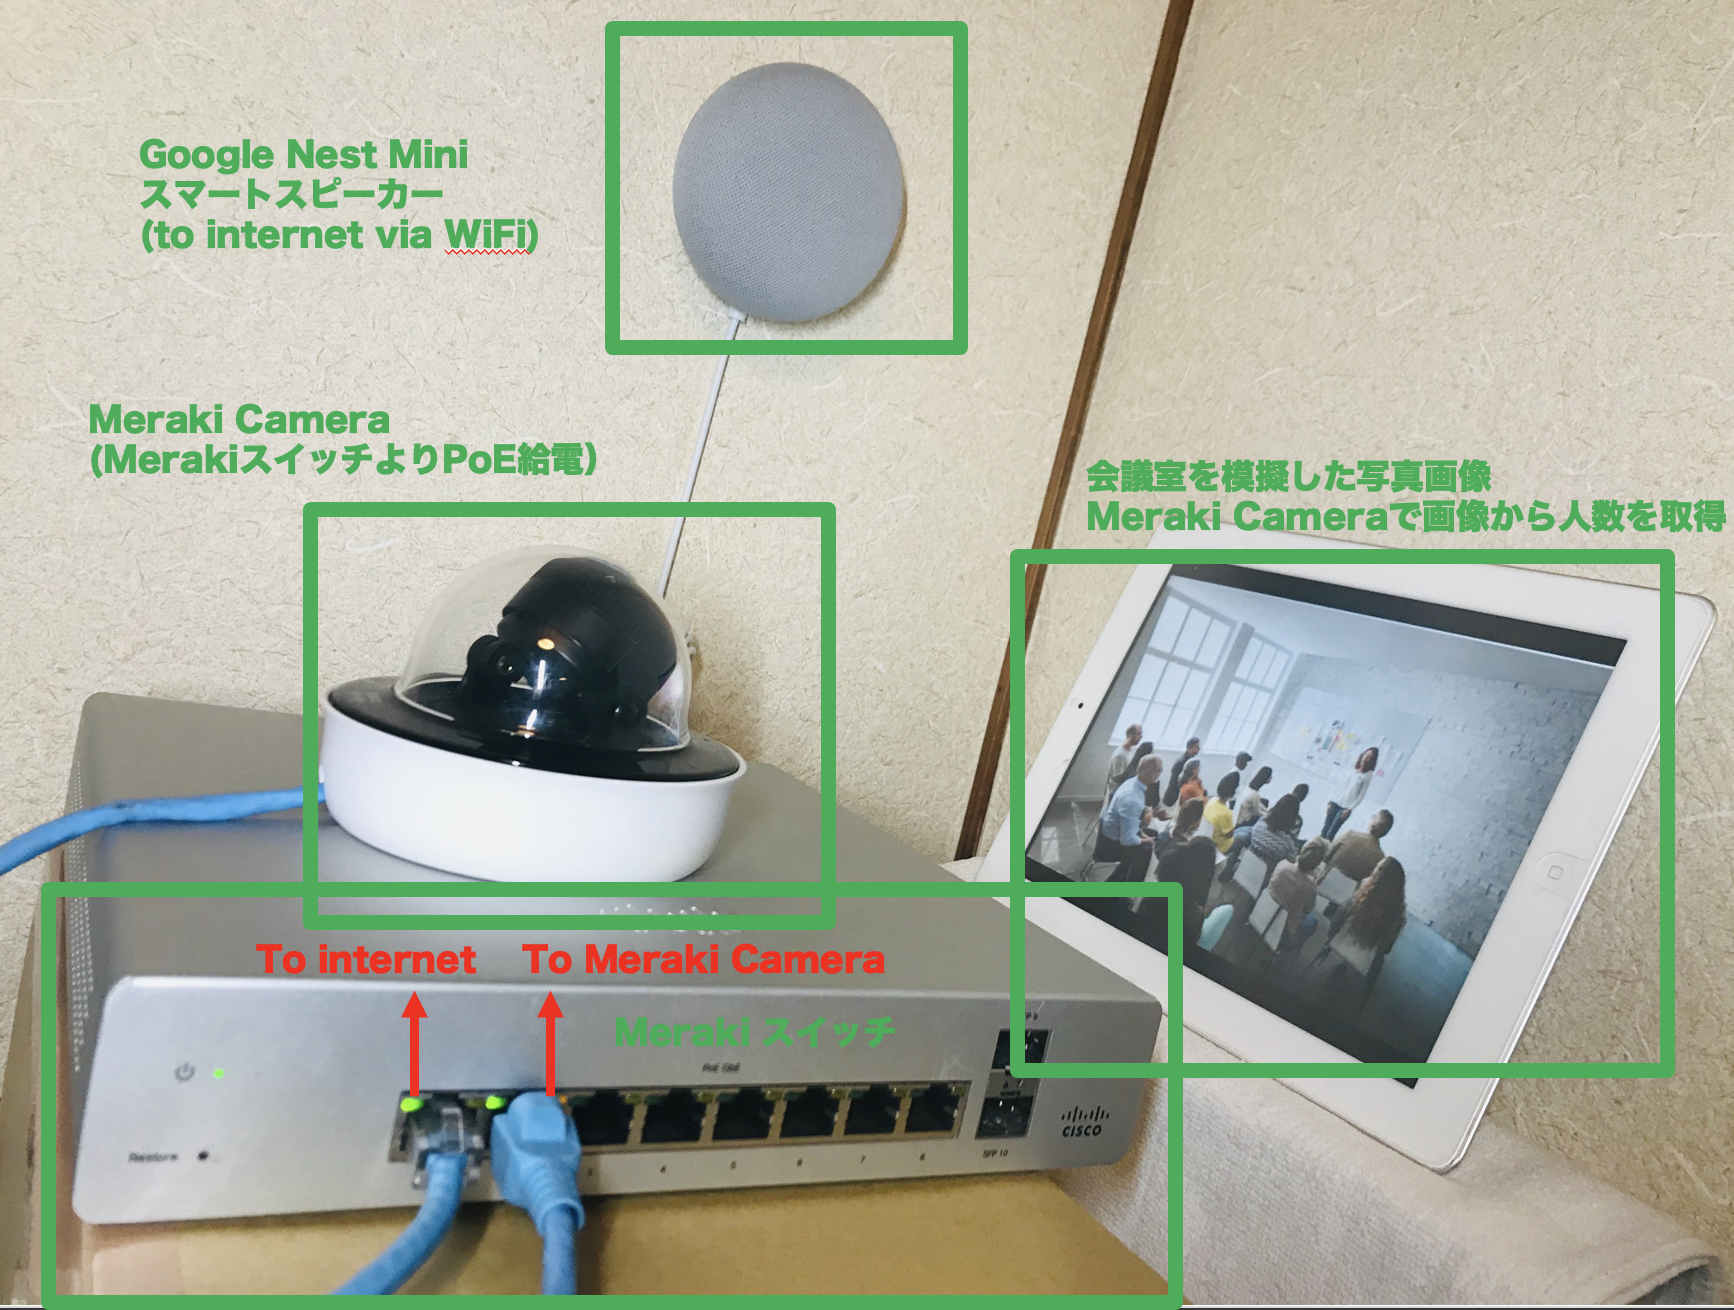
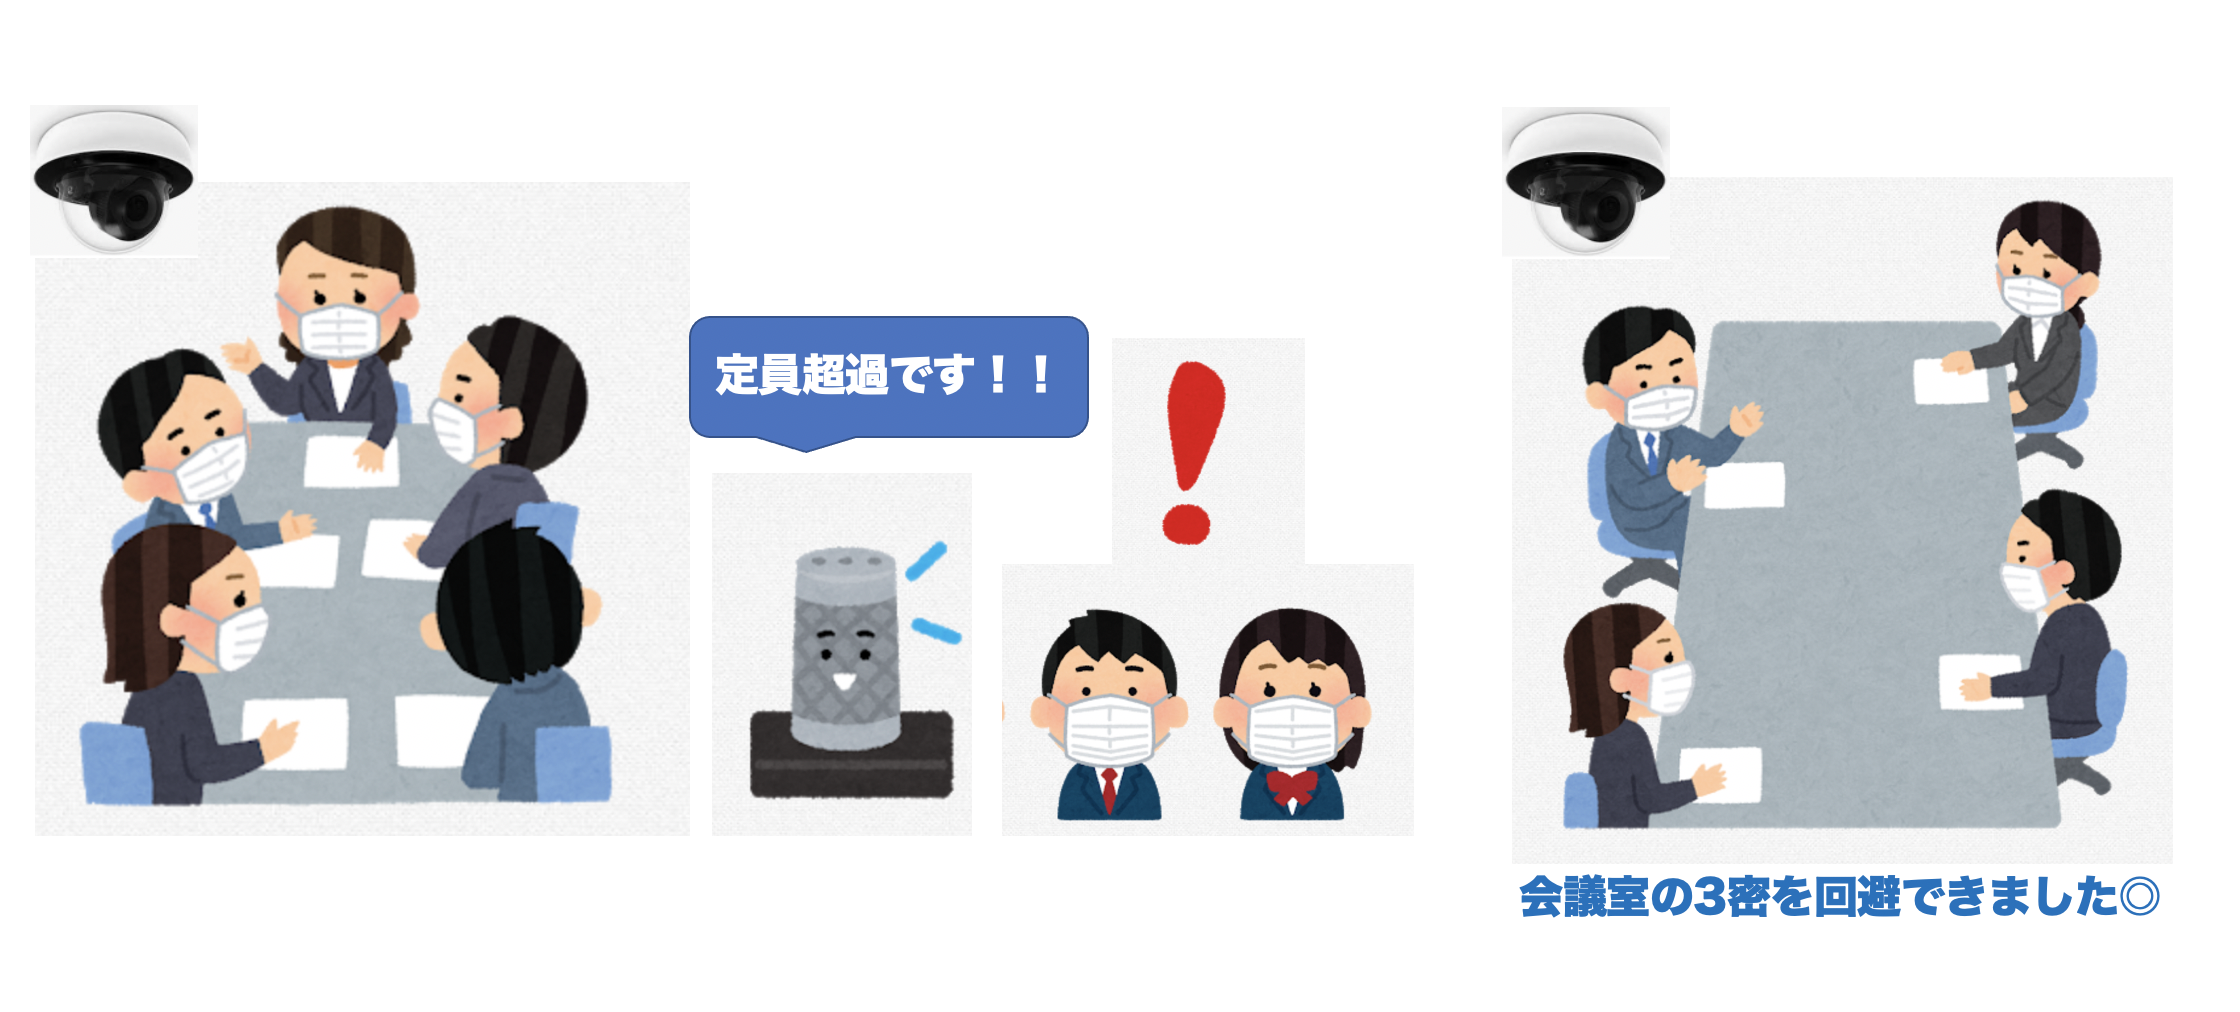
Cisco製品である Merakiカメラを使って新しい生活様式に対応する3密を避けるためのソリューションを考えてみました。Merakiカメラでは、カメラに映っている人の人数を検知し、Merakiのクラウド上の管理コントローラ(=Merakiダッシュボード、 Merakiカメラはコントローラで集中管理されます)からAPI経由で情報を取得することができます。今回はそのAPI(MV Sense API)を活用してスマートスピーカーと連携させて遊んでみました。
- Cisco Mearkiカメラで会議室など部屋にいる人の人数を定期的に監視する
- 定員オーバーを検知したら、Google Nest Miniが教えてくれる。
- Google Nest Miniからは警告メッセージに加えて音楽を流しpositiveな気持ちで密を回避する。
デモ構成
上記の構成に加え、Python Flaskを実行するPCを用意します。PC上で起動されるFlask webサーバーは、インターネット経由でMerakiダッシュボード、そして、ローカルネットワーク経由でGoogle Nest Miniと通信します。スピーカーから流す音声は、Flask webサーバー上(今回はMac PCでwebサーバーを起動)に配置します。
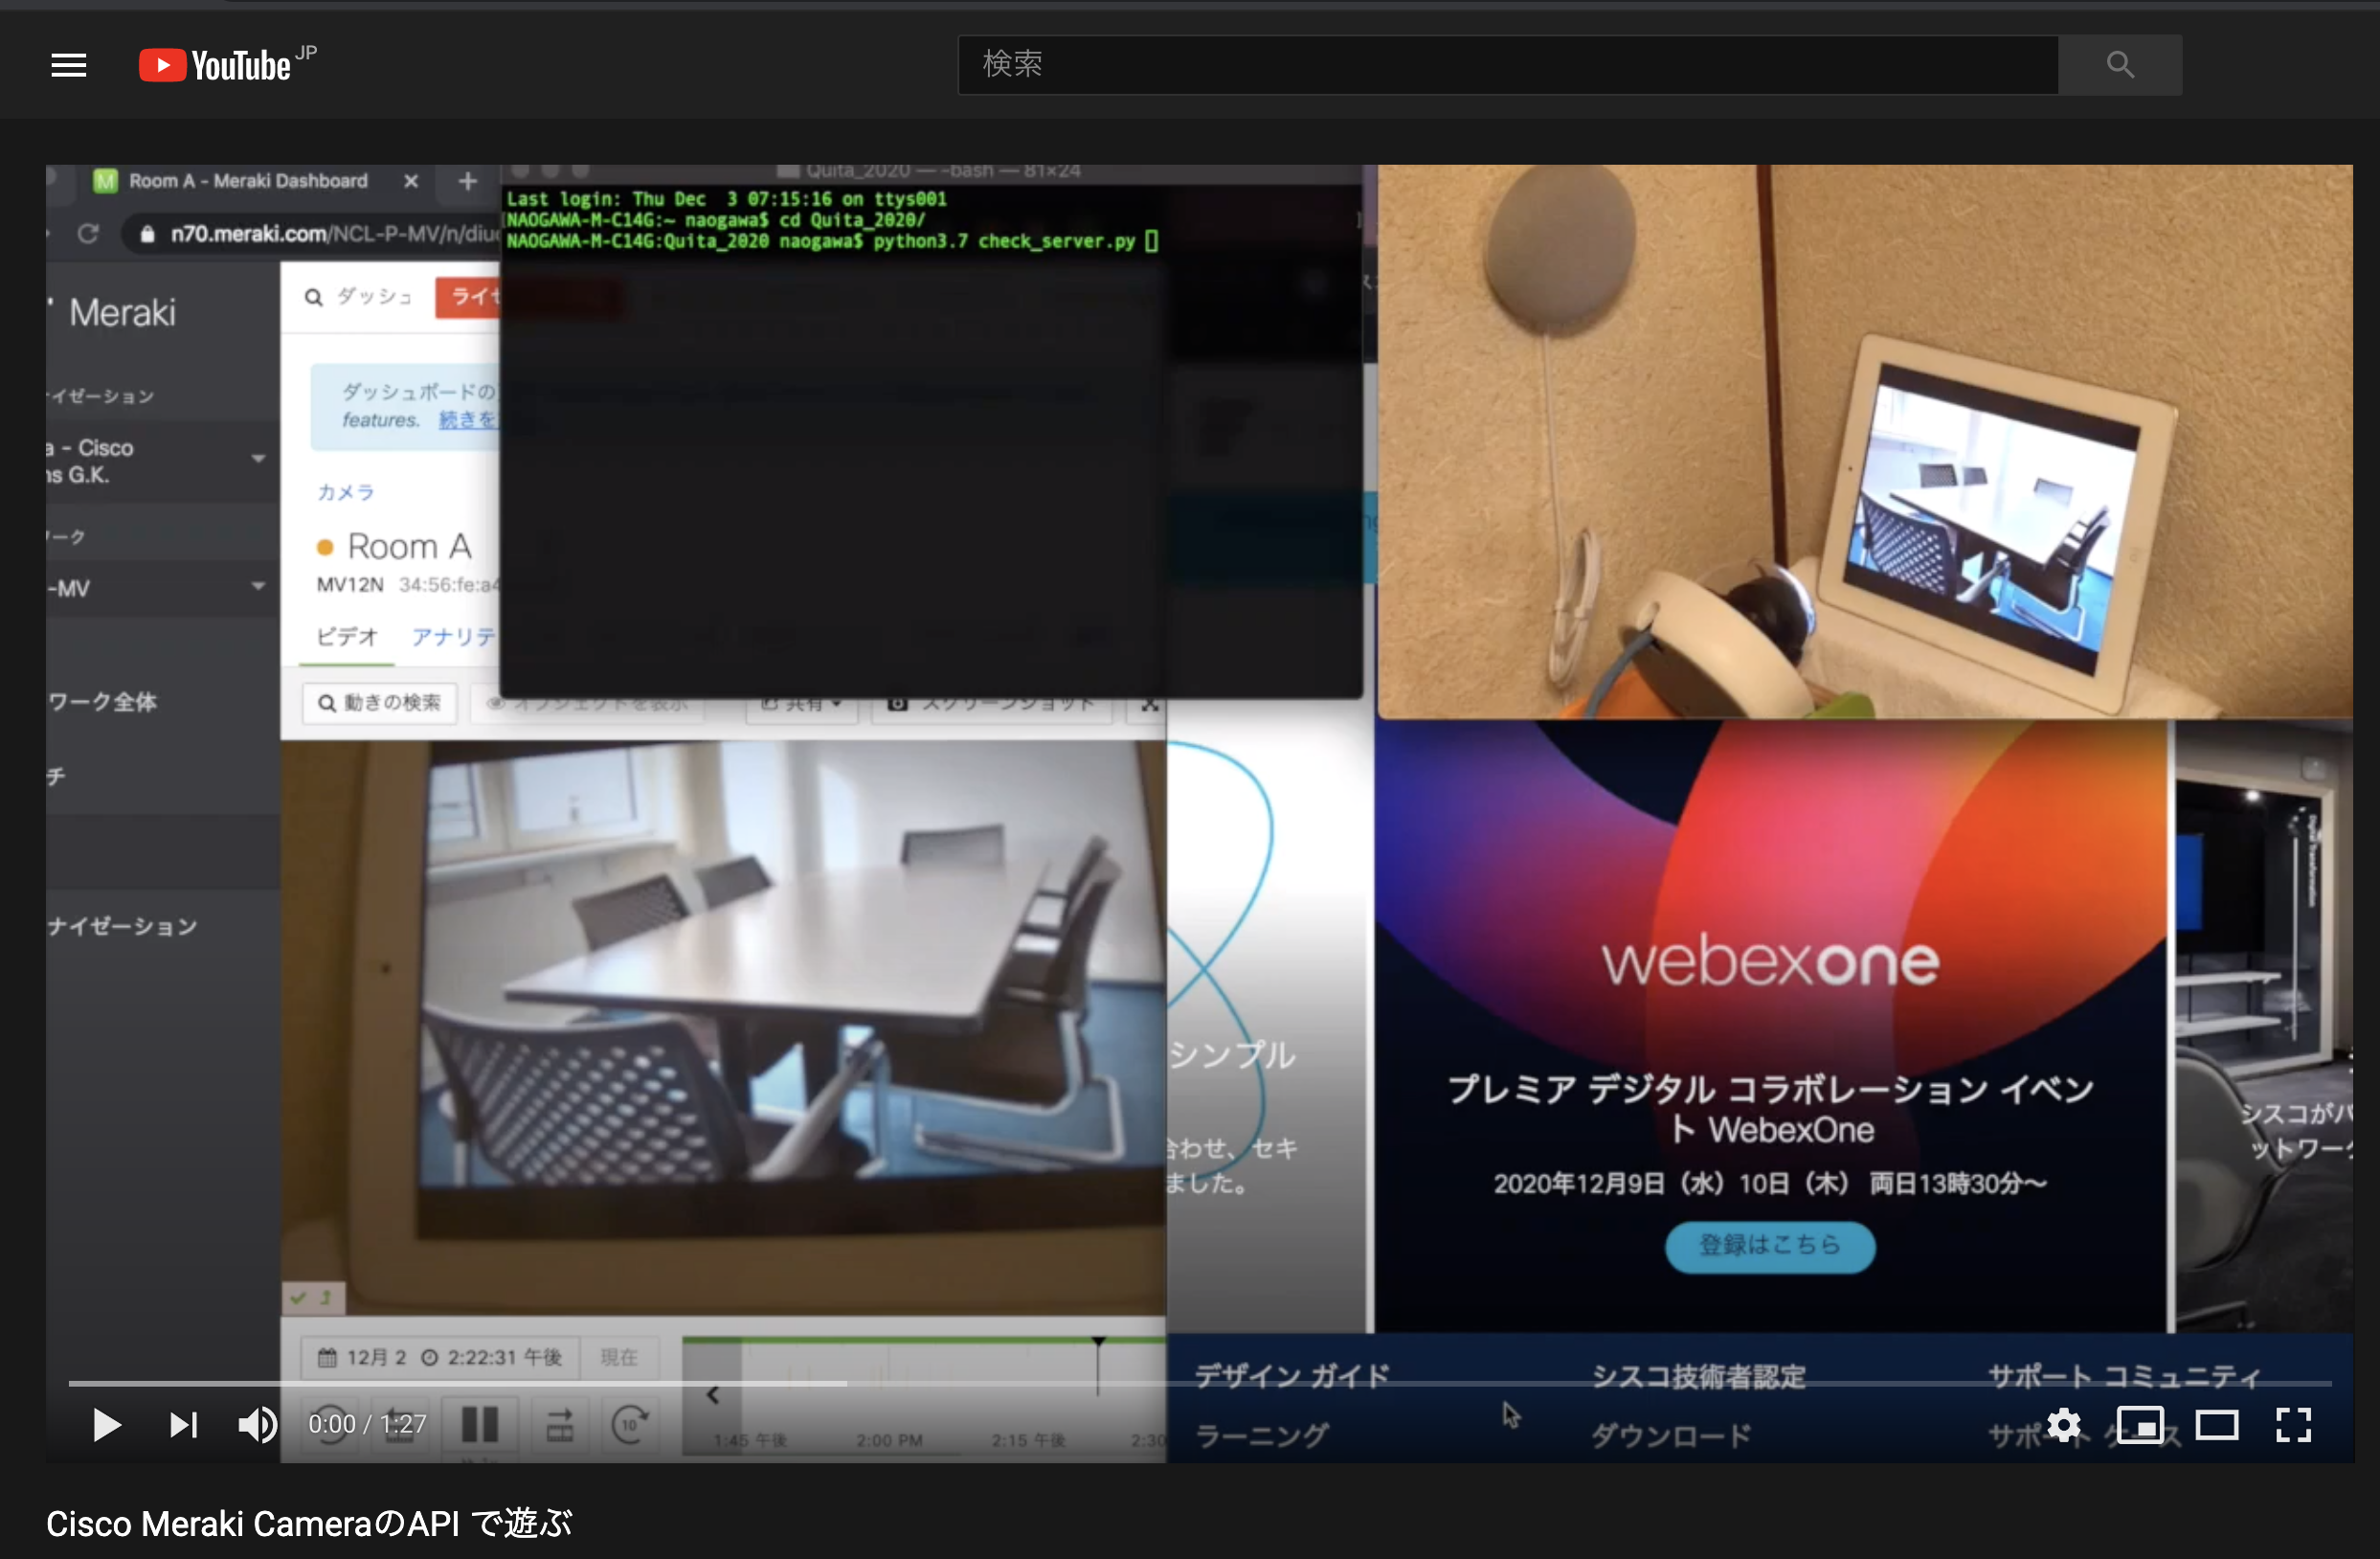
デモ動画
MerakiのAPI解説 -Meraki APIを使う方法-
STEP0: MerakiカメラをPoEスイッチ-> Internet に接続し、Merakiダッシュボードから管理できる状態にします。
STEP1: Meraki API 有効化と API key 取得
MerakiのAPIにアクセスするには、MerakiダッシュボードにアクセスしAPIを有効にする必要があります。ダッシュボードにログインしたら、Organization(オーガナイゼーション) > Settings(設定) > Dashboard API access(ダッシュボードAPIアクセス)で、オーガナイゼーションのAPIを有効化します。
APIを有効化したら、my profileページに移動して、APIキーを生成します。APIキーはダッシュボード管理者アカウントに関連付けられます。自分のプロファイルのAPIキーを生成、失効、および再生成することができます。

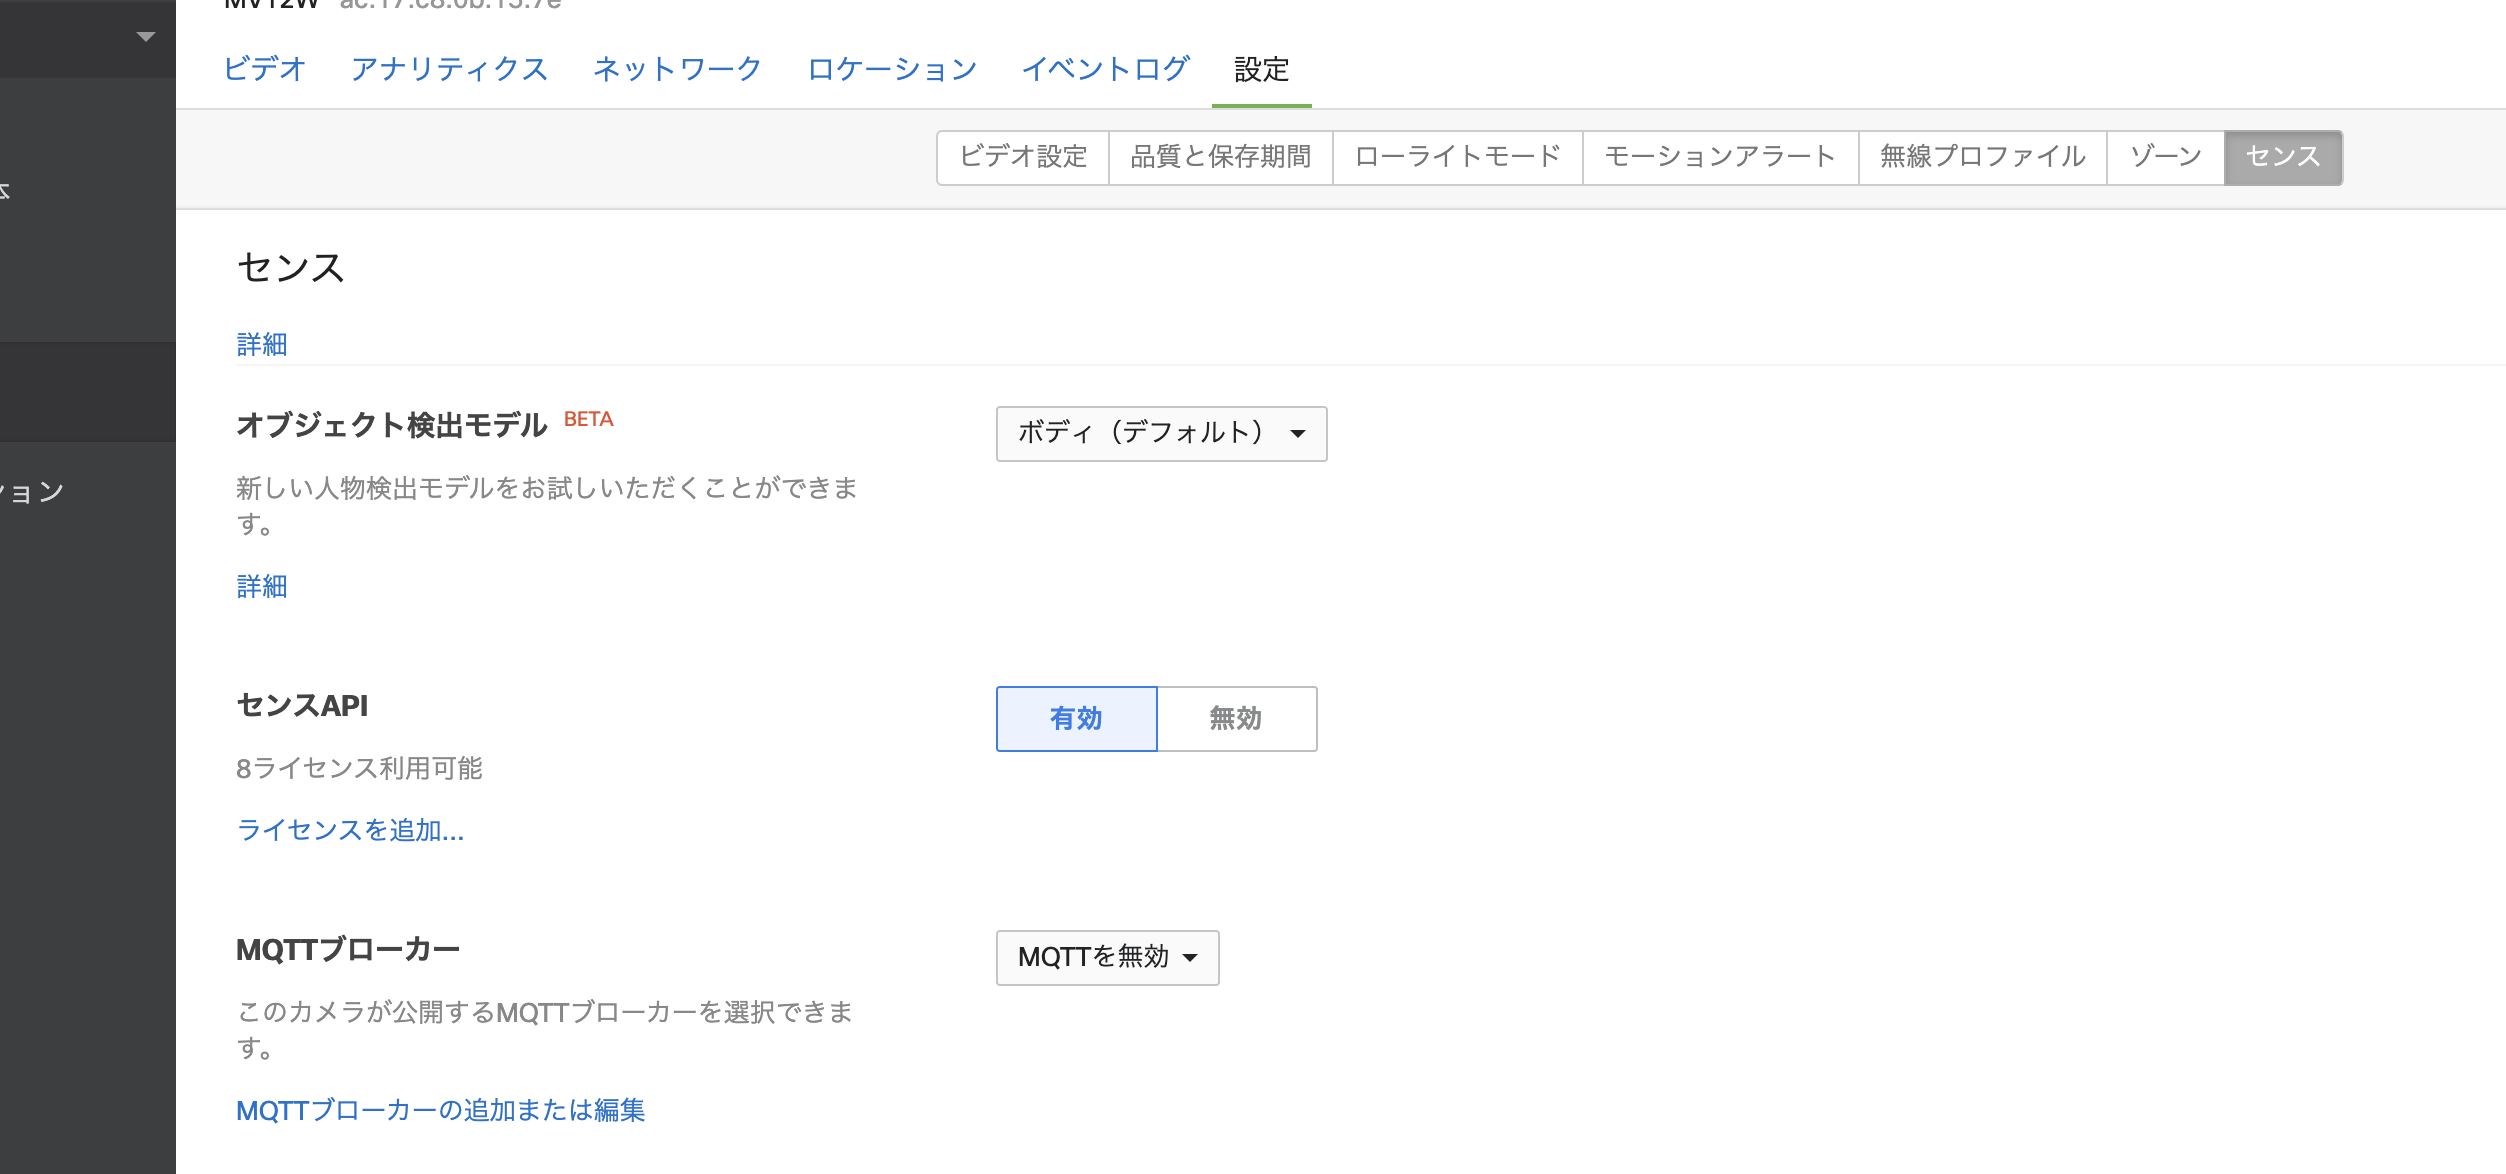
STEP2: Merakiカメラの MV Sense API 有効化
Merakiカメラの MV Sense APIにアクセスするには、最初に Camera(カメラ) > APIを有効にしたいカメラを選択 > Settings(設定) > Sense (センス)で、センスAPIを有効化します。
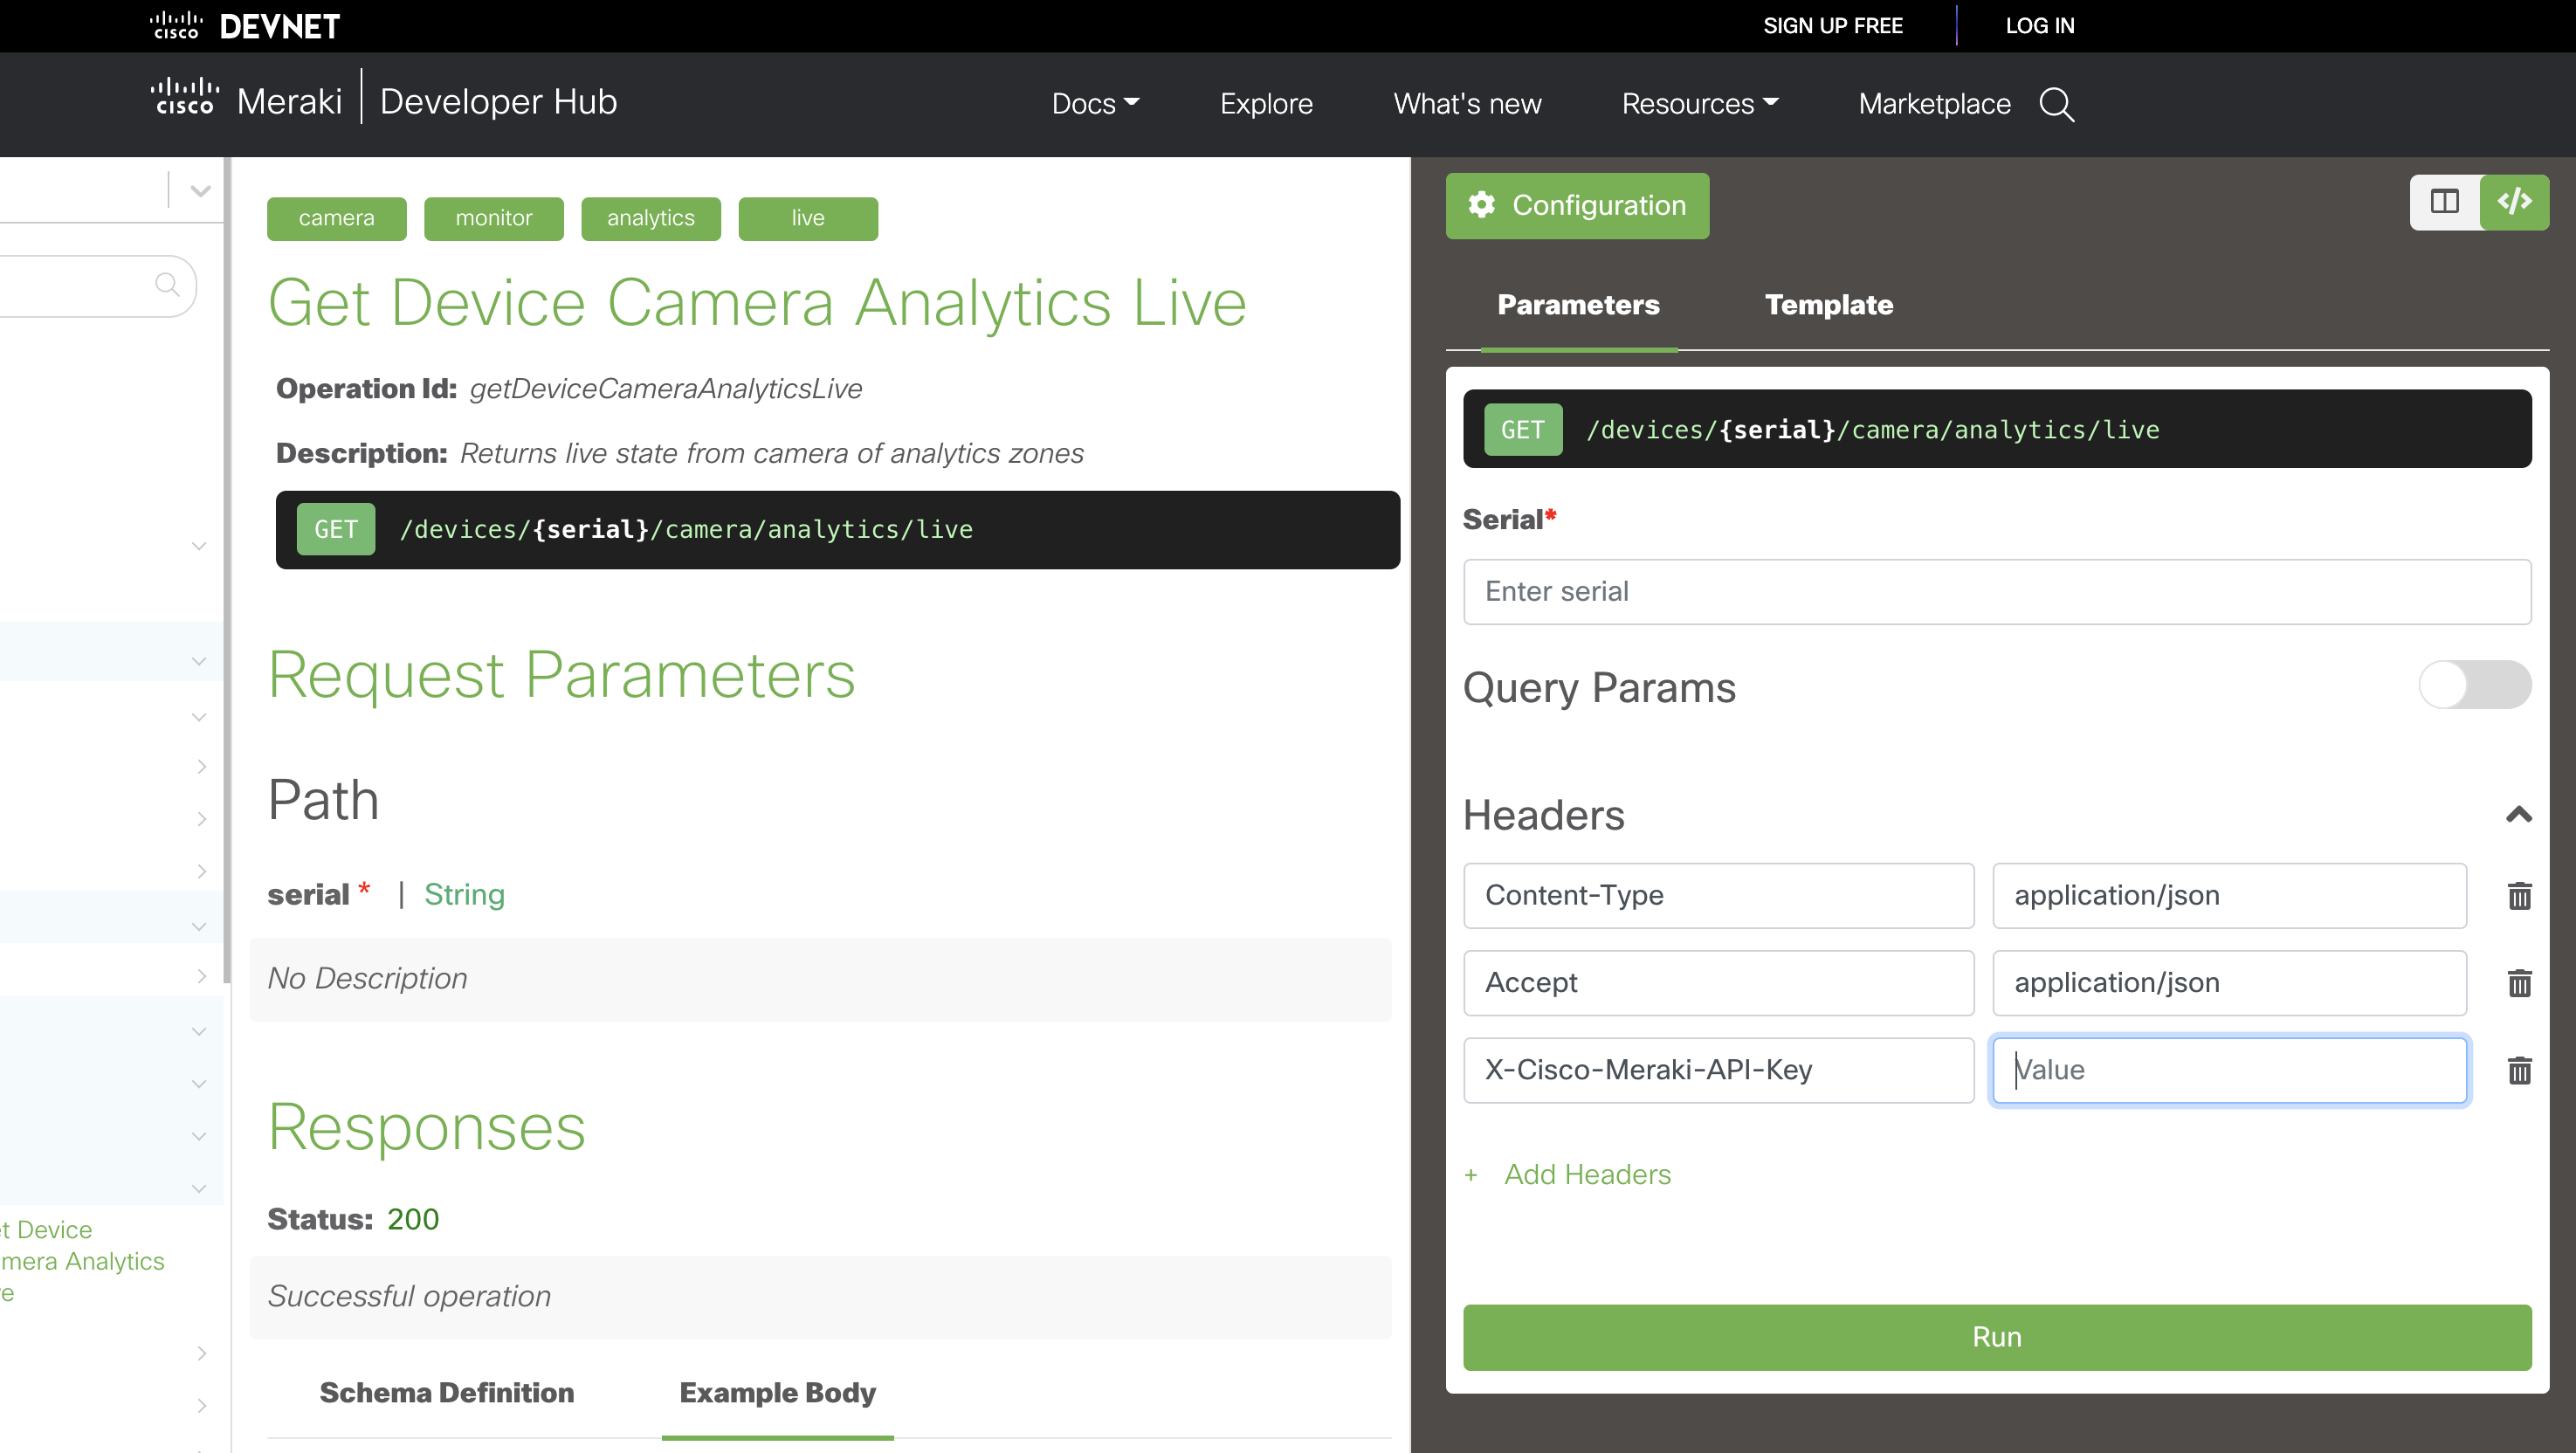
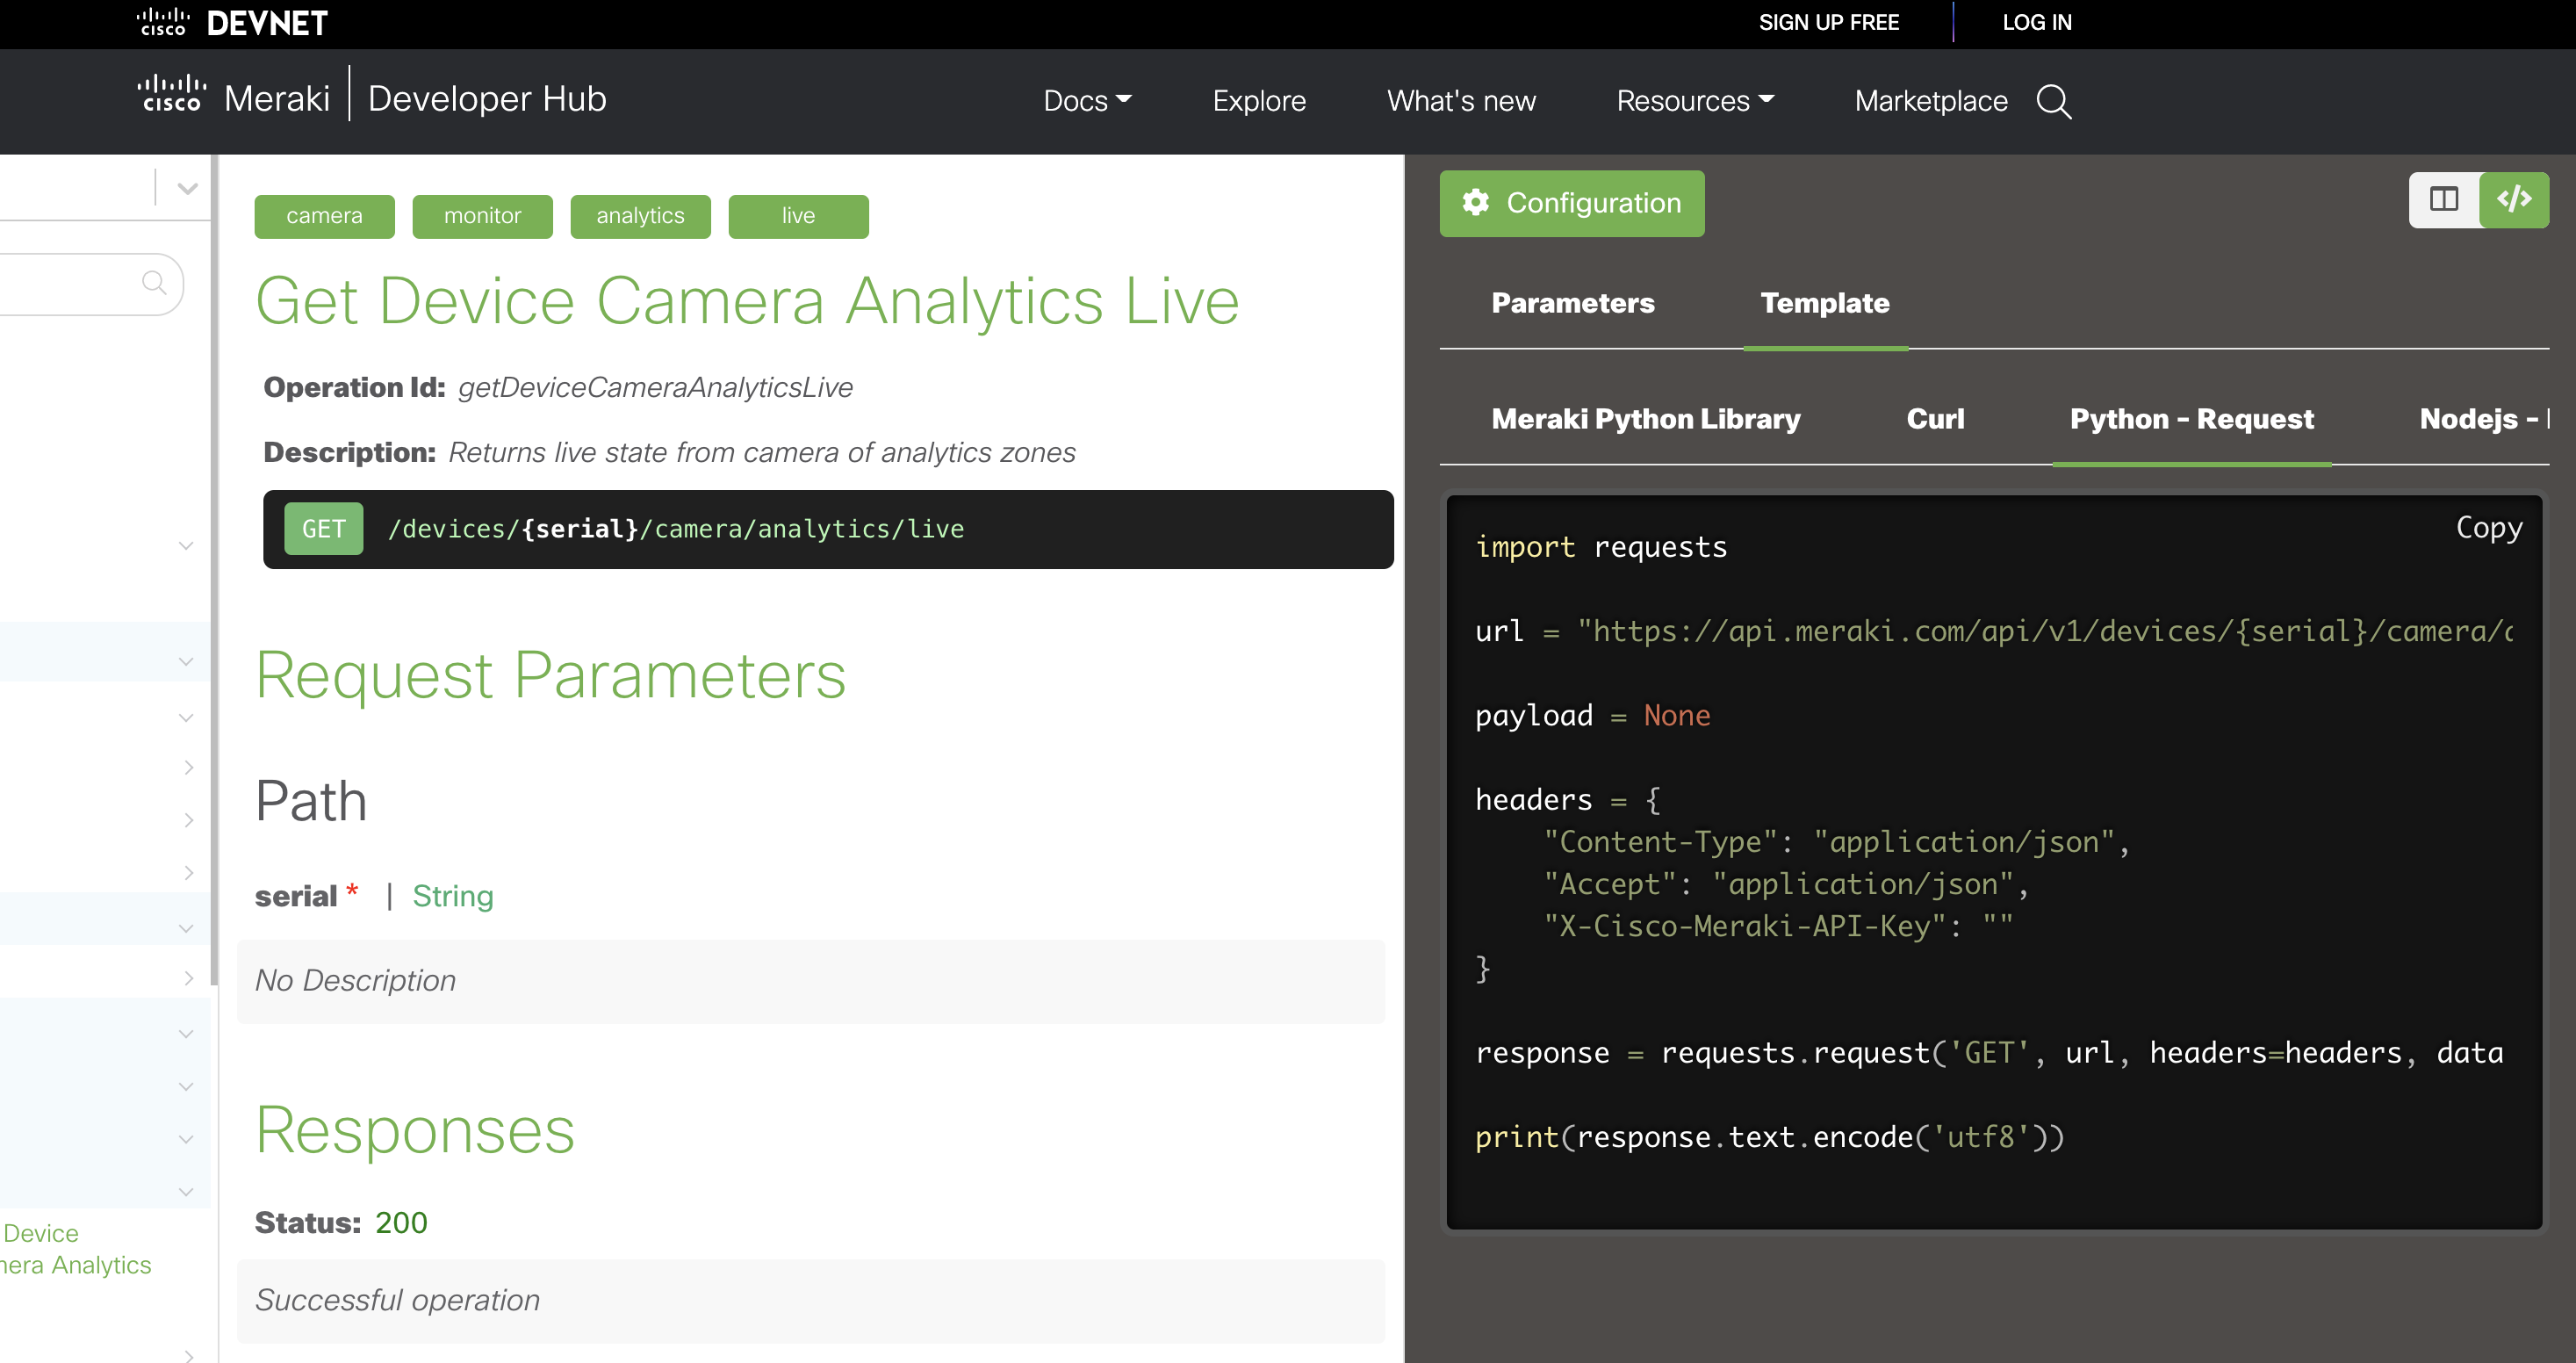
STEP3: Meraki カメラで検知した人の人数を取得するAPIの動作確認
下記のAPIを使用します。
https://developer.cisco.com/meraki/api-v1/#!get-device-camera-analytics-live
上記サイトから、STEP1で取得したAPI Keyとカメラのシリアル番号を使い簡単に動作確認を行うことができます。
また言語を選択してサンプルコードも取得することができます。
Google Nest MiniをPythonで喋らせる方法
下記の記事を参考にさせていただきました!
Python で pychromecast を使ってしゃべらせる方法を使用しています。
スピーカーから流す音声は、Flask webサーバー上(今回はMac PCでwebサーバーを起動)に配置しています。
https://qiita.com/rukihena/items/8af9b8baed49542c033d
https://qiita.com/sousoumt/items/d815c813a91f3173c2a0
実行コード
Flaskサーバpythonスクリプト
from flask import Flask, render_template
from flask import send_from_directory
from ghome import speech
from detect import personcount

app = Flask(__name__)

#mp3ファイルの読み込み
@app.route("/mp3/<string:file_name>")
def play(file_name):
    return send_from_directory("mp3", file_name)


#監視ページ。定期的にカメラから人数を取得(detect.py)。10人以上の場合、Google Nest Miniが警告する(ghome.py)。
@app.route("/roomcheck")
def check():
 num_of_person = personcount()
 i=num_of_person[0]
 if i >= 10:
   status=1
   speech()
   return render_template("roomcheck.html", count=i,status=status)
 else:
   status=0
   return render_template("roomcheck.html",count=i,status=status)


if __name__ == '__main__':
    app.run(debug=False, host='0.0.0.0', port=5000)
Merakiカメラで検知された人数を取得するpythonスクリプト
import requests
import json

def personcount():
 camlist = ['<camera serial number>']
 num_of_person=[]
 apikey = '<meraki api key>'
 for sn in camlist:
  headers = {'X-Cisco-Meraki-API-Key': apikey}
  mv_live_url = 'https://api.meraki.com/api/v1/devices/'+sn+'/camera/analytics/live'
  mv_live_response = requests.get(mv_live_url, headers=headers)
  mv_live_response_json=json.loads(mv_live_response.text)
  num_of_person_detected=mv_live_response_json['zones']['0']['person']
  num_of_person.append(num_of_person_detected)
 return num_of_person
Google Nest Miniにおしゃべりしてもらうpythonスクリプト
Google Nest Miniから、流すファイルは、
http://192.168.1.xx:5000/mp3/alarms.mp3
今回はalarms.mp3ファイルに警告音+メッセージ+音楽を収録しています。
import pychromecast

def speech():
 mp3url = 'http://192.168.1.xx:5000/mp3/alarms.mp3';

 #IPアドレスでGoogle Nest Miniを特定する
 googleHome = pychromecast.Chromecast('192.168.1.xx')

 if not googleHome.is_idle:
    print("Killing current running app")
    googleHome.quit_app()
    time.sleep(5)

 #喋らせる
 googleHome.wait()
 googleHome.media_controller.play_media(mp3url, 'audio/mp3')
 googleHome.media_controller.block_until_active()

 return
監視ページhtml, 定期的(30秒毎)にリフレッシュして、check_server.pyのcheck関数が実行される。
<html>
  <head>
   <meta http-equiv="refresh" content="30";>
   <hr>
   <div align="center"><img width=600 height=350 src="static/images/top.png"></div>
   </hr>
   <h1> Room Congestion Check System </h1>
   <script>
    var n={{status}}
    function Image(){
    if (n == 1){
    document.getElementById("congeimage").src="static/images/red.png";
    }else{
    document.getElementById("congeimage").src="static/images/green.png";
    }
    }
   </script>
  </head>
  <body onload="Image();" style="text-align:center;">
   <table border="1" align="center"">
    <tr>
      <th width="300">Room</th> <th width="300">Number of people</th> <th width="150">Congestion status</th>
    </tr>

    <tr>
      <td>Room A</td> <td>{{count}} people is here</td> <td><img id="congeimage" name="congeimage"></td>
    </tr>

    <tr>
      <td>Room B</td> <td>3 people is here</td> <td><img src="static/images/green.png"></td>
    </tr>

   </table>
  </body>
</htm>
終わりに
デモ動画では、スピーカーから音声が流れているのが分かりにくく、、なかなか地味なデモになってしまいました(涙)。今回は時間がなかったですが、「OK Google!」と話しかけて、監視サーバーやアプリを起動させて、会議室のリアルタイムの混雑状況を聞いたり、管理者にチャットやメールで混雑状況を通知したり、会議室の人数に応じてスイッチにQoSを仕掛けたり、、今後の発展バージョンとして色々な仕組みを作ってみたいなーと思っています。MerakiのAPIを活用した情報取得はスクリプト自体もシンプルで汎用的に使え、何か別のシステムやAPIと連携させることも容易です。アイデア次第では様々な活用方法が可能だと思います。このアドベントカレンダー後半には、同じくMerakiカメラを使って3密を避ける、レストランや商業施設向けのソリューションの記事が2つ登場予定です。是非ご期待ください!!
免責事項
本サイトおよび対応するコメントにおいて表明される意見は、投稿者本人の個人的意見であり、シスコの意見ではありません。本サイトの内容は、情報の提供のみを目的として掲載されており、シスコや他の関係者による推奨や表明を目的としたものではありません。各利用者は、本Webサイトへの掲載により、投稿、リンクその他の方法でアップロードした全ての情報の内容に対して全責任を負い、本Web サイトの利用に関するあらゆる責任からシスコを免責することに同意したものとします。
