忘備録
【OS】
今回はCentOS7.2_x86_64版を使用。詳細は以下を参照。
http://www.server-world.info/query?os=CentOS_7&p=install
事前準備
セットアップに必要なパッケージを事前に設定しておく必要がある。以下を全て設定する。
システム変更が発生するので管理者権限が必須。rootにsuしておく事。
【YUMパッケージ管理】
yum -y install yum-plugin-priorities
yum -y update
yum -y groupinstall "Base" "Development tools" "Japanese Support"
[EPELリポジトリ追加]
yum -y install epel-release
[Remiリポジトリ追加]
rpm -ivh http://rpms.famillecollet.com/enterprise/remi-release-7.rpm
[RPMforgeリポジトリ追加]
yum -y install http://pkgs.repoforge.org/rpmforge-release/rpmforge-release-0.5.3-1.el7.rf.x86_64.rpm
【Firewall無効】
systemctl stop firewalld
systemctl disable firewalld
【SELinux無効化】
vi /etc/selinux/config
SELINUX=enforcing
SELINUX=disabled ←変更(起動時に無効にする)
依存パッケージをインストール
yum install curl openssh-server
【GitLab】
リポジトリ登録
curl https://packages.gitlab.com/install/repositories/gitlab/gitlab-ce/script.rpm.sh | sudo bash
インストール
yum -y install gitlab-ce
【メール設定】
まずはオリジンをバックアップ
cp -ip /etc/gitlab/gitlab.rb /etc/gitlab/gitlab.rb.org
vi /etc/gitlab/gitlab.rb
# gitlab_rails['gitlab_email_from'] = 'example@example.com'
 ↓
gitlab_rails['gitlab_email_from'] = '<Gmailのアドレス>'

# gitlab_rails['gitlab_email_reply_to'] = 'noreply@example.com'
 ↓
gitlab_rails['gitlab_email_reply_to'] = '<Gmailのアドレス>'
# gitlab_rails['smtp_enable'] = true
# gitlab_rails['smtp_address'] = "smtp.server"
# gitlab_rails['smtp_port'] = 456
# gitlab_rails['smtp_user_name'] = "smtp user"
# gitlab_rails['smtp_password'] = "smtp password"
# gitlab_rails['smtp_domain'] = "example.com"
# gitlab_rails['smtp_authentication'] = "login"
# gitlab_rails['smtp_enable_starttls_auto'] = true
# gitlab_rails['smtp_tls'] = false
# gitlab_rails['smtp_openssl_verify_mode'] = 'none' # Can be: 'none', 'peer', 'client_once', 'fail_if_no_peer_cert', see http://api.rubyonrails.org/
 ↓
gitlab_rails['smtp_enable'] = true
gitlab_rails['smtp_address'] = "smtp.gmail.com"
gitlab_rails['smtp_port'] = 587
gitlab_rails['smtp_user_name'] = "<Gmailのアドレス>"
gitlab_rails['smtp_password'] = "<Gmailのパスワード>"
gitlab_rails['smtp_domain'] = "smtp.gmail.com"
gitlab_rails['smtp_authentication'] = "login"
gitlab_rails['smtp_enable_starttls_auto'] = true
gitlab_rails['smtp_tls'] = false
gitlab_rails['smtp_openssl_verify_mode'] = 'peer' # Can be: 'none', 'peer', 'client_once', 'fail_if_no_peer_cert', see http://api.rubyonrails.org/
# gitlab_rails['time_zone'] = 'UTC'
 ↓
gitlab_rails['time_zone'] = 'Asia/Tokyo'
chmod 600 /etc/gitlab/gitlab.rb
【HTTPS設定】
秘密鍵の作成
openssl genrsa 2048 > server.key
openssl req -new -key server.key > server.csr

Country Name (2 letter code) [XX]: JP
State or Province Name (full name) []:<空エンター>
Locality Name (eg, city) [Default City]:<空エンター>
Organization Name (eg, company) [Default Company Ltd]:<空エンター>
Organizational Unit Name (eg, section) []:<空エンター>
Common Name (eg, your name or your server's hostname) []: gitlab.example.com
Email Address []:<空エンター>

Please enter the following 'extra' attributes
to be sent with your certificate request
A challenge password []:<空エンター>
An optional company name []:<空エンター>
サーバ証明書の作成
openssl x509 -days 3650 -req -signkey server.key < server.csr > server.crt
秘密鍵とSSL証明書を移動
mv -i server.key /etc/pki/tls/private/
mv -i server.crt /etc/pki/tls/certs/
パーミッション変更
chmod 400 /etc/pki/tls/private/server.key
chmod 400 /etc/pki/tls/certs/server.crt
CSR削除
rm server.csr
【GitLab のHTTPS設定】
vi /etc/gitlab/gitlab.rb
external_url 'http://localhost'
 ↓
external_url 'https://gitlab.example.com'

# nginx['ssl_certificate'] = "/etc/gitlab/ssl/#{node['fqdn']}.crt"
# nginx['ssl_certificate_key'] = "/etc/gitlab/ssl/#{node['fqdn']}.key"
 ↓
nginx['ssl_certificate'] = "/etc/pki/tls/certs/server.crt"
nginx['ssl_certificate_key'] = "/etc/pki/tls/private/server.key"
【GitLab の起動】
gitlab-ctl reconfigure
(略)
Running handlers complete
Chef Client finished, 211/284 resources updated in 04 minutes 20 seconds
gitlab Reconfigured!
GitLabの起動状態を確認
gitlab-ctl status
run: gitlab-workhorse: (pid 20656) 134s; run: log: (pid 20411) 235s
run: logrotate: (pid 20515) 223s; run: log: (pid 20514) 223s
run: nginx: (pid 20454) 229s; run: log: (pid 20453) 229s
run: postgresql: (pid 20172) 340s; run: log: (pid 20171) 340s
run: redis: (pid 20034) 352s; run: log: (pid 20033) 352s
run: sidekiq: (pid 20373) 241s; run: log: (pid 20372) 241s
run: unicorn: (pid 20317) 243s; run: log: (pid 20316) 243s
【管理画面】
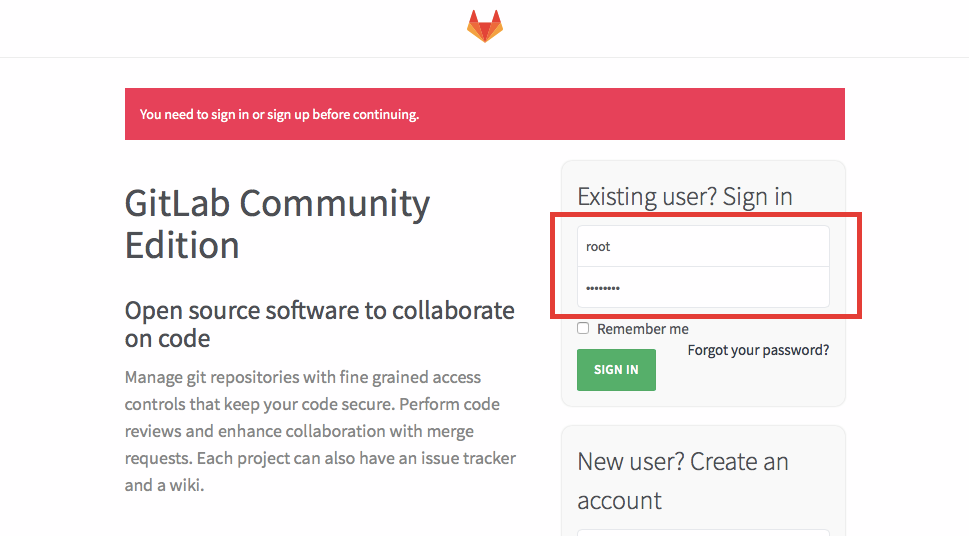
設定したURLを、WEBブラウザで開き、初期アカウント(root)でログイン。
Username: root
Password: 5iveL!fe

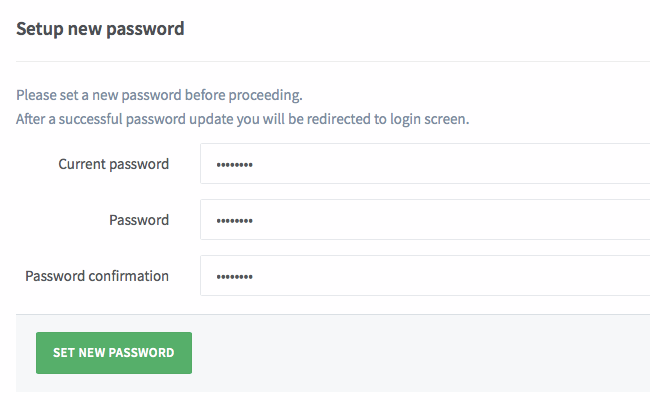
root のパスワードを変更

【動作設定】
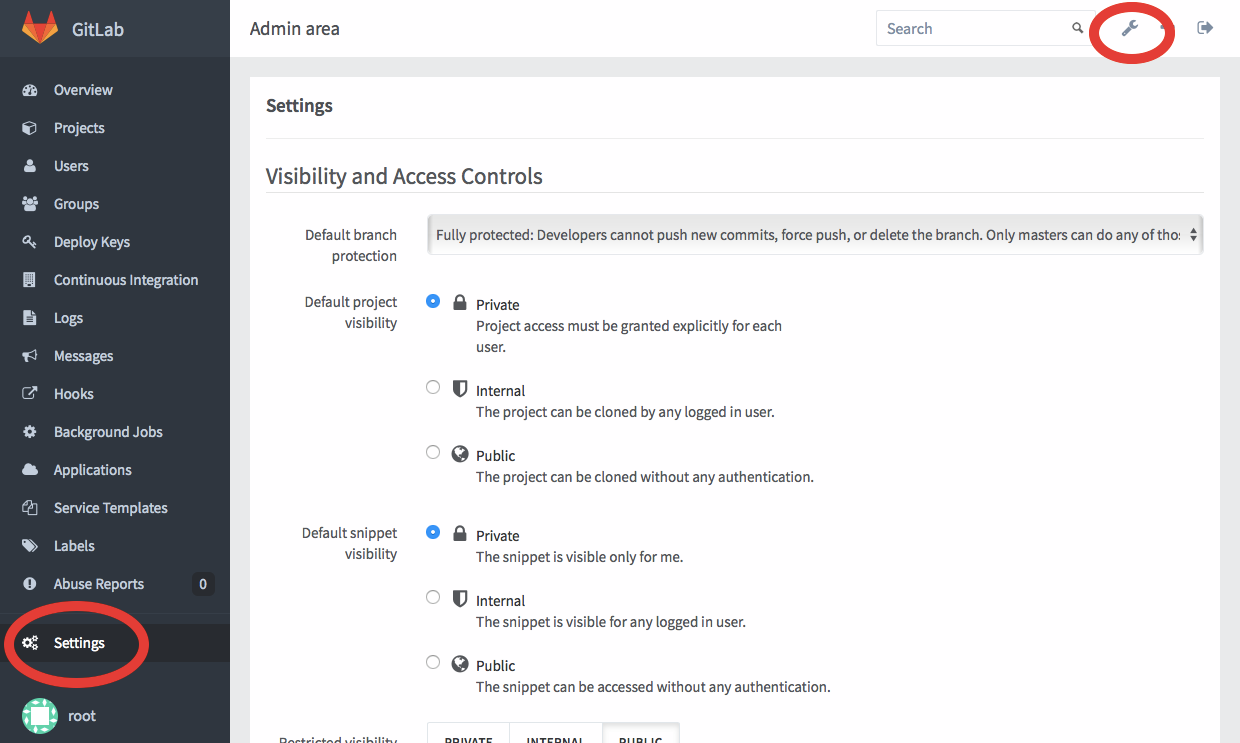
右上の工具マーク「Admin area」をクリック → 左下の「Settings」をクリックして、設定画面を開きます。

今回は非公開環境として設定しますので、公開リポジトリとサインアップを制限しておきます。
Restricted visibility levels 「Public」を選択

Sign-up enabled のチェックを外す

上記を設定して、ページ最下部の「SAVE」をクリックします。
【日次バックアップ】
gitlab-rake gitlab:backup:create
下記のようなファイルができていればOKです。
ls -l /var/opt/gitlab/backups/
-rw-------. 1 git git 30720 1月 27 05:31 1449433912_gitlab_backup.tar
スケジュールに登録
crontab -u root -e
00 05 * * * /opt/gitlab/bin/gitlab-rake gitlab:backup:create CRON=1