AndroidStudio2.2から利用可能になるEspresso Test Recorderを使ってみました。
EspressoでUIテスト書いている方も多いかと思いますが、操作記録をテストコードにおこしてくれるツールです。
UIテスト作成にかける工数削減に繋がれば良いですね。
個人的には業務の方のアプリ開発で、Quality向上のためにUIAutomatorやEspressoでUIテスト作成を試みたことはあります。
ですが、自前で書くと時間がかかるので、開発プロセスに取りいれるのはやめたことがあります。
そして、UIテスト作成を任意にすると、開発メンバは時間が無くてだいたい皆UIテスト書かなくなります。(マネージャー側は保守より機能対応優先で考えがちですし)
準備
- 2016/7/1現在AndroidStudio2.2の正式版はリリースされていないのでpreview版をインストールします。
- 詳細は省略します。
- build.gralde周りの設定は後述しますが、初回作成時に自動で追加してくれます。
使い方
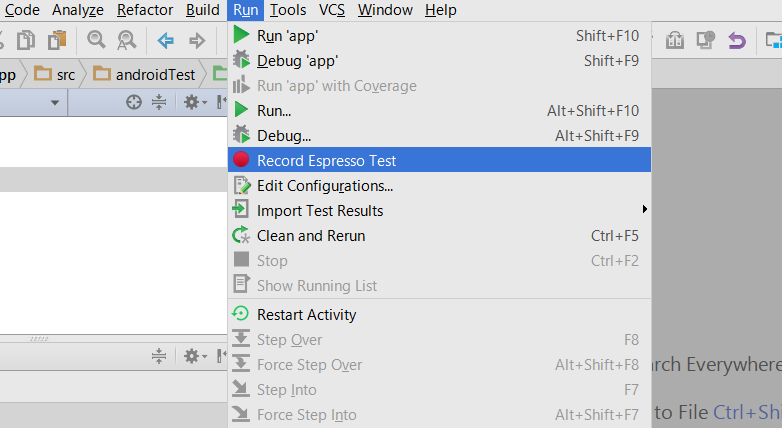
AndroidStudioメニューの[Run] - [Record Espresso Test]を選択します。
[Record Your Test]のダイアログが立ち上がるので、アプリ上でテストしたい操作を行います(しょぼいアプリですみません)。操作した記録がダイアログの方に記録されます。
- NavigatoinDrawerを開く
- 金沢能楽美術館をタップ
- ツールバーが存在することをチェック
適当にツールバーが存在するかチェックするようにしましたが、操作3のようにアサーション定義も録画中に追加できます。
右側のキャプチャ画面でアイテムをクリックしてアイテムを選ぶこともできます。
生成されたコード
実際に生成されたテストコードはこちら。
MainActivityTest2.java
package com.kanazawaevent.view.activity;


import android.support.test.espresso.ViewInteraction;
import android.support.test.rule.ActivityTestRule;
import android.support.test.runner.AndroidJUnit4;
import android.test.suitebuilder.annotation.LargeTest;

import com.kanazawaevent.R;

import org.junit.Rule;
import org.junit.Test;
import org.junit.runner.RunWith;

import static android.support.test.espresso.Espresso.onView;
import static android.support.test.espresso.action.ViewActions.click;
import static android.support.test.espresso.assertion.ViewAssertions.matches;
import static android.support.test.espresso.matcher.ViewMatchers.isDisplayed;
import static android.support.test.espresso.matcher.ViewMatchers.withContentDescription;
import static android.support.test.espresso.matcher.ViewMatchers.withId;
import static android.support.test.espresso.matcher.ViewMatchers.withParent;
import static android.support.test.espresso.matcher.ViewMatchers.withText;
import static org.hamcrest.Matchers.allOf;

@LargeTest
@RunWith(AndroidJUnit4.class)
public class MainActivityTest2 {

    @Rule
    public ActivityTestRule<MainActivity> mActivityTestRule = new ActivityTestRule<>(MainActivity.class);

    @Test
    public void mainActivityTest2() {
        ViewInteraction imageButton = onView(
                allOf(withContentDescription("Open navigation drawer"),
                        withParent(withId(R.id.toolbar)),
                        isDisplayed()));
        imageButton.perform(click());

        ViewInteraction textView = onView(
                allOf(withText("金沢能楽美術館"), isDisplayed()));
        textView.perform(click());

        ViewInteraction viewGroup = onView(
                allOf(withId(R.id.toolbar), isDisplayed()));
        viewGroup.check(matches(isDisplayed()));

    }
}
補足
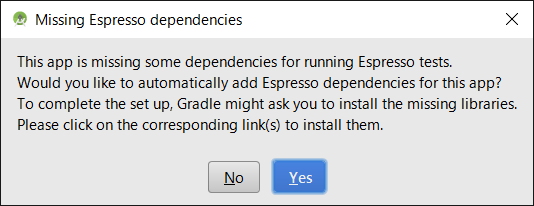
最初に操作録画を終えて完了しようとしたとき、以下のダイアログがでてYESを選択すれば以下のbuild.gradle周りの設定をしてくれます。
build.gradle
android {
    defaultConfig {
        ・
        ・
        ・
        testInstrumentationRunner 'android.support.test.runner.AndroidJUnitRunner'
    }
}

dependencies {
    ・
    ・
    compile 'com.android.support.test.espresso:espresso-core:2.2.2'
    compile 'com.android.support.test:runner:0.5'
}
まとめ
テストしたい内容に応じて微修正は必要かもしれません。
枠組み作成には使えそうかと個人的には思っているのですが、どうでしょうか。