■ NOTAをAzureの仮想サーバで動かしてみる。(CentOS 7ベース)
Microsoft Azureのvirtual machineでCentOS7上にNOTAという一風かわったCMSを構築してみます。
その過程で、久しぶりに触れるAzureの使い方で気づいたことを記載していきます。
※百聞は一見に如かず。こちらが公式デモサイト:http://nota.jp/trial/beta/
■サーバスペック
A0-Basicを使います。
■ 1日目 Azureのアカウントを登録します。
こちらかアカウント登録します。 https://azure.microsoft.com/ja-jp/
アカウント登録が終わった人は、上記のページの右上のアカウントの文字をクリックして
管理コンソールへログインしましょう!
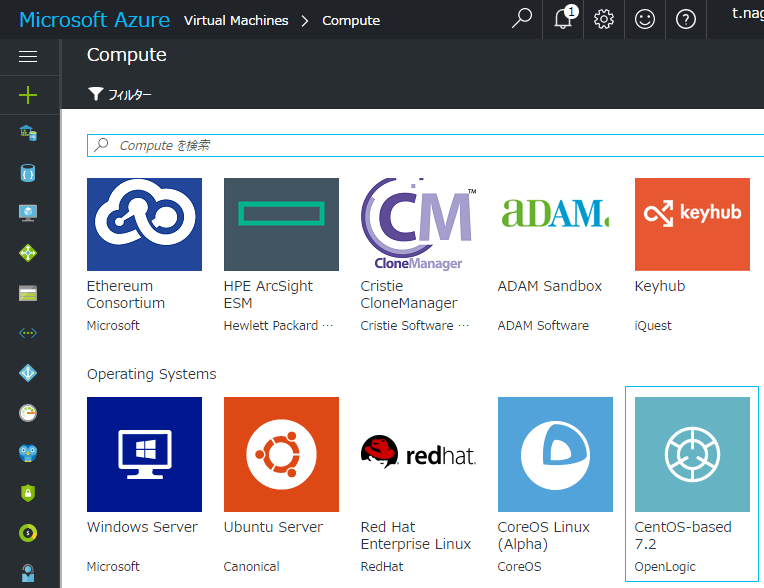
無事にログインが完了したら Virtual Machines > Compute > CentOS-Based 7.2 Open-Logic を選択してインストールします。
■ 2日目 Linuxサーバを構築する。
セキュリティ設定でiptablesが好きなので、設定を変更します。
- firewalldの停止
- firewallsが停止している事を確認する
- firewallsを無効化しておきます。
systemctl stop firewalld
systemctl status firewalld
systemctl disable firewalld
- iptablesをインストールする。
yum -y install epel-release
yum --enablerepo=epel -y install mod_perl
yum -y install iptables
yum -y install iptables-services
- iptablesの初期設定
cat << _EOF_ > /etc/sysconfig/iptables
*filter
:INPUT ACCEPT [0:0]
:FORWARD ACCEPT [0:0]
:OUTPUT ACCEPT [0:0]
-A INPUT -m state --state RELATED,ESTABLISHED -j ACCEPT
-A INPUT -p icmp -j ACCEPT
-A INPUT -i lo -j ACCEPT
-A INPUT -p tcp -m state --state NEW -m tcp --dport 22 -j ACCEPT
-A INPUT -p tcp -m state --state NEW -m tcp --dport 80 -j ACCEPT
-A INPUT -j REJECT --reject-with icmp-host-prohibited
-A FORWARD -j REJECT --reject-with icmp-host-prohibited
COMMIT
_EOF_
- サーバを起動します。
systemctl enable iptables
systemctl start iptables
systemctl start httpd
- うざい国からのアクセスを遮断する。
wget http://www.42ch.net/~shutoff/data/iptables-krcnkp.sh
sed -i -e "s/CKFILTERED/REJECT/g" iptables-krcnkp.sh
sed -i -e "s/CKFILTER/INPUT/g" iptables-krcnkp.sh
nouhp sh  iptables-krcnkp.sh &
※ 最後の行は、終了するまで時間がかかるので、nohupを使ってログアウトする。
■ 3日目 NOTAに必要なモジュールを準備する。
- 不足しているモジュールをインストールします。
yum -y install epel-release
yum --enablerepo=epel -y install mod_perl
yum -y install httpd
yum -y install perl-CGI
yum -y install git
yum -y install nmap
yum -y install ImageMagick-devel.x86_64 ImageMagick.x86_64 ImageMagick-perl.x86_64
yum -y install perl-XML-Parser
yum -y install perl-Digest-MD5
■ 4日目 NOTAをサーバにインストールする。
- NOTAをインストールします。
ダウンロードサイトにアクセスして、 http://nota.jp/ja/download/
「NOTAのライセンスに同意」してください。
cd /var/www/

#
git clone https://github.com/rakusai/Nota.git

mv Nota/nota html/.
mv Nota/flaproject html/.

chown -R apache:apache html/

chmod 775 /var/www/html/
chmod 775 /var/www/html/nota
chmod 775 /var/www/html/nota/default
chmod 777 /var/www/html/nota/default/install.cgi
chmod 666 /var/www/html/nota/default/option.pl
chown -R apache:apache /var/www/notadata/
chmod -R 770 /var/www/html/nota/default/*
chmod 775 /var/www/notadata/master/{trash,drawing,img}

cd /var/www/notadata
rsync -azr master/img/ default/img/
rsync -azr master/trash/ default/trash/
rsync -azr master/drawing/ default/drawing/

chmod 775 /var/www/notadata/default/{trash,drawing,img}

ls -1 `find /var/www/html/ -type f -print ` | grep -v cgi | xargs chmod 664
■ 5日目 NOTAを使ってみる。
- サーバを起動して、つないでみます。
http://13.68.219.107/nota/default/
