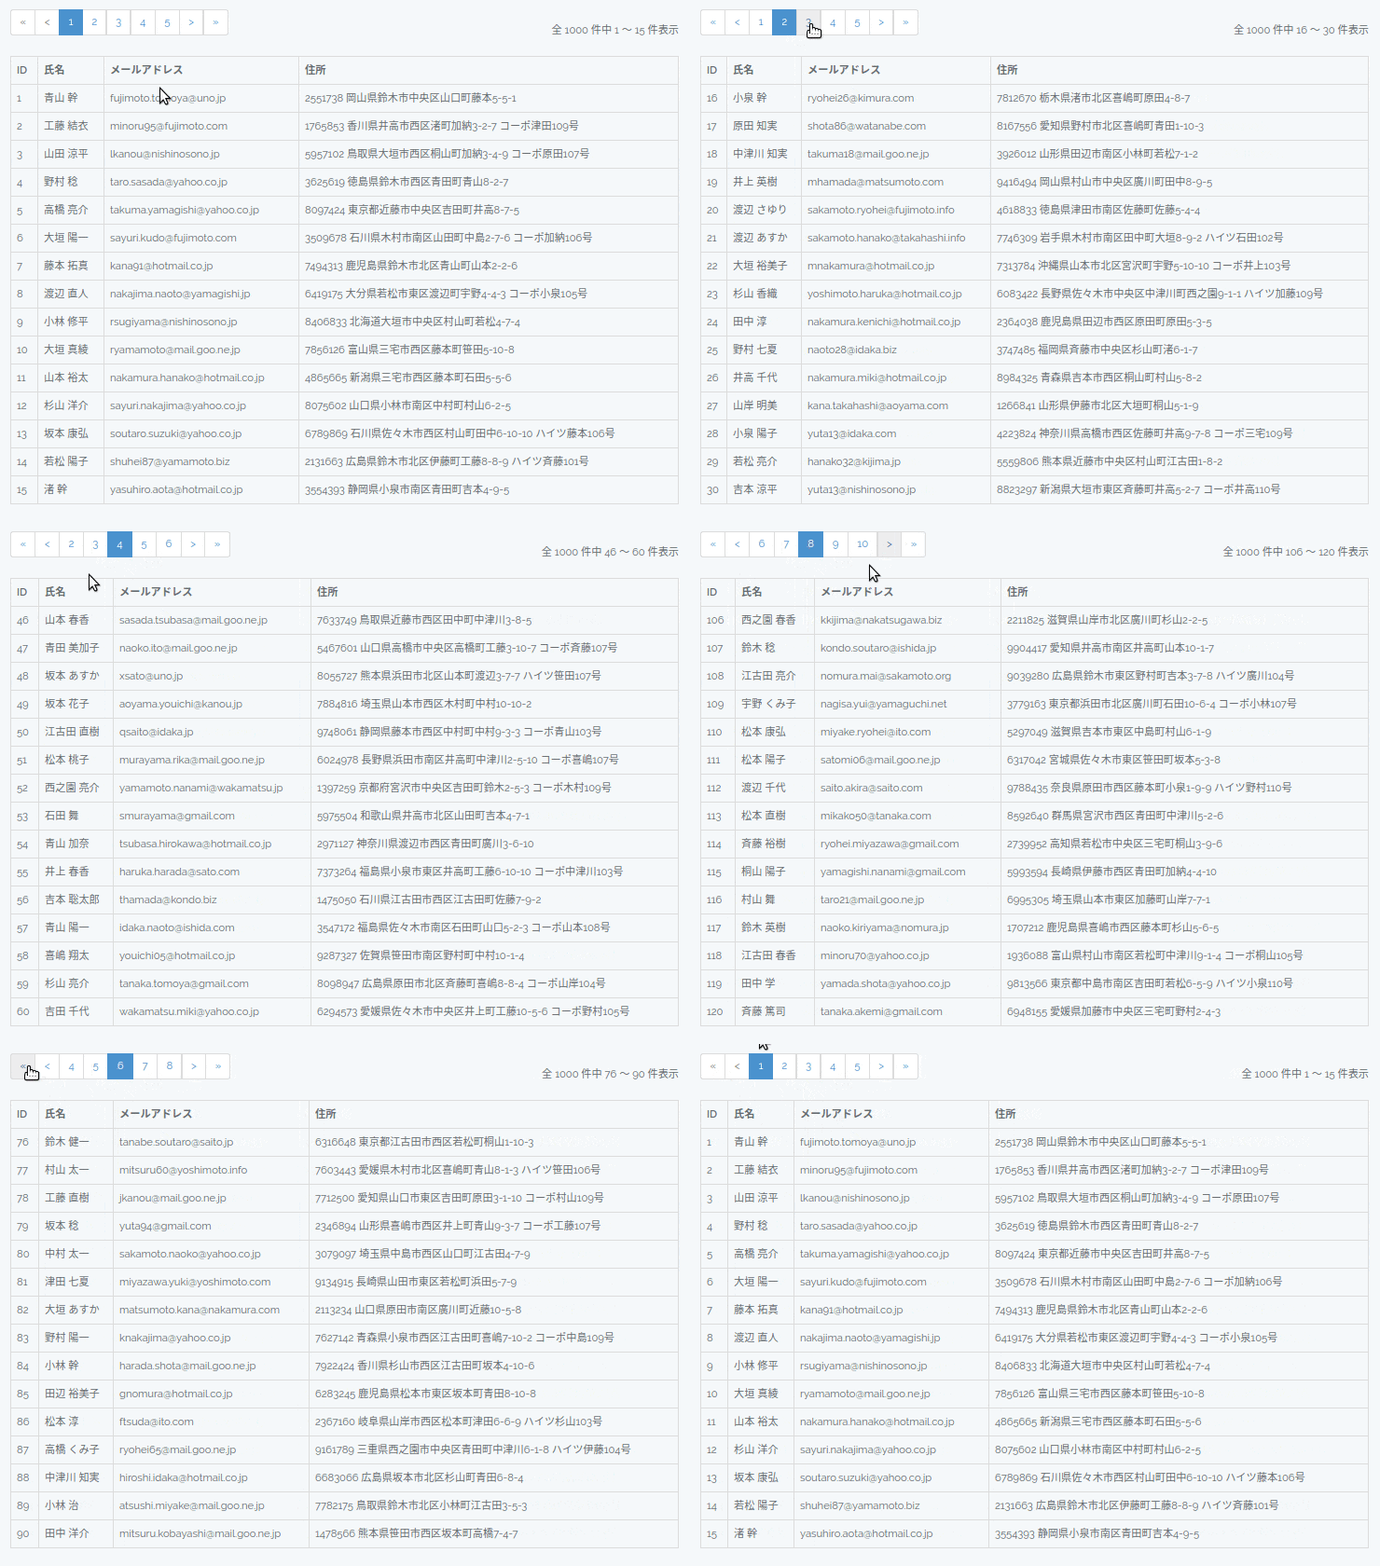
Vue + Laravel + Bootstrap でページネーション付きテーブルを作成する
Laravelのページネーション機能を使って、オリジナルのページネーション付きテーブルコンポーネントを作成します。
テーブルとページネーションの見た目はBootstrapのコンポーネントを使います。
プロジェクト作成
まず適当な名前でプロジェクトを作成します。
Laravelインストーラを使うなら以下のような感じで。
laravel new vue-laravel-table
テーブル作成
デフォルトで存在しているマイグレーションファイルを改変し、名前・メール・住所フィールドの入ったusersテーブルを作成します。
database/migrations/xxxx_create_users_table.php
    public function up()
    {
        Schema::create('users', function (Blueprint $table) {
            $table->increments('id');
            $table->string('name');
            $table->string('email');
            $table->string('address');
            $table->timestamps();
        });
    }
パスワードリセットテーブルxxxx_create_password_resets_table.phpは不要なので削除してから、マイグレーション実行します。
php artisan migrate
Userモデルは最初からあるものをそのまま使います。
ダミーデータ作成
LaravelにバンドルされているFakerを使ってダミーデータを1000件ほど作成しておきます。
database/seeds/DatabaseSeeder.phpのrunメソッドに追加します。
    public function run()
    {
        DB::table('users')->delete();
        $faker = Faker\Factory::create('ja_JP');
        for ($i = 0; $i < 1000; $i++) {
            App\User::create([
                'name' => $faker->name,
                'email' => $faker->email,
                'address' => $faker->address,
            ]);
        }
    }
Seederを実行します。
php artisan db:seed
API作成
ユーザー一覧表示のバックグラウンド側APIを作成します。
routes/api.phpに元から書いてあるルートを上書きします。
<?php
use Illuminate\Http\Request;

Route::middleware('api')->get('/user', function(Request $request) {
    return App\User::paginate();
});
たったのこれだけで、ページネーション付きAPIを作成することができます。
api/userにアクセスしてみてユーザー一覧がJSONで取得されることを確認してみてください。
paginateメソッドは実データ+以下のようなページネーション用のパラメータが返ってきます。
- data: 実データ
- current_page: 現在のページ番号
- per_page: 表示する行数
- last_page: 最終ページ番号
- from: 表示する先頭のレコード
- to: 表示する最後のレコード
- total: 総レコード数
デフォルトの表示行数は15行ですが、paginateメソッドに引数を渡すと表示行数を変更できます。
テーブルコンポーネント作成(ページングなし)
resources/assets/js/components/MyTable.vueを以下の内容で作成します。
<template>
  <table class="table table-bordered">
    <thead>
      <tr><th>ID</th><th>氏名</th><th>メールアドレス</th><th>住所</th></tr>
    </thead>
    <tbody>
      <tr v-for="user in users" :key="user.id">
        <td>{{user.id}}</td>
        <td>{{user.name}}</td>
        <td>{{user.email}}</td>
        <td>{{user.address}}</td>
      </tr>
    </tbody>
  </table>
</template>

<script>
  export default {
    data() {
      return {
        users: []
      }
    },
    mounted() {
      axios.get('/api/user').then(res => {
        this.users = res.data.data
      })
    }
  }
</script>
中身は、API側からユーザー一覧を取得してテーブルに出力しているだけです。
次にresources/assets/js/app.jsにコンポーネントを登録します。
Vue.component('my-table', require('./components/MyTable.vue'));
bladeテンプレート作成
表示するガワを作成します。resources/views/welcome.blade.phpを以下の内容で上書きします。
<!DOCTYPE html>
<html lang="ja">
<head>
    <meta charset="UTF-8">
    <meta name="csrf-token" content="{{csrf_token()}}">
    <title>Vue table</title>
    <link href="{{asset('css/app.css')}}" rel="stylesheet">
</head>
<body>
    <div id="app" class="container-fluid">
        <my-table />
    </div>
    <script src="{{asset('js/app.js')}}"></script>
</body>
</html>
ブラウザでアクセスすると、一覧が15件表示されます。
テーブルコンポーネントにページネーションを追加
resources/assets/js/components/MyTable.vueにページング用のナビゲーションを設置してみます。
<template>
<div>
<div class="row">
<div class="col-sm-6">
<ul class="pagination">
<li :class="{disabled: current_page <= 1}"><a href="#" @click="change(1)">«</a></li>
<li :class="{disabled: current_page <= 1}"><a href="#" @click="change(current_page - 1)"><</a></li>
<li v-for="page in pages" :key="page" :class="{active: page === current_page}">
<a href="#" @click="change(page)">{{page}}</a>
</li>
<li :class="{disabled: current_page >= last_page}"><a href="#" @click="change(current_page + 1)">></a></li>
<li :class="{disabled: current_page >= last_page}"><a href="#" @click="change(last_page)">»</a></li>
</ul>
</div>
<div style="margin-top: 40px" class="col-sm-6 text-right">全 {{total}} 件中 {{from}} 〜 {{to}} 件表示</div>
</div>
<table class="table table-bordered">
<thead>
<tr><th>ID</th><th>氏名</th><th>メールアドレス</th><th>住所</th></tr>
</thead>
<tbody>
<tr v-for="user in users" :key="user.id">
<td>{{user.id}}</td>
<td>{{user.name}}</td>
<td>{{user.email}}</td>
<td>{{user.address}}</td>
</tr>
</tbody>
</table>
</div>
</template>
<script>
export default {
data() {
return {
users: [],
current_page: 1,
last_page: 1,
total: 1,
from: 0,
to: 0
}
},
mounted() {
this.load(1)
},
methods: {
load(page) {
axios.get('/api/user?page=' + page).then(({data}) => {
this.users = data.data
this.current_page = data.current_page
this.last_page = data.last_page
this.total = data.total
this.from = data.from
this.to = data.to
})
},
change(page) {
if (page >= 1 && page <= this.last_page) this.load(page)
}
},
computed: {
pages() {
let start = _.max([this.current_page - 2, 1])
let end = _.min([start + 5, this.last_page + 1])
start = _.max([end - 5, 1])
return _.range(start, end)
},
}
}
</script>
ブラウザで確認すると、ページネーションが動くと思います。
追加した部分は以下の通りです。
-
<ul class="pagination">〜</ul>の部分がページネーションです。Bootstrapのpaginationクラスを使っています。 - プロパティ
current_pageには現在のページ番号、last_pageは最終ページ番号、totalは総レコード数、fromは表示する先頭のレコード、toは表示する最後のレコードです。paginateメソッドの同名のデータが入ります。 - API
/api/userはGETパラメータpageにページ番号を入れて呼び出すように変更しています。paginateメソッドは自動的にGETパラメータpageを現在のページ番号としてセットします。 - 算出プロパティ
pagesは、現在のページを中央に置いて5ページ分の配列を算出しています。
まとめ
Laravelのpaginateメソッドを使うと、とても簡単にページネーションが作成できることが分かりました。
