はじめに
Raspberry pi 3の電子工作にハマり、部屋の温度、湿度、気圧を取って遊んでみようと言うことで、「SWITCH SCIENCE BME280」を購入してました。
今回は動かすことメインで!!!
構成
- Raspberry pi 3(OS:Raspbian)
- SWITCH SCIENCE BME280 温湿度・気圧センサーモジュール
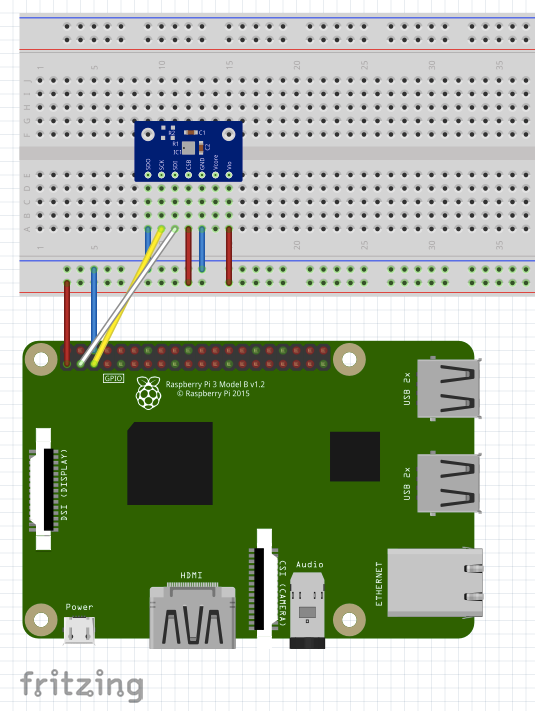
接続図は以下の通り
手順
I2C を有効にする
左上の アイコン → 設定 → Raspberry Pi の設定 を選択すると、画面が起動。
インターフェースタブを選択し、 I2C を有効にし、OKボタンを押す
以下のコマンドで再起動することで、I2Cが有効化します。
terminal
$ reboot
I2C 接続できているか確認する
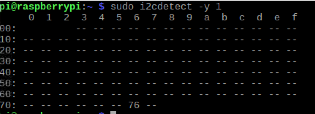
I2C接続のデバイスを以下のコマンドで確認する。
terminal
$ sudo i2cdetect -y 1
サンプルソフトを動作
ダウンロード方法
SWITCHSCIENCE の github からサンプルソースコードを取得
terminal
$ cd (sampleファイルを置くディレクトリ)
$ wget https://raw.githubusercontent.com/SWITCHSCIENCE/samplecodes/master/BME280/Python27/bme280_sample.py
必要なソフトのインストール
bme280_sample.py 内で、smbus2 のライブラリを利用しているので、
以下のコマンドでインストール。
terminal
$ pip install smbus2
動作確認
以下のコマンドを入力することで、温度、気圧、湿度 を表示する。
温度は少し高めに出ているような気がする。。。
terminal
$ python bme280_sample.py

temp : 27.56  ℃
pressure :  986.88 hPa
hum :  25.52 %
今後について
温度、気圧、湿度を クラウドサーバー に蓄えておき、それらのデータを分析してみたい。

