1.Alibaba Cloud CLIについて
1-1.概要
Alibaba CloudをCLIで操作するためのコマンドラインツールです。
Microsoft AzureにおけるAzure CLI、AWSにおけるAWS CLIの位置付けです。
例
# ECSインスタンスを停止
$ aliyun ecs StopInstance --InstanceId i-6we0ok5maw3veisbvfvh
{
	"RequestId": "D8F808F8-EA41-4B2C-9EFF-67CF0E2C52FA"
}
# ECSインスタンスを起動
$ aliyun ecs StartInstance --InstanceId i-6we0ok5maw3veisbvfvh
{
	"RequestId": "8F29C282-1691-4D8A-99F1-931C8185EE35"
}
Goで作成されたオープンソースであり、GitHubで公開されています。
https://github.com/aliyun/aliyun-cli
日本語のドキュメントはこちらにあります。
https://jp.alibabacloud.com/help/product/29991.htm
なお、Alibaba Cloud CLIは、aliyunというコマンドを使いますが、この言葉はAlibaba Cloudの中国での名称が阿里云(Aliyun)というところから来ています。
1-2.用途
Alibaba Cloudには、ブラウザで操作できるコンソールがあります。
基本的にはそれで問題ないのですが、ある種の人にとってはCLIを使った方が簡単・確実かもしれません。
また、コンソールでは設定できないものも稀にあります。
例えば、コンソールではVPCのCIDRは、192.168.0.0/16、172.16.0.0/12、10.0.0.0/8の3つから選択するだけとなっています。
しかし、CLIを使えば、もっと細かいCIDRも自由に指定可能です。
2.CLIのインストール
2-1.ダウンロード
GitHubにMac用/Linux用/Windows用の最新版へのリンクが書かれているので、ダウンロードします。
https://github.com/aliyun/aliyun-cli

ちなみに日本語サイトにあるリンクは多少古いです。
https://jp.alibabacloud.com/help/doc-detail/90765.htm
ダウンロードしたファイルを解凍すると、aliyunというファイル名のファイルが1つだけできます。
2-2.インストール
[Macへのインストール]
aliyunを /usr/local/bin においてください。
~$ ls -l /usr/local/bin/aliyun
-rwxr-xr-x@ 1 xxxxxxx  staff  28013660  4 16 15:39 /usr/local/bin/aliyun
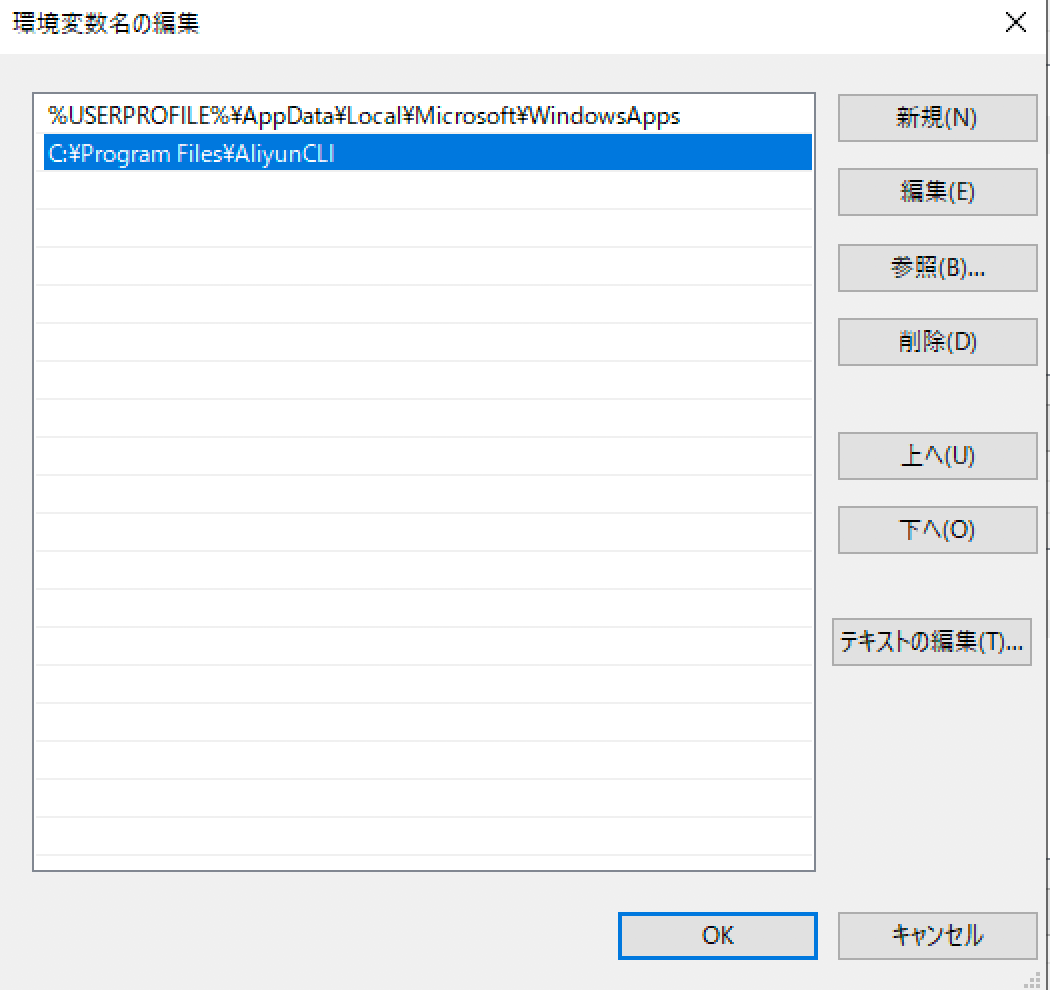
[Windowsへのインストール]
C:¥Program FilesにAliyunCLIフォルダを作成します。
aliyun を C:¥Program Files¥AliyunCLI においてください。

環境変数PATHに C:¥Program Files¥AliyunCLI を追加します。
2-3.インストール確認
コマンドが実行可能な状態になったか確認しましょう。
aliyunとコマンドを打って、以下のようになれば問題ありません。
~$ aliyun
Alibaba Cloud Command Line Interface Version 3.0.15

Usage:
  aliyun <product> <operation> [--parameter1 value1 --parameter2 value2 ...]

Commands:
  configure       configure credential and settings
  oss             Object Storage Service
  auto-completion enable auto completion

Flags:
  --mode              use `--mode {AK|StsToken|RamRoleArn|EcsRamRole|RsaKeyPair}` to assign authenticate mode
  --profile,-p        use `--profile <profileName>` to select profile
  --language          use `--language [en|zh]` to assign language
  --region            use `--region <regionId>` to assign region
  --config-path       use `--config-path` to specify the configuration file path
  --access-key-id     use `--access-key-id <AccessKeyId>` to assign AccessKeyId, required in AK/StsToken/RamRoleArn mode
  --access-key-secret use `--access-key-secret <AccessKeySecret>` to assign AccessKeySecret
  --sts-token         use `--sts-token <StsToken>` to assign StsToken
  --ram-role-name     use `--ram-role-name <RamRoleName>` to assign RamRoleName
  --ram-role-arn      use `--ram-role-arn <RamRoleArn>` to assign RamRoleArn
  --role-session-name use `--role-session-name <RoleSessionName>` to assign RoleSessionName
  --private-key       use `--private-key <PrivateKey>` to assign RSA PrivateKey
  --key-pair-name     use `--key-pair-name <KeyPairName>` to assign KeyPairName
  --retry-timeout     use `--retry-timeout <seconds>` to set retry timeout(seconds)
  --retry-count       use `--retry-count <count>` to set retry count
  --secure            use `--secure` to force https
  --force             use `--force` to skip api and parameters check
  --endpoint          use `--endpoint <endpoint>` to assign endpoint
  --version           use `--version <YYYY-MM-DD>` to assign product api version
  --header            use `--header X-foo=bar` to add custom HTTP header, repeatable
  --body              use `--body $(cat foo.json)` to assign http body in RESTful call
  --pager             use `--pager` to merge pages for pageable APIs
  --output,-o         use `--output cols=Field1,Field2 [rows=jmesPath]` to print output as table
  --waiter            use `--waiter expr=<jmesPath> to=<value>` to pull api until result equal to expected value
  --dryrun            add `--dryrun` to validate and print request without running.
  --quiet,-q          add `--quiet` to hide normal output
  --help              print help

Sample:
  aliyun ecs DescribeRegions

Use `aliyun --help` for more information.
3.RAMユーザー設定
Alibaba Cloud CLIを使うと、Alibaba CloudのAPIに対し、命令を出せるわけですが、それには権限設定が必要です。
Alibaba Cloudのユーザー管理は、Resource Access Management(RAM)というサービスで管理されます。
3-1.RAMユーザーの作成
RAMで設定を行うため、コンソールにログインします。
https://ram.console.aliyun.com
ログイン後、 ユーザー をクリックします。

新規ユーザー をクリックします。

ユーザーの作成をします。
今回の例では、handsonというユーザー名にしました。
「このユーザーの AccessKey を自動生成」 にチェックを入れてください。(後で生成も可能です。)

「AK 情報を保存」 をクリックします。(なお、AKとはAccess Keyのことです。)
そうすると、CSVファイルがダウンロードされます。
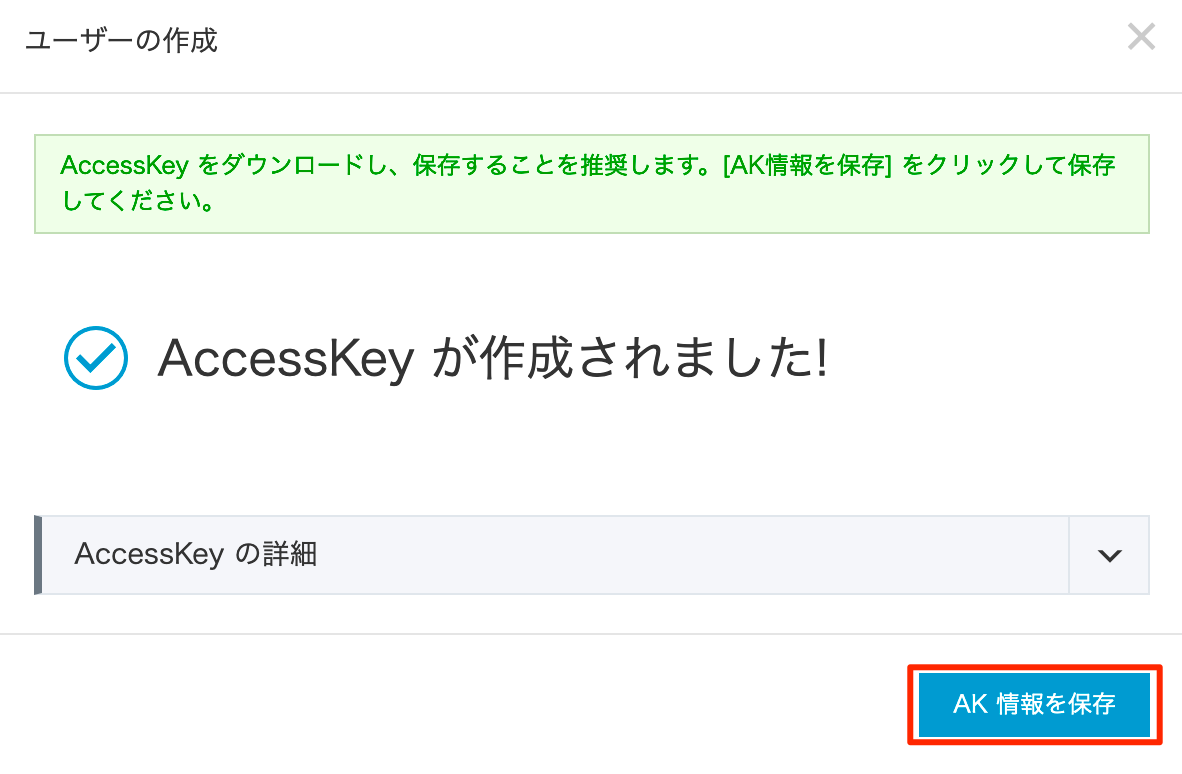
CSVファイルの中にはAccessKeyIdとAccessKeySecretが記載されています。
~$ ls -l Downloads/20190504145010.csv
-rw-r--r--@ 1 nobuhide  staff  87  5  4 15:50 Downloads/20190504145010.csv

~$ cat Downloads/20190504145010.csv
"AccessKeyId","AccessKeySecret"
"XXXXXXXXXXXXXXXX","XXXXXXXXXXXXXXXXXXXXXXXXXXXXXX"
3-2.RAMユーザーに権限設定
作成したユーザーに権限を設定します。
RAMのユーザー画面でhandsonユーザーの 許可 をクリックします。

今回は、 AdministratorAccess ポリシーを付与します。
ほぼなんでもできるポリシーです。
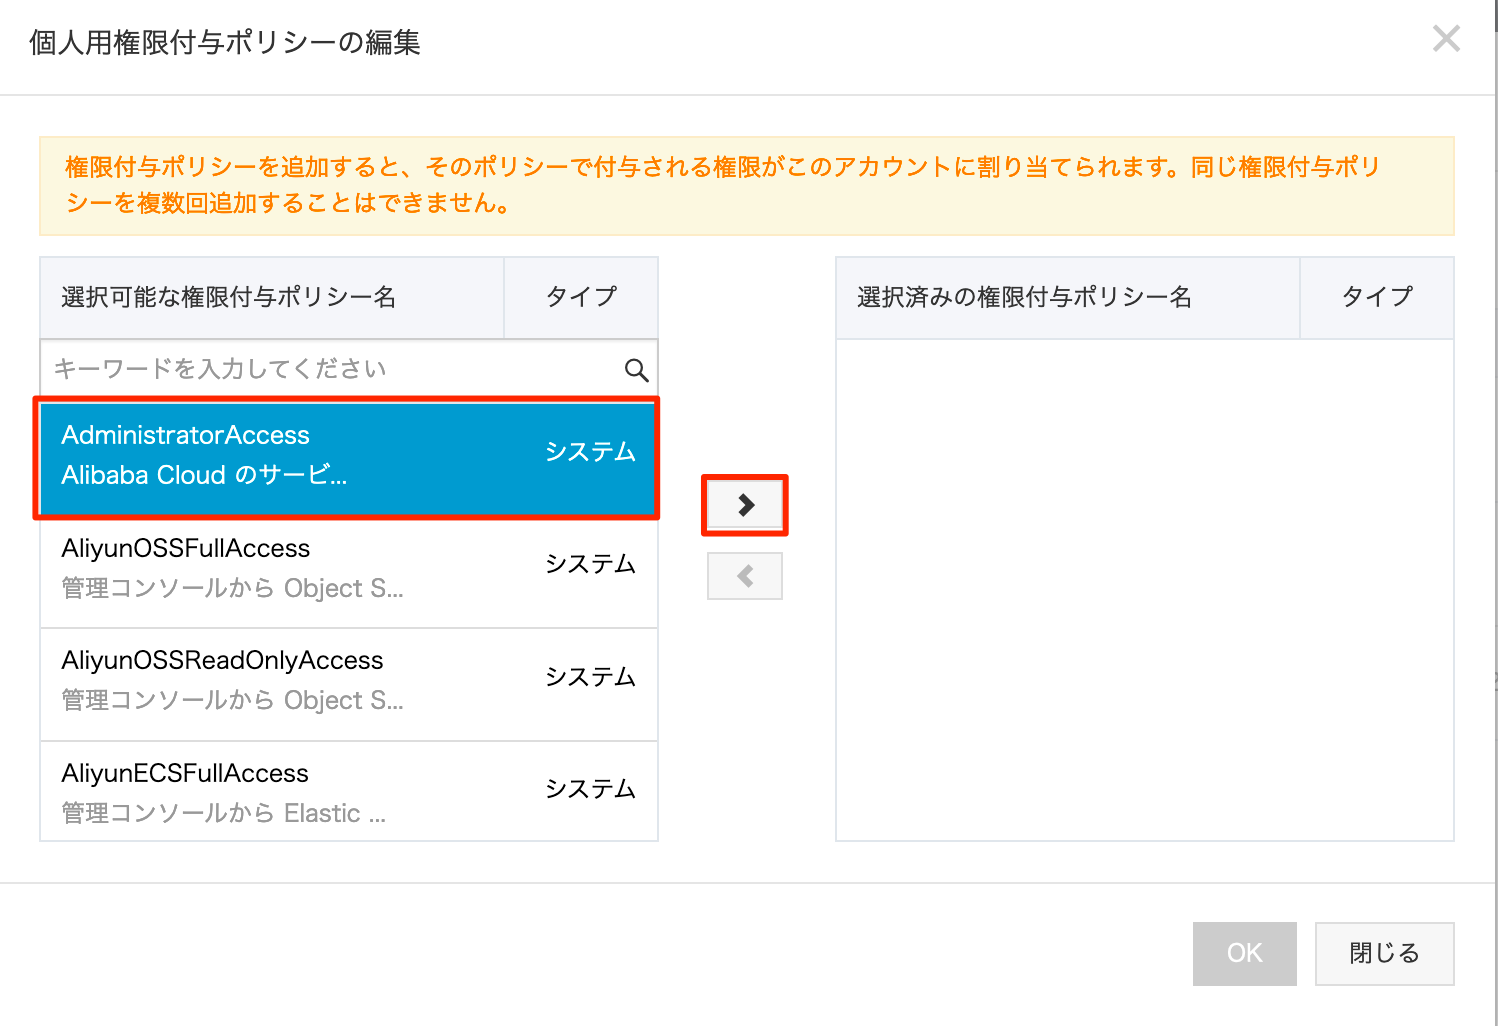
OKをクリックします。

4.CLIの設定
4-1.profile作成
aliyun configure --profile default を実行します。
CSVファイルに書かれた「Access Key Id」「Access Key Secret」、それから「Default Region Id」を入力します。
リージョンIDはこちらで確認できます。
https://jp.alibabacloud.com/help/doc-detail/40654.htm
今回は東京(ap-northeast-1)としました。
~$ aliyun configure --profile default
Configuring profile 'default' in '' authenticate mode...
Access Key Id []: XXXXXXXXXXXXXXXX
Access Key Secret []: XXXXXXXXXXXXXXXXXXXXXXXXXXXXXX
Default Region Id []: ap-northeast-1
Default Output Format [json]: json (Only support json))
Default Language [zh|en] en:
Saving profile[default] ...Done.
 available regions:
  cn-qingdao
  cn-beijing
  cn-zhangjiakou
  cn-huhehaote
  cn-hangzhou
  cn-shanghai
  cn-shenzhen
  cn-hongkong
  ap-northeast-1
  ap-southeast-1
  ap-southeast-2
  ap-southeast-3
  ap-southeast-5
  ap-south-1
  us-east-1
  us-west-1
  eu-west-1
  me-east-1
  eu-central-1

Configure Done!!!
..............888888888888888888888 ........=8888888888888888888D=..............
...........88888888888888888888888 ..........D8888888888888888888888I...........
.........,8888888888888ZI: ...........................=Z88D8888888888D..........
.........+88888888 ..........................................88888888D..........
.........+88888888 .......Welcome to use Alibaba Cloud.......O8888888D..........
.........+88888888 ............. ************* ..............O8888888D..........
.........+88888888 .... Command Line Interface(Reloaded) ....O8888888D..........
.........+88888888...........................................88888888D..........
..........D888888888888DO+. ..........................?ND888888888888D..........
...........O8888888888888888888888...........D8888888888888888888888=...........
............ .:D8888888888888888888.........78888888888888888888O ..............
ユーザーのホームディレクトリに以下のような.aliyun/config.json が作成されます。
~$ tree .aliyun/
.aliyun/
└── config.json
~$ cat .aliyun/config.json
{
	"current": "default",
	"profiles": [
		{
			"name": "default",
			"mode": "AK",
			"access_key_id": "XXXXXXXXXXXXXXXX",
			"access_key_secret": "XXXXXXXXXXXXXXXXXXXXXXXXXXXXXX",
			"sts_token": "",
			"ram_role_name": "",
			"ram_role_arn": "",
			"ram_session_name": "",
			"private_key": "",
			"key_pair_name": "",
			"expired_seconds": 0,
			"verified": "",
			"region_id": "ap-northeast-1",
			"output_format": "json",
			"language": "en",
			"site": "",
			"retry_timeout": 0,
			"retry_count": 0
		}
	],
	"meta_path": ""
}
4-2.CLIの動作確認
正しくアクセスキーが設定できたか確認します。
aliyun ram ListUsersというRAMユーザーの一覧を取得するコマンドを打ってみます。
先ほど作成したhandsonというRAMユーザーが確認できれば、問題ありません。
~$ aliyun ram ListUsers
{
	"Users": {
		"User": [
			{
				"Comments": "",
				"UserName": "handson",
				"UpdateDate": "2019-05-04T06:49:41Z",
				"UserId": "xxxxxxxxxxxxxxxxxx",
				"DisplayName": "",
				"CreateDate": "2019-05-04T06:49:41Z"
			},
			{
				"Comments": "",
				"UserName": "xxxxxxxxx",
				"UpdateDate": "2018-11-13T12:08:32Z",
				"UserId": "xxxxxxxxxxxxxxxxxx",
				"DisplayName": "",
				"CreateDate": "2018-11-13T12:08:32Z"
			}
		]
	},
	"IsTruncated": false,
	"RequestId": "C4C6CF0B-2006-4128-B628-E1355933672C"
}
なお、権限が適切に設定されていない場合は、下記のようなエラーが出ます。
~$aliyun ram ListUsers
ERROR: SDK.ServerError
ErrorCode: NoPermission
Recommend:
RequestId: 0A2398FD-475D-4E62-AD4B-93CE5F87C984
Message: You are not authorized to do this action. Resource: acs:ram:*:xxxxxxxxxxxxxxx:user/* Action: ram:ListUsers
Appendix
Open API ExploreでAlibaba Cloud CLIを使う
ブラウザでコンソールにログインした後で、**https://api.aliyun.com**にアクセスします。
なお、ChromeとFirefoxでは動作確認できましたが、Safariでは正常に動きませんでした。

画面上のOnline Linux Shellをクリックします。
Authorizationとポップアップが出るので、OKを選択します。

Storage Spacesというポップアップが出ます。Open API Exploreの環境は一時的なものなので、作業終了後は削除されます。作業結果などを保存したい場合はNASが利用できますが、今回は必要ないのでSkipを選択します。
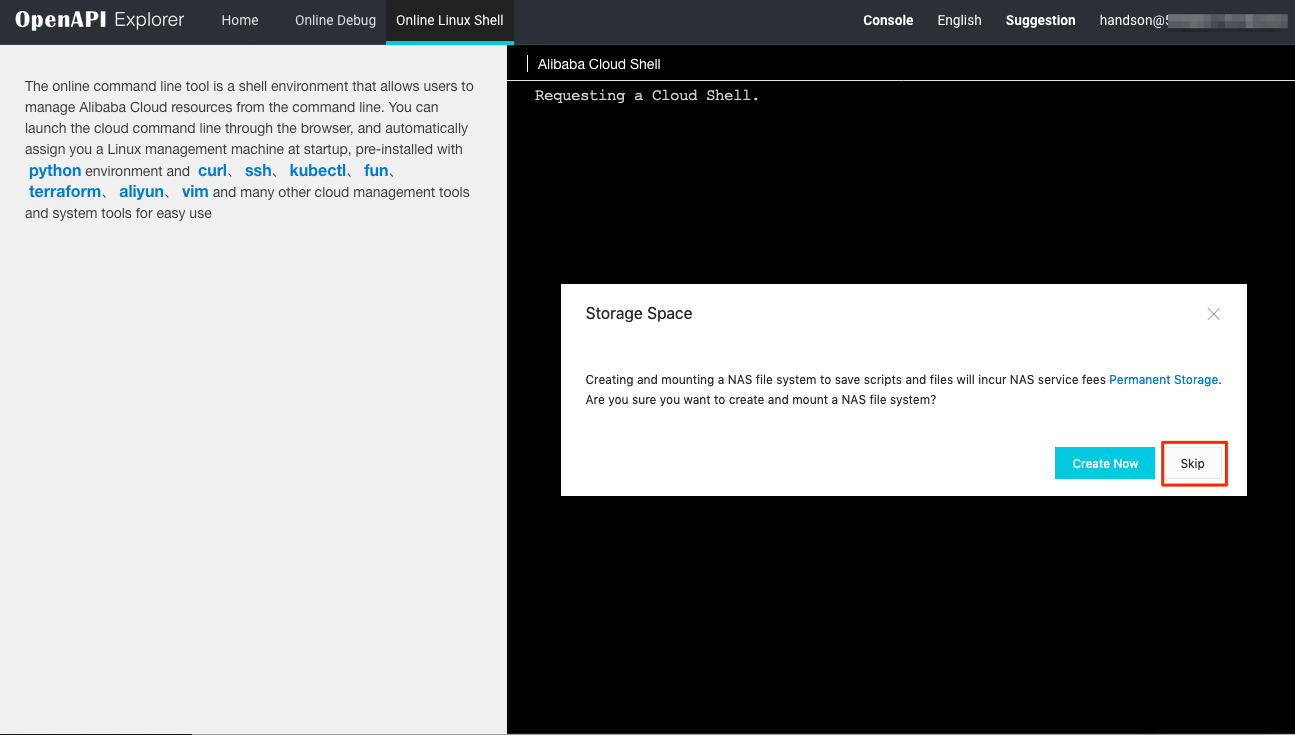
これでaliyunコマンドが打てるようになっています。インストールや設定作業は不要です。
ただし、バージョンが少し古いかもしれません。

複数のprofileを使い分ける
aliyun configure --profile xxxxx でプロファイルを追加します。
aliyun --profile xxxxx ram ListUsers といった感じでプロファイルを指定して実行します。
スイッチロールしてCLI実行
アクセスキーを持つユーザーとは別のRoleで実行することもできます。
コンソールでは以下のようになります。
handsonユーザーでログインした後で、HogeRoleにスイッチしています。

これと同じことをCLIでもできます。
CLIのオプションでRoleを指定する方法
aliyunコマンドのオプションで --role-session-name と --ram-role-arn を追加します。
# アカウントxxxxxxxxxxxxxxxxのhogeroleにスイッチしてCLIを実行する例
~$ aliyun ram ListUsers --role-session-name hoge --ram-role-arn acs:ram::xxxxxxxxxxxxxxxx:role/hogerole
{
	"Users": {
		"User": [
			{
				"Comments": "",
				"UserName": "handson",
				"UpdateDate": "2019-05-11T17:10:48Z",
				"UserId": "xxxxxxxxxxxxxxxxxx",
				"DisplayName": "",
				"CreateDate": "2019-05-04T06:49:41Z"
			}
		]
	},
	"IsTruncated": false,
	"RequestId": "03A06DC9-6932-4DDE-9485-7E2348A97082"
}
Profileを作成する方法
aliyun configure で --mode RamRoleArn を指定します。
なお、Access Key IdとAccess Key Secretは、ログインユーザーのものを指定します。
~$ aliyun configure --profile hoge --mode RamRoleArn
Configuring profile 'hoge' in 'RamRoleArn' authenticate mode...
Access Key Id []: xxxxxxxxxxxxx
Access Key Secret []: xxxxxxxxxxxxxxxxxxxxxxxxxxxxxx
Ram Role Arn []: acs:ram::xxxxxxxxxxxxxxxxxxxx:role/hogerole
Role Session Name []: hoge
Default Region Id []: ap-northeast-1
Default Output Format [json]: json (Only support json))
Default Language [zh|en] en:
Saving profile[hoge] ...Done.
<以下省略>